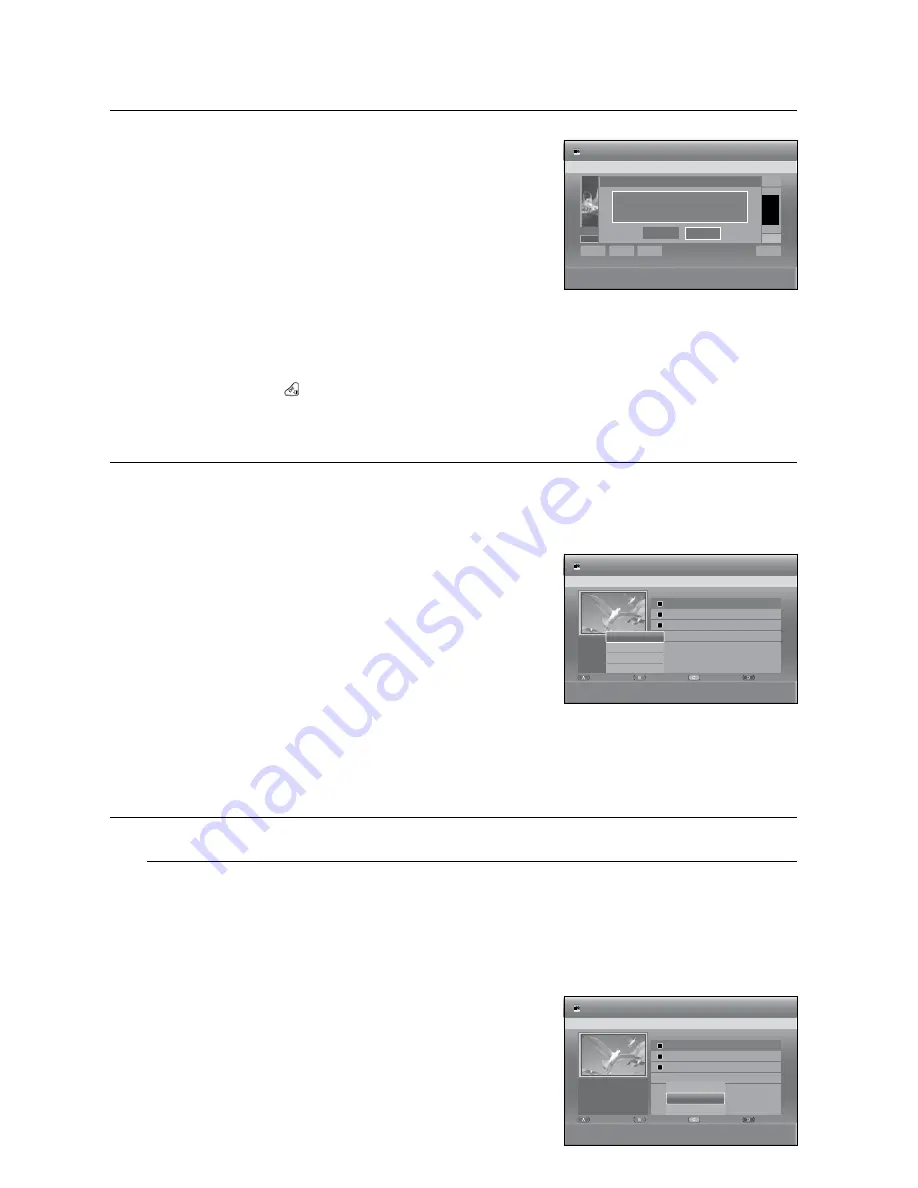
background image

0_


editing

editing

Press the 

_ +

 buttons to select 

Delete

, then press the 

OK


button.
Press the 

_ +

 buttons to select 

Yes

, then press the 

OK

 button.  

The selected section has been deleted.
Press the 

_ +

 buttons to select 

return

, then press the 

OK


button to finish the operation.

The length of the section to be deleted must be at least 5 seconds long.
End point cannot be marked earlier than start point
The section cannot be deleted when it includes a still picture.
Press the 

EXIT


( )

 button after the operation has finished. 

The Title List screen will disappear.

USing THE SOrT FUnCTiOn (TiTLE LiST)

SXCVKL

When you need to change the Sort order of Title List, you can change it simply. You can sort by Date, Name, 
Length, Channel info. Sorted list will be resorted in chronological order upon re-entering Title List.

While the list menu is displayed, press the 

grEEn(B)

 button to 

select 

Sort

.

Press the 

▲▼

 buttons to select the desired item, then press the 

OK

 or 

+

 button.

Date

 : In order of when the titles were recorded

name

 : In alphabetical order

Length

 : In order of recorded title length.

Channel info

 : In order of Channel information.

You can sort by Date, Name, Length, Channel info. Sorted list will be resorted in copied order upon re-entering Title 
List.

naVigaTiOn MEnU

Time navigation

SXC


(VR mode)

Using this function, you can search scene minute-by-minute from the recorded title list.

Using the TiTLE LiST button

With the unit in Stop mode/Playback mode, press the  

TiTLE LiST

 button.

Press the 

$%

 buttons to select an entry you want to play from 

Title List, then press the 

YELLOW(C)

 button.

Press the 

$%

 buttons to select 

Time navigation

, then press the 

OK

 or 

button.

.

.

.

M

`
`
`
`

1.

.

~
~
~
~

M

`

N

1.

.

.

Return

Title List No. 001

00:41:20

00:19:10

Start

End


MOVE 

s

SELECT 

r

RETURN 

e

EXIT

 HDD 

Partial Delete

JAN/01/

2009

 17:30 PR1 

+


Play 

#

 Pause 

( ) 

SCAN

00:41:20

Start

End

#

Delete

Do you want to delete?

(Deleted part will not be restored.)

No

Yes

No. 

Title 

Length


a

 CHECK


e

EXIT

 HDD 

Title List

001


JAN/01/2009 17:30 PR 

01:00:00

002


JAN/02/2009 21:00 PR 

01:00:00

003


JAN/03/2009 23:15 PR 

00:30:00


Edit


Sort


Go to


Contents

JAN/01/

2009

 17:30 PR1 

1/3

3
4
1

MPEG2
JAN/01/2009 17:30
SP

V-Mode Compatibility

Date
Name
Length
Channel Info

No. 

Title 

Length


a

 CHECK


e

EXIT

 HDD 

Title List

001


JAN/01/2009 17:30 PR 

01:00:00

002


JAN/02/2009 21:00 PR 

01:00:00

003


JAN/03/2009 23:15 PR 

00:30:00


Edit


Sort


Go to


Contents

JAN/01/

2009

 17:30 PR1 

1/3

3
4
1

MPEG2
JAN/01/2009 17:30
SP

V-Mode Compatibility

Playlist
Time Navigation
Scene Navigation

Содержание DVD-SH893

Страница 1: ...gine the possibilities Thanks you for purchasing this Samsung product To receive more complete service please register your product at www samsung com register DVD user manual DVD SH893 DVD SH895 DVD SH897 ...

Страница 2: ...lug incorporating a fuse The value of the fuse is indicated on the pin face of the plug If it requires replacing a fuse approved to BS1362 of the same rating must be used Never use the plug with the fuse cover omitted if the cover is detachable If a replacement fuse cover is required it must be of the same colour as the pin face of the plug Replacement covers are available from your dealer If the ...

Страница 3: ...unused for long periods of time Refer all servicing to qualified service personnel Servicing is required when the apparatus has been damaged in any way such as power supply cord or plug is damaged liquid has been spilled or objects have fallen into the apparatus the apparatus has been exposed to rain or moisture does not operate normally or has been dropped Handling Cautions Before connecting othe...

Страница 4: ...ecover lost data The hard disk is only a temporary storage space Disc Handling Use discs with regular shapes If an irregular disc a disc with a special shape is used this HDD DVD Recorder may be damaged Holding discs Avoid touching the surface of a disc where recording is performed DVD RAM DVD RW and DVD R Clean with an optional DVD RAM PD disc cleaner LF K200DCA1 where available Do not use cleane...

Страница 5: ...ay Some CD R RW discs may not be playable with this unit depending on the device which was used to burn them For contents recorded on CD R RW media from CDs for your personal use playability may vary depending on contents and discs DVD R Disc Playback and Recording Once a DVD R recorded in Video Mode is finalised it becomes DVD Video You can record onto the available space on the disc and perform ...

Страница 6: ...discs refer to the user s manual for the player For cartridge type DVD RAM discs remove the cartridge and use the disc only Disc Copy Title Copy Specifications Contents HDD DVD DVD HDD Recorded Video Title Supported Supported Copy Protected Title Not supported Not supported Copy Once Title Move Deletes the Title in the HDD after copying Not supported Once Copy Once programme has been recorded on t...

Страница 7: ...tion recording failure loss of recorded or edited materials or damage to the HDD DVD Recorder Disc Format Using MP3 disc CD R RW DVD RAM RW R HDD USB with MP3 files recorded with UDF ISO9660 or JOLIET format can be playbacked Only MP3 files with the mp3 or MP3 extension can be played For MP3 files recorded with a VBR Variable Bit Rates from 32 Kbps to 320 Kbps the sound may cut in and out Playable...

Страница 8: ...s The USB host port provides USB2 0 connectivity and also backward compatibility with USB1 1 USB1 0 devices Supported devices at host port Mass Storage Devices Digital Still Camera MP3 Player Memory stick Card Reader One or Multi slot Card Reader External Hard disk drive Only supports FAT32 formatted HDD Others removable storage devices PTP Picture Transfer Protocol devices Digital Still Camera in...

Страница 9: ...tal Still Camera Vendor Brand Samsung VP MS11 S800 Pro815 V20 V10 D60 UCA5 Sony DSC W50 DSC R1 DSC P150 DSC P200 Canon IXUS 60 IXUS 600 PowerShot A700 IXUS 700 A620 S80 Panasonic DMC FX01 DMC LX1S DMC FZ5 Nikon Coolpix 7900 Coolpix p3 Coolpix S2 Olympus C 70 zoom SP 700 FE5500 C 470Z Fuji Finepix F700 MP3 Player Vendor Brand Samsung YP T8 YP U2 YP T9 YP P2 i river H10 N11 T30 Mplayer Others Produc...

Страница 10: ...ecoder box TV 26 Other type of connecting the Video output cable 28 Other type of connecting the Audio output cable 31 Connecting HDMI DVI to a TV 33 Connecting to AV IN 3 DV input jack 34 Connecting to USB Devices system setup 35 35 On Screen Menu Navigation 35 Plug Auto Setup 37 Clock Set 38 Channel Set 41 Setting up the System Options 43 Setting up the Language Options 44 Setting up the Audio O...

Страница 11: ...67 Viewing a Picture 69 Playing a DivX recording 71 71 Recordable Discs 72 Recording Formats 73 Recording Mode 75 Unrecordable Pictures 75 Recording Immediately 77 Copying from a Camcorder 78 Making a One Touch Recording OTR 78 Simultaneous Recording and Playback 79 Time Shift function as a live signal 81 Making a Timer Recording 84 Go To Recorded List editing 86 86 Basic Editing Title List 90 Usi...

Страница 12: ...ng for both the DVD and the built in hard disk drive HDD are completely independent For instance While Recording to the HDD play another title on the HDD or play a previously recorded programme on DVD While Recording to a DVD play a previously recorded programme on HDD See pages 78 79 Automated Quality Adjustment for Timer Recording If FR mode is selected the video quality is adjusted automaticall...

Страница 13: ...inalise a disc automatically See page 50 EPG functions EPG is an Advanced Electronic Programme Guide With a Remote Control Unit you can operate full function It has a Auto and Manual Scan facility and Channel Organizing programmable facility USB Interface for Data Transfer You can transfer JPEG MP3 and DivX file of the MP3 player USB memory or digital camera to a HDD DVD RECORDER using the USB int...

Страница 14: ... available on CD R RW DVD R RW RAM discs or HDD A MP3 This involves a function available on CD R RW DVD R RW RAM discs or HDD D DivX This involves a function available on CD R RW DVD R RW RAM discs or HDD J Caution This involves a case where a function does not operate or settings may be cancelled M NOTE This involves tips or instructions on the page that help each function operate N One Touch but...

Страница 15: ...ormat VR mode For an unused disc a message that asks whether to initialise a disc or not If you select DVD VR or DVD V initialising will be started You can play a Video mode disc on various DVD components A VR mode disc allows more varied editing Using a DVD R Formatting disc is unnecessary and only V Mode Recording is supported You can play these types of discs on various DVD components only when...

Страница 16: ...n other DVD components finalising may be necessary First finish all editing and recording operations then finalise the disc When using a DVD RW disc in VR Mode DVD discs recorded in VR mode can only be played back in DVD recorders not players When using a DVD RW disc in Video Mode The disc should be finalised first to enable playback on anything other than this HDD DVD Recorder No more editing or ...

Страница 17: ... If the remote does not operate properly Check the polarity of the batteries Dry Cell Check if the batteries are drained Check if remote sensor is blocked by obstacles Check if there is any fluorescent lighting nearby Dispose of batteries according to local environmental regulations Do not put them in the household trash To determine whether your television is compatible follow the instructions be...

Страница 18: ...sarily work on all televisions If you encounter problems operate the television directly M M BRAND BUTTON SAMSUNG 01 02 03 04 05 06 07 08 09 AIWA 82 ANAM 10 11 12 13 14 15 16 17 18 BANG OLUFSEN 57 BLAUPUNKT 71 BRANDT 73 BRIONVEGA 57 CGE 52 CONTINENTAL EDISON 75 DAEWOO 19 20 23 24 25 26 27 28 29 30 31 32 33 34 EMERSON 64 FERGUSON 73 FINLUX 06 49 57 FORMENTI 57 FUJITSU 84 GRADIENTE 70 GRUNDIG 49 52 ...

Страница 19: ...els Stop mode PLAY PAUSE button Plays a disc or pauses playback STOP button Stops disc playback REC button Starts recording HDD DVD button Selects HDD DVD mode DISC TRAY Opens to accept a disc USB HOST Connects to digital still camera MP3 player memory stick Card reader externl HDD or other removable storage devices 10 DV INPUT Connects to external digital equipment with a DV jack such as a camcor...

Страница 20: ... AUDIO OUT OPTICAL Connects to an amplifier having a digital optical audio input jack AV1 TV OUTPUT SCART Connectora Connects to equipment having SCART input jack AUDIO OUT Connects to the audio input of external equipment using audio cables COMPONENT VIDEO OUT Connects to equipment having Component video input Out to TV connector Connects RF cable to TV antenna input Fan The fan always revolves w...

Страница 21: ... VIEW Indicator Lights when HDD mode is selected USB VIEW Indicator Lights when USB mode is selected TIMER Indicator Lights to indicate the timer record mode HDMI Indicator Lights to indicate when HDMI is connected and HDMI resolution status REC Indicator Lights in the record mode STATUS Indicator Playing time clock current status indicator ...

Страница 22: ...RAM RW R discs REC MODE button Use this to set the desired recording time and picture quality XP SP LP EP SELECT TV USB DVD HDD OPEN CLOSE button To open and close the disc tray TV STANDBY ON button COPY button TV MUTE button In TV mode this operates as sound mute PROG button Use this to select a TV programme RETURN button OK DIRECTION buttons _ buttons PLAY LIST TITLE MENU button Use this to retu...

Страница 23: ... Connect one end of the SCART cable to the AV1 socket on the rear of the HDD DVD Recorder Plug the other end into the appropriate connector on the television Plug in the HDD DVD Recorder and TV Turn on the HDD DVD Recorder and TV Press the SOURCE button on your TV remote control until the Video signal from the HDD DVD Recorder appears on the TV screen The RF cable connection of this product sends ...

Страница 24: ...onnector to the SCART AV connector on TV Turn on the HDD DVD Recorder External device VCR Satellite receiver and TV Set Input mode on AV2 TV mode Press the TV DVD button on remote control then TV appear on Front display or turn off HDD DVD Recorder You can watch programmes from a satellite or digital tuner connected to this HDD DVD Recorder even when the HDD DVD Recorder is turned off 1 2 3 4 1 2 ...

Страница 25: ...HDD DVD Recorder Connect RF antenna cables as shown Connect the AV1 connector on this recorder to the SCART AV connector on TV using a SCART cable Connect the AV2 connector to a SCART AV connector on decoder box To watch or record PAY TV Canal Plus programmes set your HDD DVD Recorder to receive the channels using the on screen display Refer to page 38 1 2 3 4 3 Wall DECODER SCART cable not includ...

Страница 26: ...deo This is only available with TVs that support progressive scan Progressive Scan Output 576p Consumers should note that not all high definition television sets are fully compatible with this product and may cause artifacts to be displayed in the picture in case of 576 progressive scan picture problems It is recommended that the user switch the connection to the standard definition output If ther...

Страница 27: ...o cables white and red between the AUDIO OUT jacks on the HDD DVD Recorder and AUDIO IN jacks on TV or AV amplifier See pages 28 33 After connecting refer to the page 46 Make sure that the colour coded connections match The Y PB PR component output jacks of your HDD DVD Recorder must be connected to the exact corresponding component input jacks on your TV Progressive setting is only available when...

Страница 28: ...an AV amplifier with a digital output jack Manufactured under license under U S Patent 5 451 942 other U S and worldwide patents issued pending DTS and DTS Digital Out are registered trademarks and the DTS logos and Symbol are trademarks of DTS Inc 1996 2009 DTS Inc All Rights Reserved Manufactured under licence from Dolby Laboratories Dolby and the double D symbol are trademarks of Dolby Laborato...

Страница 29: ...necting setting up Case 2 Connecting to a stereo amplifier with AV output jacks If your stereo amplifier only has AUDIO INPUT jacks L and R use the AUDIO OUT jacks White Red Front L speaker Front R speaker Audio cable ...

Страница 30: ...plifier with a digital output jack If your AV amplifier has a Dolby Digital MPEG2 or DTS decoder and a digital input jack use this connection To enjoy Dolby Digital MPEG2 or DTS sound you will need to set up the audio settings According to your amplifier connect to an optical cable See pages 44 45 Optical cable not included ...

Страница 31: ...th DVI Jack Case 1 Connecting to a TV with HDMI Jack Using the HDMI cable not supplied connect the HDMI OUT jack on the rear of the HDD DVD Recorder to the HDMI IN jack of your TV Press the input selector on your TV remote control until the HDMI signal from the HDD DVD Recorder appears on your TV screen If the HDD DVD Recorder is connected to your TV in HDMI 1080p output mode you must use High spe...

Страница 32: ...vates when HDMI is connected If TV HDMI Receiver does not support DTS Audio output is not available when you play disc in DTS format You can switch from the HDMI output to other output only in stop mode If you use an HDMI cable to connect a Samsung TV to the HDD DVD Recorder you can operate the recorder using the TV remote control This is only available with SAMSUNG TVs that support Anynet HDMI CE...

Страница 33: ...Recorder to your TV What is the HDCP HDCP High bandwidth Digital Content Protection is a system for protecting DVD content outputted via HDMI from being copied It provides a secure digital link between a video source PC DVD etc and a display device TV projector etc Content is encrypted at the source device to prevent unauthorised copies from being made Connecting to AV IN 3 DV input jack This allo...

Страница 34: ...t Connecting to USB Devices This allows you to connect your HDD DVD RECORDER to USB devices Connecting a USB memory MP3 player Digital Camera to the USB HOST Disconnecting the USB cable during the data transfer will stop the communication and may damage data stored in the memory When data communication is disrupted due to static electricity magnetic field or other reason restart the programme or t...

Страница 35: ...upplied make the Audio Video connection before plugging in the power cord or after finishing the Plug Auto Setup Do not connect the HDMI cable while the Plug Auto Setup is progressing Plug the HDD DVD Recorder into the mains AUTO in the front panel display flickers Press the OK or button then Country option display Press the buttons to select the desired country option then press the OK button Pre...

Страница 36: ...nalogue menu See pages 38 39 Auto setup function can be performed by pressing STOP on the unit continuously for 5 seconds or more during power off with no disc inserted Check the date and time If it is Correct press OK button then the date and time will be saved If you don t press the OK button the date and time will be saved automatically after 5 seconds If it is Incorrect input correct Month Day...

Страница 37: ... number buttons to input clock data directly Press the OK button then the date and time will be saved If you don t press the OK button it will not be saved You must have the RF cable connected to set the Auto Clock See page 23 The DVD Recorder automatically sets the clock according to the time signal broadcast between the channels PR1 to PR5 If there is no clock in the analogue broadcast the clock...

Страница 38: ...ect Digital Analogue or All If you select Analogue you can not select the Scan Mode Start frequency and End frequency Scan Mode Only Free Receives signals except for the scrambled signal All Receives signals including the scrambled signal Start frequency End frequency It is changed automatically when the country is selected Press the button to select Start then press OK button Auto Scan will be st...

Страница 39: ...matically detected in broadcasting signal If not detected you can edit name by using _ buttons Decoder If you set on you can record scrambled channels using external decoder box Before setting on refer to connecting external decoder box in the page 25 MFT Manual Frequency Tunning You can tune up the channel frequency better using _ buttons In case of Delete GREEN B button the channel information o...

Страница 40: ...you renumber a scheduled channel the channel will be removed from the scheduled list If a new channel is added or a lesser number of channels are received than the TV channels run Auto Scanning again Favorite List Digital This function is possible in DVB T mode only You can immediately register the present channel to the Favorite List Digital To setup follow steps 1 2 in page 38 Press the buttons ...

Страница 41: ...and the front panel display goes off Off Does not set to Power Save Normally select OFF mode Anynet HDMI CEC Anynet is a function that can be used to operate the recorder using a Samsung TV remote control by connecting the HDD DVD Recorder to a SAMSUNG TV using an HDMI Cable See pages 31 32 This is only available with SAMSUNG TVs that support Anynet Press the buttons to select Anynet HDMI CEC then...

Страница 42: ...ecorder is recording it can t be powered off If you change the HDMI to other sources Composite Component RF etc in TV while playing the DVD disc the HDD DVD Recorder will stop playing But the HDD DVD Recorder may keep the DVD disc Recording DVB T Auto Subtitle On The subtitle is shown automatically when receiving the DVB T Off The function is cancelled It is available when receiving the DVB T that...

Страница 43: ... recorder to the TV See pages 31 32 If the Anynet feature of the HDD DVD recorder is set to On see page 41 and the menu language is set to Automatic then the menu language will be set to the same as that of the TV If the TV menu language in Automatic mode is not supported by the recorder the recorder s menu language will be set to the default Press the buttons to select the desired language then p...

Страница 44: ... DTS signal Select this when your AV receiver or AV amplifier does not have DTS decoder On Outputs DTS Bitstream via digital output when you play DTS track Select this only when your AV receiver or AV amplifier have DTS decoder When DTS soundtrack is played sound does not output from AV Audio Output DRC This is only active when a Dolby Digital signal is detected On When Movie soundtracks are playe...

Страница 45: ... even though you have a TV with a 4 3 ratio screen Black bars will appear at the top and bottom of the screen 4 3 Pan Scan Select this for conventional size TV when you want to see the central portion of the 16 9 screen Extreme left and right side of movie picture will be cut off 16 9 Wide You can view the full 16 9 picture on your wide screen TV 3D Noise Reduction motion adaptive noise reduction ...

Страница 46: ...etting enables you to select a desired progressive mode To view Progressive scan mode first connect the component cable See page 27 Be sure the Component cables are connected properly Progressive The message Do you want to maintain progressive mode Reverting in 10 seconds will be displayed Select Yes to revert progressive mode Interlace The message Do you want to maintain interlace mode Reverting ...

Страница 47: ...80 Output selection Connect the HDD DVD Recorder to your TV via HDMI Set your TV s input to HDMI The BD Wise menu item appears only if BD Wise is set to On BD wise function is enabled only if BD Wise compliant Samsung Products are connected with each other using the HDMI cable Progressive scan automatically activates when HDMI is connected Consult your TV User s Manual to find out if your TV suppo...

Страница 48: ...ting the DVD Level Press the buttons to select DVD Level then press the OK or button Press the buttons to select the DVD Level you want then press the OK or button For example if you select up to 6 discs that contain 7 8 will not play A larger number indicates that the programme is intended for adult use only Changing the Password Press the buttons to select Change Password then press the OK or bu...

Страница 49: ... chapter will be about 5 minutes long in XP and SP and about 15 minutes long in LP and EP mode Press the STOP button to stop recording To display the created titles finalise the disc See page 104 and then press the TITLE MENU button The title menu will be displayed Finalising is generally unnecessary when using a DVD RW disc To display the created chapters select the desired Title and then press t...

Страница 50: ... see pages 73 74 V Mode Compatibility This feature is about the setup for selecting audios when recording the Dual STEREO Multi audio broadcasting on HDD It does not affect to the direct DVD recording of a programme Off Both Dual L and Dual R of the multi audio broadcasting are recorded on HDD Titles recorded on HDD under such setup status cannot be copied to DVD RW R or DVD RW V mode On Either Du...

Страница 51: ...ect Audio Track Press the AUDIO button to see the Audio Track list Press the buttons to select desired Audio Track then press the OK button Setting the Favorite List Digital You can immediately register the present channel to the Digital Favorite Channel List Press the FAV LIST button while you are viewing a programme To add the current channel to the Digital Favorite channels press the GREEN B bu...

Страница 52: ...om now to 7 days after button select the programme and station INFO button Information View the detail information The contents of cell could be displayed with a delay according to the broadcasting If Daylight Saving Time and GMT Time settings are wrong EPG Time will be incorrect 1 1 1 M Teletext FRA Transparency off Change TRANSPARENCY P100 TF1 30 01 15 08 09 METEO INFOS SPORTS ASTRO FOOT CINE 10...

Страница 53: ...NFORMATION INFO DTV Guide 12 00 12 25 Blue Peter Timer Rec A TUE 1 JAN 12 30 13 00 13 30 001 BBC ONE Blue Peter Neighbours BBC News Look North 002 BBC TWO The Weakest Link Beg Borrow or Steal Strictly Come Dancing It T 007 BBC THREE 030 CBBC Channel Basli Brush Tracy Beake Blue Peter Out There 040 BBC NEWS 24 BBC News BBC News 001 BBCi BBCi BBCi 12 00 TUE 1 JAN 2009 Previous Next Day INFORMATION I...

Страница 54: ... in U K France Germany etc DivX MP3 Disc types that can be played Disc Types Disc Logo content Recorded content Disc Shape Max Playing Time DVD VIDEO AUDIO VIDEO Single sided 12cm 240 min Double sided 12cm 480 min Single sided 8cm 80 min Double sided 8cm 160 min AUDIO CD AUDIO Single sided 12cm 74 min Single sided 8cm 20 min JPEG JPEG Image Single sided 12cm Single sided 8cm MP3 MP3 Audio Single s...

Страница 55: ...VD RAM RW R JPEG MP3 DivX Discs that cannot be played DVD Video with a region number other than 2 or ALL 3 9 GB DVD R Disc for Authoring DVD RAM RW VR mode not recorded following the Video Recording Standard A DVD R DVD RW V disc which has been recorded and not finalised in a different manufacturer s recorder DVD ROM PD MV Disc etc VCD SVCD CVD CD ROM CDV CD G CD I BD HD DVD This HDD DVD Recorder ...

Страница 56: ...case Be especially careful that children s fingers are not caught between the disc tray and the tray chassis when it closes You must only insert one DVD disc at a time Inserting two or more discs will not allow playback and may cause damage to the HDD DVD Recorder Using the Disc Menu Title Menu Some type of discs contain a dedicated menu system that allows you to select special functions for title...

Страница 57: ...peed Skipping Chapters Titles or Markers SXCV KL During play press the SKIP buttons on the remote control If you press the SKIP button It moves to the beginning of the chapter or title or marker Pressing the button once again within 3 seconds returns to the beginning of the previous chapter or title or marker If you press the SKIP button It moves to the next chapter or track or marker Slow Motion ...

Страница 58: ...to select Title Chapter or Time Press the _ buttons or number buttons to select the desired scene then press the OK button In case of searching a time enter the time in the sequence of hours minutes and seconds using the number buttons Then press the OK button This may not work for some discs When an audio CD CD DA or an MP3 JPEG disc is inserted depending on the disc type the information display ...

Страница 59: ...he Angle function Press the INFO button during playback Press the buttons to select Angle Press the _ buttons to select the desired angle This function is disc dependent and may not work on all DVDs This function does not work when a DVD has not been recorded with a multi camera angle system Displays the current angle total angle number Repeat Play Playing Repeatedly Repeat Playback SZXCVKLD You c...

Страница 60: ...ormal Playback by pressing the EXIT button Audio CDs CD DA MP3 discs and DivX discs do not support the Repeat A B function Zooming In SZXCVKL Press the INFO button during playback Press the buttons to select Zoom then press the OK or button will be displayed Press _ buttons to move to the area you want to enlarge Press the OK button The screen will be enlarged to twice the normal size The screen s...

Страница 61: ...ker Pressing the button once again within 3 seconds returns to the beginning of the previous marker If you press the SKIP button it moves to the next marker Clearing a marker Press the MARKER button during playback Press the _ buttons to select a marked scene Press the RED A button to delete the selected mark When a marker is cleared while HDD DVD RAM RW VR mode is playing marker numbers will chan...

Страница 62: ...or next page Press the SEARCH buttons Fast Play X 2 X 4 X 8 Audio CD only STOP button Stops a track song PAUSE button Pauses playback PLAY button OK button Plays the selected track song Selects a track song 7 RED A button Creates a playlist or go to playlist Select All MP3 CD DA Copy MP3 CD Import Audio CD 8 GREEN B button Selects the sort order MP3 disc only 9 YELLOW C button Selects the play mod...

Страница 63: ...he REPEAT button on the remote control During playback press the REPEAT button repeatedly to select the repeat mode you want Press the YELLOW C button during the Music List playback Press the buttons to select desired play mode then press the OK or button Normal CD CD DA MP3 Tracks on a disc are played in the order in which they were recorded on the disc Repeat Track CD CD DA MP3 Repeat Folder MP3...

Страница 64: ...tracks in the order in which you want them to play then press the OK button If you playlisted a wrong track press the buttons to select the wrong track then press the OK button To store the Playlist press the RED A button A new Playlist will be created 1 M 1 9 CDDA 8 3 64MB Previous Next Page a Check eExit Start Copy Sort Select All Unselect All CD CD Import Selected Items Available Source DVD E H...

Страница 65: ...List playback Press the buttons to select Go To Playlist then press the OK or button Press the buttons to select the Playlist you want to edit Press the GREEN B button in playlist mode Press the buttons to select tracks in the order in which you want them to play then press the OK button If you playlisted a wrong track press the buttons to select the wrong track then press the OK button To store t...

Страница 66: ...on This function is possible only when the disc contains the selected contents Audio CD CD DA is not available 1 1 M 1 M SONG 1 mp3 1 10 9 SONG 1 mp3 E ROOT 00 02 22 No Title Size Previous Next Page a Check eExit Edit Sort Play Mode Contents CD Music List Y ROOT Q SONG 1 MP3 3 8 MB 002 SONG 2 MP3 3 8 MB 003 SONG 3 MP3 5 1 MB 004 SONG 4 MP3 9 2 MB 005 SONG 5 MP3 5 2 MB 006 SONG 6 MP3 10 3 MB Name S...

Страница 67: ... also operate Slide Show in by pressing the YELLOW C button Press the RED A button to select Speed Press the buttons to select the Slide Show speed then press the OK or button The Slide Show starts and plays at the selected speed You can go to Photo List by pressing YELLOW C button To stop the Slide Show Press the GREEN B STOP or RETURN button 1 M 1 Playback Image 1 jpg 1 17 Rotate Zoom mPhoto Sli...

Страница 68: ...o To Photo List To setup follow steps 1 to 4 in page 67 5 1 Press the RETURN button to go to Photo List Using the Sort When you need to change the Sort order of Photo List you can change it simply To setup follow steps 1 to 4 in page 67 5 1 While the list menu is displayed press the GREEN B button to select Sort Press the buttons to select the desired item then press the OK or button Name In alpha...

Страница 69: ...ion Function Description Skip Scene During play press the SKIP buttons it moves forward or backward 5 minutes Search Scene During play press the SEARCH buttons and press again to search at a faster speed X 2 X 4 X 8 Slow Motion In pause mode press the SEARCH button on the remote control 1 2 1 4 1 8 Reverse Slow Motion Play is not available Step Motion In pause mode press the SKIP buttons on the re...

Страница 70: ...the GREEN B button to select Sort Press the buttons to select the desired item then press the OK or button Name In alphabetical order Size In order of DivX file size You can sort by Name Size Sorted list will be resorted in copied order upon re entering DivX List Select Contents Press the BLUE D button to select Contents Press the buttons to select the contents you want to move then press the OK o...

Страница 71: ...ecording in Samsung Recorder DVD RAM VR Mode Samsung X Recordable Other Company X Recordable DVD RW VR Mode Samsung finalised Not recordable not finalised Recordable Other Company finalised Not recordable not finalised Recordable V Mode Samsung finalised Not recordable not finalised Recordable Other Company finalised Not recordable not finalised Not recordable DVD R V Mode Samsung finalised Not re...

Страница 72: ... DVD RAM R Formatting will be started automatically DVD RW Use after formatting the disc DVD RW Use after initialising the disc If you want to change the VR or V mode refer to Formatting a Disc on pages 103 104 DVD R Formatting disc is unnecessary and only V Mode Recording is supported DVD RAM RW VR mode This mode allows multiple editing functions such as deletion of the whole title partial deleti...

Страница 73: ...urs Approx 1 hour about 8 5 Mbps SP standard quality mode Approx 67 hours Approx 2 hours about 4 5 Mbps LP long recording mode Approx 133 hours Approx 4 hours about 2 Mbps EP extended mode Approx 199 hours Approx 264 hours Approx 6 hours about 1 6 Mbps Approx 8 hours about 1 2 Mbps FR Flexible Recording Approx 33 hours 264 hours Approx 1 8 hours DVD SH895 Recording Mode Recording Times HDD 250GB D...

Страница 74: ... Approx 8 hours about 1 2 Mbps FR Flexible Recording Approx 68 hours 534 hours Approx 1 8 hours Recording time may vary according to specific conditions 1GB 1 000 000 000 bytes actual formatted capacity may be less as the internal firmware uses a portion of the memory The dual layer DVD Rs have approximately double the capacity of single layer DVD Rs See pages 54 55 DVB T recording is possible onl...

Страница 75: ... Recordable Media CPRM CPRM is a mechanism that ties a recording to the media on which it is recorded It is supported by some HDD DVD Recorders but not by many DVD players Each blank recordable DVD has a unique 64 bit media ID etched in the BCA When protected content is recorded onto the disc it can be encrypted with a 56 bit C2 Cryptomeria cipher derived from the media ID During playback the ID i...

Страница 76: ...oncerning the external input mode is displayed on the screen then recording begins Icon REC is displayed on the front panel To pause recording Press the REC PAUSE button to pause a recording in progress Press the REC PAUSE button again during pause to resume recording You can switch channels by pressing the PROG buttons while recording pauses Analogue broadcasting only If you select DV mode during...

Страница 77: ...u select DVD press the OPEN CLOSE button and place a recordable disc on the disc tray Press the OPEN CLOSE button to close the disc tray Wait until LOAD disappears from the front panel display Press the REC MODE button repeatedly to select the recording speed quality Press the SOURCE button to select DV If the input is set to DV a playback record menu that enables camcorder control appears on the ...

Страница 78: ... 8 00 to 0 00 then the HDD DVD Recorder stops recording To stop recording Press the STOP button The message Do you want to stop recording is displayed Press the _ buttons to select Yes then press the OK button Or press the STOP button again Simultaneous Recording and Playback S You can play back from the beginning of the programme you are currently recording You can watching the previous title lis...

Страница 79: ...om the beginning Stopping Playback Recording Press the STOP button once playback screen disappears and the Title List screen appears Pressing the MENU button again the recording in progress screen appears Pressing the STOP button once more will stop the recording No sound is heard during search mode DVD disc or HDD playback is available during HDD recording However JPEG MP3 and DivX files in the d...

Страница 80: ...emote Control used for Time Shift function PLAY button Playback PAUSE button Pause live TV SEARCH buttons Fast play X 2 X 4 X 8 X 16 X 32 X 128 SKIP button STOP button Moves to Live point STOP button If you press this button in the Live point a dialog box appears where you can stop Time Shift SKIP button Returns to the point where Time Shift begins EXIT or RETURN button Hides the Time Shift icon o...

Страница 81: ... of the timer recording Mode Recording Mode FR Flexible Recording Select when you want to set video quality automatically In FR mode the most suitable record mode is adjusted automatically according to the remaining time on the disc and length of the timer recording This function is selected only one mode in XP SP LP and EP modes XP high quality Select when video quality is important SP standard q...

Страница 82: ...gramme is complete the second programme starts being recorded To exit without saving the current setting Press the EXIT button To return to the previous menu Press the RETURN button if you don t want to set a timer recording Turn the power off to finish the Timer Recording setting Timer Recording will not work when the power is on The timer recording time may differ from the set time depending on ...

Страница 83: ...en will disappear N 1 English _83 Current Time 10 54 No To Source Date Start End Mode VPS PDC HDD Scheduled List m MOVE sSELECT rRETURN eEXIT 01 HDD PR 01 JAN 01 17 30 18 30 SP On 02 HDD PR 01 JAN 01 21 00 22 00 SP On 03 HDD PR 01 JAN 01 23 15 23 45 SP On Recordable Time HDD 65 19 XP Add Delete Recorded List Current Time 10 54 No To Source Date Start End Mode VPS PDC HDD Scheduled List m MOVE sSEL...

Страница 84: ...R button With the unit in Stop mode press the TIMER button Press the button to select Recorded List then press the OK or button Press the EXIT button after finishing the operation The Recorded List screen will disappear Information about Recorded List Informs whether the selected Recorded List performed a Timer Recording successfully 3 1 Press the buttons to select the number of the Recorded List ...

Страница 85: ...Date Start End Mode VPS PDC Status HDD Recorded List m MOVE sSELECT rRETURN eEXIT Delete Delete All Scheduled List 01 HDD PR 01 JAN 01 17 30 18 30 SP On OK 02 HDD PR 01 JAN 01 21 00 22 00 SP On OK 03 HDD PR 01 JAN 01 23 15 23 45 SP On OK Do you want to delete No No 01 Yes No To Source Date Start End Mode VPS PDC Status HDD Recorded List m MOVE sSELECT rRETURN eEXIT Delete Delete All Scheduled List...

Страница 86: ...he Title List then press the RED A button Press the buttons to select Rename then press the OK or button The Rename screen is displayed Select the desired characters using the _ buttons press the OK button Back Space RED A button Deletes and moves the cursor backwards by one position Space GREEN B button Enters a blank and moves the cursor one forward to the right Clear YELLOW C button Deletes all...

Страница 87: ... select On then press the OK button The key icon on the information window for the selected entry changes to the locked status 1 0 If you want to cancel the Protection select Off in step 5 and press the OK button The key icon changes to the unlocked status 0 1 If you select Select All in the Edit menu all title will be checked N 1 M No Title Length MOVE sSELECT rRETURN eExit HDD Title List 001 JAN...

Страница 88: ...ised it cannot be deleted With DVD R titles are only deleted from the menu however the Title remains physically on the disc If you select Select All in the Edit menu all title will be checked Splitting a Section of a Title Split SK Follow these instructions to split a section of a Title List entry into two titles Using the TITLE LIST button With the unit in Stop mode Playback mode press the TITLE ...

Страница 89: ...dow Select the start and end points of the section you want to delete using the playback related buttons Playback related buttons PLAY PAUSE SEARCH Press the OK button at the end point The image and end point time is displayed in the Section deletion ending point window N 1 Select Split Return Title List No 001 00 00 00 00 00 00 Split 1 Split 2 MOVE sSELECT rRETURN eEXIT HDD Split JAN 01 2009 17 3...

Страница 90: ...ate Name Length Channel info Sorted list will be resorted in copied order upon re entering Title List Navigation Menu Time Navigation SXC VR mode Using this function you can search scene minute by minute from the recorded title list Using the TITLE LIST button With the unit in Stop mode Playback mode press the TITLE LIST button Press the buttons to select an entry you want to play from Title List ...

Страница 91: ...l not operate if a selected title does not have Markers Select Contents SXCVKL Press the BLUE D button to select Contents Press the buttons to select the contents you want to move then press the OK or button This function is possible only when the disc contains the selected contents M N 1 M 1 M No Title Length a Check eExit HDD Title List 001 JAN 01 2009 17 30 PR 01 00 00 002 JAN 02 2009 21 00 PR ...

Страница 92: ...played Repeat steps 4 6 to make a new scene for the playlist A new scene will be added to the current playlist You can check and see all the scenes on the Edit playlist screen See pages 92 96 To make a new playlist Repeat steps 1 6 if you want to make a new playlist Press the _ button to select Return then press the OK button to finish the operation You can create up to 99 playlist entries Dependi...

Страница 93: ...and moves the cursor backwards by one position Space GREEN B button Enters a blank and moves the cursor one forward to the right Clear YELLOW C button Deletes all the character inputs Save BLUE D button Registers the character inputs Press the BLUE D button to select Save The changed title is displayed in the title field of the selected playlist entry N 1 N 1 No Title Length a Check eExit HDD Play...

Страница 94: ...t the starting or ending point of the section you want to modify using the playback related buttons PLAY PAUSE SEARCH SKIP 6 Press the OK button at the end point of the scene The image and ending point time is displayed in the End window 7 Press the _ buttons to select Change then press the OK button The scene you want to modify is changed with the selected section N 1 No Title Length a Check eExi...

Страница 95: ...s the OK button at the end point of the scene The image and end point time are displayed in the End window To cancel press the _ buttons to select Return then press the OK button 7 Press the _ buttons to select Add then press the OK button The section you want to add is inserted prior to the scene selected in step 4 1 of Adding a Scene Deleting a Scene To setup follow steps 1 to 3 in page 94 4 1 P...

Страница 96: ...he GREEN B button to select Sort Press the buttons to select the desired item then press the OK or button Date In order of when the playlists were created Name In alphabetical order You can sort by Date Name Sorted list will be resorted in copied order upon re entering Playlist N 1 M 1 M No Title Length a Check eExit HDD Playlist 001 JAN 02 2009 13 47 00 06 09 002 JAN 02 2009 13 51 00 03 33 003 JA...

Страница 97: ...has been recorded on the HDD this title can be copied to DVD RW VR mode or DVD RAM Using the TITLE LIST button Press the OPEN CLOSE button and place a recordable disc on the disc tray Press the OPEN CLOSE button to close the disc tray Wait until LOAD disappears from the front panel display Check that the disc has enough available space for the recording Select a desired mode by pressing the HDD or...

Страница 98: ... Video disc on the disc tray Press the OPEN CLOSE button to close the disc tray During the playback press the COPY button Copy will be started The Copy function will be disabled in the followings If you try to copy in the section of a menu NTSC disc or copy protected disc Titles that are different in the broadcasting system The audio title that is copied to the HDD will be recorded in the 2ch AC3 ...

Страница 99: ...press the EXIT button Folder Copy Insert a Disc JPEG MP3 or DivX into the tray Press the buttons to select Library then press the OK or button Press the buttons to select Music Photo or DivX then press the OK or button MP3 JPEG or DivX folder is displayed 1 1 MP3 5 85MB Previous Next Day a Check eExit Start Copy Sort Selection All Unselect All CD Copy Selected Items 5 85MB 1 Available Source DVD T...

Страница 100: ...olders you should delete one or more items before you can create a new folder File size on a disc and the copied file in the HDD may be slightly different due to the file system If you check some entries in the current folder and move to open a different folder those entries are automatically unchecked and excluded from the selection list Changing the name of Music Photo DivX file S You can rename...

Страница 101: ...yed Select the desired characters using the _ buttons then press the OK button Press the BLUE D button to select Save A disc name is given to the disc You may need to clear Disc Protection beginning editing Depending on the kind of disc the displayed screen may be different If you have recorded a DVB T radio channel program the time information displayed for each of free and used space may be inco...

Страница 102: ...ata cannot be deleted from a disc If you select Yes you will be prompted with the confirmation message All playlists will also be deleted Do you want to continue Press the _ buttons to select Yes then press the OK button All title lists are deleted 1 1 MOVE sSELECT rRETURN eEXIT DVD RAM VR Disc Manager Rename Protection Delete All Format Disc Name Used Space Available Space Disc Protection Info Cu...

Страница 103: ...u will be prompted with the confirmation message Current media Do you want to format If you select Yes you will be prompted with the confirmation message All data will be deleted Do you want to continue 1 1 MOVE sSELECT rRETURN eEXIT HDD Disc Manager Delete Format Used Space Available Space 000 39 1 68 GB 065 19 XP 231 01 GB MOVE sSELECT rRETURN eEXIT HDD Disc Manager Delete Format Used Space Avai...

Страница 104: ...from the record list After being finalised the DVD R RW video mode operates in the same manner as a DVD Video Depending on the disc type the displayed screen may be different Finalising time may be different depending on the amount of data recorded on the disc Data on the disc will be damaged if the recorder is powered off during finalisation process You can finalise the disc automatically using E...

Страница 105: ...mode Finalise Unfinalise Mark DVD Video RW DVD RW V Operation Same as DVD Video Additional recording protection and deletion are possible A DVD RW can be finalised or unfinalised in VR mode Finalise Unfinalise Mark DVD RW VR F DVD RW VR Operation Additional recording deletion editing and protection are impossible Additional recording deletion editing and protection are possible 1 M MOVE sSELECT rR...

Страница 106: ...the moment 4 You ve requested a title chapter or scan time that is out of range Play mode settings are different from the settings configured in the Settings menu The disc does not support all selected functions In this case some settings configured in the settings menu may not work properly Cannot change the aspect ratio The aspect ratio is fixed for DVD discs See page 45 The angle operation does...

Страница 107: ... connection between the TV and the HDMI jack of the HDD DVD Recorder See if your TV supports HDMI Abnormal HDMI output screen If snow noise appears on the screen it means that TV does not support HDCP High bandwidth Digital Content Protection HDMI output Jitter Check your TV system setup correctly Please refer to the user s manual of your TV The remote control doesn t work Point the remote control...

Страница 108: ... audio output Video Composite Video Video output jack x 1 Component output x 1 Y 1 0Vp p PB 0 70Vp p PR 0 70Vp p at 75Ω load HDMI DVI 576p 720p 1080i 1080p Scart Jack AV1 Scart TV Video Composite RGB Audio analogue Recording Picture Compression format MPEG II Audio Compression format Dolby Digital 2ch 256Kbps MPEG II Recording Quality XP about 8 5 Mbps SP about 4 5 Mbps LP about 2 5 Mbps EP about ...

Страница 109: ... placed by the copyright holder saying it may be distributed under the terms of this General Public License The Program below refers to any such program or work and a work based on the Program means either the Program or any derivative work under copyright law that is to say a work containing the Program or a portion of it either verbatim or with modifications and or translated into another langua...

Страница 110: ...License since you have not signed it However nothing else grants you permission to modify or distribute the Program or its derivative works These actions are prohibited by law if you do not accept this License Therefore by modifying or distributing the Program or any work based on the Program you indicate your acceptance of this License to do so and all its terms and conditions for copying distrib...

Страница 111: ... to most effectively convey the exclusion of warranty and each file should have at least the copyright line and a pointer to where the full notice is found One line to give the program s name and a brief idea of what it does Copyright C year name of author This program is free software you can redistribute it and or modify it under the terms of the GNU General Public License as published by the Fr...

Страница 112: ...estrict the users of a free program by obtaining a restrictive license from a patent holder Therefore we insist that any patent license obtained for a version of the library must be consistent with the full freedom of use specified in this license Most GNU software including some libraries is covered by the ordinary GNU General Public License This license the GNU Lesser General Public License appl...

Страница 113: ...sed by this function must be optional if the application does not supply it the square root function must still compute square roots These requirements apply to the modified work as a whole If identifiable sections of that work are not derived from the Library and can be reasonably considered independent and separate works in themselves then this License and its terms do not apply to those section...

Страница 114: ...copy For an executable the required form of the work that uses the Library must include any data and utility programs needed for reproducing the executable from it However as a special exception the materials to be distributed need not include anything that is normally distributed in either source or binary form with the major components compiler kernel and so on of the operating system on which t...

Страница 115: ...D BY APPLICABLE LAW EXCEPT WHEN OTHERWISE STATED IN WRITING THE COPYRIGHT HOLDERS AND OR OTHER PARTIES PROVIDE THE LIBRARY AS IS WITHOUT WARRANTY OF ANY KIND EITHER EXPRESSED OR IMPLIED INCLUDING BUT NOT LIMITED TO THE IMPLIED WARRANTIES OF MERCHANTABILITY AND FITNESS FOR A PARTICULAR PURPOSE THE ENTIRE RISK AS TO THE QUALITY AND PERFORMANCE OF THE LIBRARY IS WITH YOU SHOULD THE LIBRARY PROVE DEFE...

Страница 116: ...DS 0900 SAMSUNG 0900 7267864 0 10 Min www samsung com nl NORWAY 3 SAMSUNG 7267864 www samsung com no POLAND 0 801 1SAMSUNG 172678 022 607 93 33 www samsung com pl PORTUGAL 80820 SAMSUNG 726 7864 www samsung com pt SLOVAKIA 0800 SAMSUNG 726 7864 www samsung com sk SPAIN 902 1 SAMSUNG 902 172 678 www samsung com es SWEDEN 075 SAMSUNG 726 78 64 www samsung com se U K 0845 SAMSUNG 7267864 www samsung ...

Страница 117: ...tally safe recycling Business users should contact their supplier and check the terms and conditions of the purchase contract This product and its electronic accessories should not be mixed with other commercial wastes for disposal Code No AK68 01785H Correct disposal of batteries in this product Applicable in the European Union and other European countries with separate battery return systems Thi...

Отзывы: