background image

advance functions

0_


advance functions

4. When you reach the scene you want to mark, press-the 

   ENTER button. Up to three scenes may be marked at a time.

1

   -   -

3. Press the 

/

®

 buttons to select Bookmark (except VCD),  

    then press the ENTER button.

Note

Only Menu Off is available for VCD2.0. Each 
press of the DISC MENU button toggles between 
Menu-On and Menu Off.

-  Depending on a disc, the Bookmark function may 

not work.

5. Press the PLAY/PAUSE (

) button to skip to the marked     

    scene.

Recalling a Marked Scene

1~3. The first 1~3 steps are the same as those for “Using the    

     Bookmark Function” on page 19.

4.  Press the 

/

®

 buttons to select a marked scene.

1   

2

   3

Clearing a Bookmark

1~3. The first 1~3 steps are the same as those for  “Using the   

    Bookmark Function” on page 19.
4. Press the 

√/®

 buttons to select the bookmark number you   

    want to delete.
5. Press the CANCEL button to delete a bookmark number.

1   

2

   3

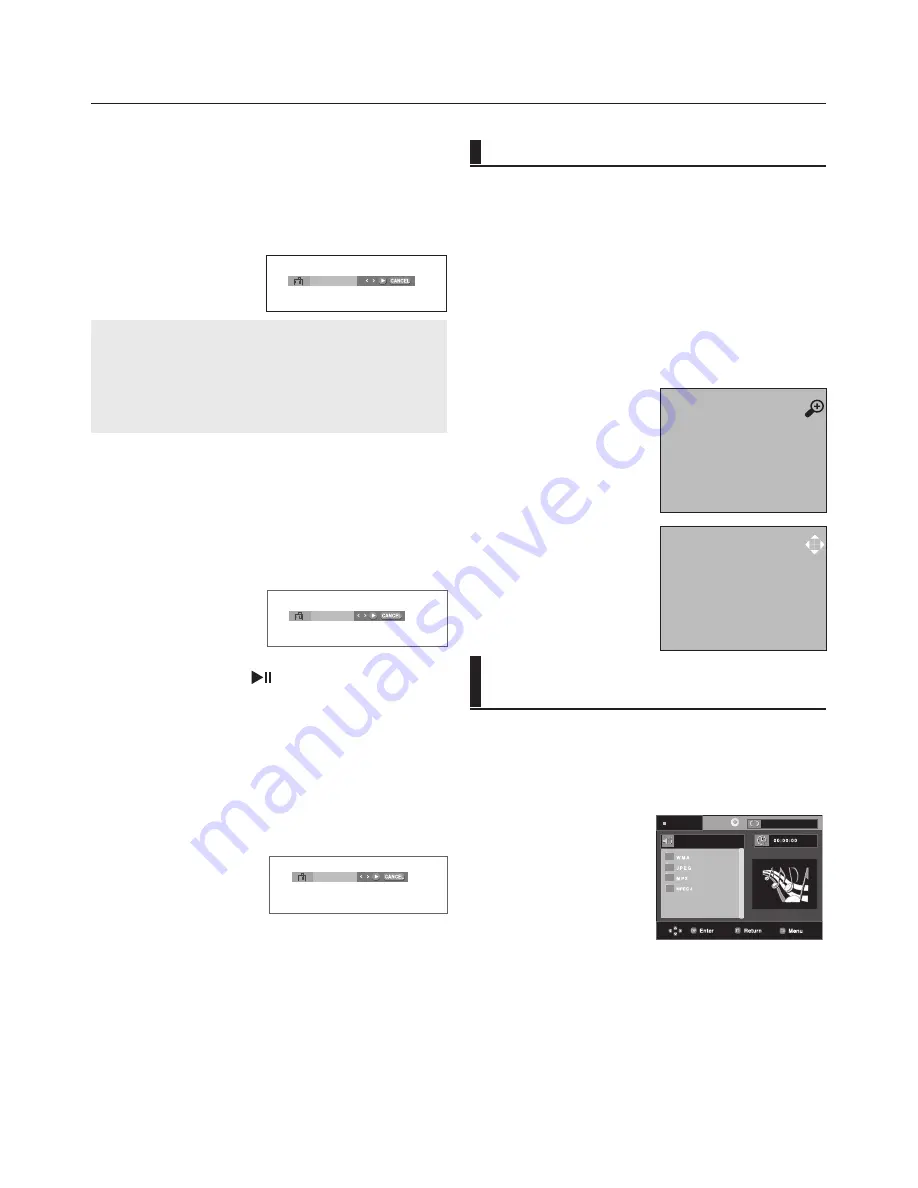
Using the Zoom Function

Using the Zoom Function (DVD/  

VCD)

1. During play, press the INFO button on the remote control.

2. Press the 

π

/

 buttons to select Shortcut

3.  Press the 

/

® 

buttons to select Zoom, then press the 

    ENTER button. 
    - During DVD play, press ENTER to zoom in 2X/4X/2X/ 

      Normal in order.

    - During VCD play, press ENTER to zoom in 

      2X/4X/2X/Normal-in order.

Clips Menu for MP3/WMA/ 

JPEG/ MPEG4/CD Audio


CD Audio or discs with MP3/WMA/JPEG contain 

individual songs and/or pictures that can be orga-

nized into folders as shown below. They are similar 

to how you use your computer to put files into differ-

ent folders.

Open the disc tray.

Place the disc on the tray.

Close the tray.

The tray closes and this 

screen displays.

Stop

Off

2X

Содержание DVD-P490

Страница 1: ... the possibilities Thanks you for purchasing this Samsung product To receive more complete service please register your product at www samsung com global register DVD Player user manual DVD P490 AK68 01768A 01 ...

Страница 2: ...yer will operate normally When condensation forms inside the player due to sharp changes in temperature the player may not operate correctly If this occurs leave the player at room tempera ture until the inside of the player becomes dry and operational 4 Disc Do not clean record cleaning sprays ben zene thinner or other volatile solvents that may cause damage to the disc surface Do not touch the d...

Страница 3: ...pe and Characteristics 5 Description 6 Tour of the Remote Control 8 Connections Choosing a Connection 9 Basic Functions Playing a Disc 15 Using the Search and Skip Functions 16 Using the Display Function 16 Using the Disc and Title Menu 17 Repeat Play 17 Slow Play 17 Advanced Functions Adjusting the Aspect Ratio EZ View 18 Selecting the Audio Language 18 Selecting the Subtitle Language 19 Changing...

Страница 4: ...DVD ROM DVD RAM CD ROM CDV CDI CVD CDGs play audio only not graphics Ability to play back may depend on recording conditions DVD R R CD RW DVD RW RW V mode The unit may not play certain CD R CD RW and DVD R due to the disc type or recording conditions COPY PROTECTION Many DVD discs are encoded with copy protection Because of this you should only connect your DVD player directly to your TV not to a...

Страница 5: ...O CD This DVD player is capable of playing the following types of discs with the corresponding logos Disc Type and Characteristics Disc Markings Region Number Both the DVD player and the discs are coded by region These regional codes must match in order for the disc to play If the codes do not match the disc will not play The Region Number for this player is described on the rear panel of the play...

Страница 6: ...Ad Player is loading disc information 1 STANDBY ON When STANDBY ON is pressed on the player is turned on 2 DISC TRAY Place the disc here 3 USB Host Connect digital still camera MP3 player memory stick Card reader or another removable storage devices 4 DISPLAY Operation indicators are displayed here 5 OPEN CLOSE STOP Press to open and close the disc tray Stops disc play 6 PLAY PAUSE Begin or pause ...

Страница 7: ...able to connect to a compatible Dolby Digital receiver Use a coaxial digital cable to connect to an A V Amplifier that contains a Dolby Digital MPEG2 or DTS decoder 3 VIDEO OUT JACK Use a video cable to connect to the Video input jack on your television The Video Output in Setup Menu must be set to Component I SCAN 4 COMPONENT VIDEO OUT JACKS Use these jacks if you have a TV with Component Video i...

Страница 8: ...access various audio functions on a disc 10 ENTER π Buttons This button functions as a toggle switch 11 INFO Button Displays the current disc mode 12 OPEN CLOSE Button To open and close the disc tray 13 REPEAT A B Button Allows you to repeat A B disc 14 USB Button 15 VIDEO SEL Button Selects video output formats 16 PLAY PAUSE Button Begin Pause disc play 17 SKIP Buttons Use to skip the title chapt...

Страница 9: ...IDEO yellow AUDIO red and white IN terminals of TV 2 Turn on the DVD player and TV 3 Press the TV VIDEO button on the TV s remote control to select Video Note Noise may be generated if the audio cable is too close to the power cable If you want to connect to an Amplifier please refer to the Amplifier connection page See pages 12 to 14 The number and position of terminals can vary depending on your...

Страница 10: ...IO red and white OUT terminals of 5 1 CH Front L R on the rear of the DVD player to the AUDIO red and white IN terminals of TV Turn on the DVD player and TV 3 Press the TV VIDEO button on the TV s remote control to select Component or DVD 4 Set the Video Output to I SCAN in the Display Setup menu See pages 29 to 30 Note If you want to connect to an Amplifier please refer to the Amplifier connectio...

Страница 11: ...until the Component signal from the DVD player appears on the TV screen 4 Set the Video Output to P SCAN in the Display Setup menu See pages 29 to 30 You can use the VIDEO SEL button to change the Video Output mode See page 9 RED WHITE RED WHITE RED BLUE GREEN RED BLUE GREEN Audio Cable Component cable not included To see the progressive video output You need a TV set supporting the progressive sc...

Страница 12: ...EO or COMPONENT IN terminal of your TV 3 Turn on the DVD player TV and Amplifier 4 Press the input select button of the Amplifier to select exter nal input in order to hear sound from the DVD player Note Please turn the volume down when you turn on the Amplifier Sudden loud sound may cause damage to the speakers and your ears Please set the audio in the menu screen according to the Amplifier See p...

Страница 13: ...D player to the VIDEO or COMPONENT IN terminal of TV 3 Turn on the DVD player TV and Amplifier 4 Press the input select button of the Amplifier to select external input in order to hear sound from the DVD player Note Please turn the volume down when you turn on the Amplifier Sudden loud sound may cause damage to the speakers and your ears Please set the audio in the menu screen according to the Am...

Страница 14: ... using audio cables for 5 1 CH Analog Amplifier not included connect the 5 1CH ANALOG AUDIO OUT termi nals on the rear of the DVD player to the 5 1CH ANALOG AUDIO IN terminals of the 5 1CH Analog Amplifier 2 Using the video signal cable s connect the VIDEO or COMPONENT terminals on the rear of the DVD player to the VIDEO or COMPONENT terminals of your TV as described on pages 9 to 11 3 Turn on the...

Страница 15: ...When you stop disc play the player remembers where you stopped so when you press PLAY PAUSE button again it will pick up where you left off 4 Stopping Play Press the STOP button during play 6 Pausing Play Press the PLAY PAUSE button on the remote control during play Screen stops no sound To resume press the PLAY PAUSE button once again 7 Step Motion Play Except CD Press the SKIP button on the remo...

Страница 16: ...buttons to make the desired setup and then press the ENTER button You may use the number but tons of the remote control to directly access a title chap ter or to start the playback from a desired time 4 To make the screen disappear press the CANCEL button Title To access the desired title when there is more than one in the disc For example if there is more than one movie on a DVD each movie will b...

Страница 17: ...2 Press the π buttons to select Disc Menu then press the or ENTER button Using the Disc and Title Menu Note Depending on a disc the Disc Menu may not work You can also use the Disc Menu using the DISC MENU button on the remote control When playing VCD the Disc Menu may not work Press ENTER key for Disc Menu Repeat Play Note A B REPEAT allows you to set point B until at least 5 seconds of play back...

Страница 18: ...l portion of the 16 9 screen is displayed Screen Fit The top and bottom portions of the screen are cut off and a full screen appears The picture will look vertically stretched Zoom Fit The top bottom left and right of the screen are cut off and the central portion of the screen is enlarged For 4 3 aspect ratio discs NORMAL SCREEN Displays the content of the DVD title in 4 3 aspect ratio Screen Fit...

Страница 19: ... You have to change the desired subtitle in the Disc Menu according to discs Press the DISC MENU button This function depends on what subtitles are encoded on the disc and may not work on all DVDs A DVD disc can contain up to 32 subtitle languages To have the same subtitle language come up whenever you play a DVD Refer to Using the Subtitle Language on page 27 Off SUBTITLE MPEG4 Changing the Camer...

Страница 20: ...se for Using the Bookmark Function on page 19 4 Press the buttons to select the bookmark number you want to delete 5 Press the CANCEL button to delete a bookmark number 1 2 3 Using the Zoom Function Using the Zoom Function DVD VCD 1 During play press the INFO button on the remote control 2 Press the π buttons to select Shortcut 3 Press the buttons to select Zoom then press the ENTER button During ...

Страница 21: ...lder and Random Off Normal Playback Track Repeats the current song file Folder Repeats the song files which have the same extension in the current folder Random Song files which have the same extension will be played in random order To resume normal play press the CANCEL button CD R MP3 WMA file When you record MP3 or WMA files on CD R please refer to the following Your MP3 or WMA files should be ...

Страница 22: ... MPEG4 file MPEG4 Function Description Function Description Reference page Skip or During play press the or button it moves forward or backward 5 minutes Search or During play press the SEARCH or but ton and press again to search at a faster speed Allows you to search at a faster speed in an AVI file 2X 4X 8X Slow Motion Play Allows you to search at a slower speed in an AVI file 1 2X 1 4X 1 8X P 1...

Страница 23: ...sconnecting the USB cable Press the STOP button Remove the USB cable Off STOP 00 00 00 Skip Forward Back During playback press the button When there is more than one file when you press the button the next file is selected When there is more than one file when you press the button the previous file is selected Compatible Devices 1 USB devices that support USB Mass Storage v1 0 USB devices that ope...

Страница 24: ...ack 03 Track 04 Track 05 Track 06 Track 07 Track 08 Track 01 DEV SELECT START USB Disc Off Stop 2 Press the π buttons to select SELECT then press the ENTER button to marked all files to be copying To unmarked copying all files press the ENTER button again UNSELECT Menu If you want to marked several files to be copying press the button then press the ENTER button on the selected file 3 Press the π ...

Страница 25: ...EG files in the pictures folder can be played Kodak Picture CD The JPEG files in the pictures folder can be played automatically Konica Picture CD If you want to see the Picture select the JPEG files in the clips menu Fuji Picture CD If you want to see the Picture select the JPEG files in the clips menu QSS Picture CD The unit may not play QSS Picture CD If the number of files in 1 Disc is over 50...

Страница 26: ...Language Features If you set the player menu disc menu audio and subtitle language in advance they will come up automatically every time you watch a movie Using the Player Menu Language 1 With the unit in Stop mode press the MENU button 2 Press the π buttons to select Setup then press the or ENTER button 3 Press the π buttons to select Language Setup then press the or ENTER button 4 Press the π bu...

Страница 27: ... not recorded on the disc the original pre recorded language is selected The language is selected and the screen returns to Language Setup menu To make the setup menu disappear press the MENU button Setting Up the Audio Options Audio Options allows you to setup the audio device and sound status settings depending on the audio system in use 1 With the unit in Stop mode press the MENU button 2 Press...

Страница 28: ...KHZ Off Select this when the Amplifier connected to the player is 96KHz compatible In this case all signals will be output without any changes Output Channel 2Ch Select this when using 2 channel connection only 5 1 Ch Select this when using 5 1 Channel connection To make The Speaker Setup menu appear select output channel to 5 1 Ch Speaker Setup Power On Music This menu is used to activate or deac...

Страница 29: ...has PAL input you must choose PAL Auto Setting Up the Display Options Display options enable you to set various video functions of the player 1 With the unit in Stop mode press the MENU button 2 Press the π buttons to select Setup then press the or ENTER button 3 Press the π buttons to select Display Setup then press the or ENTER button 4 Press the π buttons to select the desired item then press t...

Страница 30: ...with DVDs that have been assigned a rating which helps you control the types of DVDs that your family watches There are up to 8 rating levels on a disc 1 With the unit in Stop mode press the MENU button 2 Press the π buttons to select Setup then press the or ENTER button Setting Up the Rating Level 3 Press the π buttons to select Parental Setup then press the or ENTER button 4 Press the π buttons ...

Страница 31: ...le if you select up to Level 6 discs that contain Level 7 8 will not play 4 Press the π button to select Change Password then press the or ENTER button Enter your new password again Note If you have forgotten your password see Forgot Password in the Troubleshooting Guide Language Setup Audio Setup Display Setup Parental Setup DivX R Registration Language Setup Audio Setup Display Setup Parental Se...

Страница 32: ...Finalized single session Write speed low Upgrade procedure 1 Open the disc tray Place the disc on the tray Close the tray The Firmware upgrade screen appears Firmware upgrade appears on the display 0801023 VD B P480KXEG 071208 VD B P480KXEG Firmware upgrade starts In the middle of the writing the tray will open automatically After taking out the disc please wait for about 2 minutes If the unit was...

Страница 33: ...re is not available at the moment 4 You ve requested a title or chapter number or search time that is out of range Disc Menu doesn t appear Check if the disc has a Menu Play mode differs from the Setup Menu selection Some of the functions selected in the Setup Menu may not work properly if the disc is not encoded with the corresponding function P26 31 The screen ratio cannot be changed The Screen ...

Страница 34: ...e 74 min CD 8Cm COMPACT DISC Reading Speed 4 8 5 6 m sec Maximum Play Time 20 min VCD 12Cm Reading Speed 4 8 5 6 m sec Maximum Play Time 74 min Video Audio Video Output Composite Video 1 channel 1 0 Vp p 75 Ω load Component Video Y 1 0 Vp p 75 Ω load Pr 0 70 Vp p 75 Ω load Pb 0 70 Vp p 75 Ω load Audio Output 5 1 channel F L F R R L R R CT S W Maximum Output level 2 Vrms Digital Audio Output Coaxia...

Страница 35: ...URG 02 261 03 710 www samsung com lu NETHERLANDS 0900 SAMSUNG 726 7864 0 10 Min www samsung com nl NORWAY 815 56 480 www samsung com no POLAND 0 801 801 881 022 607 93 33 www samsung com pl PORTUGAL 80820 SAMSUNG 726 7864 www samsung com pt SLOVAKIA 0800 SAMSUNG 726 7864 www samsung com sk SPAIN 902 1 SAMSU 72678 www samsung com es SWEDEN 0771 400 200 www samsung com se U K 0845 SAMSUNG 7267864 ww...

Страница 36: ...ELECTRONICS AK68 01768A 01 ...

Страница 37: ......

Страница 38: ......

Отзывы: