changing setup menu
_
changing setup menu
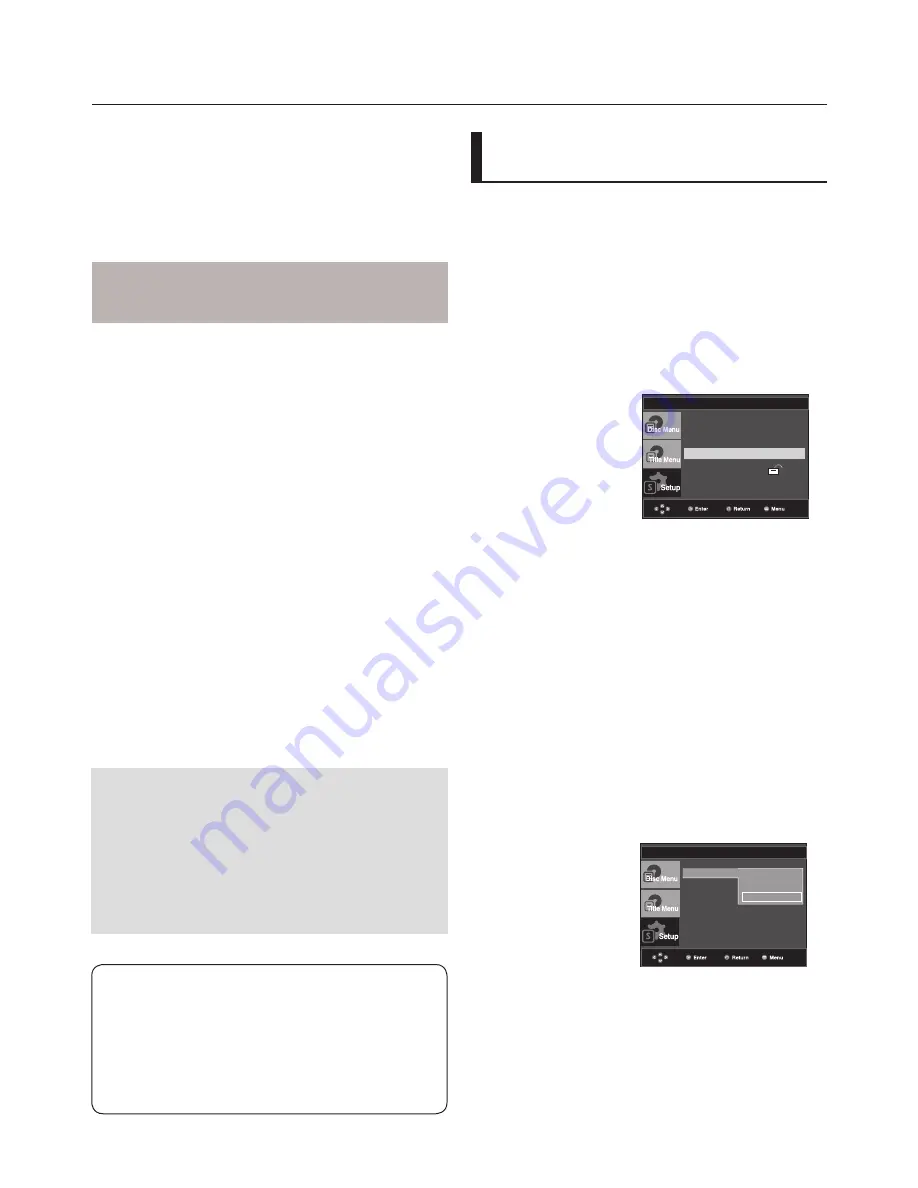
Setting Up the Display
Options
Display options enable you to set various video functions of
the player.
1. With the unit in Stop mode, press the
MENU
button.
2. Press the
π
/
†
buttons to select
Setup
, then press the
®
or
ENTER
button.
3. Press the
π
/
†
buttons to select
Display Setup
, then press
the
®
or
ENTER
button.
4. Press the
π
/
†
buttons to select the desired item, then
press the
®
or
ENTER
button.
❶
TV Aspect
Depending on a type of television you have, you
may want to adjust the screen setting (aspect ratio).
- 4:3 Letter Box : Select when you want to see
the total 16:9 ratio screen the DVD
supplies, even though you have a TV with a 4:3
ratio screen. Black bars will appear at the top
and bottom of the screen.
- 4:3 Pan&Scan : Select this for conventional
size TVs when you want to see the central por-
tion of the 16:9 screen. (Extreme left and right
side of movie picture will be cut off.)
- 16:9 Wide : You can view the full 16:9
picture on your wide screen TV.
DISPLAY SETUP
TV Aspect
Screen Message
Black Level
TV System
: Auto
Video Output
: SCART-RGB
4:3 Letter Box
4:3 Pan&Scan
√ 16:9 Wide
Manufactured under license from Dolby
Laboratories. “Dolby” and the double-D symbol
are trademarks of Dolby Laboratories.
“DTS” e “DTS Digital Out” são marcas comerci-
ais da Digital Theater Systems, Inc.
Note :
Even when PCM Down sampling is Off
• Some discs will only output down sampled
audio through the digital outputs.
• To make the Setup menu disappear, press the
MENU button.
❶
Dolby Digital Out
- PCM : Converts to PCM(2CH) audio.
- Bitstream : Outputs Dolby Digital or DTS via the digital
output. Select Bitstream when connecting to a
Dolby Digital or DTS Decoder.
Note
• There is no analog audio output when you play a DTS
sound disc.
❷
MPEG-2 Digital Out
- PCM : Converts to PCM(2CH) audio.
- Bitstream : Converts to MPEG-2 Digital Bitstream (5.1CH
or 8CH). Select Bitstream when using the
Digital Audio Output.
❸
Dynamic Compression
- On : To select dynamic compression.
- Off : To select the standard range.
❹
PCM Down Sampling
- On : Select this when the Amplifier connected to
the player is not 96KHz compatible. In this case, the
96KHz signals will be down converted to 48KHZ.
- Off : Select this when the Amplifier connected to the
player is 96KHz compatible. In this case, all signals
will be output without any changes.
❺
Power On Music
- On : To turn On Start up music
- Off : To turn Off Start up music
❺
Video Output
Select Video Output.
- I-SCAN : Select when you want to use
Component Interlace Out.
- P-SCAN : Select when you want to use
Component Progressive Out.
- SCART-RGB Output : Select when you want to
use Scart Out.
It does not function in NTSC mode.
- SCART-CVBS : Select when you want CVBS
output form Scart connector.
It does not function in NTSC mode.
• If the Yes/No selection in the Display Setup
sub Menu is not made within 10 seconds, the
screen returns to the previous menu.
❹
TV System
- NTSC : In case of using NTSC disc
• If your TV system only has PAL-Video input, you
must choose “PAL”. When you choose “PAL”,
Interlace output format is PAL 60 Hz output.
• If your TV system only has NTSC, input you
must choose “NTSC ”.
- PAL : In case of using PAL disc
• If your TV system only has NTSC-Video input,
you must choose “NTSC”.
• If your TV system only has PAL input, you must
choose “PAL ”.
- Auto
Note :
• If Video Output is set incorrectly, the screen
may be blank.
❷
Screen Messages
Use to turn on-screen messages On or Off.
❸
Black Level
Adjusts the brightness of the screen. (On or Off)
It does not function in PAL and Auto mode.
Language Setup
®
Audio Setup
®
Display Setup
®
Parental Setup :
®
DivX(R) Registration
®
Содержание DVD-P390
Страница 36: ...AK68 01770A 03 ...
Страница 73: ...AK68 01770A 03 ...
Страница 110: ...AK68 01770A 03 ...
Страница 147: ...AK68 01770A 03 ...


