background image

ENG-15

Connections

ENG-14

C

O N N E C T I O N S

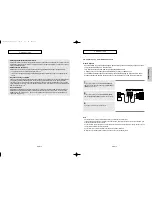
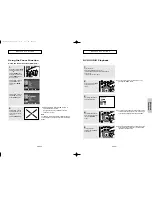
Connection to a TV (S-Video)

- Connecting to your TV using an S-Video cable.

- You will enjoy high quality video. S-Video separates the picture element into black and white(Y)

and color(C) signals to present clearer images than regular video input mode. 
(Audio signals are delivered through the audio output.)

Note

- If you want to connect to an Amplifier, please refer to the Amplifier connection page. (See pages 20 to 22)

- The number and position of terminals may vary depending on the TV set. 

Please refer to the user's manual of your TV.

1

Using an S-Video cable (not included), connect the S-VIDEO
OUT 
terminal on the rear of the DVD player to the 
S-VIDEO IN terminal of your TV.

2

Using the audio cables, connect the AUDIO (red and white)
OUT 
terminals on the rear of the DVD player to the AUDIO (red
and white) IN 
terminals of your TV. 
Turn on the DVD player and TV.

3

Press the input selector on your TV remote control until the S-
Video signal from the DVD player appears on your TV screen.

4

Set the Video Output to COMPOSITE/S-VIDEO in the Display
Setup menu. (See pages 64 to 66)
You can use the VIDEO SEL. button to change the Video
Output mode. (See page 12)

RED

WHITE

RED

WHITE

Audio Cable

S-Video Cable
(not included)

C

O N N E C T I O N S

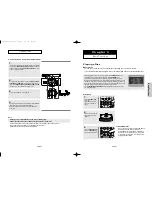
Connection to a TV (Interlace)

- Connecting to your TV using Component video cables.

- You will enjoy high quality and accurate color reproduction images. Component video separates

the picture element into black and white(Y), blue(P

B

), red(P

R

) signals to present clear and clean

images. (Audio signals are delivered through the audio output.)

Note

- If Video output is incorrectly set to COMPOSITE/S-VIDEO with the Component cables connected, the

screen will turn red.

- If you want to connect to an Amplifier, please refer to the Amplifier connection page. (See pages 20 to 22)

- The component terminal of your TV may be marked “R-Y, B-Y, Y” or “Cr, Cb, Y” instead of “P

R

, P

B

, Y” 

depending on the manufacturer. The number and location of the terminals may vary depending on the TV
set. Please refer to the user's manual of your TV.

1

Using component video cables (not included), connect the
COMPONENT VIDEO OUT terminals on the rear of the DVD
player to the COMPONENT IN terminals of your TV.

2

Using the audio cables, connect the AUDIO (red and white)
OUT 
terminals on the rear of the DVD player to the AUDIO (red
and white) IN 
terminals of your TV. 
Turn on the DVD player and TV.

3

Press the input selector on your TV remote control until the
Component signal from the DVD player appears on the TV
screen.

4

Set the Video Output to COMPONENT(I-SCAN) in the Display
Setup menu. (See pages 64 to 66)
You can also use the VIDEO SEL. button to change the Video
Output mode. (See page 13)

RED

WHITE

RED

WHITE

RED

BLUE

GREEN

RED

BLUE

GREEN

Audio Cable

Component cable
(not included)

00627F-HD950-XAC-Eng1  5/5/05  4:07 PM  Page 14

Содержание DVD-HD950

Страница 1: ...DVD Player DVD HD950 Lecteur DVD DVD HD950 AK68 00627F www samsung ca CA AK68 00627F www samsung ca CA 00627F HD950 XAC Cover 5 5 05 3 48 PM Page 2...

Страница 2: ...ions accompanying the product CAUTION DVD PLAYERS USE AN INVISIBLE LASER BEAM WHICH CAN CAUSE HAZARDOUS RADIATION EXPOSURE IF DIRECTED BE SURE TO OPERATE PLAYER CORRECTLY AS INSTRUCTED Do not install...

Страница 3: ...r any product unit other than this product unit and the license does not extend to any unlicensed product unit or process conforming to ISO IEC 11172 3 or ISO IEC 13818 3 used or sold in combination w...

Страница 4: ...to a VCR Connecting to a VCR results in a distorted picture from copy protected DVD discs This product incorporates copyright protection technology that is protected by methods claims of certain U S p...

Страница 5: ...SOUND STEREO NTSC Play Region Number NTSC broadcast system in U S A Canada Korea Japan etc Dolby Digital disc Stereo disc Digital Audio disc DTS disc MP3 disc DVD AUDIO disc Super Audio CD disc You mu...

Страница 6: ...u must be set to COMPONENT I SCAN or COMPOSITE S VIDEO 6 S VIDEO OUT JACK Use the S Video cable to connect this jack to the S Video jack on your television for higher picture quality The Video Output...

Страница 7: ...or disc 32 PAGE Buttons Use to skip the PAGE 33 BOOKMARK Button 34 SHUTTLE DIAL Search mode Performs fast motion play 35 JOG DIAL Step mode Operates frame by frame play In CD mode performs track searc...

Страница 8: ...mponent video cables You will enjoy high quality and accurate color reproduction images Component video separates the picture element into black and white Y blue PB red PR signals to present clear and...

Страница 9: ...GREEN Audio Cable Component cable not included CONNECTIONS Connecting to a TV with DVI Jack 1 Using the HDMI DVI cable connect the HDMI OUT terminal on the rear of the DVD player to the DVI IN termina...

Страница 10: ...pted at the source device to prevent unauthorized copies from being made CONNECTIONS 1 Using an Anynet cable connect the Anynet Input Green terminal on the rear side of the DVD player to Anynet Output...

Страница 11: ...DVI IN terminals of your TV as described on pages 13 to 17 3 Turn on the DVD player TV and Amplifier 4 Press the input select button of the Amplifier to select external input in order to hear sound fr...

Страница 12: ...V s remote control If you connected an external Audio System turn on your Audio System and set it to the correct Audio Input After plugging in the player the first time you press the DVD POWER button...

Страница 13: ...ress the button it moves backward 5 minutes During play press the SKIP or button Note When VCD 2 0 is in Menu Off mode only this function works Select Menu Off by pressing the DISC MENU button BASIC F...

Страница 14: ...t DVD discs are recorded in chapters so that you can quickly find a specific passage similar to tracks on an audio CD Allows playback of the film from a desired time You must enter the starting time a...

Страница 15: ...only be displayed if there are at least two titles in the disc Press ENTER key for Disc Menu Press ENTER key for Title Menu BASIC FUNCTIONS Using the Function Menu Using the Function Menu DVD VCD 1 Pr...

Страница 16: ...TER T REPEAT ENTER T D DVD VCD CD Off 01 01 A B Off 01 01 A B Off 01 01 A B Off 01 01 A B BASIC FUNCTIONS Slow Repeat Play This feature allows you slowly to repeat scenes containing sports dancing mus...

Страница 17: ...mode operates differently depending on the screen setting in the Display Setup menu To ensure correct operation of the EZ VIEW button you should set the correct aspect ratio in the Display Setup menu...

Страница 18: ...re will look vertically stretched ZOOM FIT The top bottom left and right portions of the screen are cut off and the central portion of the screen is enlarged Note EZ View may behave differently depend...

Страница 19: ...ins multiple angles of a particular scene you can use the ANGLE function Using the ANGLE button DVD If the disc contains multiple angles the ANGLE appears on the screen 1 Press the ANGLE button then t...

Страница 20: ...time Note When VCD2 0 is in Menu Off mode only this function works Select Menu Off by pressing the DISC MENU buton Depending on a disc the Bookmark function may not work Press the buttons to select Fu...

Страница 21: ...fo Zoom Bookmark Repeat EZ View Front Display On Info Zoom Bookmark Repeat EZ View Front Display On ADVANCED FUNCTIONS 5 To make the screen disappear press the INFO button again DVD AUDIO Playback 1 O...

Страница 22: ...the slide show mode this function can not be used PAGE is still images You can see the still images when a DVD AUDIO disc is played back 2 Use INDEX PRE NEXT buttons to Skip the Index when there is m...

Страница 23: ...button If you want to convert to regular CD mode press the SACD CD button During play or stop mode you can change the 2CH or MULTI mode by using LEFT RIGHT buttons You can use this function when Super...

Страница 24: ...your computer to put files into different folders Open the disc tray Place the disc on the tray Close the tray The tray closes and this screen displays R O O T W M A J P E G M P 3 M P E G 4 R O O T Pa...

Страница 25: ...special characters including Use a compression rate of at least 128 Kbps when recording MP3 files Sound quality with MP3 files basically depends on the rate of compression you choose Getting CD audio...

Страница 26: ...al time If you don t press any button the slide show will start automatically in about 10 seconds by default R O O T W M A J P E G M P 3 M P E G 4 R O O T 1 2 3 R O O T W M A J P E G M P 3 M P E G 4 O...

Страница 27: ...Chapter 5 CHANGING SETUP MENU Setup Language Setup Audio Setup Display Setup Parental Setup EZ Setup ADVANCED FUNCTIONS CD R JPEG Discs Only files with the jpg and JPG extensions can be played If the...

Страница 28: ...Aspect then press the ENTER button See page 65 EZ SETUP TV Aspect 4 3 Letter Box 4 3 Pan Scan 16 9 Wide Language Setup Audio Setup Display Setup Parental Setup EZ Setup 7 Press the buttons to select...

Страница 29: ...Audio Setup Display Setup Parental Setup EZ Setup Setup Language Setup Audio Setup Display Setup Parental Setup EZ Setup CHANGING SETUP MENU Setting Up the Language Features If you set the player menu...

Страница 30: ...Setup Display Setup Parental Setup EZ Setup Setup Language Setup Audio Setup Display Setup Parental Setup EZ Setup CHANGING SETUP MENU Using the Audio Language 4 Press the buttons to select Audio the...

Страница 31: ...dio via the HDMI output or Digital Audio Output Manufactured under license from Dolby Laboratories Dolby and the double D symbol are trademarks of Dolby Laboratories DTS and DTS Digital Out are tradem...

Страница 32: ...and outputs the bass frequencies of the speaker from the subwoofer Center None If you do not connect a center speaker select this Large Outputs the bass frequencies of the center speaker Small If the...

Страница 33: ...reen Extreme left and right side of movie picture will be cut off 16 9 Wide You can view the full 16 9 picture on your wide screen TV Still Mode These options will help prevent picture shake in still...

Страница 34: ...4 output YCbCr 4 2 2 HDMI Limited range YCbCr 4 2 2 output If you set the HDMI output resolution to 768p you cannot use YCbCr format Limited range Black White and color level displayed within Limited...

Страница 35: ...guage Setup Audio Setup Display Setup Parental Setup EZ Setup Setup Language Setup Audio Setup Display Setup Parental Setup EZ Setup CHANGING SETUP MENU Changing the Password 3 Press the buttons to se...

Страница 36: ...oblems 5 1 channel sound is not being reproduced Disc does not play Check the batteries in the remote control They may need replacing Operate the remote control at a distance of no more than 20 feet R...

Страница 37: ...ISC VCD 31 2 Composite Video Component Video S Video HDMI 2 Channel 5 1 Channel Digital Audio Output Frequency Response S N Ratio Dynamic Range Total Harmonic Distortion AC 120 V 60Hz 14 W 5 1 lbs 16...
Страница 38: ...roof of purchase It must be presented to the authorized service center at the time service is requested This warranty does not cover damage due to accident fire flood and or other acts of God misuse i...

Страница 39: ...hariot pour d placer l appareil usez de pr caution 13 Avant de d placer l appareil d branchez le Si vous utilisez un chariot pour ce faire usez de pr caution La combinaison chariot appareil pourrait s...

Страница 40: ...on commerciale La licence ne couvre aucun autre produit que celui ci et elle ne s tend pas aux produits et aux processus non couverts par une licence conform ment aux normes ISO IEC 11172 3 ou ISO IEC...

Страница 41: ...LA COPIE Nombreux sont les disques DVD prot ges contre la copie Ainsi vous ne pouvez connecter votre lecteur DVD que directement la t l vision et non au magn toscope Si vous le connectez un magn tosc...

Страница 42: ...re du lecteur Canada est R gional 1 DIGITAL SOUND STEREO NTSC Code r gional de lecture Syst me de diffusion adopt au Royaume Uni France Allemagne etc Disque Dolby num rique Disque st r o Disque audio...

Страница 43: ...ateur de votre r cepteur pour savoir si votre TV prend en charge le balayage progressif P SCAN Si le mode Balayage progressif est pris en charge suivez les instructions du manuel d utilisation du t l...

Страница 44: ...p cifique 4 Touche STEP Pour avancer la lecture image par image 5 Touches VOL Ces touches permettent de r gler le volume 6 Touche TV VIDEO Appuyez sur cette touche pour afficher les sources vid o disp...
Страница 45: ...nu Configuration de l affichage voir pp 64 66 Vous pouvez utiliser la touche VIDEO SEL pour changer le mode de Video Output sortie vid o voir pp 12 ROUGE BLANC ROUGE BLANC ROUGE BLEU VERT ROUGE BLEU V...

Страница 46: ...DMI 720p ou 1080i la sortie HDMI offre une meilleure qualit d image C ble audio c ble HDMI DVI non fourni ROUGE BLANC BRANCHEMENTS Raccordement un t l viseur balayage progressif Remarque Qu est ce que...

Страница 47: ...ites correspondre les c bles dot s d un code de couleurs et les prises en raccordant le c ble Anynet BRANCHEMENTS HDMI High Definition Multimedia Interface HDMI est une interface qui permet une transm...

Страница 48: ...e lecteur DVD le t l viseur et l amplificateur 4 Appuyez sur le bouton de s lection d entr e de l amplificateur et choisissez source externe pour entendre le son transmis par le lecteur DVD Pour r gle...

Страница 49: ...PLAY PAUSE pour recommencer il reprendra la lecture l o vous l avez quitt e moins de retirer le disque ou de d brancher le lecteur ou si vous appuyez deux fois sur la touche STOP Press 1 for English T...

Страница 50: ...MENU DVD VCD CD SACD DVD AUDIO 2X 4X 64X 128X 4X 8X 2X 4X 8X FONCTIONS ELEMETAIRES 6 Interruption de la lecture Appuyez sur la touche PLAY PAUSE ou STEP sur la t l commande durant la lecture L image d...

Страница 51: ...stes sonores Indique la langue des sous titres sur le disque Vous pouvez choisir cette langue ou si vous le pr f rez d sactiver la fonction des sous titres Un disque DVD peut comporter un maximum de 3...

Страница 52: ...Signet R p tition EZ View Luminosit Afficheur Oui FONCTIONS ELEMETAIRES Utilisation du menu Disque et pdu menu Titres Utilisation du menu Disque DVD 1 Lors de la lecture d un disque DVD appuyez sur la...

Страница 53: ...cture r p t e doit s arr ter 5 Pour revenir au mode de lecture normale appuyez sur la touche CLEAR puis appuyez sur la touche PLAY PAUSE FONCTIONS ELEMETAIRES Lecture r p t e Reprenez la lecture de la...

Страница 54: ...al Lors du visionnement d un DVD au rapport d aspect 4 3 sur un t l viseur au rapport hauteur largeur 16 9 l image est d limit e d une bande noire des deux extr mit s pour qu elle n ait pas d apparenc...

Страница 55: ...port d aspect 16 9 4 3 Letter Box Le contenu des DVD s affiche au rapport 16 9 et une bande noire appara t au haut et au bas de l cran 4 3 Pan Scan Les parties gauche et droite de l cran sont coup es...

Страница 56: ...isation de la fonction Skip saut DVD Utilisez cette fonction pour effectuer des sauts de pistes afin de faire avancer la lecture de 10 secondes Appuyez sur la touche INSTANT SKIP Le DVD saute des pist...

Страница 57: ...oment Utilisation des rep res DVD VCD 1 Pendant la lecture appuyez sur la touche BOOKMARK Utilisation du bouton MENU Pendant la lecture appuyez sur la touche MENU Utilisez les boutons pour s lectionne...

Страница 58: ...udio 3 Appuyez sue le bouton pour s lectionner I l ment souhait DVD AUDIO 01 01 01 0 00 13 FONCTIONS AVANCEES Utilisation des fonctions avanc es Utilisation des fonctions avanc es DVD VCD 1 Pendant la...

Страница 59: ...Vous pouves changer de groupe gr ce cette fontion Lecture d un groupe bonus Certains DVD AUDIO contetiennent des groupes bonus pour pouvoir le lire Le code se trouve g n ralement sur la pochette du DV...

Страница 60: ...ez le DVD AUDIO face tiqut e versle haut Fermez le tiroir Le tiroir se ferme et la lecture se lance automatiquement Menu Clips pour Super Audio CD au cours de la lecture 1 Pour s lectionner un titre m...

Страница 61: ...ppuyez sur les boutons pour s lectionner le dossier souhait puis appuyez sur ENTER Sous Dossier Appuyez sur les boutons pour mettre en surbrillance la fen tre de droite Appuyez sur les boutons pour s...

Страница 62: ...l inverse les fichiers comportant des fr quences d chantillonnage moins lev es 64 Kbps ou moins ou plus lev es 192 Kbps ou plus ne seront pas correctement lus N essayez pas d enregistrer des fichiers...

Страница 63: ...re de CD images 1 Modifiez le dossier que vous souhaitez Remarque Si vous n appuyez sur aucun bouton de la t l commande pendant 10 secondes le menu dispara t Appuyez sur le bouton STOP pour revenir au...

Страница 64: ...peuvent ne pas fonctionner avec certains disques Chapitre 5 CHANGEMENT DU MENU CONFIGURATION Setup R glage de la langue Options Audio Options D affichage Cont Parental Config EZ FONCTIONS AVANCEES CD...

Страница 65: ...CHANGEMENT DU MENU CONFIGURATION Configuration de EZ Setup Configuration facile A l aide de EZ Setup Configuration facile vous pouvez configurer votre guise PLAYER MENU LANGUAGE LANGUE D AFFICHAGE DU...

Страница 66: ...udio Options D affichage Cont Parental Config EZ Setup R glage de la langue Options Audio Options D affichage Cont Parental Config EZ CHANGEMENT DU MENU CONFIGURATION Configuration des options de lang...

Страница 67: ...GUE DES SOUS TITRES Setup R glage de la langue Options Audio Options D affichage Cont Parental Config EZ Setup R glage de la langue Options Audio Options D affichage Cont Parental Config EZ CHANGEMENT...

Страница 68: ...ce la sortie num rique S lectionnez Bitstream lors de la connexion un d codeur Dolby Digital et DTS Compression dynamique Oui Activ S lectionner la compression dynamique Non D sactiv S lectionner la g...

Страница 69: ...e sens horaire partir du haut parleur avant gauche L Ajustez la sym trie des canaux pour que les haut parleurs diffusent uniform ment le son dans votre pi ce FRONT L CENTER SUBWOOFER FRONT R SURROUND...

Страница 70: ...T P SCAN A s lectionner lorsque vous souhaitez utiliser la sortie Component 525p Progressive ou HDMI Si vous appuyez sur le bouton VIDEO SEL le mode de sortie Vid o sera bascul sur Pas de disque en un...

Страница 71: ...pas utiliser le format YCbCr lorsque vous utilisez la sortie HDMI r solution de 768 p es niveaux de gamme restreinte Noir Blanc et couleur sont exprim s l int rieur des donn es de la gamme restreinte...

Страница 72: ...e Cont Parental Cofig EZ Setup R glage de la langue Options Audio Options D affichage Cont Parental Config EZ CHANGEMENT DU MENU CONFIGURATION Param trage du niveau de contr le 3 Utilisez les boutons...

Страница 73: ...herchez la section contenant les explications du probl me rencontr et suivez de nouveau le processus Si le probl me n est pas r solu veuillez contacter votre revendeur ou le service apr s vente agr le...

Страница 74: ...ILE DISC CD 5 Disque compact CD 31 2 Disque compact VCD 5 Vid o composite Sortie P ritel Vid o Composant S Vid o HDMI 5 1 CANAUX 2 CANAUX R PONSE EN FR QUENCE RAPPORT SIGNAL BRUIT LIMITES DYNAMIQUES D...

Страница 75: ...demande d une r paration sous garantie Cette garantie ne couvre pas les dommages caus s par un accident un incendie une inondation un cas de force majeure un mauvais usage ou une tension incorrecte L...

Отзывы: