background image

S

etting Up the Language Features (Cont d)

Using the Subtitle Language

Using the Disc Menu Language

Using the Audio Language

D

D

D

D

V

V

V

V

D

D

D

D

This function changes the lan-
guage only for the text on the
disc menu screens.

Press the SETUP button

when in play or stop mode.

Use the UP/DOWN button

to select DISC MENU.

Press the ENTER button.

Use the UP/DOWN button

to select ‘ENGLISH’.

- Select “OTHERS” if the language

you want is not listed.

Press the ENTER button.

- ENGLISH is selected and the screen

returns to SETUP MENU.

1

1

1

1

..

..

Press the SETUP button
when in play or stop mode.

2

2

2

2

..

..

Press the UP/DOWN button
to move to AUDIO.

3

3

3

3

..

..

Press the ENTER button.

4

4

4

4

..

..

Press the UP/DOWN button
to select ‘ENGLISH’ .

- Select “ORIGINAL” if you want the

default soundtrack language to be
the original language the disc is
recorded in.

- Select “OTHERS” if the language

you want is not listed.

5

5

5

5

..

..

Press the ENTER button.

- ENGLISH is selected and the screen

returns to SETUP MENU.

A

A

Press the SETUP button

when in play or stop mode

Use the UP/DOWN button

to select SUBTITLE.

Press the ENTER button.

Use the UP/DOWN button

to select ‘ENGLISH’.

- Select “AUTOMATIC” if you want the

subtitle language to be the same as
the language selected as the audio
preference.

- Select “OTHERS” if the language

you want is not listed. Some discs
may not contain the language you
select as your initial language; in that
case the disc will use its original
language setting.

Press the ENTER button.

- ENGLISH is selected and the screen

returns to SETUP MENU.

e.g

Setting up in ENGLISH.

e.g

Setting up in ENGLISH.

e.g

Setting up in ENGLISH.

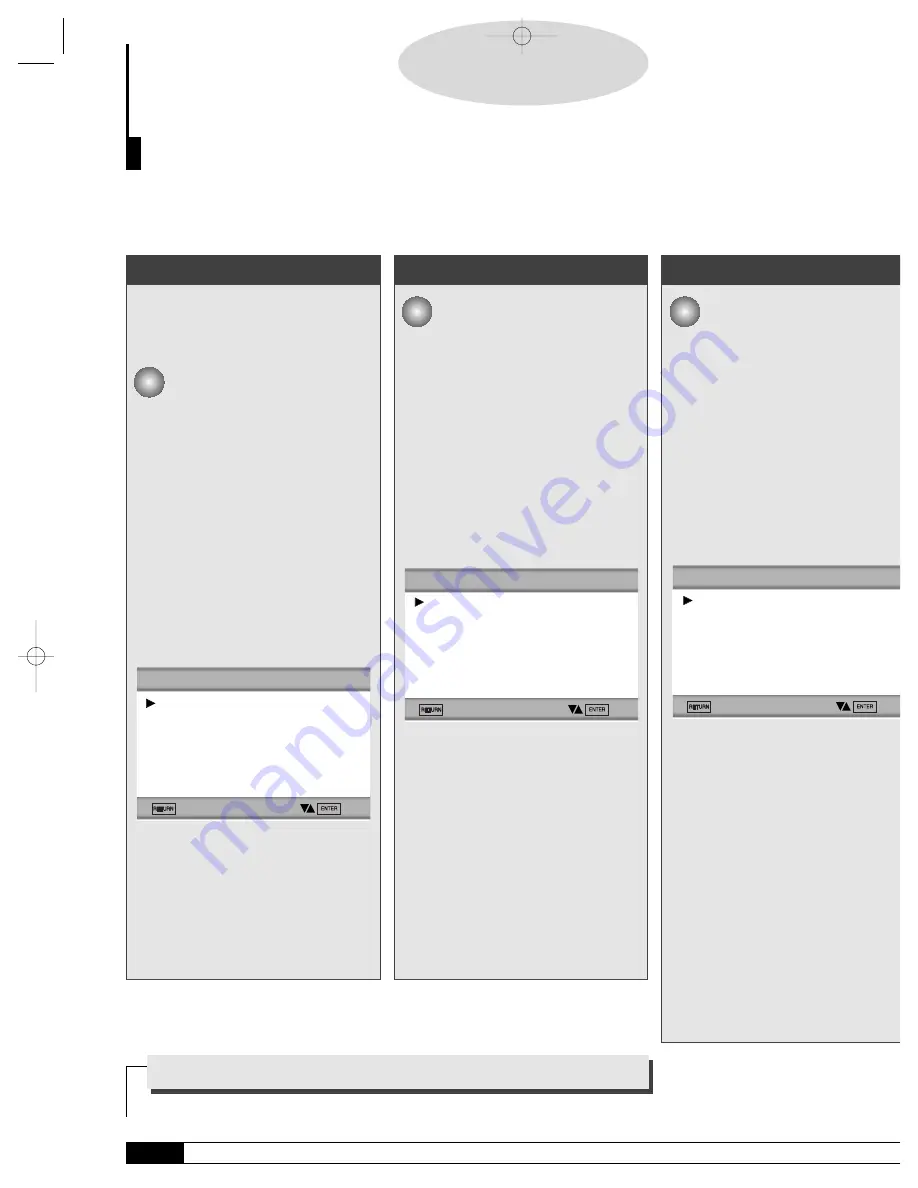
DISC MENU LANGUAGE

1 ENGLISH
2 FRANCAIS
3 DEUTSCH
4 ESPAÑOL
5 ITALIANO
6 NEDERLANDS
7

OTHERS

AUDIO LANGUAGE

1 ENGLISH
2 FRANCAIS
3 DEUTSCH
4 ESPAÑOL
5 ITALIANO
6 NEDERLANDS
7 ORIGINAL
8 OTHERS

SUBTITLE LANGUAGE

1 AUTOMATIC
2 ENGLISH
3 FRANCAIS
4 DEUTSCH
5 ESPAÑOL
6 ITALIANO
7 NEDERLANDS
8 OTHERS

How to make the SETUP MENU disappear or 

return to menu screen during set up.

Press RETURN button.

NOTE

If the selected language is not recorded on the disc, the original pre-recorded language is selected.

839  11/4/95 11:22 AM  Page 33

Содержание DVD-739

Страница 1: ...shock match wide blade of plug to wide slot fully insert Attention Pour éviter les chocs électriques introduíre la lame la plus large de la fiche dans la borne correspondante de la prise et pousser jusqu au fond This product satisfies FCC regulations when shielded cables and connectors are used to connect the unit to other equipment To prevent electromagnetic interference with electric appliances ...

Страница 2: ...the disc in the disc tray Exterior interference such as lightning and static electricity can affect normal opera tion of this player If this occurs turn the player off and on again with the POWER button or disconnect and then reconnect the AC power cord to the AC power outlet The player will operate normally Be sure to remove the disc and turn off the player after use Disconnect the AC power cord ...

Страница 3: ...TABLE OF CONTENTS DVD739 839 11 4 95 11 19 AM Page 4 ...

Страница 4: ...ugh a Chapter or Track 20 Using the Display Function 21 Repeat Play 2 Using the A B Repeat Function 2 Program Playback in a Specific Order 2 Using the Disc View Function 25 Selecting Audio 26 Selecting the Subtitle Language 27 Selecting the Desired Screen Angle 2 Using the Bookmark Function 2 Using the Zoom and 3D Sound Functions 3 Using the Setup Menu 31 Setting Up the Language Features 32 Settin...

Страница 5: ...IALIZER N 2 2 PHONE LEVEL MIN MAX OPEN CLOSE OPEN CLOSE STANDBY ON SKIP DVD 83 OPEN CLOSE STANDBY ON OPEN CLOSE 24bit 96kHz AUDIO D A CONVERTER DIGITAL VIDEO SPATIALIZER N 2 2 DVD VIDEO CD CD PLAYER DVD 739 SKIP DVD 739 COPY PROTECTION Many DVD discs are encoded with copy protection Because of this you should only connect your DVD player directly to your TV not to a VCR Connecting to a VCR results...

Страница 6: ... player is described on the rear panel of the player 5 inches 31 2 inches Single sided 240 min Double sided 480 min Single sided 80 min Double sided 160 min Audio Video Audio Video Audio An LP is recorded as an analog sig nal with more distortion CD is recorded as a Digital Signal with better audio quality less distortion and less deterioration of audio qua ity over time Video with CD sound VHS qu...

Страница 7: ... disc play STOP Stops disc play SHUTTLE DIAL Performs fast or slow motion playback JOG DIAL Operates frame by frame playback In C mode performs track search DIGITAL VIDEO SPATIALIZER N 2 2 PHONE LEVEL MIN MAX OPEN CLOSE OPEN CLOSE STANDBY ON SKIP DISC OPERATION ROTARY INDICATO OPERATION INDICATOR DISC TYPE INDICATOR TRACK INDICATOR 3D SOUND INDICATOR ANGLE INDICATOR CHAPTER INDICATOR REPEAT INDICA...

Страница 8: ...usic OPEN CLOSE Press to open and close the disc tray PLAY PAUSE Begin or pause disc play STOP Stops disc play OPEN CLOSE STANDBY ON OPEN CLOSE 24bit 96kHz AUDIO D A CONVERTER DIGITAL VIDEO SPATIALIZER N 2 2 DVD VIDEO CD CD PLAYER DVD 739 SKIP DISC OPERATION ROTARY INDICATO OPERATION INDICATOR DISC TYPE INDICATOR TRACK INDICATOR 3D SOUND INDICATOR ANGLE INDICATOR CHAPTER INDICATOR REPEAT INDICATOR...

Страница 9: ...nnect to the Audio input jacks of your television audio video receiver or VCR VIDEO OUT JACKS Use a video cable to connect one of these jacks to the Video input on your television S VIDEO OUT JACK Use the S Video cable to connect this jack to the S Video jack on your television for a higher quality picture COMPONENT VIDEO OUT JACKS Use these jacks if you have a TV with Component Video in jacks The...

Страница 10: ...of your television audio video receiver or VCR VIDEO OUT JACK Use a video cable to connect this jack to the Video input on your television S VIDEO OUT JACK Use the S Video cable to connect this jack to the S Video jack on your television for a higher quality picture COMPONENT VIDEO OUT JACKS Use these jacks if you have a TV with Component Video in jacks These jacks provide Pr Pb and Y video Along ...

Страница 11: ...ack or disc TV POWER Button Use to set the remote to control a compa ble TV VOLUME CON Button To control the master volume of the play 3D SOUND Button BOOKMARK Button PLAY PAUSE Button Begin Pause disc play SKIP Buttons Use to skip the title chapter or track CLEAR Button Use to remove menus or status displays from the screen MODE Button Allows you to program a specific order DISPLAY Button Display...

Страница 12: ...te properly 1 Open the battery cover on the back of the remote 2 Insert two AA batteries Make sure that the polari ties and are aligned correctly 3 Replace the battery cover Check the polarity of the batteries Dry Cell Check if the batteries are drained Check if remote sensor is blocked by obstacles Check if there is any fluores cent lighting nearby Install Batteries in the Remote DVD739 839 11 4 ...

Страница 13: ...Player TV with S Video Input Jack Method 3 DVD Player TV with Component Video Jacks Always turn off the DVD player TV and other components before you connect or disconnect any cables Refer to owner s manual of the components you are connecting for more information on those par ticular components AV Cable included S Video Cable included Good picture Basic Audio Better picture Video Input Jack Audio...

Страница 14: ...D Player 2ch Stereo Amplifier or Dolby Pro Logic Decoder Method 2 DVD Player Amplifier with Dolby Digital Decoder DTS Decoder OPTICAL COAXIAL DIGITAL AUDIO OUT ANALOG AUDIO OUT VIDEO OUT S VIDEOOUT COMPONENTVIDEOOUT Y Pr Pb R1 L1 R2 L2 V1 V2 OR Method 1 Analog Audio Out Audio Input Jacks 2ch Amplifier Method 2 Dolby Digital Decoder Digital Audio Input Jacks Digital Audio Out DVD739 839 11 4 95 11 ...

Страница 15: ...TV with S Video Input Jack Method 3 DVD Player TV with Component Video Jacks Always turn off the DVD player TV and other components before you connect or disconnect any cables Refer to owner s manual of the components you are connecting for more information on those par ticular components AV Cable included S Video Cable included Good picture Basic Audio Better picture Video Input Jack Audio Input ...

Страница 16: ...gital Audio Input Jack Dolby Digital Decoder 2ch Amplifier Digital Audio Out Rear Panel DIGITAL AUDIOOUT ANALOG AUDIO OUT R L VIDEO OUT S VIDEOOUT COMPONENTVIDEOOUT Y Pr Pb Connecting to an Audio System Method 1 DVD Player 2ch Stereo Amplifier or Dolby Pro Logic Decoder Method 2 DVD Player Amplifier with Dolby Digital Decoder DTS Decoder DVD739 839 11 4 95 11 20 AM Page 17 ...

Страница 17: ...time you plug in the player Playing a Disc D D D D V V V V D D D D V V V V C C C C D D D D C C C C D D D D 1 1 Press the OPEN CLOSE button The STANDBY indicator light goes out and the tray opens 2 2 Place a disc gently into the tray with the disc s label facing up 3 3 Press the PLAY PAUSE button or OPEN CLOSE button to close the disc tray 1 6 RETURN SELECT MENU LANGUAGE PRESS 1 FOR ENGLISH PRESSEZ...

Страница 18: ...he DVD player during PAUSE or STEP mode By pressing or shuttling you can select slow motion playback for 1 2 1 4 or 1 8 of normal speed No sound is heard during slow mode Press PLAY PAUSE to resume normal playback When playing a VCD the reverse slow motion playback will not work Several options are available during DVD playback RESUME function When you stop disc play the player remembers where you...

Страница 19: ... BACK SKIP button it moves backward 5 minutes When playing a VCD 2 0 in the MENU MODE or Track View function if you press NEXT SKIP button it moves to the next MENU or the next Track View display If you press BACK SKIP button it moves to the previous MENU or the previous Track View dis play Refer to page 25 1 1 Press the FWD or REV SEARCH button on the remote or turn the SHUTTLE dial DVD 839 only ...

Страница 20: ...ISPLAY button D D D D V V V V D D D D V V V V C C C C D D D D C C C C D D D D When Playing a CD VCD 1 1 During playback press the DISPLAY button on the remote Current track number and elapsed time will be displayed Use the LEFT RIGHT button to selec a track Use the UP DOWN button or Number buttons to enter a different track number and then press the ENTER button To enter the time from which you wa...

Страница 21: ...ure 1 1 Press the REPEAT button once to display the current status 2 2 Press the REPEAT button twice to repeat the chapter currently playing 3 3 Press the REPEAT button a third time to repeat the title currently playing 4 4 Press the REPEAT button again to turn off the repeat feature NOTE DVD repeats playback by chap ter or title CD and VCD repeat playback by disc or track Depending on the disc th...

Страница 22: ... beginning A and the end B of th segment you want to review D D D D V V V V D D D D V V V V C C C C D D D D C C C C D D D D To set up A B Repeat To clear A B Repeat NOTE The A B Repeat function works on the same title or track If the title or track is completed before marking the end B the end of title or track becomes B automatically Depending on the disc the A B REPEAT function may not work When...

Страница 23: ...e the LEFT RIGHT button to select RANDOM and press the ENTER button The disc will be played back in ran dom order e g To program chapters 5 and 7 in order e g To program tracks 5 and 7 in order e g To start RANDOM playback TITLE CHAPTER 01 02 03 04 05 06 07 08 09 10 11 12 13 14 15 16 When you make a wrong selection during programming Use the UP DOWN button to select CLEAR LAST TRACK or CHAPTER or ...

Страница 24: ...AN mode INTRO SCAN lets you listen to the beginning of each track for about 10 seconds Track View VCD Displays the beginning view of each track and the track number 1 1 Press the TOP MENU but ton during playback 2 2 Press the UP DOWN button to select TRACK VIEW Press the ENTER button 3 3 Select the desired view by pressing the UP DOWN or LEFT RIGHT buttons Track View example 4 4 Press the ENTER bu...

Страница 25: ...V V V C C C C D D D D C C C C D D D D Using the Menu Button Using the Audio Button When playing a DVD 1 1 Press the MENU button 2 2 Use the UP DOWN button to select AUDIO informa tion Disc menu example 3 3 Press the ENTER button 4 4 Use the UP DOWN button to select ENGLISH Disc menu example 5 5 Press the ENTER button When playing a VCD In disc version 2 0 the MENU button works as a conversion swit...

Страница 26: ...button 2 2 Use the UP DOWN button to select SUBTITLE infor mation Disc menu example 3 3 Press the ENTER button 4 4 Use the UP DOWN button to select the desired lan guage Disc menu example 5 5 Press the ENTER button When playing a VCD In disc version 2 0 the MENU button works as a conversion switch between MENU ON and MENU OFF mode When playing a VCD 1 1 or CD the MENU button will not work This fun...

Страница 27: ... Angle information display example 2 2 Use the UP DOWN button to select the desired screen angle Then press the ENTER button Angle information display example 3 3 Use the LEFT RIGHT button to determine whether or not the ANGLE mark will be dis played NOTE This function is disc dependent and may not work with all DVDs This function does not work when a DVD has not been recorded with a multi camera ...

Страница 28: ... D D D V V V V C C C C D D D D Recalling a Marked Scene 1 1 During playback press the BOOKMARK button on the remote 2 2 Use the LEFT RIGHT but ton to select a marked scene 3 3 Press the PLAY PAUSE button to skip to the marked scene Clearing a Bookmark 1 1 1 1 During playback press the BOOKMARK button on the remote 2 2 2 2 Use the LEFT RIGHT but ton to select the bookmark number you want to delete ...

Страница 29: ...IGHT button to select the part of the screen you want to zoom 3 3 Press the ENTER button During DVD playback press ENTER to zoom in 2X 4X nor mal in order During VCD playback press ENTER to zoom in 2X normal in order 1 1 1 1 2 2 2 2 NOTE 3D Sound is possible only on discs recorded using DOLBY SURROUND or DOLBY DIGITAL However some of these discs do no contain rear channel sound signals Depending o...

Страница 30: ... X rating etc AUDIO OPTIONS Setup of the Audio Options See P35 Use to set up the audio options such as speaker setup DISPLAY OPTIONS Setup of the Display Options See P36 Use to select which type of screen you want to watch and several display options 2 2 Use the UP DOWN button on the remote to access the different features 3 3 Press the ENTER button to access the sub features To make the setup scr...

Страница 31: ...ENU 3 3 Press the ENTER button 4 4 Use the UP DOWN button to select ENG LISH 5 5 Press the ENTER button ENGLISH is selected and the screen returns to SETUP MENU To make the SETUP MENU disappear press the RETURN button 1 1 2 2 e g Setting up in ENGLISH SETUP MENU 1 PLAYER MENU ENGLISH 2 DISC MENU ENGLISH 3 AUDIO ENGLISH 4 SUBTITLE AUTOMATIC 5 PARENTAL UNLOCKED 6 AUDIO OPTIONS 7 DISPLAY OPTIONS PLAY...

Страница 32: ...NU A A Press the SETUP button when in play or stop mode B B Use the UP DOWN button to select SUBTITLE C C Press the ENTER button D D Use the UP DOWN button to select ENGLISH Select AUTOMATIC if you want the subtitle language to be the same as the language selected as the audio preference Select OTHERS if the language you want is not listed Some discs may not contain the language you select as your...

Страница 33: ...r return to menu screen during set up Press RETURN button e g Setting up in LEVEL 6 PARENTAL CONTROL 1 RATING LEVEL 2 CHANGE PASSWORD PARENTAL CONTROL 1 RATING LEVEL 2 CHANGE PASSWORD NOTE What if a DVD s rating exceeds the player s rating level The player alerts you when you try to play a DVD with a rating that exceeds the level you ve set The message YOUR SELECTION EXCEEDS THE RATING LIMIT FOR T...

Страница 34: ...Then press the ENTER button DIGITAL OUTPUT A digital surround sound format that is recorded by Dolby Digital Select the suitable output signal type of digital audio output Bitstream PCM during playback DTS This program features discrete 5 1 channel sound track and must be played through DTS capable equipment When played through DTS equipment sound will be heard from all five system speak ers and a...

Страница 35: ...se this feature to turn the on screen displays on or off that appear in screen FRONT DISPLAY BRIGHT It makes the Front Panel Display bright DIM It makes the Front Panel Display dim AUTO DIM It makes the Front Panel Display dim automat cally when playing a DVD BLACK LEVEL Adjust the brightness of screen 1 2 3 1 2 1 1 2 3 2 3 1 1 Press the SETUP button in play or stop mode 2 2 Use the UP DOWN button...

Страница 36: ...he first code does not work 5 5 To operate the TV use the TV Function Buttons described on page 13 TV Codes CODE 0 1 2 3 4 5 6 7 8 9 SETUP DISPLAY BRAND SAMSUNG A SHARP B SONY MAGNAVOX SANYO A LG B RCA LG A TOSHIBA HITACHI JVC PANASONIC A CODE OPEN CLOSE AUDIO SUB TITLE DVD POWER ANGLE TOP MENU MENU RETURN REV SEARCH REPEAT FWD SEARCH BACK SKIP BRAND MITSUBISHI SAMSUNG B SAMSUNG C SHARP A ZENITH L...

Страница 37: ...d working properly The features or action cannot be completed at this time because 1 The DVD s software restricts it 2 The DVD s software doesn t support the feature e g angles 3 The feature is not available at the moment 4 You ve requested a title or chapter number or search time that is out of range Check if the disc has a Menu Some of the functions selected in the Setup Menu may not work proper...

Страница 38: ...p p 75 Ω load Pb 0 70 Vp p 75 Ω load Luminance Signal 1 0 Vp p 75 Ω load Color Signal 0 286 Vp p 75 Ω load L R Analog 2 Vrms 1 kHz Digital 1 15 Vp p 48 kHz Sampling 4 Hz to 22 kHz 96 kHz Sampling 4 Hz to 44 kHz 110 dB 96 dB 0 003 Frequency Response S N Ratio Dynamic Range Total Harmonic Distortion Output Level 2 channel S VIDEO Component Video Composite Video VCD 5 inches CD 31 2 inches COMPACT DI...

Страница 39: ...p p 75 Ω load Pb 0 70 Vp p 75 Ω load Luminance Signal 1 0 Vp p 75 Ω load Color Signal 0 286 Vp p 75 Ω load L R Analog 2 Vrms 1 kHz Digital 0 50 Vp p 48 kHz Sampling 4 Hz to 22 kHz 96 kHz Sampling 4 Hz to 44 kHz 110 dB 96 dB 0 003 Frequency Response S N Ratio Dynamic Range Total Harmonic Distortion Output Level 1 channel S VIDEO Component Video Composite Video VCD 5 inches CD 31 2 inches COMPACT DI...

Страница 40: ...per or unauthorized repair cosmetic damage or exterior finish product with altered serial number failure to follow operating instructions customer adjustments maintenance and environmental instructions that are covered and prescribed in the instruction book use of non SAMSUNG or unauthorized parts supplies accessories or equipment which dama this product or result in service problems failures or p...

Страница 41: ...s the only acceptable proof of purchase It must be pre sented to the authorized service center at the time service is requested This warranty does not cover damage due to accident fire flood and or other acts of God misuse incorrect line voltage improp installation improper or unauthorized repairs commercial use or damage that occurs in shipping Exterior and interior finish lamps glass are not cov...

Отзывы: