background image


© SAMSUNG Electronics Co., Ltd. 


101


ANNEX


APPLICA

T

ION MENUS


CONVENIENT

 FEA

T

URES


BASIC FEA

T

URES 


T

H

ING

YOU SHOULD

 KNOW 


PREP

ARA

T

ION 

Alarm Features   


Appointment Reminder / Alarm Clock 

This feature serves as an alarm clock. Up to 3 alarms may be set. Each alarm can be set as   
a one time alarm or a daily alarm. 
Three short rings will repeat three times. Lift the handset to answer the alarm. 
If you do not answer, the alarm will ring two more times at 5-minute intervals. 
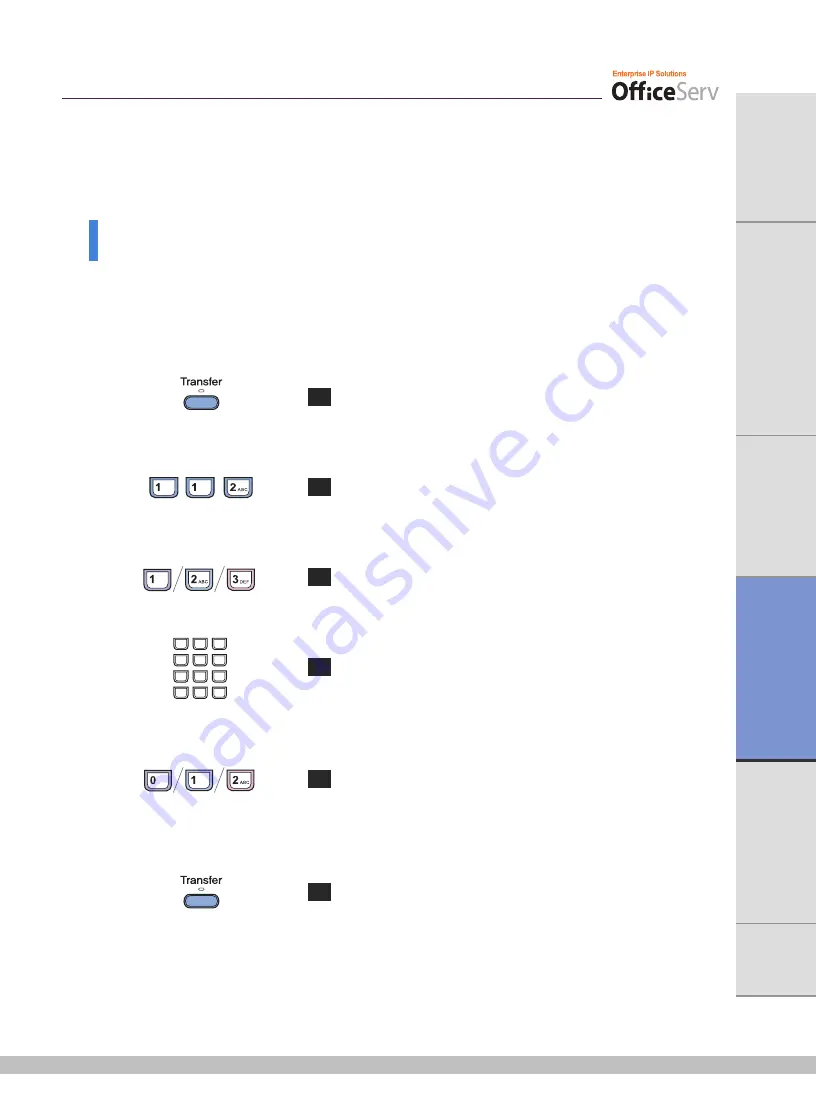


 1 

 Press the 

[Transfer]

 button. 


 2 

 Press 

[1]

[1]

[2]


 3 

  Dial the alarm number 

[1], [2]

 or 

[3]


 4 

  Enter the time at which you want the alarm to sound.   

Enter the time as HHMM(hours and minutes) based   
on a 24 hour clock. 


 5 

  Select the type of alarm between 

[0]

(Not Set),   

[1]

(Today) or 

[2]

(Daily). 


 6 

 Press the 

[Transfer]

 button to save settings. 

Repeat the above steps to set other alarms as needed. 

Содержание DS-5021D

Страница 1: ......

Страница 2: ......

Страница 3: ...Digital Phone User Guide DS 5021D DS 5014D DS 5014S DS5038S DS 5007S...

Страница 4: ...ructions that you should follow in order to avoid personal injury or fatality CAUTION Provides information or instructions that you should follow in order to avoid a service failure or damage to your...

Страница 5: ...the phone Moisture in the phone may cause a fire and electric shocks Do not place the phone in a dusty area or areas with extreme or volatile changes in temperature It may cause a fire or electric sh...

Страница 6: ...s on the phone It may cause damage to some parts Do not install the phone on an unstable surface or in direct sunlight It may cause severe damage to the plastic case of the phone and reduced the perfo...

Страница 7: ...Bottom View of the DS 5021D 5014D 14 Connecting Lines to the Phone 18 THINGS YOU SHOULD KNOW About Stations and Trunk Lines 24 Selecting System Functions 25 Entering Characters 30 Configuring My Phon...

Страница 8: ...ook Voice Announcement 111 In Group Out Of Group 113 Mute 114 Background Music 115 Timer 116 APPLICATION MENUS Navigation Buttons 120 Main Menus 123 Reviewing and Calling Recently Called Numbers 124 R...

Страница 9: ...IENT FEATURES BASIC FEATURES THINGS YOU SHOULD KNOW PREPARATION PREPARATION Main Features 8 Checking Parts in the Package 10 Front View of the DS 5021D 5014D 11 Bottom View of the DS 5021D 5014D 14 Co...

Страница 10: ...call you can use automatic redial retry function The digital phone redials the called number automatically until your party is free to take your call This button allows you to access the digital phone...

Страница 11: ...ming calls and the phone will not ring Your calls can be forwarded to another station when you do not wish to be disturbed If you have an urgent announcement to make or you wish to locate a colleague...

Страница 12: ...ONVENIENT FEATURES BASIC FEATURES THINGS YOU SHOULD KNOW PREPARATION Checking Parts in the Package Please contact your Authorised Samsung Reseller if any item above is missing or damaged DS 5021D Hand...

Страница 13: ...TION Front View of the DS 5021D 5014D DS 5021D Programmable Buttons 21 DS 5014D Programmable Buttons 14 Soft Buttons LCD screen Programmable Buttons Scroll Button Status Indicator Conference Button Re...

Страница 14: ...set Soft Buttons If the Scroll button is pressed the function menus appear on the LCD screen The Soft buttons can be used to select the desired menu from the function menus displayed Scroll Button Th...

Страница 15: ...our caller Transfer Button This button is used in the following cases When transferring your current call to other extension extension group or externally During a screened transfer pressing the trans...

Страница 16: ...CONVENIENT FEATURES BASIC FEATURES THINGS YOU SHOULD KNOW PREPARATION Bottom View of the DS 5021D 5014D Expansion Module Groove for the Wall Mounting Stand Groove for the Desk Stand Phone Line Connec...

Страница 17: ...nstalled in the wall Groove for the Desk Stand When used as the desk phone assemble the phone stand into these grooves Expansion Module Plug the KDB module into this module and secure with the two scr...

Страница 18: ...he digital extension device Supplying the DLI Port KDB S Can connect a regular phone with a wireless phone Supplying the SLI port KDB F Changes the speakerphone mode to the full duplex and provides an...

Страница 19: ...DS 5021D 5014D phone is Half Duplex The half duplex means that it can communicate in both directions but only one way at a time The KDB F enhances the speakerphone mode to the full duplex so it can p...

Страница 20: ...CATION MENUS CONVENIENT FEATURES BASIC FEATURES THINGS YOU SHOULD KNOW PREPARATION Connecting Lines to the Phone 1 Connect the handset cord to the port marked with the handset symbol 2 Connect the lin...

Страница 21: ...sktop environment insert the desktop stand into the two side holes which are located at the rear of the phone and push it in the upward direction as shown in the figure below When used as the wall mou...

Страница 22: ...ES BASIC FEATURES THINGS YOU SHOULD KNOW PREPARATION When used as a wall mounted phone the location of the handset hook should be changed so that the handset can be secured Take out the handset hook f...

Страница 23: ...N Adding a KDB Module 1 In the center of the bottom panel there is an expansion module that can install KDB Two connectors are covered with the plastic cover which shall be removed in order to install...

Страница 24: ...om of AOM At this time the AOM extension pair shall be assigned at the telephone system in order to use AOM 2 Prepare the following AOM connectors and 4 screws that are provided with AOM itself 3 Conn...

Страница 25: ...THINGS YOU SHOULD KNOW PREPARATION THINGS YOU SHOULD KNOW About Stations and Trunk Lines 24 Selecting System Functions 25 Entering Characters 30 Configuring My Phone 32 Volume Adjustment 37 Types of...

Страница 26: ...tions and Trunk Lines A station is a digital or IP phone or standard telephone connected to the OfficeServ system A trunk line is directly connected to your phone company s telephone network It allows...

Страница 27: ...l Soft Button The Scroll button is used to display the function menu on the LCD screen If the Scroll button is pressed the LCD screen will show three menus such as CALL OTHER and ANS in a row If the S...

Страница 28: ...anged in your system Refer to your System Administrator Dial Button Function Dial Button Function 0 Trunk access group number 55 0 Page internal zone 0 10 xxx Answer parked calls 55 1 Page internal zo...

Страница 29: ...Set Forward No Ans 48 Set station message 604 xxx Set Forward Busy No Ans 49 Flash 66 Group call pickup 500 529 Station group 67 Night ring answer 53 grp 0 Exclude group 681 Voice Dialler 53 grp 1 Inc...

Страница 30: ...gned for each programmable button Button Description Extenders BOSS Director Secretary 1 4 DP Direct Call Pick up Station or station group number DS Direct Station Required station numbers FWRD Call F...

Страница 31: ...ble button that requires an extender by using the TVolumeS button to scroll through programmable buttons and then press the right Soft button or press the programmable button to add an extender 4 When...

Страница 32: ...d special characters Special Button Used To enter letters of the alphabet the following special button is used A Button Switch to capital small letters when entering characters The A button of the DS...

Страница 33: ...tton letters as the previous letter used Procedures for entering characters are described below Procedures for entering characters are described below Enter the characters according to the table below...

Страница 34: ...1234 You can change the station passcode if needed 1 Press the Transfer button 2 Press 1 0 1 3 Enter the previous passcode 4 Enter the new passcode The passcode must be a 4 digit number 5 Re enter the...

Страница 35: ...e You must be a designated Boss or Secretary for this option to be available 1 Press the Transfer button 2 Press 1 0 3 3 Select the call type ANS MODE or EXEC ANS using the TVolumeS button Move the cu...

Страница 36: ...et Operation The DS 5021D 5014D Digital phone user can switch between handset mode and headset mode In headset mode you can answer or end a call by pressing the Send button or End button 1 Press the T...

Страница 37: ...ON Enabling Disabling the Key Confirmation Tone You can enable or disable a short confirmation tone whenever a dial button is pressed 1 Press the Transfer button 2 Press 1 1 0 3 To use the key confirm...

Страница 38: ...thod Hot Keypad The hot keypad allows you to make a call or activate the other functions of the OfficeServ system by pressing the dial buttons or function keys directly without picking up the handset...

Страница 39: ...SHOULD KNOW PREPARATION Volume Adjustment The TVolumeS button is used for adjusting the volume of the handset speaker and ringer Adjusting Handset Volume 1 During a call using the handset press the Vo...

Страница 40: ...ume 1 During a call using the Speaker button press the VolumeS button to increase the speaker volume 2 Press the TVolume button to decrease the speaker volume Adjusting Ring Volume 1 To increase the r...

Страница 41: ...n the following table SignalTone Name Usages Signal Interval al tone A steady tone that indicates you can begin dialling Ring back tone Indicates the station you dialled is ringing Busy tone Indicates...

Страница 42: ...ing Flashing green Recalling Flashing yellow Message waiting Flashing red Calling Denied Fast flashing red within 1 second interval Button LED The Transfer button Hold button and Speaker button have a...

Страница 43: ...NEX APPLICATION MENUS CONVENIENT FEATURES BASIC FEATURES THINGS YOU SHOULD KNOW PREPARATION BASIC FEATURES Before Making Answering a Call 42 Intercom Calls 43 Outside Calls 49 Intercom Outside Calls 5...

Страница 44: ...dset or speakerphone Calling Methods Using a handset This function allows you to lift the handset and make a call Using a speakerphone This function allows you to make a call through the speakerphone...

Страница 45: ...ning the Names to Your Extension You can assign a name of up to 11 letters to your extension This allows other extension users with display stations to call you using the directory dial feature and to...

Страница 46: ...mber or station group number Wait until the other party answers the call If a short signal tone not a ringing tone is heard the receiving extension has set up the Voice Announce or Automatic Answer fu...

Страница 47: ...Speaker button or Send button 2 To finish the call replace the handset or press either the Speaker or End button Voice Page Announce Mode Intercom Calls Only When another station calls you a short si...

Страница 48: ...ode Intercom Calls Only When another station calls you a short signal tone will be heard and then the phone automatically answers the call 1 The microphone and speaker are turned on and you can commun...

Страница 49: ...utton or press 4 4 Or press the Soft button corresponding to CBK on the LCD panel 2 When you hear the confirmation signal replace the handset 3 When the reserved station becomes free your phone rings...

Страница 50: ...Or press the Soft button corresponding to the CAMP on the LCD screen 2 The called station will receive off hook ring tone repeated every few seconds and an available Call button will flash to indicate...

Страница 51: ...dset or speakerphone when calling an external number To make an external call with a handset follow the procedures below 1 Pick up the handset 2 Press the trunk or trunk group button or dial the trunk...

Страница 52: ...al call with a speakerphone follow the procedures below 1 Press the Speaker button 2 Press the trunk line or dial the trunk access code 3 Dial the telephone number 4 Finish the call by pressing the Sp...

Страница 53: ...programmed to require you to enter an account code before making a call press the ACCT button or press 4 7 plus a valid code press the ACCT button again and then select a trunk line Ask your System A...

Страница 54: ...ine If this NEW button does not appear on your phone press the Soft button corresponding to NEW on the LCD screen Busy Line Queuing With Callback If there are no available trunk lines you will hear bu...

Страница 55: ...ephone number or speed dial number again A callback will be cancelled if not answered within 30 seconds If you have set a callback your CBK button s LED if programmed will light Cancelling Callback A...

Страница 56: ...s 1 Press the Redial button 2 Use the direction buttons or the TVolumeS button to select the required number to redial and press the Soft button corresponding to Dial 3 To review details about the pre...

Страница 57: ...number you just dialled for later use press the SAVE button before hanging up 2 This saved number can be redialled at any time by pressing the SNR button or dialling 1 7 The same external trunk line w...

Страница 58: ...en you hear a busy signal press the RETRY button or press the Soft button corresponding to RETRY on the LCD screen 2 The system will reserve the line and automatically redial the same number for you Y...

Страница 59: ...press the Soft button corresponding to PARK on the LCD screen 2 Dial the orbit number required 0 9 the PARK button will flash Or press a dedicated PARK button the PARK button will also flash To have t...

Страница 60: ...the conversation The types of hold available are system hold general hold automatic hold exclusive hold and consultation hold System Hold 1 While you are engaged in a conversation press the Hold butt...

Страница 61: ...and connect you to the next call You can set Automatic hold on your phone by following the procedure below 1 Press the Transfer button 2 Press 1 1 0 3 To use this function press 0 0 1 and if this func...

Страница 62: ...utside call on hold exclusively so that other users cannot get it 1 Press the Hold button twice 2 The call will flash green on your phone and this line will show a steady red light on other stations 3...

Страница 63: ...y to consult with another extension 1 Press the Transfer button you will hear transfer dial tone Your outside call is placed on Transfer hold 2 Dial the extension number 3 Consult with the internal pa...

Страница 64: ...pre programmed period of time it may go to the system operator depending upon your OfficeServ system programming 2 When your phone rings lift the handset or press the Send button to answer the recall...

Страница 65: ...section explains how to pickup a call that is ringing at another station Station Call Pickup If a call rings on another station and you know the station number you can answer the call on your phone 1...

Страница 66: ...another station assigned to your pick up group 2 Pick up the handset and check for dial tone 3 Press 6 6 4 Or press the flashing GROUP PICKUP button or press GROUP PICKUP button followed by the relate...

Страница 67: ...within just a few seconds 1 Press the DIR button or press the Soft button related to DIR in the CALL menu 2 Select the directory you wish to use PERS Personal Speed Dial Number SYS System Speed Dial...

Страница 68: ...on transfer hold 2 Dial an extension or group number Or press the DSS button or station group button Your call will be automatically put on transfer hold 3 For blind transfer hang up when you hear ri...

Страница 69: ...transferred call will always ring After the internal party answers you may alternate back and forth between the parties by pressing the Transfer button You cannot transfer an Intercom call by pressing...

Страница 70: ...creen 2 Dial the mailbox number 3 Hang up when dialling is completed Call Waiting If an outside call or another station has camped on to you your phone will ring and the waiting call s LED will flash...

Страница 71: ...ers the special feature buttons are used and they are designated as A B C D E and F buttons Each special feature button is explained in the following table A B C D E and F buttons of the DS 5021D 5014...

Страница 72: ...onal dial numbers 1 Press the Transfer button and press 1 0 5 without lifting the handset 2 Select a free speed dial number location 00 49 3 Dial either a specific trunk line number or the trunk acces...

Страница 73: ...lowing procedure 1 Press the Memory button or press 1 6 without lifting the handset 2 Dial the speed dial location number that is programmed with the telephone number you wish to call 3 The telephone...

Страница 74: ...ial button This name is used to dial the telephone number using the directory feature 1 Press the Transfer button 2 Press 1 0 6 3 Press the speed dial number location to be assigned with a name 00 49...

Страница 75: ...e keys on the phone for one touch speed dial use 1 Without lifting up the handset press the Transfer button 2 Press 1 0 7 3 Locate a vacant SPD button using the VolumeS button and press the right Soft...

Страница 76: ...rence call of up to 5 parties including yourself The OfficeServ system also allows each station to pre assign up to 5 conference groups so you can set up a conference call by pressing a single Group C...

Страница 77: ...nk number that is to be dropped Press the Conference button again to re establish the conference When attempting to add another person to the conference and you are not able to reach the desired perso...

Страница 78: ...e TVolumeS button to select MBR1 4 and press the right Soft button 6 Dial the extension number or outside telephone number remembering to dial the trunk access code first and press the right Soft butt...

Страница 79: ...Not Disturb 78 Call Forwarding 80 Paging and Messaging 88 Alarm Features 101 Use with the Door Phone 105 Executive Secretary Hot Line 107 Group Listening 108 Account Code 109 Locking Your Phone 110 O...

Страница 80: ...ND button or press 4 0 1 while on hook or select DND from the LCD screen using the Scroll button and Other Soft button 2 The status indicator and or DND button LED flashes to inform you that the Do No...

Страница 81: ...cribed below 1 Check if the status indicator is flashing 2 Press the DND button or press 4 0 0 3 The status indicator goes off One Time DND If you do not wish to be disturbed while you are on a call p...

Страница 82: ...rward settings and the number specified for forwarding from the LCD screen of your phone Enabling Call Forwarding can also be achieved using the dial buttons or the Forward Set Menu 1 Press the Transf...

Страница 83: ...on to save and exit Forwarding Calls You can forward calls to another station station group or an external number Programming procedures for various types of forwarding calls are described in detail n...

Страница 84: ...Remember to insert the trunk access code prior to entering the external number 3 Hang up after the confirmation tone is received The station receiving a forwarded call can transfer the call back to th...

Страница 85: ...rward Busy When you are busy on a call incoming calls can be forwarded to another station station group or an external number 1 Press 6 0 2 2 Dial the station number group number or external number Re...

Страница 86: ...KNOW PREPARATION Forward No Answer Calls can be forwarded when you are not available to answer the call 1 Press 6 0 3 2 Dial the station number group number or external number Remember to insert the...

Страница 87: ...Busy destination If you do not answer the calls will be forwarded to the Forward No Answer destination 1 Press 6 0 4 2 Hang up after the confirmation tone is received Forward When DND is Set You can...

Страница 88: ...the station you are currently using In addition you can arrange for calls to another station to be forwarded to your phone Remote Forwarding To forward all calls to your phone to the station you are...

Страница 89: ...EATURES BASIC FEATURES THINGS YOU SHOULD KNOW PREPARATION To forward calls from a specific station to your phone Remote Forwarding 1 Press 6 0 6 enter the station to follow from is displayed 2 Dial th...

Страница 90: ...page zone button as one of your programmable buttons making it unnecessary to press the PAGE button followed by the zone number Internal Page You can make a page announcement through the station spea...

Страница 91: ...speakers There are 4 external zones 5 8 and 9 for all external zones 1 Pick up the handset and check for dial tone 2 Press the PAGE button or 5 5 or select PAGE from the LCD screen by using the Scroll...

Страница 92: ...also page all external zones and internal page zone 0 simultaneously 1 Pick up the handset and check the dial tone 2 Press the PAGE button or 5 5 or select PAGE from the LCD screen by using the Scrol...

Страница 93: ...MMPG button or 5 4 or select MMPG from the LCD screen using the Scroll button and Soft buttons 3 Dial the required zone number 4 After receiving the confirmation tone instruct the other party to press...

Страница 94: ...call via paging This function is useful in a factory or in a large office when the called person is away from their workstation 1 Press the PAGE button while connected to the call and the call is auto...

Страница 95: ...ess 1 0 and enter the announced number You can also enter the announced number after selecting PARK from the LCD screen 2 You will be connected to the Parked call If the parked call is not retrieved w...

Страница 96: ...INGS YOU SHOULD KNOW PREPARATION Rejoining a Page With this option you can listen to the latter part of a page announcement after finishing a call 1 Press the Transfer button or 1 1 0 2 Press 0 5 1 to...

Страница 97: ...cation when there is no answer or if the station required is busy 1 Press the Message button or press 4 3 2 Hang up after hearing confirmation tone 3 The Message button of the receiving station will f...

Страница 98: ...celling Messages You can cancel messages you have left on other stations or messages left at your station 1 Press 4 2 and enter the station number where you left your message 2 To cancel all numbers l...

Страница 99: ...ft its number will be rung automatically 2 The LED on your Message button and status indicator will remain flashing until the station responds Repeat the above steps to respond to all station messages...

Страница 100: ...view all messages before returning them 1 Press the flashing Message button The first station that left its number is displayed on the screen 2 Press the TVolumeS button to scroll through the message...

Страница 101: ...grammed message on your station when you are away from your phone The caller will see the message on their LCD when they call you and know that you are not available 15 system wide messages are availa...

Страница 102: ...ur System Administrator can edit the first 15 Programmable Messages Your personal Programmed Messages using the following procedure 1 Press the Transfer button when your phone is in the idle condition...

Страница 103: ...ort rings will repeat three times Lift the handset to answer the alarm If you do not answer the alarm will ring two more times at 5 minute intervals 1 Press the Transfer button 2 Press 1 1 2 3 Dial th...

Страница 104: ...W PREPARATION Alarm Cancel Procedure for cancelling all previously registered alarms is described below 1 Press the Transfer button 2 Press 1 1 2 3 Dial the alarm number 1 2 or 3 4 Press the Hold butt...

Страница 105: ...arm number 1 2 or 3 4 Enter the time at which you want the alarm to sound Enter the time as HHMM hours and minutes based on a 24 hour clock 5 Select the type of alarm between 0 Not Set 1 Today or 2 Da...

Страница 106: ...e the Alarm settings from the LCD screen of your phone Cancelling alarms can also be achieved using the dial buttons 1 Press the Transfer button 2 Press 1 1 2 3 Dial the alarm number 1 2 or 3 4 Press...

Страница 107: ...Door Phone You can answer calls from the Door phone or open the door if an optional electric door lock is installed 1 When a call from the Door phone arrives you will receive three short bursts of ri...

Страница 108: ...Calling The Door Phone Room Monitor You can call the Door phone and listen to what is happening outside or in another room 1 Dial the station number of the Door phone 2 You can listen or have a conver...

Страница 109: ...by pressing the BOSS button or by selecting BOSS from the LCD screen using the Soft buttons 2 If DND is set on the executive station or it is busy all calls will be forwarded to the secretary station...

Страница 110: ...ecting LISTEN from the LCD screen using the Soft button The microphone of the phone is not active and the other party cannot hear sounds via that source 2 Press the LISTEN button again or select liste...

Страница 111: ...specific account code To enter an Account Code 1 Press the ACCT button or select ACCT using the Soft button during an external trunk call 2 Dial the account code Maximum 12 characters including 3 Pres...

Страница 112: ...your phone to prevent others from using your phone while you are away You can unlock the phone when you return 1 Press the Transfer button 2 Press 1 0 0 3 Dial your 4 digit station passcode 4 Press 2...

Страница 113: ...eive OHVA calls in DND mode The OHVA feature can be used for intercom and transferred calls OHVA Follow the below procedure to make an off hook voice announcement 1 Dial the extension number or the DS...

Страница 114: ...hold and allows you to talk to the announcing party 2 Press the related CALL button to return to the original party This disconnects the OHVA call OHVA Block You can block Off Hook Voice Announce but...

Страница 115: ...roup number and select the IN or OUT soft button If the handset is active in the group a red light will light on the IN OUT button 2 Press the IN OUT button again to remove the phone from the group Th...

Страница 116: ...eature disables the handset or phone s microphone depending on which is in use Thus the other party cannot hear what you are saying 1 Press the MUTE button or select MUTE from the LCD screen using the...

Страница 117: ...PREPARATION Background Music You can listen to music through the phone s speaker if a music source is provided 1 To listen to the music press the Hold button while on hook 2 Press the Hold button aga...

Страница 118: ...s longer than 100 minutes Selecting TIMER from the LCD screen will manually reset the timer If the automatic timer is not set while on a call press the TIMER button to start the timer Press the TIMER...

Страница 119: ...imer can be used as a stopwatch 1 Press the TIMER button or select TIMER from the Other menu on the LCD screen using the Scroll button and Soft button when the phone is in idle mode 2 Press the TIMER...

Страница 120: ...Send button Calls are answered in the order that they arrive at your phone If the ring preference option is off you must answer calls by pressing the flashing button In this case you may answer the ca...

Страница 121: ...S DS 5021D DS5014D Navigation Buttons 120 Main Menus 123 Reviewing and Calling Recently Called Numbers 124 Reviewing and Calling Recently Received Numbers 125 Reviewing and Calling Speed Dial Numbers...

Страница 122: ...the various applications Menu Button 1 The main menu is displayed when the Menu button is pressed in the idle state You can select from the presented options 2 This menu is displayed when the Menu bu...

Страница 123: ...you will answer the call on the speakerphone End Button This button is used to disconnect calls or to exit the phone menus and return to the idle display Cancel button The Cancel button is used in men...

Страница 124: ...ms button is used Used for moving to the previous menu button is used In cases where the phone number is long this button is used for displaying the rear part of the number which is not displayed on t...

Страница 125: ...se the direction buttons or the TVolumeS button and move to the preferred menu You can select the menu directly by pressing the dial button corresponding to the menu number Press the Enter button to s...

Страница 126: ...called numbers and redial them as required 1 Press the Menu button to display the main menu screen 2 Press 1 to select 1 OUT CALL LOG or select and press the Enter button 3 The list of recently calle...

Страница 127: ...tly called numbers or dial them as required 1 Press the Menu button to display the main menu screen 2 Press 2 to select 2 IN CALL LOG or select and press the Enter button 3 The list of recently receiv...

Страница 128: ...ogram the system speed numbers and names 1 Press the Menu button to display the main menu screen 2 Press 3 to select 3 SPD NO SEARCH 3 Press 1 to select 1 PERSON SPD NO or press 2 to select 2 SYSTEM S...

Страница 129: ...splay the main menu screen 2 Press 4 to select 4 DIRECTORY DIAL or select and press the Enter button The submenu below is displayed 3 Press 1 to select 1 PERSON SPD NO or press 2 to select 2 SYSTEM SP...

Страница 130: ...he name in the list you intend to dial and press the Send button to make the call Refer to the Things You Should Know of this guide for how to enter characters Use the direction buttons to move the cu...

Страница 131: ...5 to select 5 FORWARD SET or select and press the Enter button 3 Select the type of forward you wish to set a destination for using the direction buttons or the TVolumeS button and press the Enter bu...

Страница 132: ...h to set Press 0 to select 0 FORWARD TYPE The current forward setting is displayed 6 Select the required forward type to be set by using the direction button the TVolumeS button and press the Enter bu...

Страница 133: ...ree alarms 1 Press the Menu button to display the main menu screen 2 Press 6 to select 6 ALARM REMINDER The submenu below is displayed 3 Use the direction button or the TVolumeS button and press the E...

Страница 134: ...ODAY the alarm rings only once at the set time when selected 2 DAILY an alarm rings every day at the set time when selected The selected alarm type is saved and you move to the upper menu displaying t...

Страница 135: ...ANNEX APPLICATION MENUS CONVENIENT FEATURES BASIC FEATURES THINGS YOU SHOULD KNOW PREPARATION ANNEX Troubleshooting 134 Product Specifications 136...

Страница 136: ...the LCD screen while the phone is being used Check if the phone line is correctly connected to the port of the phone Refer to Connecting Lines to the Phone section of Preparation in this guide The pho...

Страница 137: ...displayed on the LCD screen Confirm with your System Administrator that the caller ID service is available from your telephone company If the caller blocks the sending of their caller ID the caller ID...

Страница 138: ...es and Australian Standard AS NZS3548 These limits are designed to provide reasonable protection against harmful interference in a residential installation This equipment generates uses and can radiat...

Страница 139: ......

Страница 140: ......

Отзывы: