background image

129

Removable Disk

To use this camera as a Removable Disk, install (p.115) the USB Driver.

1. Before turning the camera power on, connect the camera to the PC with the USB cable.

2. Click [Removable Disk] under [My computer] or [Windows Explorer].

3. Image files stored in the Removable Disk (DCIM 

100SSCAM) can be transferred to the

PC.

Important information whilst using the Removable Disk

The [Removable Disk] indicator will not show when the camera power is off or the USB
cable is removed.

We recommend that you should copy the images to the PC to view them. Opening
images directly from the removable disk may be subject to unexpected disconnection.

When uploading images from the PC to the camera, ensure that the uploaded file names
are not the same as those already stored on the memory. 

When you upload a file that is not taken by this camera to the Removable Disk, the [File
Error!] message will be displayed on the LCD monitor in the PLAY mode, and nothing is
displayed in THUMBNAIL mode.
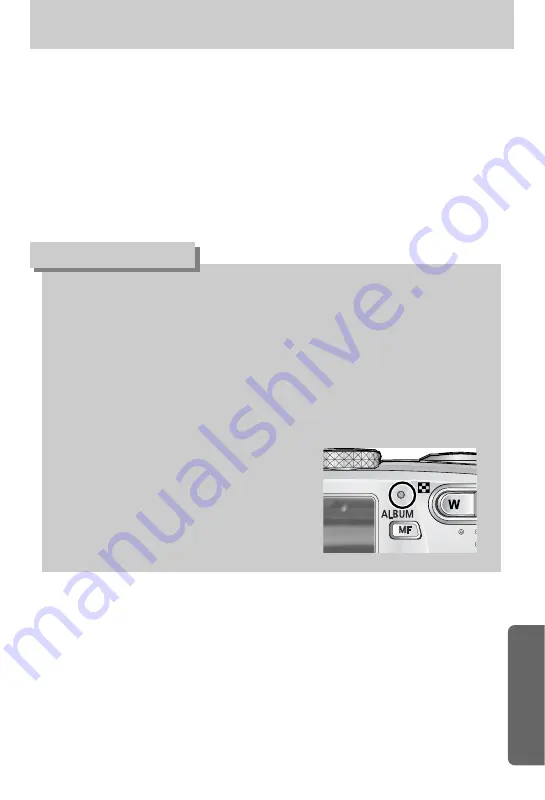
The camera status lamp will blink, when a file is
transferred (copy or deletion) between the PC and
the camera. Do not remove the USB cable until the
lamp stops blinking. 
To remove the USB cable in Windows
2000/ME/XP, use the [Unplug or Eject Hardware]
icon on the task bar.

INFORMATION

0-0009 

100-0009 

Содержание Digimax V800

Страница 1: ...mera This manual will guide you through using the camera including capturing images downloading images and using the software applications Please read this manual carefully before using your new camera ENGLISH Digimax V10 User s Manual ...

Страница 2: ... p 124 Check the camera s power If the power is turned off press the camera button to turn it on p 28 Take a picture Check the camera s power Check Removable Disk Open Window s EXPLORER and search for Removable Disk p 125 If you use a card reader to copy the images on the memory card to your PC the images could be damaged When transferring the images taken with the camera to your PC be sure to use...

Страница 3: ...e 23 How to use the MySET mode 24 How to use the MOVIE CLIP mode 24 Recording the movie clip without voice 25 Using Successive Recording 25 How to use the SCENE mode 26 How to use the VOICE RECORDING mode 26 Things to Watch Out for When Taking Pictures 27 Using the camera buttons to adjust the camera 28 POWER button 28 SHUTTER button Jog dial 28 ZOOM W T button 29 Voice memo UP button 31 Macro Dow...

Страница 4: ...Selection 89 PictBridge Print Setting 90 PictBridge Printing 91 PictBridge RESET 92 Setup menu 93 File name 94 Auto power off 95 Language 96 Formatting a memory card 96 Setting up the Date Time Date type 97 Imprinting the recording date 97 Sound 98 Connecting an External Device USB 98 Auto Focus lamp 99 LCD brightness 99 Selecting Video out type 100 Quick view 101 Initialisation 101 Setting up the...

Страница 5: ...t in death or serious injury CAUTION CAUTION indicates a potentially hazardous situation which if not avoided may result in a minor or moderate injury This manual contains instructions on using this camera that will help you to use this camera safely and correctly This will help prevent danger and injury to others Correct Disposal of This Product Waste Electrical Electronic Equipment Applicable in...

Страница 6: ...oo close to your subject s eyes may cause eyesight damage When taking photographs never point the lens of the camera directly into very strong light This may result in permanent damage to your eyesight For safety reasons keep this product and accessories out of reach of children or animals to prevent accidents e g Swallowing batteries or small camera accessories If an accident should occur please ...

Страница 7: ...ords or cables and cause a fire or electric shock An FCC warning This device has been tested in accordance with the limits of a class B digital device under item 15 of the FCC rules These limits are designed to provide protection against harmful interference in commercial installation This equipment generates absorbs and can emit radio frequency energy If it is not installed and used in accordance...

Страница 8: ...tact your nearest Samsung dealer or Samsung service centre User manual Waranty card Camera strap Software CD see p 113 114 SD memory card MMC see p 16 DPOF compatible printer see p 83 Rechargeable battery SLB 1137 Battery charger SBC L3 CHARGE AC cord AC adapter SAC 32 DC 3 3V 2 0A Included items Camera case Remote control ...

Страница 9: ... hard disk space Over 1GB is recommended USB port CD ROM drive 1024x768 pixels 16 bit colour display compatible monitor 24 bit colour display recommended DirectX 9 0 or later For Macintosh Power Mac G3 or later Mac OS 9 2 10 3 Minimum 64MB RAM 110MB of available hard disk space USB port CD ROM drive DivX for the movie clip System Requirements When you connect the camera to a computer printer or ex...

Страница 10: ...timer lamp Mode dial Camera status lamp Strap eyelet Zoom T button Digital zoom Play mode button Print button Tripod socket DC input connection point USB AV connection terminal Shutter button Speaker LCD monitor MF button Album button Zoom W button Thumbnail 5 function button Remote control sensor Delete button AEL ASM button ...

Страница 11: ...s Side 5 function button Memory card slot Battery chamber cover FLASH LEFT button MENU OK button Macro Play Pause button DOWN button SELF TIMER Remote RIGHT button Voice Recording Voice memo UP button Battery chamber Battery holder ...

Страница 12: ...era is ready to take a picture When the flash is charging Camera Status Lamp The lamp blinks The lamp lights up LCD monitor turns off after initializing the device Transmitting Data with a PC Camera Status Lamp The lamp blinks LCD monitor turns off WhentheUSBcableisinsertedtoaPC Camera Status Lamp The lamp turns off When the printer is printing Camera Status Lamp The lamp blinks The lamp turns on ...

Страница 13: ...ay become warm This is perfectly normal INFORMATION You should use the rechargeable battery SLB 1137 supplied with the camera SLB 1137 rechargeable battery Specification Number of images and battery life These figures are measured under Samsung s standard conditions and Shooting conditions and may vary depending on the way of user s usage Using the fully charged battery Auto mode 8M image size Fin...

Страница 14: ...Please ensure that you use an AC adapter 3 3V 2 0A with the correct specification for the camera Failure to do so may affect your warranty DANGER If you have access to a mains supply using an AC Adapter SAC 32 DC 3 3V 2 0A allows the camera to be used for long periods of time Plug the adapter into the connection point DC IN 3 3V on the camera Remove the batteries from the camera when using an AC a...

Страница 15: ...in the direction of the arrow 2 Insert the batteries taking note of the polarity 3 To close the battery chamber cover push it until it clicks When the battery chamber cover is opened do not press the battery chamber cover by force This may cause the battery chamber cover modification or breakage INFORMATION There are 4 indicators for battery condition that are displayed on the LCD monitor Battery ...

Страница 16: ...uld this happen clean the memory card with a soft cloth Please keep the memory card in its case when not in use During and after periods of extended use you may notice that the memory card is warm This is perfectly normal Do not use a memory card that is used in another digital camera To use the memory card in this camera format first the memory card by using this camera Do not use a memory card f...

Страница 17: ... sliding the switch to the top of the SD memory card the data protection will be canceled Slide the switch to the top of the SD memory card before taking a picture When using a 32MB SD memory card the specified shooting capacity will be as follows These figures are intended as an indication of expected performance These figures are approximate as image capacities can be affected by variables such ...

Страница 18: ...l you hear a click If the memory card does not slide in smoothly do not attempt to insert it by force Check the direction of insertion and then insert it correctly Do not insert the memory card the wrong way round Doing so may damage the memory card slot 1 Turn the power off using the power button Open the battery chamber cover and press the memory card as shown in the image and release 2 Remove t...

Страница 19: ...to the Date Time main menu if the cursor is at the first item of the date and time setup In all other instances the cursor will be shifted to the left of its current position UP DOWN button changes the value of each item You can select 21 languages These are listed below English Korean French German Spanish Italian S Chinese T Chinese Japanese Russian Portuguese Dutch Danish Swedish Finnish Thai B...

Страница 20: ... timer p 36 38 7 Voice memo MIC Off p 25 8 Macro p 32 9 Metering p 49 10 Memory card indicator p 18 11 AEL p 42 12 Manual Continuous auto focus p 43 59 13 Auto focus frame p 43 14 Camera shake warning p 27 15 Date Time 2005 08 01 01 00 PM p 97 16 Exposure compensation p 41 The LCD monitor displays information about the shooting functions and selections Recording mode 2 p 21 26 ...

Страница 21: ...t reset the date time before taking a picture 5 Select the AUTO mode by rotating the mode dial 6 Point the camera towards the subject and compose the image by using the LCD monitor 7 Press the shutter button to capture an image How to use the AUTO mode AUTO mode If the auto focus frame turns to red when you press the shutter button down half way it means that the camera cannot focus on the subject...

Страница 22: ... and special effects p 52 7 Point the camera towards the subject and compose the image by using the LCD monitor 8 Press the shutter button to capture an image 10 0 PROGRAM mode 10 0 Aperture priority mode How to use the APERTURE PRIORITY mode Steps from 1 4 are the same as those for AUTO mode 5 Select the APERTURE PRIORITY mode by rotating the mode dial 6 Select the desired aperture value by rotat...

Страница 23: ...n capture a moving object in a still image as if the object is not moving Low Shutter speeds can capture a moving object with an active effect Shutter Priority mode How to use the MANUAL mode Steps from 1 4 are the same as those for AUTO mode 5 Select the MANUAL mode by rotating the mode dial 6 Press the ASM button to select the shutter speed or the aperture value Then select the desired shutter s...

Страница 24: ...button to capture an image Please see page 58 for details of the MySET shooting mode and menus 10 0 MySET mode How to use the MOVIE CLIP mode Steps from 1 4 are the same as those for AUTO mode 5 Select the MOVIE CLIP mode by rotating the mode dial 6 The MOVIE CLIP mode icon and available recording time will display on the LCD monitor 7 Point the camera towards the subject and compose the image by ...

Страница 25: ...during unwanted scenes while recording a movie clip Using this function you can record your favourite scenes into a movie clip without having to create multiple movie clips Using Successive Recording Steps from 1 6 are the same as those for MOVIE CLIP mode 7 Point the camera towards the subject and compose the image by using the LCD monitor Press the shutter button and movie clips are recorded for...

Страница 26: ...e icon is displayed at the top left of the LCD 9 Point the camera towards the subject and compose the image by using the LCD monitor 10 Press the shutter button to capture an image SCENE mode How to use the VOICE RECORDING mode 1 In any mode with the exception of Movie clip mode select the VOICE RECORDING mode by pressing the Voice recording button twice 2 Press the shutter button to record a voic...

Страница 27: ...gainst the sun may make the picture dark To take a picture against the sun please use the Backlight in the scene shooting mode see page 59 fill in flash see page 35 spot metering see page 49 or exposure compensation see page 41 Avoid obstructing the lens or the flash when you capture an image Compose the image by using the LCD monitor Using the LCD monitor extensively will drain the batteries Unde...

Страница 28: ...e clip Press the shutter button once and the movie clip is recorded for as long as the available recording time in the memory allows If you wish to stop recording press the shutter button again In STILL IMAGE mode Pressing the shutter button down halfway activates the autofocus and checks the condition of the flash Pressing the shutter button down fully takes the image and stores the relevant data...

Страница 29: ... Pressingthe ZOOMTbutton WIDE Zoom Optical zoom WIDE Pressing the ZOOM W button This will zoom out from the subject i e the subject will appear further away Pressing the ZOOM W button continuously will set the camera to its minimum zoom setting i e the subject appears at its furthest from the camera Digital zoom WIDE When the digital zoom is in operation pressing the ZOOM W button will reduce the ...

Страница 30: ...optical zoom position and press the zoom T button again The digital zoom can t be activated in the Nightscene Children Close up Text Fireworks scene modes and when you select TIFF image quality Take care not to touch the lens to avoid taking an unclear image and possibly causing camera malfunction If the image is dim turn the camera power off and on again to modify the lens position Take care not ...

Страница 31: ...AL to select a RECORDING mode with the exception of MOVIE CLIP mode 2 Press the VOICE MEMO button If the voice memo indicator is displayed on the LCD monitor the setting is completed 3 Press the shutter button and take a picture The picture is stored on the memory card 4 Voice memo will be recorded for ten seconds from the moment the picture is stored In the middle of the sound recording pressing ...

Страница 32: ...his When you take a picture within 20cm MACRO focus select the FLASH OFF mode In the AUTO mode the Auto macro will be selected by pressing the macro button INFORMATION While the menu is showing press the DOWN button to move from the main menu to a submenu or to move down the submenu cursor When the menu is not showing you can use the MACRO DOWN button to take macro pictures within the distance ran...

Страница 33: ... the SHUTTER button the focus lock function will be cancelled 1 The image to be captured 2 Press the SHUTTER button halfway and focus on the subject 3 Recompose the picture and fully depress the SHUTTER button FLASH LEFT button Selecting the Auto flash 10 0 When the menu is displayed on the LCD monitor pressing the LEFT button makes the cursor shift to the left tab When the menu is not displayed o...

Страница 34: ...ce the life of the batteries Under normal operating conditions the charging time for the flash is normally within 7 seconds If the batteries are weak the charging time will be longer During the continuous shot movie clip mode the flash function will not operate Take photographs within the flash range The image quality is not guaranteed if the subject is too close or highly reflective INFORMATION W...

Страница 35: ...condition with poor light the camera shake warning indicator will display on the LCD monitor The flash fires regardless of available light The intensity of the flash will be controlled according to the prevailing conditions The brighter the background or subject is the less intense the flash will be The flash does not fire Select this mode when capturing images in a place or situation where flash ...

Страница 36: ... elapsed and the self timer function will be canceled Selecting a remote mode Pressing the shutter button of remote control will allow an interval of 2 seconds before the image is taken In the remote mode the shutter button of the camera can t be activated After taking a picture the remote mode will be maintained But pressing the power button rotating the mode dial pressing the play mode button an...

Страница 37: ...ing the self timer the self timer lamp works as follows 2 second self timer setting The self timer lamp blinks at 0 25 second interval for 2 seconds 10 second self timer setting The self timer lamp blinks at 1 second interval for the first 8 seconds It blinks at 0 25 second interval for the remaining 2 seconds If you operate the Mode dial and Self timer button during the self timer operation the s...

Страница 38: ...e 5 Function buttons to change the data values and for your changes to be accepted If the menu is not displayed press the MENU OK button to display a menu for the current camera mode on the LCD monitor Press the button again to return to the previous state There is no menu for VOICE RECORDING mode The menu screen may not show on the LCD when another button is pressed or image data is being process...

Страница 39: ...GB value Up Down Button Navigates between R G and B icons Left Right Button Changes value of each icon 3 When you press the button again the value you set will be saved and RGB setup mode will end You can use the button to adjust the values for the RGB ISO white balance and exposure compensation Main menu Sub menu Available camera mode RGB 2 0 0 0 2 0 1 3EV steps Exposure compensation ISO WHITE BA...

Страница 40: ...urs to appear more natural looking Selecting a White Balance 1 Press the button and then use the UP and DOWN buttons to select the white balance icon The white balance menu bar will appear as shown 2 Use the LEFT and RIGHT buttons to set the white balance to the desired value The value you set will be displayed on the LCD monitor AUTO The camera automatically selects the appropriate white balance ...

Страница 41: ...overwritten White paper Exposure compensation This camera automatically adjusts the exposure according to the ambient lighting conditions You can also select the exposure value by using the button Compensating Exposure 1 Press the button and then use the UP and DOWN buttons to select the exposure compensation icon The exposure compensation menu bar will appear as shown 2 Use the LEFT and RIGHT but...

Страница 42: ...ic focus mark on the object of desired exposure 3 Press the AEL button to lock the exposure and display the AEL icon in the bottom of the LCD 4 Focus the camera again and press the shutter button again for shooting Screen for shooting Focus to the object and press the AEL button Refocus and fully press the shutter button Using the ASM button in the M mode 1 Rotate the MODE DIAL to select the M mod...

Страница 43: ...lease be careful when using the manual focus as the picture can be blurred easily Focus distance of 0 04 0 25m are only supported in the Wide zoom If you take a picture within 0 2m select the Flash off mode as the flash range is 0 2m or farther The focus value displayed in the LCD while manually focusing is measured from the end of the lens INFORMATION Longdistance Close up Manual focusing 1 Press...

Страница 44: ... the MENU button displays the menu on the LCD monitor The menu will not be displayed on the LCD monitor in the following circumstances When another button is being operated While image data is being processed when the green lamp next to the viewfinder blinks When there is no battery capacity INFORMATION Size Menu tab Main menu Sub menu Camera working mode Page 3264X2448 3072X2304 2816X2112 2592X19...

Страница 45: ...p 52 53 p 54 55 p 56 p 57 Sharpness p 51 Menu tab Main menu Sub menu Camera working mode Page Super Fine Fine Normal Multi Spot Single Continuous AEB AFB Soft Normal Vivid Normal B W Sepia Red Green Blue Negative Off Range 1 4 Off 2 4 Part Pano 2 parts Off Frame 1 9 Histogram Save mode Composite Photo Frame Full OSD Basic OSD Highlight TIFF ...

Страница 46: ...nge without prior notice Menu tab Main menu Sub menu Camera working mode Page Myset1 Myset2 Myset3 Myset1 Myset2 Myset2 Off On Load Myset Scene p 58 p 58 p 59 p 60 Stabiliser Save Myset Nightscene Portrait Children Landscape Close up Text Sunset Dawn Backlight Fireworks Beach Snow ...

Страница 47: ...mages INFORMATION Size PROGRAM mode MOVIE CLIP mode 3 Use the UP and DOWN buttons to select a sub menu Press the LEFT or RIGHT button Press the LEFT or RIGHT button Press the UP or DOWN button Press the UP or DOWN button 3264X2448 3072X2304 2816X2112 2592X1944 2272X1704 2048X1536 Size Quality Multi Spot Metering Quality TIFF Super Fine Fine Normal TIFF Super Fine Fine Normal Quality TIFF Super Fin...

Страница 48: ...displayed while saving a TIFF file to the memory card The TIFF file format can t be selected in the Auto mode Though the TIFF menu displays in the LCD monitor in Continuous AEB and AFB shooting mode but can t be selected If you select the TIFF file format the double self timer can t be selected The digital zoom can t be used when you select the TIFF file format This file format complies with the D...

Страница 49: ...s is suitable for general use Spot Only the rectangular area in the centre of the LCD monitor will be metered for light This is suitable when the subject in the centre is exposed correctly regardless of the back lighting PROGRAM mode Multi Spot Metering The default metering mode is Multi pattern metering If the subject is not the centre of the focus area do not use the spot metering as this may re...

Страница 50: ... for saving time is long and hand shaking may occur Selecting the TIFF file format you can t select the Continuous AEB AFB shooting mode When you select the Continuous shooting mode the self timer function will not activate INFORMATION PROGRAM mode AEB You can select the exposure bracket range 0 3EV step 6 steps by rotating the jog dial Three pictures are taken in a series in different exposure va...

Страница 51: ...ffect You can adjust the sharpness of the picture you want to take You cannot check the sharpness effect on the LCD monitor before you take a picture because this function is applied only when the captured image is stored on the memory PROGRAM mode Sub menu Icon Description Vivid Normal Soft The edges of the image are softened This effect is suitable for editing images on your PC The edges of the ...

Страница 52: ...select Continuous AEB or AFB menu the special effect menu will be cancelled automatically You can make the subject stand out from its surroundings The subject will be sharp and in focus while making the rest out of focus 1 Select the PROGRAM MySET Aperture priority Shutter priority or MANUAL modes Then press the menu button 2 Press the LEFT RIGHT button and select the Special Effect menu tab 3 Sel...

Страница 53: ...tor 2 Press the button 3 The colour of focus frame turns white Press the Up Down Left Right button to moves the focus frame position 4 To select the focus frame position press the button again and you can take a picture Pressing the button The frame is activated After changing the frame position Pressing the button Pressing the Up Down Left Right button Capture SH Edit Capture SH Move Capture SH M...

Страница 54: ...ect the MANUAL mode and press the menu button 2 Press the LEFT RIGHT button and select the Special Effect menu tab 3 Select the Composite menu by pressing the UP DOWN button and press the Right button 4 Select a desired sub menu by pressing the UP DOWN button and press the OK button Off cancels the composite shooting 2 Parts 2 different shots are combined in a still image 3 Parts 3 different shots...

Страница 55: ...ot 1 After taking the last shot a cursor to select a frame will display Press the Up Down Left Right button to select the frame 2 Press the button and an image will be deleted Composite frame will be activated 3 Press the Shutter button You can take another images again by using the Up Down Left Right button and button 4 Press the OK button again to save the captured image 9 8 After taking the 4th...

Страница 56: ... the Right button 4 Select a desired sub menu by pressing the UP DOWN button and press the OK button Off The photo frame will not be added 5 Press the menu button twice and the menu will disappear If you select the Frame 1 9 menu the selected photo frame will appear Before taking a picture you can change the frame type by pressing the button Change the frame type by pressing the Up Down Left Right...

Страница 57: ... check the subject by using the LCD checking the histogram will enable more precise exposure control for the shots Pixel Dark Bright Distribution of brightness Idle mode If you select the SAVE MODE and the camera isn t operated during the specified time about 30 SEC the camera power will be idle LCD monitor OFF Camera status lamp Blinking automatically To use the camera again press any of the came...

Страница 58: ...close the menu Loading the saved camera configuration available in the MySET shooting mode 1 Turn the mode dial to select the MySET shooting mode and press the menu button 2 Press the Left Right buttons to select the Load Myset menu tap 3 Press the Up Down buttons to select a MySET slot number to load 4 Press the OK button to set the camera configuration as saved in the MySET slot The current MySE...

Страница 59: ... Portrait without shadows caused by backlight Firework scenes Text Use this mode to shoot a document For ocean lake beach and snowscape scenes When the close up sunset dawn fireworks are selected it is possible that camera shake will occur If this is the case use a tripod to eliminate this In the Children and Close up scene mode the Continuous Automatic Focusing CAF function will be activated and ...

Страница 60: ...tton 2 Select a desired sub menu by pressing the Up Down button and press the OK button Off Movie clip frame stabilizer function becomes disabled On Prevents camera shake during movie recording The recording frame range will become narrower than when you select the Off menu Pre view frames may not display smoothly on the LCD monitor but stored movie clips have no problems When you select the On su...

Страница 61: ...ted in the camera all the camera functions apply only to the internal memory Playing back a still image 1 Select the PLAY mode by pressing the play mode button 2 The last image stored on the memory is displayed on the LCD monitor 3 Select an image that you want to view by pressing the LEFT RIGHT button Press and hold the LEFT or RIGHT button to play back the images quickly Manner mode Pressing the...

Страница 62: ...FT button To fast forward the movie clip press the RIGHT button To stop playback of the movie clip press the play pause button and then press the LEFT or RIGHT button How to capture the movie clip Steps 1 2 are the same as those for playing back a still image 3 Select the recorded movie clip that you want to play back by using the LEFT RIGHT button 4 Press the Play Pause button to play the movie c...

Страница 63: ...ess the T button and a confirmation window will display 8 Select a desired sub menu by pressing the UP DOWN button and press the OK button Trimming The extracted frames are saved as a new file name Cancel The movie trimming will cancel If the running time is under 10 seconds the movie clip can t be trimmed If you want to extract the movie clip at the beginning of the frame press the Zoom T button ...

Страница 64: ...ed on the LCD monitor 4 Press the play pause button to play back a recorded voice file To pause a recorded voice file while playing it back press the play pause button again To resume playback of the voice file press the play pause button To rewind the voice file while it is playing press the LEFT button To fast forward the voice file press the RIGHT button To stop playback of the voice file press...

Страница 65: ... Flash p 35 5 Voice memo p 31 6 Protect p 79 7 DPOF icon p 83 8 Histogram p 57 9 Recording date 2005 08 01 p 97 10 Exposure Value EV 2 0 2 0 p 41 11 ISO 50 400 p 40 12 Shutter speed 15 1 2 000 p 22 23 13 Aperture Value F2 8 F7 7 p 22 23 14 Sharpness p 51 15 TIFF p 48 16 Image size 3264 X 2448 256 X 192 Recording time Movie clip 00 01 30 17 Folder name File name 100 0009 p 94 p 47 ...

Страница 66: ...nlarged view the indicator will not be displayed You can also check the area of enlargement TIFF Movie clips and WAV files can t be enlarged If an image is enlarged a loss of quality may occur Thumbnail Enlargement button You can view multiple pictures enlarge a selected picture and crop and save a selected area of an image Thumbnail display 1 While an image is displayed full screen press the thum...

Страница 67: ...ming menu will disappear If there is little memory space to save the trimmed image the image can t be trimmed Voice memo Up button When the menu is displayed on the LCD monitor pressing the UP button makes the menu cursor move up When the menu is not displayed on the LCD monitor the UP button operates as the voice memo button You can add your voice to a stored still image Adding a Voice Memo to a ...

Страница 68: ...but has the same file name as the still image to which it corresponds If you add a new voice memo to the still image that already has a voice memo the existing voice memo will be erased Play Pause Down button In Play mode the play pause down button works as follows If the menu is displayed Press the DOWN button to move from the main menu to a sub menu or to move down the sub menu cursor If a still...

Страница 69: ...l display OK button When the menu is displayed on the LCD monitor the OK button is used for confirming data that is changed by using the 5 function button Print button When the camera is connected to a PictBridge Printer with supplied USB cable currently displayed image will be printed with the printer s default setting by pressing this button Though the USB menu is set to Computer the camera will...

Страница 70: ...re deleting images from the camera you should protect p 79 or download images p 125 126 132 133 to your computer that you wish to keep INFORMATION Deleting Images in Thumbnail Display Mode 1 Use the Up Down Left Right buttons to select an image to delete 2 Press the Delete button to display the following message in the LCD monitor 3 Select the submenu values by pressing the UP DOWN button and then...

Страница 71: ...rocess How to use the album Selecting the album 1 In the play mode press the MF button 2 Select the Select menu by pressing the Up Down button and press the Right button 3 Select a desired album by pressing the Up Down Left Right buttons and press the OK button Inserting still images into the album 1 Select an album 2 Select the Add menu by pressing the Up Down button and press the Right button Al...

Страница 72: ...utton Remove Removes the selected images from the album Cancel Cancels the removing images The removed images are not deleted from the memory but just removed from the album A4 Select T Set OK A4 A4 Select T Set OK A4 A4 Select Slide Add Remove Remove Remove Cancel Confirm OK Select All Select T Set OK Select T Set OK Select Slide Add Remove Select Slide Add Remove Add Add Cancel Confirm OK 3 Sele...

Страница 73: ...e used for the slide show 3 Select the Start menu by pressing the Up Down button and press the OK button to start the slide show 4 To stop the slide show Press the Play Pause buttn and MENU OK button Playing a desired album 1 Select a desired album and press the OK button 2 Select the Slide menu by pressing the Up Down button and press the Right button You can Select the Start Interval Repeat and ...

Страница 74: ...g up the play menu press the PLAY mode button or shutter button Menu tab Main menu Sub menu Secondary menu Page Start Interval 1 3 5 10sec Repeat Off On p 77 78 Cancel Effect 1 4 Random Select All Pics Select All Pics 3072 X 2304 2816 X 2112 2592 X 1944 2272 X 1704 2048 X 1536 1600 X 1200 1024 X 768 640 X 480 User Image B W Green Effect Sepia Blue p 82 Red Negative Right 90º Left 90º Rotate 180º p...

Страница 75: ...with a USB cable Copy To Card Menu tab Main menu Sub menu Secondary menu Page Standard Select All Pics Cancel DPOF Index No Yes p 83 Size Select All Pics Cancel No Yes Full OSD Image Information OSD Off Save Mode p 86 p 87 Menu tab Main menu Sub menu Secondary menu Page One Pic All Pics No Yes Auto Postcard Card 4X6 L 2L Letter A4 A3 Auto Set Custom Set Images Size p 89 p 90 p 90 OSD Information ...

Страница 76: ...hout prior notice Menu tab Main menu Sub menu Secondary menu Page Auto Full 1 2 4 8 9 16 Index Auto Normal Photo Fastphoto Auto Draft Normal Fine Auto Date Off On Auto File name Off On Standard Index No Yes No Yes Print Custom Set Layout p 91 p 91 p 92 p 90 p 90 DPOF Print Reset Quality Type ...

Страница 77: ...ernal monitor 1 Press the play mode button and press the menu button 2 Press the LEFT RIGHT button and select the Slide menu tab Setting play interval Set the slide show play interval 1 Select the Interval sub menu by pressing the UP DOWN button and press the RIGHT button 2 Use the Up Down buttons to select the desired interval 3 Press the OK button to save the configuration Repeat setting Setting...

Страница 78: ... to select the type of effect Cancel Normal display Effect 1 Image is displayed slowly Effect 2 Image is displayed slowly from the centre outwards Effect 3 Image moves from the top left Effect 4 The image slides diagonally from top left to bottom right Random The image slides irregularly 3 Press the OK button to confirm the setting Start Interval Repeat Effect Cancel Effect 1 Effect 2 Effect 3 Eff...

Страница 79: ...eased is displayed Up Down Left Right Select an image Zoom W T Button Protect release the image Menu Button Your changes will be saved and the menu will disappear All Pics Protect release all saved images Zoom W T Button Protect release the images Menu Button Your changes will be saved and the menu will disappear If you protect an image the protect icon will be displayed on the LCD monitor An unpr...

Страница 80: ...menu tab 3 Select a desired sub menu by pressing the UP DOWN button and press the OK button Select Selection window for an image to delete is displayed Up Down Left Right Select an image Zoom T Button Select the image for deletion mark OK Button Press the OK Button to display the confirmation message Select the Delete menu and press the OK button to delete marked images All Pics Displays confirmat...

Страница 81: ...ormat The resized image will have a new file name The User Image image is stored not on the memory card but on the internal memory Only two User Image images can be saved If you save a new User Image image the existing startup image will be deleted in order If the memory capacity is insufficient to store the resized image a Card Full message will display on the LCD monitor and the resized image wi...

Страница 82: ...ia Captured images will be stored in a sepia tone a gradient of yellowish brown colours Red Captured images will be stored in a red tone Green Captured images will be stored in a green tone Blue Captured images will be stored in a blue tone Negative Save the image in negative mode 4 Press the OK button and then a confirmation window will display Save The image with the effect added will be saved a...

Страница 83: ...nce the playback of the rotated picture is finished it will switch back to the original state 1 Press the play mode button and press the menu button 2 Press the LEFT RIGHT button and select the Rotate menu tab 3 Select a desired sub menu by pressing the UP DOWN button 4 Press the OK button and the rotated image will be displayed If you display the rotated image on the LCD monitor empty spaces may ...

Страница 84: ...T button Select a number of prints Cancel Cancel the print setup 5 Press the OK button to confirm the setting If an image carries DPOF instructions the DPOF indicator will show 1 Press the play mode button and press the menu button 2 Press the LEFT RIGHT button and select the DPOF menu tab 3 Select the Index menu by pressing the UP DOWN button and press the RIGHT button 4 Select a desired sub menu...

Страница 85: ...nge the print size OK button Your changes will be saved and the menu will disappear All Pics Change print size of all saved images W T button Select a print size OK button Confirm the changed setting Cancel Cancel all of the print size settings DPOF Size secondary menu Cancel 3X5 4X6 5X7 8X10 Depending on the manufacturer and print model canceling the printing may take a little longer for the prin...

Страница 86: ...is not enough space available in the memory card to copy saved images in the internal memory 20MB the Copy to Card command will copy only some of the images and display Card Full message Then the system will return to the playback mode Please be sure to delete any unnecessary files to free up space before inserting the memory card into the camera When you move the images that are stored in the int...

Страница 87: ...o see 1 Press the play mode button and press the menu button 2 Select the OSD Information menu tab by pressing the LEFT RIGHT button 3 Select a desired sub menu by pressing the UP DOWN button and press the OK button Full OSD Image Information OSD Off Save Mode OSD Information Exit MENU Move Full OSD Image information OSD Off Save mode LCD off ...

Страница 88: ...tton 3 Press the LEFT RIGHT button and select Setup menu tab 4 Select USB menu by pressing the UP DOWN button and press the RIGHT button 5 Select Printer menu by pressing the UP DOWN button and press the OK button 6 Press the menu button twice and the menu will disappear 7 Use the supplied USB cable to connect the camera to the printer as shown below 8 Turn on the printer to connect the camera to ...

Страница 89: ...eturn to the menu without setting the number of prints The maximum numbers of prints are 100 and if you select the number over 100 Out Of Number message will display 0 141 0001 Setting the Number of Copies to Print Select One Pic or All Pics A screen where you can set the number of copies to print will appear as shown below Prev Next Select pictures to print 1 The Images menu will appear 2 Use the...

Страница 90: ...ptions are not supported in all manufacturer and printer models If not supported the menus are still displayed in the LCD but are not selectable If the setting values are not changed in the automatic manual setting the setting values are automatically kept 1 Use the LEFT and RIGHT buttons to select the Custom Set menu tab 2 Use the UP and DOWN buttons to select the desired submenu value and then p...

Страница 91: ...the Print menu is displayed Number of pictures in an index print varies depends on the printer used Depending on the manufacturer and print model canceling the printing may take a little longer for the printer to process 1 Use the LEFT and RIGHT buttons to select the DPOF Print menu tab 2 Use the UP and DOWN buttons to select the desired submenu value and then press the OK button No Cancel the pri...

Страница 92: ...then press the OK button If No is selected Settings will not be reset If Yes is selected All print and image settings will be reset Default print setting varies depending on the printer manufacturer For your printer s default setting refer to the user s guide that came with your printer Initialises user changed configurations Reset Exit MENU Move No Yes ...

Страница 93: ...gs Menu tab Main menu Sub menu Secondary menu Page Reset Series Power Off Off 1 3 5 10 min p 95 ENGLISH 한국어 FRANÇAIS DEUTSCH ESPAÑOL ITALIANO 日本語 P CCK PORTUGUÊS DUTCH p 96 DANSK SVENSKA SUOMI BAHASA POLSKI Magyar No Yes 05 01 01 13 00 Off yy mm dd dd mm yy mm dd yy Off Imprint Date p 97 Date Time Off Low Medium High File Format Date Time Sound p 94 p 96 p 97 p 98 Language ...

Страница 94: ... file name will be set from 0001 even after formatting deleting all or inserting a new memory card Series New files are named using numbers that follow the previous sequence even when a new memory card is used or after formatting or after deleting all pictures 5 Press the menu button twice and the menu will disappear File name Menus are subject to change without prior notice Menu tab Main menu Sub...

Страница 95: ...playing back a movie clip or during composite shooting INFORMATION Auto power off Setting Power Off 1 In any mode with the exception of Voice Recording mode press the MENU button 2 Press the LEFT RIGHT button and select the Setup menu tab 3 Select the Power Off menu by pressing the UP DOWN button and press the RIGHT button 4 Select a desired sub menu by pressing the UP DOWN button and press the OK...

Страница 96: ... button twice and the menu display will disappear If Yes is selected A Processing message appears and the memory card will be formatted If you ran FORMAT in Play mode a No Image message will appear There is a choice of languages that can be displayed on the LCD monitor Even if the batteries or AC adapter are removed and inserted again the language setting will be preserved Formatting a memory card...

Страница 97: ...include DATE TIME on still images Date Imprinting 1 In any mode with the exception of Voice Recording mode press the MENU button 2 Press the LEFT RIGHT button and select the Setup menu tab 3 Select the Imprint menu by pressing the UP DOWN button and press the RIGHT button 4 Use the UP and DOWN buttons to select the desired date imprint type and then press the OK button Off The DATE TIME will not b...

Страница 98: ...device to which you want to connect the camera using the USB cable Selecting an External Device 1 In any mode with the exception of Voice Recording mode press the MENU button 2 Press the LEFT RIGHT button and select the Setup menu tab 3 Select the USB menu by pressing the UP DOWN button and press the RIGHT button 4 Select a desired sub menu by pressing the UP DOWN button and press the OK button Co...

Страница 99: ...y mode with the exception of Voice Recording mode press the MENU button 2 Press the LEFT RIGHT button and select the Setup menu tab 3 Select the AF Lamp menu by pressing the UP DOWN button and press the RIGHT button 4 Select a desired sub menu by pressing the UP DOWN button and press the OK button If Off is selected The AF lamp will not light up If On is selected The AF lamp will light up If you s...

Страница 100: ...enmark Finland Germany U K Holland Italy Kuwait Malaysia New Zealand Singapore Spain Sweden Switzerland Thailand Norway When using a TV as an external monitor you will need to select the external or AV channel of the TV There will be a digital noise on the external monitor but it is not a malfunction If the image is not in the centre of the screen use the TV controls to centre it When the camera i...

Страница 101: ...ing the selected time 5 Press the menu button twice and the menu will disappear Initialisation All camera menu and function settings will be restored to their default values However values for DATE TIME LANGUAGE and VIDEO OUT will not be changed Initialising the Camera 1 In any mode with the exception of Voice Recording mode press the MENU button 2 Press the LEFT RIGHT button and select the Setup ...

Страница 102: ...p Image 1 In any mode with the exception of Voice Recording mode press the MENU button 2 Press the LEFT RIGHT button and select the Mycam menu tab 3 Select the Start Image menu by pressing the UP DOWN button and press the RIGHT button 4 Select a desired sub menu by pressing the UP DOWN button and press the OK button 5 Press the menu button twice and the menu will disappear Start up image Use a sav...

Страница 103: ...the exception of Voice Recording mode press the MENU button 2 Press the LEFT RIGHT button and select the Mycam menu tab 3 Select the Start Sound menu by pressing the UP DOWN button and press the RIGHT button 4 Select a desired sub menu by pressing the UP DOWN button and press the OK button 5 Press the menu button twice and the menu will disappear You can select the sound that is activated whenever...

Страница 104: ... lots of sand Doing so may result in failure or may permanently render the unit unusable Handling the camera Never drop the camera or subject it to severe shocks or vibrations Prevent the large size LCD monitor from an impact When this camera is not used keep this camera in the camera case Avoid obstructing the lens or the flash when you capture an image This camera is not waterproof To avoid dang...

Страница 105: ...t its performance Rough handling can damage the LCD monitor Take care to avoid damage and keep the camera in its protective carry case at all times when not in use Do not attempt to disassemble or modify the camera Under certain conditions static electricity can cause the flash unit to fire This is not harmful to the camera and is not a malfunction When images are uploaded or downloaded when the c...

Страница 106: ... turn it on again Card Locked ㆍThe memory card is locked SD memory card Slide the write protect switch to the top of the memory card Card Full ㆍThere is insufficient memory capacity to take an image Insert a new memory card Delete unnecessary image files to free up some memory No Image ㆍThere are no images stored on the memory card Take images Insert a memory card that is holding some images File ...

Страница 107: ...sert charged battery ㆍBatteries are inserted incorrectly with the reverse polarities Insert the batteries according to the polarity marks ㆍThe rechargeable battery is not inserted Insert the battery and turn on the camera The camera power ceases while in use ㆍThe batteries are exhausted Insert charged battery ㆍThe Camera is turned off automatically Turn off the camera power and turn it on again Ba...

Страница 108: ...arity marks The camera suddenly stops working while in use ㆍThe camera was stopped due to a malfunction Remove re insert batteries and switch the camera on The images are unclear ㆍA picture was taken within 0 8 m from the subject without setting an appropriate macro mode If the subject is closer than 0 8m select macro shot mode ㆍTaking a picture beyond the flash range Take a picture within the fla...

Страница 109: ...monitor has not been connected properly with the camera Check the connection cables ㆍThere are incorrect files in the memory card Insert a memory card that has correct files When using the PC s explorer the Removable Disk file does not show ㆍCable connection is incorrect Check the connection ㆍThe camera is off Turn the camera on ㆍThe operating system is not Windows 98 98SE 2000 ME XP Mac OS 9 2 10...

Страница 110: ...3EV steps ISO Equivalent Auto 50 100 200 400 Auto Auto Red eye reduction Slow sync Fill in Off Range Wide 0 2 3 0m Tele 0 25 2 0m Recharging Time Approx 7 sec Sharpness Soft Normal Vivid Effect Normal B W Sepia Negative Red Green Blue Auto Daylight Cloudy Fluorescent_H Fluorescent_L Tungsten Custom1 Custom 2 Voice Recording max 1 hour Voice Memo in Still Image max 10 sec Date Imprinting Date Time ...

Страница 111: ...ils Slide show Album organisation Movie clip Editing Trimming Resizing Rotating Digital output connector USB 2 0 Audio Mono Video output NTSC PAL user selectable DC power input connector 3 3V Rechargeable battery Li ion SLB 1137 3 7V 1 130mAh AC Adapter SAC 32 DC 3 3V 2 0A Dimensions W x H x D 106 x 56 4 x 30 5 mm excluding the projecting parts of the camera Weight Approx 162g without batteries an...

Страница 112: ...use ㆍUsing a Hand made PC or a PC and OS that has not been guaranteed by the manufacturer is not covered by the Samsung warranty ㆍBefore reading this manual you should have a basic knowledge of computers and O S Operating Systems System Requirements For Windows For Macintosh Power Mac G3 or later Windows 98 98SE 2000 ME XP Mac OS 9 2 10 3 Minimum 64MB RAM XP 128MB Minimum 64MB RAM 200MB of availab...

Страница 113: ...is not included with the Application CD You can use the camera with Mac OS 9 2 10 3 XviD codec This makes movie clips MPEG 4 recorded with this camera play back on a PC To play back a movie clip recorded with this camera you must install the XviD codec If a movie clip recorded with this camera does not play well install this codec This software is only compatible with Windows If a movie clip can t...

Страница 114: ...ram This software is only compatible with Windows Be sure to check the system requirements before installing the driver You should allow 5 10 seconds for running the automatic setup program according to the capability of your computer If the frame does not show run the Windows Explorer and select Samsung exe in the CD ROM Drive root directory INFORMATION ...

Страница 115: ...n the Auto run frame The camera driver is installed automatically Close other programs before installing the application software Before installing the application software disconnect the USB connection INFORMATION 2 Installation is complete Click the Finish button 3 The Software License Agreement window for DirectX will be displayed If you agree to this select I accept the agreement and click Nex...

Страница 116: ...The screen shot of step 5 can be different from the illustration depending on the system requirements Click Click 6 A windows to check whether the PC has XviD codec or not will display Preview You can check the movie clip display condition Install The XviD codec is installed Cancel The XviD codec is not installed and a window for installing the application softwares will display If you didn t clic...

Страница 117: ...ec is distributed according to the GNU General Public License and everyone can copy distribute and change this codec For more information see the License documents Click 7 If an error listed below takes place during the preview click the Install button to install the XviD codec Only a voice plays back An error message displays and the movie clip does not play back A window shown alongside may disp...

Страница 118: ...other folder click Browse and choose a folder you want Click Click 13 The Select Additional Tasks window will display Select the additional tasks and click the Next button 12 A window will open asking you to choose a folder to which program icons will be added Click Next button If you want to add the program icons to a different folder choose another folder and then click Next button Click Click ...

Страница 119: ...If you select Exit at step 16 the application program installation will be cancelled INFORMATION 16 A window where you can choose the program you want to install will appear Click Install For information on application software please refer to page 113 114 Click 17 The Digimax Master installation window will be displayed as shown alongside Click the Next button Click ...

Страница 120: ...oose a folder you want 21 Click Install I button and Digimax Master starts installing 20 A window will open asking you to choose a folder to which program icons will be added Click Next button If you want to choose another folder click Browse and choose a folder you want If you select Cancel at step 17 a window for installing Digimax Reader will be displayed INFORMATION Click Click Click Click ...

Страница 121: ...the computer will appear 24 A window will open Click the Next button Click 25 The Software License Agreement window will be displayed If you agree to this click Yes the window will then move to the next step If you disagree click No and the installation program will be cancelled 22 Digimax Master installation is successfully completed Click the Finish button to install Digimax Reader The screen sh...

Страница 122: ...fferent from the illustration depending on the system requirements 28 To apply changes you must restart the computer Select Yes I want to restart my computer now and then click the OK button 29 After restarting the computer connect the PC to the camera with the USB cable 30 Turn the camera power on The Found New Hardware Wizard will open and the computer will recognise the camera If your OS is Win...

Страница 123: ...Hardware Wizard will open In this case cancel the Found New Hardware Wizard and disconnect the camera Install the camera driver and connect the camera to the PC again Should the computer not find the camera driver after installation please try one or more of the following measures 1 Delete the camera driver p 127 128 and re install the driver 2 Refer to FAQ p 140 to check for a possible solution t...

Страница 124: ...your PC and then turn on the power the camera will automatically switch to computer connection mode In this mode you can download stored images to your PC through the USB cable The LCD monitor is always turned off in PC mode The camera status lamp will blink when the files are transferring via the USB connection Format Date Time Imprint Sound USB Computer Printer Setup Back Set OK If you selected ...

Страница 125: ...d images You can download the still images stored on the camera to your PC s hard disk and print them or use a photo editing software to edit them 1 Connect the camera to your PC with the USB cable 2 On your computer s desktop display select My computer and double click Removable Disk DCIM 100SSCAM The image files will then be displayed 5 Click a folder where you want to paste the file ...

Страница 126: ...use button and a pop up menu will open Click Paste 7 An image file is transferred from the camera to your PC By using Digimax Master you can see the stored images in the memory directly on the PC monitor and you can copy or move the image files ...

Страница 127: ...iver refer to the process shown below 1 Click Start Settings and click Control Panel 4 Click the OK button The camera is removed from the system 2 Double click System 3 Select Device manager Hard Disk Controller Samsung Digital Camera and click the Delete button Click ...

Страница 128: ... Settings Control Panel and double click Add Remove programs 6 The Add Remove Programs Properties window will open Click Digimax V800 and click the Add Remove button 7 Uninstallation is complete Click the Finish button and the window will disappear Click Click ...

Страница 129: ... view them Opening images directly from the removable disk may be subject to unexpected disconnection When uploading images from the PC to the camera ensure that the uploaded file names are not the same as those already stored on the memory When you upload a file that is not taken by this camera to the Removable Disk the File Error message will be displayed on the LCD monitor in the PLAY mode and ...

Страница 130: ... status lamp blinks you have to wait until the lamp illuminates Windows 98SE 1 Check whether the camera and PC are transferring a file If the camera status lamp blinks you have to wait until the lamp illuminates 2 Unplug the USB cable 3 The Unplug or Eject Hardware window will open Select the USB Mass Storage Device and click the Stop button 4 The Stop a Hardware device window will open Select the...

Страница 131: ...iver for MAC 1 Double click a new icon on the desktop and the folder in the memory will be displayed 2 Select an image file and copy or move it to MAC For Mac OS 10 0 or later First complete uploading from computer to camera and then remove the removable disk with the Extract command If a movie clip can t play back on the Mac OS please visit the following site http www divx com divx mac and downlo...

Страница 132: ...max Master Downloading images 1 Connect the camera to your PC 2 A window for downloading images will display after connecting the camera and your PC To download the captured images select the Select All A button Select desired folder in the window and click the Select All A button You can save captured images and selected folder If you click the Cancel button downloading will be cancelled 3 Click ...

Страница 133: ...e and images will be downloaded Folder name will be made as you want and images will be downloaded After selecting a folder that was made before images will be downloaded 5 Click Next N button 6 A window will open as shown alongside The destination of the selected folder will be displayed on the upper side of the window Click the Start button to download the images Click Click ...

Страница 134: ...in this window Media type selection menu You can select image viewer image edit and movie edit functions in this menu Preview window You can preview a image or a movie clip and check the multi media information Zoom bar You can change preview size Folder display window You can see the folder location of the selected image Image display window Images of the selected folder are displayed Refer to th...

Страница 135: ...You can modify image quality See the Help menu Retouch You can change image or insert effects on the image See the Help menu Drawing tools Tools for editing an image Image display window a selected image displays in this window Preview window You can preview the changed image A still image edited with Digimax Master can t be played back on the camera Refer to the Help menu in Digimax Master for fu...

Страница 136: ...t Set Text You can insert texts Narrate You can insert a narration Produce You can save the edited multi media as a new file name Frame display window You can insert multi media in this window You can select AVI Windows media wmv Windows media asf and movie clip for this camera avi MPEG 4 file types Frame display window You can insert multi media in this window Some movie clips that was compressed...

Страница 137: ...electing the width and height of the frame Frame rate Selecting the frame rate per second File location Selecting a location where the edited movie is saved File name To play back the movie on the camera you must keep the DCF rule Save the movie as SV20XXXX avi You can input any numbers between 0001 9999 instead of XXXX letters 4 Connect the camera to the computer with the included USB cable 5 Cop...

Страница 138: ...ax Reader The following screen will appear How to use the Digimax Reader 1 Connect the camera and the PC with a USB cable and download the images that were stored in the camera to the PC Please see page 125 126 for details on Connecting a camera and PC Downloading images 2 Run the Digimax Reader 3 Click the Open icon as shown alongside 4 Select the image you want to save as a text file Only an ima...

Страница 139: ...ction as a text click the Save icon A window as shown alongside will be displayed To get an image that can be recognised as a text Keep a distance that you can capture the image clearly between the subject and the camera The subject needs to be centered Seek to avoid camera shake to get a good image Refer to the Help menu in Digimax Reader for further information INFORMATION 9 Select the file type...

Страница 140: ...and then turn on the camera Case 5 There is an unexpected error during file transfer Turn the camera power off and on again Transfer the file again Case 6 How do I know my computer supports a USB Interface Check the USB port in your computer or keyboard Check the OS version A USB Interface is available in Windows 98 98SE 2000 ME XP Check Universal Serial Bus controllers in Device Manager Carry out...

Страница 141: ... and connect only one USB cable to the camera Case 9 When I open the Device Manager by clicking Start Settings Control Panel Performance and Maintenance System Hardware Device Manager there are Unknown Devices or Other Devices entries with a yellow question mark beside them or devices with an exclamation mark beside them Right click on the entry with the question or exclamation mark and select Rem...

Страница 142: ...ee Download button located at the upper right side of the page and a window for downloading the DivX codec will display 3 Select Mac OS you use and click the Download button Save it on a folder you want to 4 Run the downloaded file and the codec for playing back the movie clip will be installed If a movie clip can t play back on the Mac OS use a media player that supports XviD codec Mplayer VLC Vi...

Страница 143: ...e and re start the PC The Legacy USB Support is in the BIOS setup menu The BIOS setup menu differs from the PC manufacturers and some BIOS menus don t have Legacy USB Support If you can t change the menu by yourself contact to the PC manufacturer or BIOS manufacturer If the movie clip can t be deleted removable disk can t be extracted or an error message displays during the file transfer If you in...

Страница 144: ...only UKServiceHotline 01932455320 www samsungcamera co uk SAMSUNGOPTO ELECTRONICSGMBH AMKRONBERGERHANG6 D 65824SCHWALBACH TS GERMANY TEL 49 0 6196665303 FAX 49 0 6196665366 www samsungcameras de SAMSUNGFRANCES A S BP51TOURMAINEMONTPARNASSE 33 AV DUMAINE 75755 PARISCEDEX15 FRANCE HOTLINEPHOTONUMÉRIQUE 0080022263727 NuméroVert AppelGratuit TEL 33 1 4279 2200 FAX 33 1 4538 6858 www samsungphoto fr SA...

Отзывы: