background image

83

You can change the imprinted time.

READY

Time set

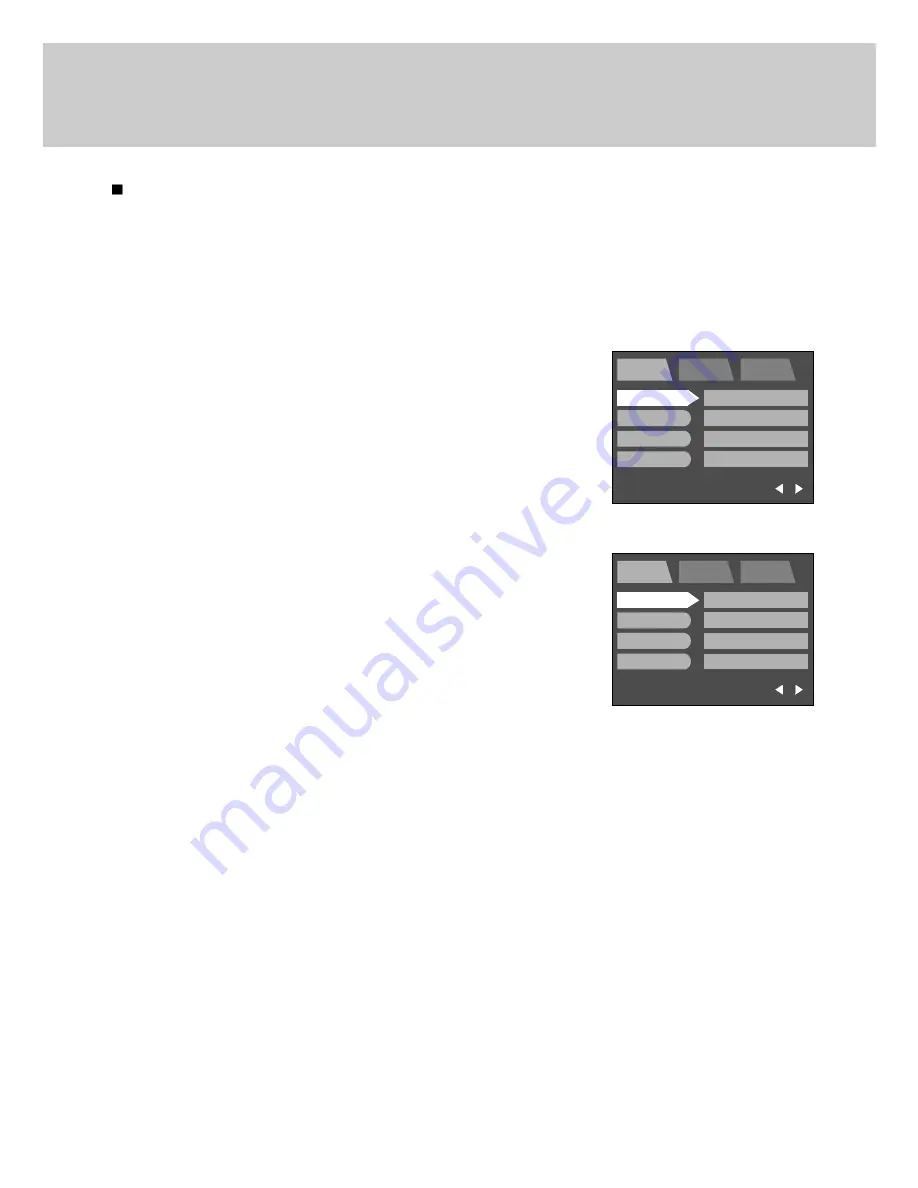
1. Press the menu button and press the RIGHT button to select [SETUP](Second) tab.

2. Press the DOWN and the cursor will be shifted to the main menu.

3. Select [FORMAT] menu by pressing the UP/DOWN button.

4. Press the DOWN button on the [FORMAT] menu and the next menu page will be displayed.

5. Select [TIME SET] menu by pressing the UP/DOWN button.

6. Press the RIGHT button and the cursor will shift to the [TIME

SET] sub menu. Select the desired sub menu by pressing the

UP/DOWN button.

RIGHT button : selects HOUR, MINUTE, AM/PM item.

UP/ DOWN button : changes the value of each item.

7. Press the OK button to confirm the setting.

Press the menu button twice and the menu display will be

disappeared.

EXIT : MENU

PORTRAIT

SETUP

MyCAM

PAGE :

SIZE

QUALITY

METERING

SHOOTING

L 2272X1753

FINE

MULTI

SINGLE

EXIT : MENU

PORTRAIT

SETUP

MyCAM

PAGE :

SIZE

QUALITY

METERING

SHOOTING

L 2272X1753

FINE

MULTI

SINGLE

Содержание DIGIMAX V4

Страница 1: ...driver that is contained in the Application S W CD ROM p 39 Take a picture p 29 100 Insert supplied USB cable into PC USB port and the camera USB connection terminal p 50 Check the camera power If the power is turned off slide the camera switch to power it on p 38 Open Window s EXPLORER and search Removable Disk p 100 Take a picture Insert USB cable Check the camera power Check Removable Disk ...

Страница 2: ...ANGER DANGER indicates an imminently hazardous situation which if not avoided will result in death or serious injury WARNING WARNING indicates a potentially hazardous situation which if not avoided could result in death or serious injury CAUTION CAUTION indicates a potentially hazardous situation which if not avoided may result in a minor or moderate injury NOTICE NOTICE indicates a factor which i...

Страница 3: ...ra from its power source Do not fire the flash while it is in contact with hands or objects Do not touch the flash after using it continuously It may cause burns Do not move the camera while it is switched on if you are using the AC Power Adapter After use always switch off the camera before unplugging the adapter from the AC Power wall socket Then make sure that any connector cords or cables to o...

Страница 4: ...mperatures may adversely affect the camera s internal components and could cause a fire When in use do not cover the camera or AC Power Adapter This may cause heat to build up and distort the camera body or cause a fire Always use the camera and its accessories in a well ventilated area For safety reasons keep this product and accessories out of reach of children or animals to prevent accidents e ...

Страница 5: ...f explosion Should any form of liquid or a foreign object enter the camera do not use it Switch off the camera and then disconnect the power source batteries or AC Power Adapter You must contact your dealer or Samsung Camera Service Center Do not continue to use the camera as this may cause a fire or electric shock Do not insert or drop metallic or inflammable foreign objects into the camera throu...

Страница 6: ...rence in commercial installation This equipment generates absorbs and can emit radio frequency energy If it is not installed and used in accordance with the instructions it may cause harmful interference to radio communication There is however no guarantee that interference will not occur in a some situations Should any interference occur when this device is in operation please try one or more of ...

Страница 7: ... BE USED FOR Printing images using a dedicated printer DPOF compatible printer or DPOF equipped photo lab p 74 p 76 Down loading image files from camera to computer p 85 p 90 Editing images on a PC p 81 Viewing images on TV p 86 ...

Страница 8: ...h h h h h h h h h h h Insert ng mages d rect y nto any e ectron c document Tak ng a se f portra t and us ng the mage to persona ze name cards You can even create your own un que g ft wrap paper by us ng your d g ta mages Creat on of a d g ta photo a bum g h h h h g h h g h g h g g g g g g g g g g g g h g g h h h h h h h h h h h h h h h h h h h h h h h h h h h h h h h h h h h h h h h h h h h h h h ...

Страница 9: ...before using this product Manufacturer s contents Digital camera Pouch AV USB cable Camera strap Product warranty User manual Applications S W Driver CD ROM Adobe Element SD memory card AC Adapter Rechargeable battery Battery charger Cigar jack for car ...

Страница 10: ... 27 Autofocus indicator lamp Green Flash indicator lamp Red Mode dial p 30 Mode dial Lamp WIDE THUMBNAIL button p 36 p 64 5 function button TELE Digital zoom button p 36 p 64 Speaker MENU OK button p 44 p 67 LCD monitor Tripod socket PLAY mode button p 47 DC input connection point USB AV connection terminal PLAY PAUSE button p 46 MF DELETE button p 46 LCD INFROMATIO N button p 33 p 63 Flash Strap ...

Страница 11: ...nction button FLASH LEFT button p 37 p 37 MACRO SUPER MACRO DOWN button p 39 p 44 p 67 SELF TIMER REMOTE RIGHT button p 37 p 37 p 37 Voice memo UP button p 38 p 66 p 44 p 67 Memory card slot Memory card slot Memory card cover Battery chamber cover ...

Страница 12: ...peration easier minimum camera settings need in this mode like image size for printing memo and e mail PROGRAM Program mode In program mode you can take a properly exposed photograph Moreover you can set camera setting except aperture and shutter speed PORTRAIT Portrait mode This is used for only portrait or both portrait and landscape shots NIGHT Night mode This mode is used at night or against a...

Страница 13: ...p mode A movie clip can be recorded as long as the available recording time allows Image size and type are listed below Image size QVGA 320 x 240 File type AVI MySET User set mode You can set your preferences and save them in this mode There are 3 kinds of user set mode VOICE RECORDING Voice recording mode You can record your voice in this mode ...

Страница 14: ...ition indicator There are 3 indicators for battery condition that are displayed on the LCD monitor The batteries are fully charged Prepare new batteries There is no battery capacity Replace with new batteries OPEN OPEN O2 6K O 2 6K O2 6K O 2 6K O2 6K O2 6K O2 6K O2 6K O2 6K O 2 6X O 2 K O26 2 6X O 2 X O 2 X O 2 X O26 2 X X K 6K 6K 6K 6K 6K 6X X X X X X X 1 L X 1 L 1 L 1 L 1 L 1 L 1 L 1 L 1 L 1 L 1...

Страница 15: ...r Low temperatures below O can affect the performance of the batteries and you may experience reduced battery life Batteries will normally recover at normal temperatures Do not use old and new batteries at the same time During extended use of the camera the camera body may become warm This is perfectly normal If you are planning to use this camera for long periods of time it is advisable to use an...

Страница 16: ...ff the power before taking the AC adapter out of the mains supply As with all mains powered devices safety is important Ensure that neither the camera nor adapter comes into contact with water or metallic materials Please ensure that you use an AC adapter with the correct specification for the camera Failure to do so may affect your warranty Attaching the strap To prevent accidental damage to the ...

Страница 17: ... not fit check that it is inserted correctly Do not force the memory card 2 Insert the memory card all the way into the memory card slot The Label stuck to the memory card and the front side of the camera should face in the same direction The memory card pins and the LCD monitor should face in the same direction 1 Turn off the camera power and pull the memory card cover in the direction of the arr...

Страница 18: ...f the SD memory card the data will be protected By sliding the switch to the top of the SD memory card the data protection will be canceled Check the switch position before taking an image When using a 32MB SD memory card the specified shooting capacity will be as follows These figures are intended as an indication of expected performance These figures are approximate as image capacities can be af...

Страница 19: ...to come into contact with any liquid Should this happen clean the memory card with a soft cloth Please keep the memory card in its case when not in use During and after periods of extended use you may notice that the memory card is warm This is perfectly normal Preserving the memory card data If the memory card is subjected to any of the following the recorded data may become corrupted When the me...

Страница 20: ...essing the RIGHT button 1 Turn on the power and press the MENU OK button The recording mode menu will be displayed in the RECORDING mode and the play mode menu will be displayed in the PLAY mode There is no associated menu in VOICE RECORDING mode INFORMATION Date setting range 2003 01 01 2050 12 31 Leap years and months are corrected automatically The default is 2003 01 01 EXIT MENU PORTRAIT SETUP...

Страница 21: ...MONTH DAY item UP or DOWN button changes the value of each item NOTICE If the batteries are removed the date and time settings will remain for approximately 1 hour If the batteries are removed for a period longer than 1 hour it may be necessary to reset the date and time EXIT MENU PORTRAIT SETUP MyCAM PAGE SIZE QUALITY METERING SHOOTING L 2272X1753 FINE MULTI SINGLE EXIT MENU PORTRAIT SETUP MyCAM ...

Страница 22: ... menu will be displayed in the PLAY mode There is no associated menu in VOICE RECORDING mode 2 Select SETUP tab by pressing the RIGHT button Press the UP or DOWN utton and select LANGUAGE 3 Shift the cursor to the LANGUAGE sub menu by pressing the RIGHT button and select language that you want by pressing the UP or DOWN button 4 Press the MENU OK button to confirm the setting To return to the main...

Страница 23: ...25 Recording mode ...

Страница 24: ... shots remaining 15 Recording time while recording a movie clip 0 01 40 hour minute second 5 Image size Continuous shot p 49 p 54 6 Image quality p 50 7 Sharpness p 58 8 White Balance p 56 9 Date Time 12 00 pm 2003 01 01 p 10 focus p 45 11 Exposure Aperture Shutterspeedcompensation p 46 12 ISO p 55 13 Metering p 53 14 Macro Super macro p 39 15 Voice memo p 36 16 Self timer remote p 42 17 Flash p 4...

Страница 25: ...xt to the viewfinder If the camera is in focus when you press the shutter button halfway the green LED will light up and you can take an image If the camera can focus on the subject the autofocus frame in the center of the LCD monitor will change from white to green If the red lamp lights up the flash can fire If the red lamp blinks the flash is being charged When an image is being stored onto the...

Страница 26: ...e Recording a Movie clip Steps from 1 4 are the same as those for recording a still image 1 Select the MOVIE CLIP mode by rotating the mode dial 2 Point the camera towards the subject and compose the image by using either the viewfinder or LCD monitor 3 Press the shutter button to take a movie clip Press the shutter button once and movie clips are recorded for as long as the available recording ti...

Страница 27: ... As there can be some differences between what is seen through the Viewfinder and the resulting image when taken at a range closer than 1 5m it is recommended that you use the LCD monitor to compose the shot Using the LCD monitor extensively will drain the batteries We recommend turning off the LCD monitor and using the optical viewfinder as often as possible in order to extend battery life Under ...

Страница 28: ...VIE CLIP USER SET VOICE RECORDING mode In EASY PROGRAM PORTRAIT NIGHT SCENE A S M USER SET mode Pressing the shutter button down halfway activates the autofocus and checks the condition of the flash Pressing the shutter down fully takes the image and stores the relevant data regarding the shot In MOVIE CLIP VOICE RECORDING mode Pressing the shutter down fully takes the movie clip or records the vo...

Страница 29: ...tical zoom 1X Pressing the TELE button Pressing the TELE button Optical zoom 3X Digital zoom 1 1X Used for digital or optical zooming in out This camera has a 3X optical zoom and a 4 X digital zoom function Using both will offer a total zoom ratio of 12 X When you press the zoom W T button the zoom bar will display in the upper centre of the LCD monitor Zoom TELE Optical zoom TELE Press zoom butto...

Страница 30: ...ill proceed to reduce the optical zoom until the minimum setting is reached NOTICE Take care not to touch the lens to avoid taking a dim image and camera malfunction If the image is dim turn the camera power off and turn on again to modify the lens position Take care not to press the lens as this may cause camera malfunction When the camera is turned on take care not to touch the camera moving par...

Страница 31: ... the LCD monitor pressing the UP button makes the menu cursor move up or change the sub menu value When the menu is not displayed on the LCD monitor the UP button operates as the voice memo button You can add your voice to a stored still image Recording a voice memo 1 Rotate the mode dial to the RECORDING except MOVIE CLIP VOICE RECORDING mode 2 Press the VOICE MEMO button If the voice memo indica...

Страница 32: ...CORDING except MOVIE CLIP VOICE RECORDING mode 2 Press the MACRO button The macro indicator will be displayed on the LCD monitor Press the MACRO button until the desired FLASH mode indicator displays on the LCD monitor 3 Take a picture with the desired macro mode 161 161 Selecting the macro mode Selecting the super macro mode NOTICE The super macro can be activated only in wide zoom mode You canno...

Страница 33: ... the camera shaking When the super macro is selected the flash mode is changed to Flash off automatically LEFT FLASH button When the menu is displayed on the LCD monitor pressing the LEFT button makes the cursor shift to the main menu When the menu is not displayed on the LCD monitor the LEFT button operates as the FLASH button Selecting the flash mode 1 Rotate the mode dial to the RECORDING excep...

Страница 34: ...the red eye reduction function The flash fires regardless of available light The intensity of the flash will be controlled according to theprevailingconditions Thebrighterthebackgroundorsubjectis thelessintensetheflashwillbe The flash will operate in conjunction with a slow shutter speed in order to obtain the correct exposure We recommend using a tripod When you take an image in a low light condi...

Страница 35: ... to recharge it FLASH button Flash mode setting Camera working mode Setting marked camera working mode is the default setting EASY Red eye reduction Off PROGRAM Auto Red eye reduction Fill in Slow synchro Off PORTRAIT Red eye reduction Fill in Off NIGHT SCENE Slow synchro Off A S M USER SET Off Fill in Slow synchro MOVIE CLIP Flash off Fixed VOICE RECORDING Not Available Normal focus MACRO ISO Aut...

Страница 36: ...the shutter button will allow an interval of ten seconds before the image is taken After that the self timer is cancelled Selecting the remote mode The remote control sensor will blink at 2 seconds intervals Pressing the shutter button in the remote controller will allow an interval of 2 seconds before the image is taken In the remote mode you cannot use the shutter button 161 161 Selecting the se...

Страница 37: ... 2second intervals If you operate the Power switch Mode dial and Self timer button during the self timer operation the self timer function is cancelled Use a tripod to prevent from the camera shaking Self timer remote mode setting Camera working mode Setting marked camera working mode is the default setting EASY Off 10s self timer Remote PROGRAM PORTRAIT NIGHT SCENE A S M USER SET MOVIE CLIP Off R...

Страница 38: ...NU button MEMU button When you press the MENU button a menu related to each camera mode will be displayed on the LCD monitor Pressing it again will return the LCD to the initial display A menu option can be displayed when the following are selected EASY PROGRAM PORTRAIT NIGHT SCENE A S M MOVIE CLIP and USER SET There is no menu available when the VOICE RECORDING mode is selected OK button When the...

Страница 39: ...ge zoom Pressing the DOWN button focus into a close range Release the MF button and the MF bar will disappear If you change the focus value the MF indicator will be displayed at the bottom of the LCD monitor INFORMATION If you didn t change the focus value while you pressing the MF button the auto focus is activated You can s use the manual focus function in the EASY and VOICE RECORDING mode The M...

Страница 40: ...posure value by pressing the LEFT RIGHT button Aperture priority mode A While pressing the button select the desired aperture value by pressing the UP DOWN button While pressing the button select the desired exposure value by pressing the LEFT RIGHT button Shutter priority mode S While pressing the button select the desired shutter speed by pressing the UP DOWN button While pressing the button sel...

Страница 41: ...mage will be darker The aperture value Av or shutter speed Tv can be selected according to the P A S M mode in the USER SET mode Decreasing or increasing the exposure value may lead to images being under or over exposed too dark or too bright Manual mode M While pressing the button select the desired shutter speed by pressing the UP DOWN button While pressing the button select the desired aperture...

Страница 42: ...UTO 100 200 400 EASY PROGRAM PORTRAIT NIGHT SCENE A S M USER SET 1 2 3 PROGRAM PORTRAIT NIGHT SCENE A S M USER SET 1 2 3 USER SET 1 2 3 A S M USER SET 1 2 3 PROGRAM PORTRAIT A S M USER SET 1 2 3 PROGRAM A S M MOVIE CLIP EASY PROGRAM USER SET 1 2 3 of prints 0 0 EV PROGRAM A S M USER SET 1 2 3 Using the LCD monitor to adjust the camera Recording functions can be changed by using the LCD monitor In ...

Страница 43: ...3 PROGRAM A S M MOVIE CLIP USER SET 1 2 3 INFORMATION The menu will not be displayed on the LCD monitor in the following circumstances When another button is being operated While image data is being processed when the green LED next to the viewfinder blinks When there is no battery capacity When the menu is showing on the LCD monitor it is not possible to operate the shutter button i e take an ima...

Страница 44: ...etting press the LEFT button 6 Press the OK button to confirm the setting Press the menu button twice and the menu display will be disappeared RECORDING mode EXIT MENU PORTRAIT SETUP MyCAM PAGE SIZE QUALITY METERING SHOOTING L 2272X1753 FINE MULTI SINGLE SETUP mode EXIT MENU PORTRAIT SETUP MyCAM PAGE SIZE QUALITY METERING SHOOTING L 2272X1753 FINE MULTI SINGLE MyCAM mode EXIT MENU PORTRAIT SETUP M...

Страница 45: ... pressing the UP DOWN button PRINT taking a picture for printing 2272 X 1504 Super fine MEMO taking a picture for web site image 1120 X 840 Fine E MAIL taking a picture for e mail 544 X 408 Normal PROGRAM PORTRAIT NIGHT SCENE A S M MySET 1 2 3 mode Select the desired sub menu by pressing the UP DOWN button 2272x1704 LARGE 2272x1504 PHOTO 1120x840 MEDIUM 544x408 SMALL INFORMATION A large image uses...

Страница 46: ...will be displayed on the LCD monitor This file format complies with DCF Design rule for Camera File system Even though the camera is restarted the quality setting is maintained Even though the camera is restarted the quality setting is maintained When using the 32MB SD memory card the specified shooting capacity will be as follows These figures are intended as an indication of expected performance...

Страница 47: ... speed automatically to make proper exposure value Shutter priority S You can select the shutter speed in this mode The camera calculates the best aperture value automatically to make proper exposure value Manual M You can select the shutter speed and the aperture value in this mode EXIT MENU PORTRAIT SETUP MyCAM PAGE SIZE QUALITY METERING SHOOTING L 2272X1753 FINE MULTI SINGLE INFORMATION After p...

Страница 48: ...hile pressing the button select the desired shutter speed by pressing the UP DOWN button To change the exposure value press the LEFT RIGHT button with pressing the button Point the camera towards the subject and compose the image and take a picture Manual mode M You can select the shutter speed and the aperture value in this mode While pressing the button select the desired shutter speed by pressi...

Страница 49: ...pattern metering Exposure will be calculated based on an average of the light available in the image area However the calculation will be biased towards the centre of the image area Spot metering Use this function when there is backlight or when photographing a subject that has little contrast In backlighting conditions adjust the light metering to suit the subject matter INFORMATION The default m...

Страница 50: ...terrupt this funtion The maximum number of shots in a sequence is governed by the image settings Using a 32MB SD memory card the specified shooting capacity will be as follows These figures are intended as an indication of expected performance Quality Size Large Photo Medium Small TIFF 1 1 N A N A N A N A Super fine 4 1 3 3 14 59 Fine 8 1 6 7 28 99 Normal 16 1 10 11 42 99 EXIT MENU PORTRAIT SETUP ...

Страница 51: ...enu by pressing the UP DOWN button 4 Press the DOWN button on the SHOOTING menu and the next menu page will be displayed 5 Select ISO menu by pressing the UP DOWN button Press the OK button to confirm the setting Press the menu button twice and the menu display will be disappeared Take a picture 6 Press the RIGHT button and the cursor will shift to the ISO sub menu Select the desired sub menu by p...

Страница 52: ... sub menu Press the OK button to confirm the setting Press the menu button twice and the menu display will be disappeared Take a picture Select the desired sub menu by pressing the UP DOWN button AUTO The camera automatically selects the appropriate white balance settings depending on the prevailing lighting conditions DAYLIGHT For taking images outside CLOUDY For taking images under a cloudy and ...

Страница 53: ... the SHOOTING menu and the next menu page will be displayed 5 Select EFFECT menu by pressing the UP DOWN button 6 Press the RIGHT button and the cursor will shift to the EFFECT sub menu 7 Select the desired sub menu by pressing the UP DOWN button NORMAL No effect is added to the image B W Converts the image to black and white sRGB sRGB is device independent standard color model Devices supporting ...

Страница 54: ...nd the cursor will shift to the SHARPNESS sub menu 7 Select the desired sub menu by pressing the UP DOWN button SOFT This gives smooth edges and the final image will have a soft appearance NORMAL This setting will give a standard finish to the final image HARD This will give the image a crisp and clear appearance Press the OK button to confirm the setting Press the menu button twice and the menu d...

Страница 55: ...u 5 Select the desired sub menu by pressing the UP DOWN button Press the OK button to confirm the setting Press the menu button twice and the menu display will be disappeared Take a picture To apply this function to the camera change the MySET mode menu or press the DOWN button and select the CHANGE menu Refer to the CHANGE menu You can select your favorite menus and save them in this menu Main me...

Страница 56: ...enu by pressing the UP DOWN button 6 Press the OK button to confirm the setting Press the menu button twice and the menu display will be disappeared Take a picture Selecting NO The MySET memu will not be changed Selecting YES You can change your favorite menus Refer to page 30 50 for information about the menus P A S M in the main menu stands for Program mode P Aperture priority A Shutter priority...

Страница 57: ...59 Play mode ...

Страница 58: ...n the memory is displayed on the LCD monitor 3 Select an image that you want to play back by pressing LEFT RIGHT button Playing back a still image INFORMATION Even though the camera power is off you can start the play mode by pressing the play mode button The LCD monitor will remain in operation until the camera is switched off in PLAY mode The menu will not display on the LCD monitor under the fo...

Страница 59: ... the play pause button and the movie clip will restart To stop play back press the LEFT RIGHT button 161 Playing back a recorded voice Steps from 1 2 are the same as those to play back a still image 1 Select the recorded voice that you want to play back by using the LEFT RIGHT button If you select a recorded voice file the voice indicator will be displayed on the LCD monitor 2 Press the play pause...

Страница 60: ...y mode p 62 2 Battery p 18 3 Running time movie clip p 37 4 Image enlargement p 37 5 DPOF indicator p 74 6 Protect indicator p 72 7 Voice memo p 66 8 Voice recording p 161 161 SIZE 1280X1240 ISO AUTO TV 1 60 AV F3 0 DATE 2000 02 12 SIZE 1280X1240 image size ISO AUTO ISO sensitivity TV 1 60 shutter speed AV F3 0 aperture value DATE 2002 01 31 recording date ...

Страница 61: ...s the 5 function button to move to desired image To view an image separately press the enlargement button Information button The last image stored on the memory is displayed on the LCD monitor Pressing the LCD button in the PLAY mode will change the display as shown below 161 161 Image OSD Pressing the information button Pressing the information button Pressingthe information button Image only Ima...

Страница 62: ... Select YES or NO by pressing the LEFT RIGHT button and press the OK button Selecting YES a trimmed image that has the last file name will be displayed on the LCD monitor Selecting NO an initial image will be displayed INFORMATION The maximum enlargement rate in proportion as the image size If an image is enlarged enlargement indicator will be displayed in the bottom left of the LCD monitor Photo ...

Страница 63: ...be stopped by pressing the shutter button again INFORMATION A voice can s be recorded in the movie clip and voice recording file When you press the shutter button to stop the sound recording press the shutter button halfway and the buzzer sound will not be recorded 40cm between you and the camera microphone is the best distance to record a sound When the menu is displayed on the LCD monitor pressi...

Страница 64: ...e RIGHT button makes the cursor shift to the sub menu INFORMATION The menu will not be displayed on the LCD monitor in the following circumstances When another button is being operated While image data is being processed when the green LED next to the viewfinder blinks When there is no battery capacity MENU OK button MENU button When you press the MENU button the play mode menu will be displayed o...

Страница 65: ...mage if you want to keep it 3 a message as shown alongside will be displayed on the LCD monitor 4 To cancel the deletion press the LEFT button Press the OK button and a message as shown alongside will be displayed on the LCD monitor Select YES or NO by pressing the LEFT RIGHT button and press the OK button Selecting YES Once an image has been deleted the previous image in the sequence will appear ...

Страница 66: ...ingle image display When the image is playing the play pause button power switch and mode dial can be activated When the image is paused the left right button power switch and mode dial can be activated 3 Pressing the OK button activates the following If an image is showing but there is no sound or movement plays the sound clip or start the movie clip If the image is playing The progress is paused...

Страница 67: ...TECT ONE IMAGE UNLOCK LOCK ALL IMAGES UNLOCK LOCK RESIZE 1024 768 640 480 320 240 LOGO DELETE ALL NO YES STD ONE IMAGE ALL INDEX PRINT NO YES CANCEL STANDARD INDEX 0 10 SEC 0 30 PRINTS 0 30 PRINTS PLAY mode functions can be changed by using the LCD monitor In the PLAY mode pressing the MENU button displays the menu on the LCD monitor ...

Страница 68: ... menu 5 Select the desired sub menu by pressing the UP DOWN button If you select 1 10SEC you can select the REPEAT secondary menu Select 1 10SEC and press the RIGHT button and the cursor shift to the secondary menu Select the desired menu by pressing the UP DOWN button ON Even though a cycle from the first image to the last image is completed the slide show doesn t stop OFF If a cycle is completed...

Страница 69: ...yed on the LCD monitor is protected or unprotected Select LOCK or UNLOCK by pressing the UP DOWN button and press the OK button If you need to protect the other image press the LEFT RIGHT button Press the shutter button and the menu will be disappeared ALL PICS All of the stored images are protected or unprotected Select LOCK or UNLOCK by pressing the UP DOWN button and press the OK button Press t...

Страница 70: ...es can s be resized The resized image will have a new file name EXIT MENU PORTRAIT SETUP MyCAM PAGE SIZE QUALITY METERING SHOOTING L 2272X1753 FINE MULTI SINGLE 1 Press the play mode button and select an image that you want to resize by pressing the LEFT RIGHT button 2 Press the menu button 3 Press the DOWN and the cursor will be shifted to the main menu 4 Select RESIZE menu by pressing the UP DOW...

Страница 71: ...tton 4 Press the RIGHT button and the cursor will shift to the SIZE sub menu 5 Select the desired sub menu by pressing the UP DOWN button 6 Press the OK button to confirm the setting Press the menu button twice and the menu display will be disappeared Selecting NO The display is returned to the initial menu Selecting YES PLEASE WAIT message will display and all the unprotected images are deleted I...

Страница 72: ...S Specifying the number of copies from all images except for movie clips and voice recording file 9 Press the OK button and a display to select the quantity will display on the LCD monitor 10 Select the print quantity by pressing the LEFT RIGHT button 11 Press the OK button to confirm the setting INFORMATION DPOF Digital Print Order Format allows you to embed printing information on your memory ca...

Страница 73: ...he main menu 3 Select DEL ALL menu by pressing the UP DOWN button 4 Press the DOWN button on the DEL ALL menu and the next menu page will be displayed 5 Select INDEX menu by pressing the UP DOWN button 6 Press the RIGHT button and the cursor will shift to the INDEX sub menu 7 Select the desired sub menu by pressing the UP DOWN button 8 Press the OK button to confirm the setting Press the menu butt...

Страница 74: ...2 Press the DOWN and the cursor will be shifted to the main menu 3 Select DEL ALL menu by pressing the UP DOWN button 4 Press the DOWN button on the DEL ALL menu and the next menu page will be displayed 5 Select CANCEL menu by pressing the UP DOWN button 6 Press the RIGHT button and the cursor will shift to the CANCEL sub menu 7 Select the desired sub menu by pressing the UP DOWN button STANDARD P...

Страница 75: ...SIAN GERMANY SPANISH FORMAT NO YES DATA SET p 23 TIME SET 12 00 AM PM p 23 D TYPE YY MM DD MM DD YY DD MM YY IMPRINT OFF DATE DATE TIME SOUND ON OFF LCD LOW NORMAL HIGH VIDEO NTSC PAL Q VIEW DEL ANSWER OFF DEL ANSWER ON In this mode you can set up basic settings marked sub menu is the default setting OFF 1 10MIN 2003 01 01 OFF 1 3SEC ...

Страница 76: ...even after formatting deleting all or inserting a new memory card SERIES Under this system the file name will directly follow the last stored file name regardless of any actions such as file deletion or formatting INFORMATION The first stored folder name is 100SSCAM and first name is S400001 Whenever you store an image the file number is increased by 1 The file number is named from S430001 to S439...

Страница 77: ...er off function will not operate Selecting YES A menu will be displayed on the LCD monitor as shown alongside Select desired time by pressing the UP DOWN button 6 Press the OK button to confirm the setting Press the menu button twice and the menu display will be disappeared INFORMATION Even if the batteries or AC adapter are removed and inserted again the power off setting will be preserved Note t...

Страница 78: ...splayed after the formatting in the play mode 6 Press the OK button to confirm the setting Press the menu button twice and the menu display will be disappeared INFORMATION Before using the memory card it must be initialized New memory card unformatted memory card A memory card that has a file this camera can t recognize or taken by the other camera NOTICE All the files in the memory are deleted by...

Страница 79: ... Yhe XeW2 Y Y f f e 6KO2 W I X W M B e3Xe 6X 6X 6X f g e W e 2 W26X e 75 U hfI W Mf J e Y H g h N1 h he g O H e3 eV46K X HJ e B1 hf eW2 6X W2 W26 2 W2 0MI4 e e H 7 B X H C5 J H W X 7H f O e X e L g V4 h J5 V g hf fN fB 0YJ e e 7 7 5 U e V X e 3 Y W e g eW 5 e 7 M I X hf L f KO2 e 3 T X X V X O Y hf V fJ 5fC e U V C5 e e3L L M H B1 K e e L 3 C N H eC M e h O H He V Xhf 1 fJ5 V h V40M I4 0 4 V Y N e...

Страница 80: ...y pressing the UP DOWN button 6 Press the RIGHT button and the cursor will shift to the DATE SET sub menu Select the desired sub menu by pressing the UP DOWN button RIGHT button selects YEAR MONTH DAY item UP DOWN button changes the value of each item 7 Press the OK button to confirm the setting Press the menu button twice and the menu display will be disappeared EXIT MENU PORTRAIT SETUP MyCAM PAG...

Страница 81: ... pressing the UP DOWN button 6 Press the RIGHT button and the cursor will shift to the TIME SET sub menu Select the desired sub menu by pressing the UP DOWN button RIGHT button selects HOUR MINUTE AM PM item UP DOWN button changes the value of each item 7 Press the OK button to confirm the setting Press the menu button twice and the menu display will be disappeared EXIT MENU PORTRAIT SETUP MyCAM P...

Страница 82: ...Select D TYPE menu by pressing the UP DOWN button 6 Press the RIGHT button and the cursor will shift to the D TYPE sub menu Select the desired sub menu by pressing the UP DOWN button YY MM DD Year Month Day MM DD YY Month Day Year DD MM YY Day Month Year 7 Press the OK button to confirm the setting Press the menu button twice and the menu display will be disappeared EXIT MENU PORTRAIT SETUP MyCAM ...

Страница 83: ...tton to confirm the setting Press the menu button twice and the menu display will be disappeared INFORMATION Date Time are imprinted at the bottom right side of the LCD monitor Date will be imprinted as DATE TYPE setting TIME is imprinted in the following way Hour Minute Second and hours are shown using the 24 hour clock The imprint function is unaffected by the camera being switched on and off Da...

Страница 84: ...enu and the next menu page will be displayed 6 Select SOUND menu by pressing the UP DOWN button 4 Press the RIGHT button and the cursor will shift to the SOUND sub menu 5 Select the desired sub menu by pressing the UP DOWN button OFF The sound function doesn t activate ON The sound function activate 7 Press the OK button to confirm the setting Press the menu button twice and the menu display will ...

Страница 85: ...n on the IMPRINT menu and the next menu page will be displayed 7 Select LCD menu by pressing the UP DOWN button 8 Press the RIGHT button and the cursor will shift to the LCD sub menu 9 Select the desired sub menu by pressing the UP DOWN button There are LOW NORMAL and HIGH sub menu in the LCD menu 10 Press the OK button to confirm the setting Press the menu button twice and the menu display will b...

Страница 86: ...connected 1 Press the menu button and press the RIGHT button to select SETUP Second tab 2 Press the DOWN and the cursor will be shifted to the main menu 3 Select FORMAT menu by pressing the UP DOWN button 4 Press the DOWN button on the FORMAT menu and the next menu page will be displayed 5 Select IMPRINT menu by pressing the UP DOWN button 6 Press the DOWN button on the IMPRINT menu and the next m...

Страница 87: ...will be turned off automatically INFORMATION When using a TV as an external monitor you will need to select the external or AV channel of the TV There will be a digital noise on the external monitor but it is not a malfunction If the image is not in the centre of the screen use the TV controls to centre it When the camera is connected to an external monitor the menu will be visible on the external...

Страница 88: ...e UP DOWN button OFF The quick view function can t activate 1 3 SEC The captured image is briefly displayed during the selected time DEL ANSWER If you select one of the quick view time a message as shown alongside will display whenever you take a picture Selecting ON DEL ANSWER message will display whenever you take a picture If you need not to store the image press YES button otherwise the image ...

Страница 89: ...b menu 5 Select the desired sub menu by pressing the UP DOWN button 6 Press the OK button to confirm the setting Press the menu button twice and the menu display will be disappeared INFORMATION To save you favorite image as LOGO do RESIZE in the play mode menu and select LOGO sub menu MySET menu You can set up the start up image start up sound and shutter sound Start up image You can select the im...

Страница 90: ...UP DOWN button 6 Press the OK button to confirm the setting Press the menu button twice and the menu display will be disappeared 1 Press the menu button and press the RIGHT button twice to select MyCAM Third tab 2 Press the DOWN and the cursor will be shifted to the main menu 3 Select SH SOUND menu by pressing the UP DOWN button 4 Press the RIGHT button and the cursor will shift to the SH SOUND su...

Отзывы: