36
Ⅳ. ADJUSTMENT
1. Digital camera service
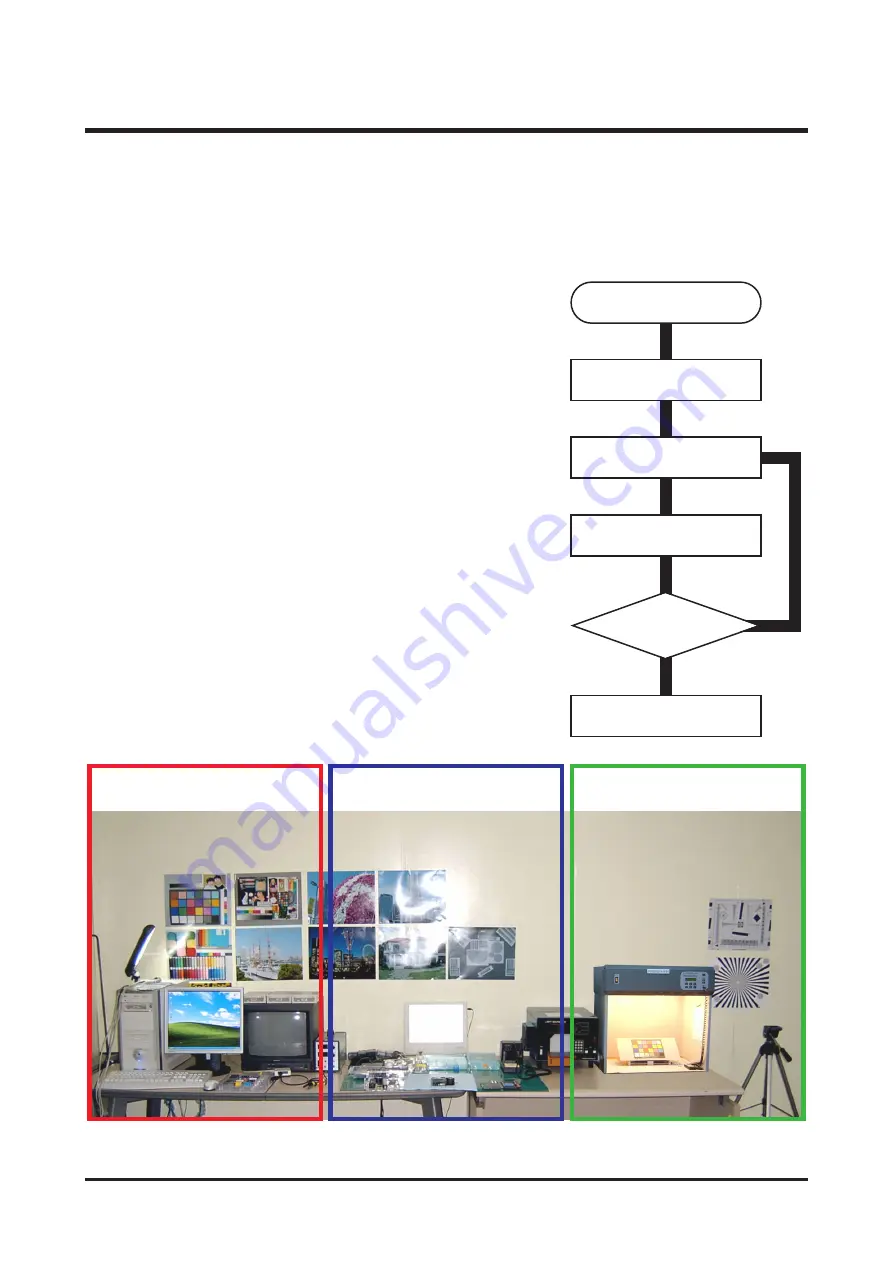
To take a digital camera service (Repair, Tuning and Checking), the following equipments have to be arranged.
The sequences for the camera service are as shown.
1. Receiving the camera
When receiving a camera, check whether the accessories are
included or not and ask the customer exact problems.
2. Checking the camera
Checking the camera with priority given to the exact problems
to find overall malfunctions.
3. Repairing the camera
Repair the camera malfunctions found at the step 2.
4. Inspection
After repairing the camera, inspect all of the camera functions.
1. Checking the camera and Inspection
2. Repairing the camera
3. Tuning
Receiving the camera
Checking the camera
Repairing the camera
Tuning
Inspection
Finish
Содержание DIGIMAX S700
Страница 1: ......
Страница 13: ...13 Ⅱ INSTALLATION ...
Страница 16: ...Ⅲ EXPLODED VIEW AND PART LIST 16 1 1 1 2 1 2 1 3 1 MAIN ASSEMBLY ...
Страница 24: ...24 Ⅲ EXPLODED VIEW AND PART LIST 4 8 4 1 4 3 4 4 4 5 4 6 4 2 4 2 4 7 4 BARRIER ASSEMBLY ...
Страница 26: ...26 Ⅲ EXPLODED VIEW AND PART LIST 5 1 5 7 5 10 5 4 5 2 5 3 5 8 5 9 5 5 5 6 5 FRONT COVER ASSEMBLY ...
Страница 30: ...30 Ⅲ EXPLODED VIEW AND PART LIST 7 BACK COVER ASSEMBLY 7 1 7 3 7 2 7 4 7 5 7 6 7 7 ...
Страница 70: ...70 Ⅴ PATTERN DIAGRAM 1 PARTS ARRANGEMENT FOR EACH PCB ASS Y 1 MAIN_TOP ...
Страница 71: ...71 Ⅴ PATTERN DIAGRAM 2 MAIN_BOTTOM ...
Страница 72: ...72 Ⅴ PATTERN DIAGRAM 3 MODE ...
Страница 73: ...73 Ⅴ PATTERN DIAGRAM 4 STROBO_TOP ...
Страница 74: ...74 Ⅴ PATTERN DIAGRAM 5 STROBO_BOTTOM ...
Страница 75: ...75 Ⅴ PATTERN DIAGRAM 6 CCD_TOP ...
Страница 76: ...76 Ⅴ PATTERN DIAGRAM 7 CCD_BOTTOM ...
Страница 78: ...78 Ⅵ CIRCUIT DIAGRAM 2 MAIN_POWER ...
Страница 79: ...79 Ⅵ CIRCUIT DIAGRAM 3 MAIN_AUDIO ...
Страница 80: ...80 Ⅵ CIRCUIT DIAGRAM 4 MAIN_KEY ...
Страница 81: ...81 Ⅵ CIRCUIT DIAGRAM 5 MAIN_FEB ...
Страница 82: ...82 Ⅵ CIRCUIT DIAGRAM 6 MAIN_LCD ...
Страница 84: ...84 Ⅵ CIRCUIT DIAGRAM 8 MAIN_CRADLE ...
Страница 85: ...85 Ⅵ CIRCUIT DIAGRAM 9 MAIN_DDR ...
Страница 86: ...86 Ⅵ CIRCUIT DIAGRAM 10 MAIN_TOP ...
Страница 87: ...87 Ⅵ CIRCUIT DIAGRAM 11 MAIN_MEMORY ...
Страница 88: ...88 Ⅵ CIRCUIT DIAGRAM 12 MAIN_MOTOR ...
Страница 89: ...89 Ⅵ CIRCUIT DIAGRAM 13 MAIN_STROBO ...
Страница 90: ...90 Ⅵ CIRCUIT DIAGRAM 14 STROBO FPCB ...
Страница 91: ...91 Ⅵ CIRCUIT DIAGRAM 15 CCD FPCB ...
Страница 93: ...93 Ⅷ SERVICE INFORMATION Disassemble the outer camera 1 Remove 2 screws 2 Remove 2 screws 3 Remove 2 screws ...
Страница 97: ...97 Ⅷ SERVICE INFORMATION 12 Disassemble the MAIN PCB 13 Remove 2 screws 14 Remove 2 screws ...
Страница 98: ...98 Ⅷ SERVICE INFORMATION 15 Disassemble the Barrel ASSY 16 Remove a screw 17 Disassemble the STROBE PCB ...
Страница 99: ...99 Ⅷ SERVICE INFORMATION Assemble Camera 1 Attach the STROBE PCB 2 Assemble a screw 3 Attach the Barrel ASSY ...
Страница 100: ...100 Ⅷ SERVICE INFORMATION 4 Assemble 2 screws 5 Assemble 2 screws 6 Attach the MAIN PCB ...
Страница 103: ...103 Ⅷ SERVICE INFORMATION 14 Attach the BACK COVER 15 Assemble 2 screws 16 Assemble 2 screws 17 Assemble 2 screws ...
Страница 111: ...111 Ⅶ SERVICE INFORMATION 18 Disassemble the F PCB from the Lens Base After completing the disassembly ...


