background image

V

EUILLEZ 

C

ONSERVER CES 

I

NSTRUCTIONS

Sécurité

P

RÉCAUTION DE 

S

ÉCURITÉ 

POUR 

É

VITER UNE 

E

XPOSITION 

E

XCESSIVE A 

L’

ÉNERGIE DU 

M

ICRO-ONDES:

(a) Ne pas tenter de faire fonctionner cet appareil lorsque la 

porte est ouverte puisque ceci pourrait résulter en une 
exposition à l’énergie excessive et dommageable du micro-
ondes. Il est important de ne pas contourner ou modifier le 
système de sécurité.

(b) Ne pas placer d’objets entre la façade du four et la porte, et 

ne pas laisser s’accumuler des éclaboussures ou résidus 
de produits nettoyants sur les parois du four.

(c) Ne pas faire fonctionner le four s’il est endommagé. Il est 

très important que la porte se referme complètement et que 
celle-ci ne soit pas endommagée soit 

1) que la porte soit pliée ou bossée 

2) que les gonds et les loquets ne soient pas brisés ou 

défaits et 

3) que la porte soit bien scellée et le tout bien étanche.

(d) La porte ne devrait pas être ajustée ou réparée par une 

autre personne qu’un technicien de service.

AVERTISSEMENT

Toujours suivre ces précautions de sécurité lorsque 
vous vous servez de votre micro-ondes. Ne jamais 
tenter de le réparer vous-même - il y a un voltage 
dangereux à l’intérieur. Si votre four doit être réparé, 

veuillez communiquer avec 1-800-SAMSUNG pour 
obtenir le nom du Centre de Service autorisé le plus 
près de chez vous.

R

EMARQUES DE 

S

ÉCURITÉ 

I

MPORTANTES

Lorsque vous utilisez des appareils électriques, des 
précautions sécuritaires de base devraient être suivies telles 
que:

AVERTISSEMENT

Pour réduire le risque de brûlures, chocs électriques, 
feux, blessures personnelles ou exposition à l’énergie 
excessive du micro-ondes. 

• Veuillez lire toutes les instructions avant de vous servir de l’appareil.
• Lire et suivre toutes les “

Précautions de Sécurité pour éviter une 

exposition à l’énergie excessive du micro-ondes

“ qui sont sur 

cette page.

• Cet appareil doit être mis à la terre. Connecter l’appareil à une prise 

secteur bien mise à la terre. Voir “

instructions importantes de mise 

à la terre

” à la page 4 de ce manuel.

• Placer ou installer cet appareil de façon conforme aux instructions 

fournies.

• Les oeufs, les contenants scellés peuvent exploser lorsque 

réchauffés dans ce four.

• Se servir de cet appareil seulement pour l’usage pour lequel il a été 

conçu tel que décrit dans ce manuel. Ne pas utiliser de produits 
chimiques corrosifs ou vapeurs dans cet appareil. Ce genre de four a 
été conçu dans le but de réchauffer, cuire ou sécher de la nourriture. 
Il n’a pas été conçu pour un usage industriel ou de laboratoire.

XGtzX]`Wz{h†mU”GGwˆŽŒGYGGm™‹ˆ SGmŒ‰™œˆ™ GXSGYWWYGG^a[]Ght

Содержание DE68-02065A

Страница 1: ...Code No DE68 02065A Microwave Oven Owner s Manual MS1690STA XGtzX Wz hU GGw GXGG SGq GZXSGYWWYGG a _Gwt ...

Страница 2: ...owed including the following WARNING To reduce risk of burns electric shock fire personal injury or exposure to excessive microwave energy Read all safety instructions before using the appliance Read and follow the specific PRECAUTIONS TO AVOID POSSIBLE EXPOSURE TO EXCESSIVE MICROWAVE ENERGY on this page This appliance must be grounded Connect only to properly grounded outlets See IMPORTANT GROUND...

Страница 3: ...leave paper products cooking utensils or food in the oven when not in use Do not try to preheat oven or operate while empty Do not cook without the glass tray in place on the oven floor Food will not cook properly without the tray Do not defrost frozen beverages in narrow necked bottles The containers can break Dishes and containers can become hot Handle with care Carefully remove container coveri...

Страница 4: ...ply cord is provided to reduce the risk of becoming entangled in or tripping over a longer cord Longer cord sets or extension cords are available and may be used if care is exercised in their use If a long cord or extension cord is used 1 The marked electrical rating of the cord set or extension cord should be at least as great as the electrical rating of the appliance 2 The extension cord must be...

Страница 5: ... Setting Cooking Times Power Levels 15 Using the More Less Buttons 16 Adjusting the Volume 17 Using the Kitchen Timer 17 Setting the Child Protection Lock 17 Demonstration Mode 18 Setting the Remind End Signal 18 Setting the Word Prompting Speed 18 Cooking Instructions 19 Cooking Utensils 19 Testing Utensils 19 Cooking Techniques 20 General Tips 20 Auto Sensor Cook 21 Utensils Cover For Sensor Coo...

Страница 6: ...________________________ Serial Number ________________________________ Date Purchased ________________________________ Dealer ________________________________ Setting Up Your Microwave Oven 1 Place the oven on a flat sturdy surface and plug the cord into a grounded outlet Once plugged in the display on your oven will show after four seconds Make sure there is adequate ventilation for your oven by...

Страница 7: ... defrosted 7 Custom Cook p 10 Press twice to program your favorite recipe Press once to cook with that recipe 8 Sensor Reheat p 13 9 My Choice p 8 Press to set non cooking feature 10 Kitchen Timer p 17 Sets kitchen or convenience timer 11 Number Buttons Set cooking times or amounts and power levels other than high 12 More Less p 16 Increase or decrease cooking time 13 Power Level p 15 Press this p...

Страница 8: ...grams Press My Choice 2 and select by repeatedly pressing My Choice To set press Start Adjusting the Volume Volume options include Off Low Medium High and Melody 1 5 Press My Choice 3 and select by repeatedly pressing My Choice To set press Start Remind End Signal The Remind End Signal can be turned On and Off Press My Choice 4 and select by repeatedly pressing My Choice To set press Start Child P...

Страница 9: ...ton repeatedly to select the weight measurements you wish to use 3 Press the Start button Setting the Clock 12HR 24HR The time can be displayed in either 24 hour or 12 hour format 1 Press the My Choice button and then 6 The display shows CLOCK 12HR 24HR OPTION 2 Press the My Choice button repeatedly to select either 12HR or 24HR 3 Press the Start button XGtzX Wz hU GGw G GG SGq GZXSGYWWYGG a _Gwt ...

Страница 10: ... Defrost 8 Reheat 4 Medium Low 9 Sauté 5 Medium 0 High 4 Press the Custom Cook button again The display will read CUSTOM RECIPE SAVED Using the Custom Cook button Press the Custom button after memorizing a recipe the press Start but ton You can check the power level while cooking is in progress by pressing the Power Level button Setting the Clock 1 Press the Clock button The display will show 2 Us...

Страница 11: ...press Pause Cancel once then re enter the instructions To cancel a timer setting press Pause Cancel once Using the Help Button Your microwave offers helpful instructions for many procedures 1 When you need feature information and helpful hints press the Help button and then press the button that you want to get information on Help information is available in 3 languages English French and Spanish ...

Страница 12: ...rowave will begin cooking automatically If you don t need to read all the menu options simply press the Start button to begin cooking If you want to check the cooking time press the Instant Cook button When the cooking times are over the oven will beep The oven will then beep every minute Instant Cook Chart Item Weight Remarks Beverage cup 1 cup 2 cups Use measuring cup or mug do not cover Place t...

Страница 13: ...ide Defrosting Automatically To thaw frozen food set the weight of the food and the microwave auto matically sets the defrosting time power level and standing time 1 Press the Auto Defrost button The display shows 0 5 LB 0 2Kg if you have set your oven for metric measure 2 To set the weight of your food press the Auto Defrost button repeatedly This increases the weight by 0 5 lb increments up to 6...

Страница 14: ...to the Kids Meals Chart below for the serving 3 Press the Start button to begin cooking Kids Meals Chart Note Hot Dogs For the best texture of buns should be added to hot dogs when the oven beeps Item Weight Remarks Melt Chocolate 2 squares or 1 cup chips Place chocolate chips or square in a microwave safe dish Stir well at half time when the oven beeps and re start the oven Soften Cream Cheese 1 ...

Страница 15: ... 99 seconds To set a time over one minute enter the seconds too For example to set 20 minutes enter 2 0 0 0 2 If you want to set the power level to something other than High press the Power Level button then use the number buttons to enter a power level Power Levels 1 Warm 6 Simmer 2 Low 7 Medium High 3 Defrost 8 Reheat 4 Medium Low 9 Sauté 5 Medium 0 High The display shows PRESS START OR ENTER NE...

Страница 16: ...evel of the second stage of cooking The display shows the power level you have set and then PRESS START OR ENTER NEXT STAGE COOKING TIME 4 Press Start to begin cooking or repeat steps 2 and 3 to set a cooking time and power level for a third stage of cooking When finished press Start Using the More Less Buttons The More Less buttons allow you to adjust pre set cooking times They only work in the S...

Страница 17: ...ns to set the length of time you want the timer to run 2 Press the Kitchen Timer button 3 The display counts down and beeps when the time has elapsed Setting the Child Protection Lock You can lock your microwave oven so it can t be used by unsupervised children 1 Press the My Choice Button and then press the 5 button The display shows CHILD LOCK ON OFF 2 Press the My Choice button once to select t...

Страница 18: ...d End Signal The Remind End Signal can be set On or Off 1 Press the My Choice button and then press 4 The display shows REMIND END SIGNAL ON OFF 2 Press the My Choice button to select ON 3 Press the Start button The display returns to the time of day To turn Remind End Signal off repeat steps 1 3 above Setting the Word Prompting Speed 1 Press the My Choice button and then press 7 The display shows...

Страница 19: ...our oven so be careful Ceramic porcelain and stoneware Use these if they are labeled Microwave Safe If they are not labeled test them to make sure they can be used safely Never use dishes with metallic trim Plastic Use only if labeled Microwave Safe Other plastics can melt Straw wicker and wood Use only for short term heating as they can be flammable Not Recommended Glass jars and bottles Regular ...

Страница 20: ...oking is complete Let liquids stand a moment before serving When heating baby food stir well and test the temperature before serving Adding Moisture Microwave energy is attracted to water molecules Food that is uneven in moisture content should be covered or allowed to stand so that the heat disperses evenly Add a small amount of water to dry food to help it cook General Tips Dense foods such as p...

Страница 21: ... this book Always use microwave safe containers and cover them with their lids or with plastic wrap When using plastic wrap turn back one corner to allow steam to escape at the proper rate Always cover with the lid intended for the utensil being used If the utensil does not have its own lid use plastic wrap Fill containers at least half full Foods that require stirring or rotating should be stirre...

Страница 22: ... Power Level High 0 for first 5 minutes then Medium 5 Place roast fat side down on roasting rack Cover with wax paper Turn over when cooking time is half up Let stand 10 minutes Pork Boneless or bone in Up to 4 lbs Cooking Time 11 15 min lb for 160 F Well Done Power Level High 0 for first 5 minutes then Medium 5 Place roast fat side down on roasting rack Cover with vented plastic wrap Turn over wh...

Страница 23: ... vented microwavable plastic wrap Whole unpeeled vegetables such as potatoes squash eggplant etc should have their skin pricked in several spots before cooking to prevent them from bursting For more even cooking stir or rearrange whole vegetables halfway through the cooking time Generally the denser the food the longer the standing time Standing time refers to the time necessary for dense large fo...

Страница 24: ...s Chops Fish 0 5 3 0 lbs After each stage rearrange the food If there are any warm or thawed portions of food shield them with narrow flat pieces of aluminum foil Remove any pieces of food that are nearly defrosted Let stand covered for 5 10 minutes Ground Meat 0 5 3 0 lbs After each stage remove any pieces of food that are nearly defrosted Let stand covered with foil for 5 10 minutes Whole Chicke...

Страница 25: ...r 10 minutes Remove bay leaf before serving Makes 6 servings Broccoli and Cheese Casserole cup butter or margarine cup chopped onion 1 Tbs flour tsp salt tsp dry mustard 1 8 tsp pepper 1 cups milk cup chopped red pepper 8 oz 2 cups cheddar cheese shredded 1 pkg 9 10 oz frozen chopped broccoli thawed 4 cups cooked spiral shaped pasta 8 oz dry 1 In a 2 quart casserole cook butter and onion at High f...

Страница 26: ...gar salt flour celery seed and pepper Cook at High until mixture boils 30 40 seconds Stir in vinegar and cup water Cook at High until liquid boils and thickens slightly 1 2 minutes stir once Add bacon to dressing Pour dressing over potatoes Stir well Makes 6 servings Black Bean Soup 1 cup chopped onion 1 clove garlic minced 2 cans 15 oz each black beans drained 1 can 14 16 oz stewed tomatoes chopp...

Страница 27: ...inutes before using again Frozen Vegetables 1 to 4 cups Place frozen vegetables in microwave safe ceramic glass or plastic dish and add 2 4 Tbs water Cover with lid or vented plastic wrap during cooking and stir before standing Let oven cool for at least 5 minutes before using again Frozen Breakfast 2 to 8 oz Follow package instructions for covering and standing Use this pad for frozen sandwich br...

Страница 28: ...M 5 for 5 minutes or use Sensor Reheat Stir in brandy Let stand covered for 5 minutes before serving Serve with croutons and cheese Food Amount Procedure Plate of food 1 serving 1 plate Use only pre cooked refrigerated foods Cover plate with vented plastic wrap or waxed paper tucked under plate If food is not as hot as you prefer after heating with SENSOR REHEAT continue heating using time and pow...

Страница 29: ...per to taste 1 In 1 1 2 quart casserole combine peas cel ery and water cover 2 Microwave at HIGH 0 for 5 to 7 1 2 minutes or use Sensor Fresh Vegetable Stir in lettuce recover 3 In small dish combine butter flour sugar salt and pepper Blend in cream Microwave at HIGH 0 for 1 to 2 minutes or use Sensor Reheat Stir until smooth 4 Drain vegetables Add sauce to vegetables toss to coat Stuffed Potatoes...

Страница 30: ...owave at HIGH 0 for 7 to 9 minutes or use Sensor Fresh Vegetable Remove wrap immediately scatter olive slices attractively over all 3 Place butter or magarine in 1 cup glass measure and Microwave at HIGH 0 for 30 seconds to 1 minute to melt Add oregano and lemon juice Pour over vegetables Sprinkle with parmesan cheese and serve Franks And Beans Casserole 4 to 6 servings 1 2 cup chopped onions 2 ta...

Страница 31: ...urntable and roller ring are positioned correctly Using your microwave causes TV or radio interference This is similar to the interference caused by other small appliances such as hair dryers Move your microwave further away from other appliances like your TV or radio Care and Cleaning Follow these instructions to clean and care for your oven Keep the inside of the oven clean Food particles and sp...

Страница 32: ...els including defrost Timer 99 minutes 99 seconds Power Source 120 VAC 60 Hz Power Output 1100 Watts Outside Dimensions 2321 32 W X 135 16 H X 1917 32 D Oven Cavity Dimensions 161 2 W X 93 16 H X 179 32 D Net Gross Weight 47 0 51 6 lbs 21 3 23 4kg XGtzX Wz hU GGw GZYGG SGq GZXSGYWWYGG a _Gwt ...

Страница 33: ... This warranty will automatically be voided for any unit found with a missing or altered serial number This warranty is valid only on products purchased and used in the Canada SAMSUNG ELECTRONICS Subject to the requirements conditions exclusions and limitations of the Original Limited Warranty supplied with Samsung Electronics SAMSUNG products and the requirements conditions exclusions and limitat...

Страница 34: ...34 Note XGtzX Wz hU GGw GZ GG SGq GZXSGYWWYGG a _Gwt ...

Страница 35: ...35 Note XGtzX Wz hU GGw GZ GG SGq GZXSGYWWYGG a _Gwt ...

Страница 36: ... defrosting cycle Set Cooking Time and Power Levels 1 Use number buttons to set cooking time 2 To set power level at other than HIGH press POWER LEVEL and use the number buttons to enter the power level 3 Press START to begin cooking Sensor Cook Buttons 1 Press button that corresponds to the food you are cooking for example POTATO 2 The display will show the food you have chosen and the oven will ...

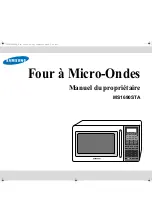
Страница 37: ...Four à Micro Ondes Manuel du propriétaire MS1690STA XGtzX Wz h mU GGw GXGGm SGm GXSGYWWYGG a Ght ...

Страница 38: ...tre four doit être réparé veuillez communiquer avec 1 800 SAMSUNG pour obtenir le nom du Centre de Service autorisé le plus près de chez vous REMARQUES DE SÉCURITÉ IMPORTANTES Lorsque vous utilisez des appareils électriques des précautions sécuritaires de base devraient être suivies telles que AVERTISSEMENT Pour réduire le risque de brûlures chocs électriques feux blessures personnelles ou exposit...

Страница 39: ...i un plat prend feu à l intérieur du four garder la porte fermée éteindre le four débrancher le cordon d alimentation ou couper le courant à partir du fusible ou du panneau électrique d Ne pas utiliser l intérieur du four comme espace de rangement Ne pas y laisser du papier des ustensibles ou de la nourriture lorsqu il ne fonctionne pas Ne pas essayer de faire fonctionner le four lorsqu il est vid...

Страница 40: ...ATION Un cordon d alimentation court est fourni pour éviter les risques qu il s emmêle ou que l on trébuche dessus Des cordons d alimentation plus longs sont disponibles mais doivent être utilisés avec précaution 1 La puissance d alimentation du cordon éectrique ou cordon de ralonge doit être au moins équivalent à la source d alimentation indiquée sur la plaque signalétique de l appareil 2 Le cord...

Страница 41: ...iveaux de puissance 15 Utilisation des touches More Less 16 Ajustement du Volume 17 Utilisation de la minuterie Kitchen Timer 17 Programmer le système de fermeture de sécurité pour enfants 17 Mode de Démonstration 18 Programmer le signal de rappel de fin de cycle 18 Programmation de Word Prompting Speed 18 INSTRUCTIONS POUR LA CUISSON 19 Les ustensiles de cuisson 19 Essais des ustensiles 19 Techni...

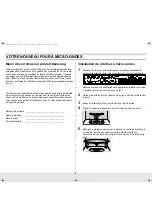
Страница 42: ...ateur au cas où vous auriez besoin des services de garantie Numéro de modèle ________________________________ Numéro de série ________________________________ Date d achat ________________________________ Concessionnaire ________________________________ Installation de otre four à micro ondes 1 Placer votre four sur une surface plate et stable et brancher le cordon à la prise de terre Une fois bra...

Страница 43: ...Custom Cook pour programmer votre recette préferée et une fois pour cuisiner avec cette recette 8 Sensor Reheat Cuisson automatisée p 12 9 My Choice Mon Choix p 8 Appuyer pour choisir des options de non cuisson 10 Kitchen Timer Minuterie de cuisine p 17 Met en marche la minuterie pour la cuisine ou pour autre chose 11 Number Buttons Touches numériques Établi le temps de cuisson ou la quantité et l...

Страница 44: ...l ume Les options sont Étein dre Volume Bas Moyen Haut et Mélodie 1à 5 Appuyer My Choice Mon Choix 3 et choisir en pesant répétitivement sur My Choice Mon Choix Pour com mencer appuyer sur Start Signal de fin de programme Le signal de fin de pro gramme peut être allumé ou éteint Appuyer My Choice Mon Choix 4 et choisir en pesant répétitivement sur My Choice Mon Choix Pour com mencer appuyer sur St...

Страница 45: ... indique l option CLOCK 12HR 24HR OPTION HORLOGE 12HR 24HR 2 Appuyez sur la touche My Choice Mon Choix plusieurs fois pour sélectionner soit 12HR ou 24HR 3 Appuyez sur la touche Start départ Mettre l Horloge à l Heure 1 Appuyez sur la touche Clock Horloge Le cadran indiquera 2 Utilisez les touches numériques pour entrer l heure Vous devez appuyez au moins sur 3 numéros pour mettre l horloge à l he...

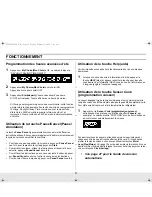
Страница 46: ...ée 3 Appuyez sur la touche Power Level et utilisez les touches numériques pour programmer le niveau de puissance L écran indique le niveau de puissance prgrameeé Vous pouvez choisir le niveau de puissance entre 0 et 9 1 Chaud 6 Mijoter 2 Bas 7 Moyen Haut 3 Décongélation 8 Réchauffage 4 Moyen Bas 9 Sauté 5 Moyen 0 Haut 4 Appuyez encore une fois sur la touche Custom Cook L écran affiche CUSTOM RECIP...

Страница 47: ... fois et entrer à nouveau les instructions Pour annuler l heure indiquée appuyer sur Pause Cancel une fois Utilisation de la touche Help aide Votre micro ondes vous apporte l aide nécessaire pour de nombreuses démarches 1 Lorsque vous avez besoin d information et d aide appuyer la touche HELP aide et appuyer ensuite la touche pour laquelle vous désirez de l informatio HELP vous donne de l informat...

Страница 48: ...vous ne voulez pas lire toutes les options du menu appuyez simplement sur Start pour commencer la cuisson Si vous désirez vérifier le temps de cuisson appuyez sur la touche cuisson instantanée Lorsque la cuisson est terminée le four émettra un bruit et cela toute les minutes Charte de réchauffage instantané Article Poids Remarques Beverage Boisson tasse 1 tasse 2 tasses Utiliser une tasse à mesure...

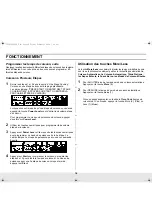
Страница 49: ...on automatisée Décongeler automatiquement Pour décongeler la nourriture en établissant le poids du plat le micro ondes définira automatiquement le temps de décongélation la puissance de cuis son et le temps de repos 1 Appuyer sur la touche Auto Defrost Le cadran indique 0 5lbs 0 2 Kg si votre four est mis sur le système métrique 2 Pour établir le poids de votre nourriture appuyer le Auto Defrost à...

Страница 50: ... Repas Enfants ci dessous pour les quantités 3 Appuyer sur la touche Start pour commencer la cuisson Charte Repas Enfants Remarque Hot Dogs Pour une leilleure texture de petits pains les joindre aux hot dogs lorsque le four sonne Article Poids Remarques Melt Chocolate Fondre du chocolat 2 carrés ou 1 tasse de chips Déposer les pépites ou carrés de chocolat dans un plat allant au micro ondes Bien m...

Страница 51: ... secondes Pour indiquer une durée de plus de une minute entrer les secondes aussi Par ex pour indiquer 20 minutes entrer 2 0 0 0 2 Si vous désirez entrer un niveau de puissance différent de High appuyer sur la touche Power Level Niveau de puissance Niveau de Puissance 1 Chaud 6 Mijoter 2 Bas 7 Moyen Haut 3 Décongélation 8 Réchauffag 4 Moyen Bas 9 Sauté 5 Moyen 0 Haut Le cadran indique PRESS START ...

Страница 52: ...el utiliser ensuite les touches numériques pour programmer Le niveau de puissance de la 2e étape Le cadran indique Le niveau de puissance que vous avez demandé Ensuite 4 Appuyer sur Start pour commencer la cuisson ou répéter les étapes 2 et 3 pour établir le temps de cuisson et Le niveau de puissance pour une 3e étape de cuisson Lorsque terminé appuyer sur Start Utilisation des touches More Less L...

Страница 53: ...e la minuterie 2 Appuyer sur la touche Minuterie Kitchen Timer 3 Lorsque le temps est écoulé la sonnerie se fera entendre Programmer le système de fermeture de sécurité pour enfants Vous pouvez fermer votre four à micro ondes de manière à ce qu il ne soit pas utilisable par des enfants sans supervision 1 Appuyer sur la touch My Choice Mon Choix d abord ensuite sur 5 Le cadran indiquera CHILD LOCK ...

Страница 54: ... de fin de cycle Le signal de fin de cycle peut être sur ON ou OFF 1 Appuyer sur la touche My Choice Mon Choix ensuite sur 4 Le cadran indiquera REMIND END SIGNAL ON OFF 2 Appuyer sur la touche My Choice Mon Choix pour choisir ON 3 Appuyer sur la touche Start Le cadran retournera à l heure d origine Pour éteindre le signal de rappel répétez les étapes ci dessus de de 1 3 Programmation de Word Prom...

Страница 55: ...orcelaine et grès N utilisez des contenants faits de ces matériaux que s ils sont marqués d un sceau garantissant leur capacité à être utilisés dans un four à micro ondes S ils ne sont pas marqués vous devez alors les essayer pour vous assurer qu ils sont adéquats et sécuritaires Ne jamais utiliser un plat comportant un rebord de métal Plastique N utiliser que des contenants de plastique marqués d...

Страница 56: ...leur sortie du four Laisser reposer quelques instants avant de servir Lorsque vous réchauffez des aliments pour bébés brasser les bien et vérifier la température avant de les servir Humidifier L énergie micro ondes à tendance à se concentrer autour des molécules d eau Les aliments dont le taux d humidité n est pas également réparti doivent être couverts ou laissés à reposer afin de permettre à la ...

Страница 57: ...iser les conteneurs et couvercles appropriés ou encore du papier plastique en laissant un coin soulevé pour laisser la vapeur s échapper Recouvrir les plats with les couvercles appropriés Si le plat n a pas de couvercle mettre du papier plastique Remplir les contenants à moitié Ce n est que vers la fin du cycle de cuisson qu il est recommendé de retourner ou mélanger la nourriture Important Après ...

Страница 58: ... saignant 8 à 12 min lb à 120 F médium 9 à 14 min lb à 145 F bien cuit Le niveau de puissance Haut 0 pour les 5 premières minutes puis Moyen 5 Placer la partie la plus grasse du rôti vers le bas sur la grille Recouvrir de papier ciré Retourner à mi temps de la cuisson Laisser reposer pendant 10 minutes Porc avec ou sans os Jusqu à 4 livres lbs Temps de cuisson 11 à 15 mn lb à 160 F bien cuit Le ni...

Страница 59: ...s recouvrir toujours le plat avec un couvercle ou une enveloppe de plastique perforée pour micro ondes Avant leur cuisson percer à plusieurs endroits la peau des légumes entiers et non pelés Cela empêchera les légumes comme les pommes de terre les courges ou les aubergines d éclater lors de leur cuisson Pour obtenir une cuisson plus égale brasser ou retourner les légumes entiers à mi cuisson En gé...

Страница 60: ...artie qui est chaude avec des lanières de papier d aluminium Steaks Côtelettes Poisson 0 5 à 3 0 lbs À la fin de chaque étape arranger de nouveau la viande ou le poisson S il y a des parties chaudes ou décongelées les protéger avec des lanières plates de papier d aluminium Retirer les morceaux en partie décongelés Couvrir d aluminium et laisser reposer pendant 5 à 10 minutes Viande Hachée 0 5 à 3 ...

Страница 61: ...t de servir Donne 6 portions Casserole de brocoli et fromage tasse de beurre ou margarine tasse d oignon haché 1 c à table de farine c à thé de sel c à thé de moutarde séchée 1 8 c à thé de poivre 1 tasses de lait tasse de piment rouge haché 8 on 2 tasses fromage cheddar râpé 1 sac 9 à 10 on brocoli haché surgelé décongelé 4 tasses de pâte alimentaire cuite en forme de spirale 8 on sec 1 Dans une ...

Страница 62: ...er la vapeur Cuire à Haut 0 jusqu à ce qu ils soient tendres 1 à 2 minutes mélanger une fois 4 Mélanger le sucre le sel la farine les graines de céleri et le poivre Cuire à Haut 0 jusqu à ébullition 30 à 40 secconds Mélanger le vinaigre et tasse d eau Cuire à Haut 0 jusqu à ébullition et léger épaississement 1 à 2 minutes mélanger une fois Ajouter le bacon à la sauce Verser la sauce sur les pommes...

Страница 63: ... avant de l utiliser à nouveau Légumes congelés 1 à 4 tasses Placer les légumes congelés dans un contenant en céramique verre ou plastique pour le micro ondes et ajouter 2 à 4 c d eau Recouvrir avec un couvercle ou une pellicule de plastique perforée pendant la cuisson remuer et laisser reposer Laisser reposer le four pour 5 minutes avant de l utiliser à nouveau Petit déjeuner congelé 2 à 8 oz Sui...

Страница 64: ...utes ou utiliser la cuisson automatisée pour réchauffer Ajouter le brandy en remuant Laisser reposer couvert pour 5 minutes avant de servir Servir avec les croûtons et le fromage Aliment Quantité Procédure Assiette de nourriture 1 portion 1assiette N utilisez que des aliments pré cuits réfrigérés Bien recouvrir de tous les côtés avec une pellicule de plastique ou de papier ciré Si la nourriture n ...

Страница 65: ... à Haut 0 pour 5 à 7 minutes ou utiliser la cuisson automatisée pour les légumes frais Ajouter la laitue en remuant recouvrir Dans un petit plat combiner le beurre farine sucre sel et poivre Ajouter la crème 3 Placer au micro ondes à Haut 0 pour 1 à 2 minutes ou utiliser la cuisson automatisée pour réchauffer Remuer jusqu à consistance homogène Égoutter les légumes 4 Ajouter la sauce aux légumes r...

Страница 66: ... frais Enlever la pellicule de plastique immédiatement placer les tranches d olives par dessus le tout 3 Placer le beurre ou la margarine dans une tasse dans le micro ondes à Haut 0 pour 30 secondes à une minute pour fondre le tout Ajouter l origan et le jus de citron Verser sur les légumes Parsemer de fromage parmesan et servir Casserole de fèves et saucisses 4 à 6 portions tasse d oignons hachés...

Страница 67: ...oient bien placés dans la rainure prévue à cet effet L utilisation de votre four cause de l interférence à votre radio ou votre téléviseur Cette interférence est similaire à celle causée par d autres appareils tels que les séchoirs à cheveux Déplacer alors votre four micro ondes afin de l éloigner du récepteur radio ou de la télévision Nettoyage et entretien Veuillez suivre ces directives pour bie...

Страница 68: ...lation Chronomètre 99 minutes 99 secondes Source d alimentation 120 VAC 60 Hz Puissance de sortie 1100 Watts Dimensions extérieures 2321 32po L X 135 16po H X 1917 32po P Dimensions de la cavité 161 2 po L X 93 16 po H X 179 32 po P Poids net brut 47 0 51 6 lbs 21 3 23 4 kg XGtzX Wz h mU GGw GZYGGm SGm GXSGYWWYGG a Ght ...

Страница 69: ...ment pour tout appareil dont le numéro de série a été modifié ou est manquant La présente garan tie ne couvre que les appareils achetés et utilisés au Canada SAMSUNG ELECTRONICS Conformément aux exigences conditions exclusions et limitations de la Garantie limitée de l acheteur d origine décernée avec les produits Sam sung Electronics SAMSUNG ainsi que les exigences conditions exclu sions et limit...

Страница 70: ...34 Remarque XGtzX Wz h mU GGw GZ GGm SGm GXSGYWWYGG a Ght ...

Страница 71: ...35 Remarque XGtzX Wz h mU GGw GZ GGm SGm GXSGYWWYGG a Ght ...

Страница 72: ...ation continue jusqu à la fin Ajuster le temps de cuisson les niveaux de cuisson 1 Utiliser les commandes numériques pour établir le temps de cuisson 2 Pour indiquer un autre niveau de cuisson que HIGH appuyer sur la touche POWER LEVEL et utiliser les commandes numériques pour entrer le niveau de cuisson désiré 3 Appuyer sur START pour commencer la cuisson Touches pour capteur cuisson 1 Appuyer su...

Отзывы: