background image

22

ENG

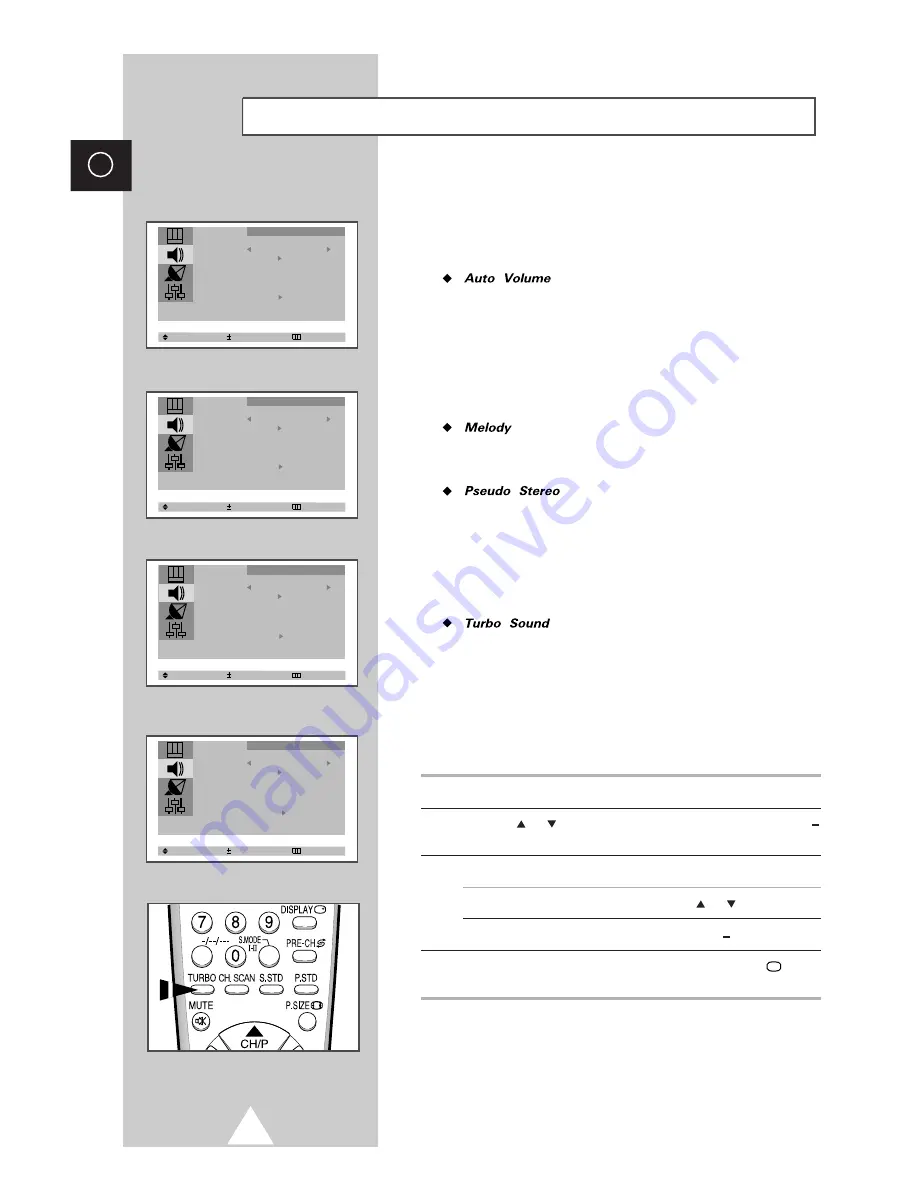
Select       Enter         Exit

Mode          Custom
Adjust
Auto Volume    : Off
Melody         : Off
Pseudo Stereo  : Off

Sound

Select       Adjust        Exit

Mode          Custom
Adjust
Auto Volume    : Off

Melody         : On

Pseudo Stereo  : Off

Sound

Select       Adjust        Exit

Mode          Custom
Adjust

Auto Volume    : On

Melody         : Off
Pseudo Stereo  : Off

Sound

The following sound settings can be adjusted to suit your preferences.

Each broadcasting station has its own signal conditions,
and so it is not easy for you to adjust the volume every
time the channel is changed. "Auto V olume"  lets you
automatically adjust the volume of the desired channel by
lowering the sound output when the modulation signal is
high or by raising the sound output when the modulation
signal is low. This is saved for each Channel individually.

You can hear clear melody sound when the TV  is
powered O N  or O FF.

"Pseudo Stereo" converts a monaural sound signal into

two identical left and right channels.
O nce the "Pseudo Stereo"  is set to  "O n" or  "O ff", the
setting applies to the sound effects such as Standard,
Music, Movie and Speech. This is saved for each Channel

and for external input mode 

individually.

You can enjoy more magnificent and dynamic sound
when watching music, movie or other channel. "Turbo
Sound" suitably emphasizes both higher and lower bands
of sound (and includes other effects). 

You can select the 

Turbo Sound by pressing the "TURBO" button on the Remote

Extra Sound Settings


(depending on the model)

Control. This is saved for each Channel 

and for external input

1

Press the 

MENU button.

2

Press the 

or 

button to select the "Sound"  and press the 

+

or 

button.

3

To...

Press the...

Change an option

or 

button.

Select the required option (On/Off)

+

or  button.

4

When you are satisfied with the settings, press the 

TV

button

or, press the 

MENU button repeatedly to return to normal viewing.

Select       Adjust        Exit

Mode          Custom
Adjust
Auto Volume    : Off
Melody         : Off

Pseudo Stereo  : On

Sound

Woofer         

Woofer         

Woofer         

Woofer         

mode individually.

Содержание CZ-21K5ML

Страница 1: ...COLOUR TELEVISION Owner s Instructions Before operating the unit please read this manual thoroughly and retain it for future reference ENG REMOTE CONTROL ON SCREEN MENUS ENJOY GAME ELECT ...

Страница 2: ...ed service personnel During a storm conditions especially when there is lightning unplug the television from the mains socket and aerial If the remote control is not used for a long period of time remove the batteries and store it in a cool dry place WARNING TO PREVENT DAMAGE WHICH MAY RESULT IN FIRE OR SHOCK HAZARD DO NOT EXPOSE THIS APPLIANCE TO RAIN OR MOISTURE The main voltage is indicated on ...

Страница 3: ...s 19 Changing the Sound Standard 20 Adjusting the Sound Settings 20 Adjusting the Volume 21 Extra Sound Settings 22 Auto Volume Melody Pseudo Stereo Turbo Sound Voice Boost 21 Selecting the Sound Mode 24 Switching the Sound Off Temporarily 24 Setting the Sleep Timer 26 Setting and Displaying the Current Time 26 Switching the Television On and Off Automatically 27 Setting the Blue Screen Mode 28 Ac...

Страница 4: ...n the model Buttons and markings are subject to change MENU DISPLAY VOLUME ADJUSTMENT CHANNEL SELECTION POWER STAND BY INDICATOR REMOTE CONTROL SENSOR MENU DISPLAY VOLUME ADJUSTMENT CHANNEL SELECTION STAND BY INDICATOR REMOTE CONTROL SENSOR ...

Страница 5: ...st it you can use the controls on the front panel of the television to 1 Switch on the television when it is in Standby mode and select channels CH 2 Access the main menu MENU 3 Adjust the volume VO L Buttons on the front panel have the same function as corresponding buttons on the remote control ...

Страница 6: ...on your TV may be different depending on your model ENG Connection Panels HEADPHONE JACK Side of TV RCA AUDIO VIDEO INPUT CONNECTORS HEADPHONE JACK OPTION RCA AUDIO VIDEO INPUT CONNECTORS Connecting earphones headphones You can connect a set of earphones headphones to your television if you wish to watch a television programme without disturbing the other people in the room Prolonged use of earpho...

Страница 7: ...BO SOUND ON OFF SOUND STANDARD SOUND MODE SELECTION CHANNEL SCANNING POWER TEMPORARY SOUND SWITCH OFF VOLUME DECREASE DIRECT CHANNEL SELECTION TUNER CABLE NETWORK SELECTION EXTERNAL INPUT SELECTION ON SCREEN DISPLAY PREVIOUS CHANNEL PICTURE SIZE CHANNEL UP VOLUME INCREASE PICTURE STANDARD MENU DISPLAY GAME DISPLAY CHANNEL DOWN ONE TWO THREE DIGIT CHANNEL SELECTION ...

Страница 8: ...on the battery with on the remote control on the battery with on the remote control 3 Replace the cover by pushing it in the direction of the arrow To view television channels correctly a signal must be received by the set from one of the following sources An outdoor aerial A cable television network Plug the aerial or cable network input cable to the 75Ω coaxial socket on the rear of the televisi...

Страница 9: ...ision Placing Your Television in Standby mode Your television can be placed in Standby mode in order to reduce Power consumption Wear of the cathode ray tube The Standby mode can be useful when you wish to interrupt viewing temporarily during a meal for example The television is placed automatically in Standby mode when you turn it on 1 Press the POWER button on the remote control Result The scree...

Страница 10: ...to Storing the Channels Automatically on page 12 Result The horizontal bar is displayed and then channels are stored in an order which reflects their positions in the frequency range 4 When searching and storing is complete the Time menu is displayed 5 Press the or button to move to the hour or minute Set the hour or minute by pressing the or button refer to Setting and Displaying the Current Time...

Страница 11: ...guage 4 Select a particular language by pressing the or button repeatedly 5 When you have finished press the TV button or press the MENU button repeatedly to return to normal viewing Select Adjust Exit Language English Time Plug Play Blue Screen Off Child Lock Low Noise AMP Off Function Select Enter Exit Mode Custom Adjust Digital NR Off Picture Select Enter Exit Language English Time Plug Play Bl...

Страница 12: ...lly 5 When searching and storing is complete the Sort menu is displayed To Then Sort the stored channels Go to Step 4 of the Sorting into the desired numerical order the Stored Channels procedure on page 16 Exit the channel store function Press the MENU button without sorting the channels repeatedly until the menus disappear Select Enter Exit Mode Custom Adjust Digital NR Off Picture If sound does...

Страница 13: ...on your screen 7 To assign a programme number to the channel select the Prog No Press the or button until you find the correct number 8 To store the channel and associated programme number select the Store and press the or button Result OK is displayed 9 Repeat Steps 6 to 8 for each channel to be stored 10 When you have finished manual storage press the TV button or press the MENU button repeatedl...

Страница 14: ...Erase and press the or button Result The Add Erase menu is displayed 4 Press the or button to select the required channel 5 To add or erase the desired channel by pressing the or button 6 When you have finished adding and erasing channels press the TV button or press the MENU button repeatedly to return to normal viewing 14 ENG Select Adjust Exit Add Erase P 0 Erased P 1 Added P 2 Added P 3 Added ...

Страница 15: ... button clear picture and Result The horizontal bar s good sound quality cursor moves to the left or right memorise adjusted or button to select the Store picture or sound or button Result OK is displayed erase adjusted or button to select the Erase picture or sound or button Result OK is displayed 5 When you have finished press the TV button or press the MENU button repeatedly to return to normal...

Страница 16: ...you wish to identify the channel is displayed Result The selected channel is exchanged with the one previously stored to the chosen number Example If you select P 1 for the From and P 3 for the To Channel 1 becomes channel 3 Channel 3 becomes channel 1 7 To Press the Confirm the exchange or button to select the Store of channel numbers or button Result OK is displayed You can exchange other channe...

Страница 17: ... channel To the previous channel To another channel The numeric button s corresponding to that channel Press PRE CH Pre Channel button to switch repeatedly between last two channels displayed This can be done as many times as required Enter the two digit channel number or three digit channel number To select channel 187 Press till is displayed Then press 1 followed by 8 followed by 7 or Changing C...

Страница 18: ...on the remote control Changing the Picture Standard Select Adjust Exit Mode Custom Adjust Size Normal Picture Selecting the Picture Format dependingonthemodel You can select the picture format which best corresponds to your viewing requirements The following picture formats are available in the order given Normal Zoom 16 9 option 1 Press the MENU button Result The Picture menu is displayed 2 Press...

Страница 19: ... button repeatedly to return to normal viewing The television has an Automatic Degaussing system that is activated if magnetic interference is present To degauss the television screen switch power off by pressing the POWER ON OFF button on the front panel refer to Automatic Degaussing to Remove Color Patches on page 34 If you make any changes to the Adjust settings the picture standard is automati...

Страница 20: ... Melody Off Pseudo Stereo Off Sound These Sound Standards can be saved for each channel Adjusting the Sound Settings dependingonthemodel The sound settings can be adjusted to suit your preferences 1 Press the MENU button 2 Press the or button to select the Sound and press the or button 3 Press the or button to select the Adjust and press the or button Result When select the Mode to Custom the Adju...

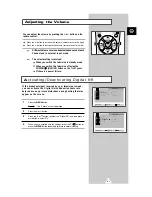
Страница 21: ...r failure Activating Deactivating Digital NR If the broadcast signal received by your television is weak you can activate the Digital Noise Reduction Feature to help reduce any picture disturbance and ghosting that may appear on the screen 1 Press the MENU button Result The Picture menu is displayed 2 Press the or button 3 Press the or button to select the Digital NR and then press or button to se...

Страница 22: ... into two identical left and right channels Once the Pseudo Stereo is set to On or Off the setting applies to the sound effects such as Standard Music Movie and Speech This is saved for each Channel and for external input mode individually You can enjoy more magnificent and dynamic sound when watching music movie or other channel Turbo Sound suitably emphasizes both higher and lower bands of sound...

Страница 23: ... you select the Mode to Custom the Equalizer is displayed Select Enter Exit Mode Custom Auto Volume Off Melody Off Pseudo Stereo Off Sound Equalizer Adjust Select Exit Sound R L 100 300 1K 3K 10K Woofer Voice Boost depending on model 1 Press the MENU button 2 Press the or button to select the Sound and press the or button 3 To Press the Change an option or button Select the required option On Off ...

Страница 24: ... Jack provided at the back of the cabinet To activate the Woofer Select the Woofer Volume by pressing the or button and select the desired volume level 5 When you are satisfied with the settings press the TV button or press the MENU button repeatedly to return to normal viewing If you want to use Headphones first turn the Woofer to Off position 1 Press the MUTE button Result The sound is switched ...

Страница 25: ...tereo NICAM Dual I II Regular broadcast Standard audio Bilingual or Dual I II Stereo On screen indication MONO Normal use MONO MONO NICAM Normal STEREO MONO NICAM Normal MONO Normal use Dual I Dual II STEREO MONO Forced Mono Dual I Dual II MONO NICAM NICAM Normal NICAM Stereo A2 Stereo ...

Страница 26: ...tic On Off timers The clock setting will be re activated when pressing the ON OFF button on the front panel 1 Press the MENU button 2 Press the or button to select the Function and press the or button 3 Press the or button to select the Time and press the or button Result The Time menu is displayed with the Clock selected 4 To Press the Move to the hour or minute or button Set the hour or minute o...

Страница 27: ...you have finished setting the On Off time Pr No and On Vol press the TV button or press the MENU button repeatedly to Fuzzy Power Off If no function buttons including remote control buttons or front panel buttons are operated for three hours after the TV is turned on by On time the TV will be automatically turned off Switching the Television On and Off Automatically depending on the model Select A...

Страница 28: ... mode individually 4 In addition to Sound Setting Volume level for all the channels and external input mode can be saved individually as per your preference MENU button 2 Press the or button to select the Function and press the or button 3 Press the You can save certain custom features depending on preferences for all the 200 Channels and external input mode or button to select the Blue Screen 4 S...

Страница 29: ...nnel to be locked by pressing the or button 6 Press the or button to select the Lock and press the or button Result Locked is displayed 7 When you have finished press the TV button or press the MENU button repeatedly to return to normal viewing Activating the Child Lock Select Enter Exit Language English Time Plug Play Blue Screen Off Child Lock Function Select Adjust Exit Child Lock Child Lock On...

Страница 30: ...een Off Child Lock Function Select A Exit Time Clock 11 35 Timer Off Function Sleep Off Clock 11 00 am Timer Select Adjust Exit 1 Reminder Press the MENU button 2 Press the 3 Press the or button to select the button Result The Time menu is displayed button to select the Time and press Function and press or button 6 or Press the button to set the mode to On 8 Press the button to select Edit that en...

Страница 31: ...der On 12 00 am Erase Edit GOOD MORNING Function 10 11 Press the Menu button to return to Reminder menu Press 12 Press the or button to select Display Time Result The message entered by you will be erased 13 14 Set the time at which you wish the message to be displayed When you have finished setting the Reminder press TV button or press the MENU button repeatedly to return to normal viewing Exit G...

Страница 32: ...ed 4 If you want to re start the game press the MENU or button Then the final score window will be switched to the START window 5 To exit the Game mode press the GAME button START L EVEL 0 HIT 0 SCORE 0 MISS 0 1 2 3 4 5 6 7 8 9 Clickomania Water Baloons or or button to go to the start screen Press Clickomania Water Balloons Water ballons will fall downwards you have to hit them by hitting arrows b...

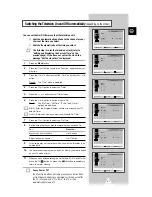
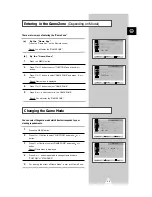
Страница 33: ...an select the game mode which best corresponds to your 1 Press the MENU button 2 Press or button button to select FUNCTION and press or 3 Press or button button to select GAME ZONE and press or Result Game menu is displayed 4 Press button repeatedly to change Game Mode to or CUSTOM or STANDARD viewing requirements 5 For viewing the effect of Game Mode enter into Game Zone Select Enter Exit Languag...

Страница 34: ...the volume of the Game as per your requirements 1 Press the MENU button 2 Press or button button to select FUNCTION and press or 3 Press or button button to select GAME ZONE and press or Result Game menu is displayed 5 Press button to change Game Vol as per your choice or 6 For viewing the effect of Game Vol enter into Game Zone 4 Press or button to select VOLUME Select Enter Exit Language English...

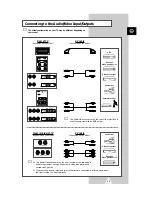
Страница 35: ...eiver AV cable depending on the model Front or Side of TV depending on the model AV cable depending on the model Video disc player Decoder Video game device Camcorder The Audio Video connector on the front or side of the television is used for equipment such as camcorders video disc players and certain video games When both the front or side and rear connectors are connected to external equipment ...

Страница 36: ...36 ENG Connecting to the DVD Input Option The DVD RCA AUDIO L and R connectors are used for equipment with a DVD output DVD Rear of TV INPUT DVD IN MONITOR VIDE O MONO L AUDIO R OUT ...

Страница 37: ...d Viewing Pictures From External Sources A degaussing coil is mounted around the picture tube so you do not normally need to degauss the television manually If you move the television to a different position and color patches appear on the screen you must Switch the television off by pressing the POWER ON OFF button on the front panel Unplug the television from the wall socket Leave the television...

Страница 38: ...he colour settings Check that the broadcast system selected is correct Try to identify the electrical appliance that is affecting the television and move it further away Plug your television into a different mains socket Check the direction location and connections of your aerial This interference is often due to the use of an indoor aerial Replace the remote control batteries Clean the upper edge...

Страница 39: ...39 ENG Memo ...
Страница 40: ... AFTER SALES SERVICE Do not hesitate to contact your retailer or service agent if a change in the performance of your product indicates that a faulty condition may be present AA68 02418D ENG ELECTRONICS ...

Отзывы: