background image

29

GB

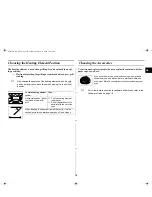
Cleaning Your Microwave Oven

The following parts of your microwave oven should be cleaned
regularly to prevent grease and food particles from building up:

Inside and outside surfaces

Door and door seals

Turntable and Roller rings

ALWAYS ensure that the door seals are clean and the door
closes properly.

1.

Clean the outside surfaces with a soft cloth and warm, soapy water. Rinse and
dry.

2.

Remove any splashes or stains on the inside surfaces or on the roller ring with
a soapy cloth. Rinse and dry.

3.

To loosen hardened food particles and remove smells, place a cup of diluted
lemon juice on the turntable and heat for ten minutes at maximum power.

4.

Wash the dishwasher-safe plate whenever necessary.

DO NOT

spill water in the vents. NEVER use any abrasive

products or chemical solvents.Take particular care when cleaning
the door seals to ensure that no particles:

Accumulate

Prevent the door from closing correctly

Clean the

microwave oven cavity right after each use with a mild

detergent solution, but let the microwave oven cool down before
cleaning in order to avoid injury.

Storing and Repairing Your Microwave Oven

A few simple precautions should be taken when storing or having your
microwave oven serviced.

The oven must not be used if the door or door seals are damaged:

Broken hinge

Deteriorated seals

Distorted or bent oven casing

Only a qualified microwave service technician should perform repair.

NEVER

remove the outer casing from the oven. If the oven is

faulty and needs servicing or you are in doubt about its condition:

Unplug it from the wall socket

Contact the nearest after-sales service centre

If you wish to store your oven away temporarily, choose a dry,
dust-free place.

Reason:

Dust and damp may adversely affect the working

parts in the oven.

This microwave oven is not intended for commercial use.

When cleaning the upper part inside the cavity, it will be
convenient to turn heater downward by 45° and clean it.

CE2933-GB_XML.fm Page 29 Monday, February 18, 2002 10:01 AM

Содержание CE2933N

Страница 1: ...0 Mengguna Ciri Memanas Semula Memasak Segera 10 Seting Memanas Semula Memasak Segera 11 Mengguna Ciri Cair Beku Automatik Auto Defrost 12 Seting Cair Beku Automatik 12 Menggunakan Ciri Pemanasan Automatik 13 Seting Pemanasan Automatik 13 Menggunakan Ciri Pengukus 14 Seting Pengukus 14 Memilih Kedudukan Unsur Pemanasan 15 Memilih Aksesori 15 Menggril 16 Menggabungkan Gelombang Mikro dan Gril 16 Me...

Страница 2: ...asukkan makanan dingin beku ke dalam ketuhar Tekan butang AUTO DEFROST sekali atau lebih daripada sekali menurut jenis makanan yang hendak dicairbekukan 2 Pilih berat dengan menekan butang kg dan g seperti yang dikehendaki 3 Tekan butang Start Biarkan makanan di dalam ketuhar Tekan 30s sekali atau lebih daripada sekali untuk setiap 30 saat tambahan yang anda mahu tambah 1 Panaskan gril terlebih da...

Страница 3: ...PINTU GRIL 1 MEMILIH BUTANG PEMANAS AUTOMATIK 2 PILIHAN MEMANAS SEMULA SEGERA MEMASAK 3 PILIHAN CIRI CAIR BEKU AUTOMATIK AUTO DEFROST 4 PILIHAN MOD GRIL 5 SETING JAM 6 SETING MASA 7 BUTANG STOP PAUSE 8 MEMILIH BUTANG PENGUKUS 9 PILIHAN BERAT 10 PILIHAN MOD GABUNGAN 11 PILIHAN MOD GELOMBANG MIKRO 12 BUTANG MULA 2 3 4 9 7 10 12 5 1 6 8 11 CE2933N MA fm Page 3 Monday February 18 2002 10 01 AM ...

Страница 4: ...Jangan letakkan sebarang objek di antara pintu ketuhar dengan permukaan depan atau membiarkan makanan atau sisa sisa bahan pencuci terkumpul pada permukaan kedap Pastikan pintu dan permukaan kedap pintu sentiasa bersih dengan mengelapnya selepas digunakan mula mula dengan kain lembap dan kemudian dengan kain kering yang lembut c Jangan gunakan ketuhar sekiranya ia rosak sehinggalah ia telah diperb...

Страница 5: ...rtas atau beg plastik Jangan gunakan ketuhar gelombang mikro anda untuk mengeringkan surat khabar Kalau ternampak asap di dalam ketuhar biarkan pintu ketuhar tertutup dan tutup suis atau cabut palam ketuhar daripada bekalan kuasa 8 Berhati hati apabila memanaskan cecair dan makanan bayi SENTIASALAH memberikan standing time sekurang kurangnya 20 saat selepas ketuhar ditutup suisnya supaya suhunya b...

Страница 6: ...r anda di atas permukaan yang rata dan cukup kuat untuk menampung berat ketuhar itu JANGAN SEKALI KALI menghalang lubang udara kerana ketuhar akan menjadi terlalu panas dan mati sendiri secara automatik Untuk keselamatan peribadi gunakan soket 3 pin 240 VOLT 50 Hz AC soket bumi Kalau kabel kuasa ini rosak hendaklah diganti oleh pengilang atau agen perkhidmatan atau orang yang berkelayakan untuk me...

Страница 7: ... Oleh itu standing time yang ditetapkan dalam resipi dan dalam buku panduan ini mesti dipatuhi untuk memastikan Makanan itu masak sekata hingga ke bahagian tengahnya Suhu yang sama pada seluruh makanan itu 1 Untuk memaparkan Kemudian tekan waktu dalam butang Putaran 24 jam Sekali Putaran 12 jam Dua kali 2 Laraskan jam dengan butang h dan minit dengan butang min 3 Apabila waktu yang betul dipaparka...

Страница 8: ...abkan fius terbakar atau menyebabkan alat pemutus terpasang Makanan sama ada terlampau masak atau kurang masak Adakah jangka masa memasak yang sesuai dilaraskan bagi jenis makanan itu Adakah aras kuasa yang sesuai dipilih Percikan api dan bunyi meletup letup berlaku di dalam ketuhar pengarkaan Adakah anda menggunakan bekas yang mempunyai perapi logam Adakah anda meninggalkan garpu atau perkakas lo...

Страница 9: ...esti dikurangkan Sekiranya anda memilih aras kuasa yang lebih rendah masa memasak mesti ditingkatkan 1 Tekan butang Power level Hasilnya Penunjuk 900W kuasa memasak maksimum dipaparkan Pilih aras kuasa yang sesuai dengan menekan butang Power level sekali lagi sehingga wattan yang sepadan dipaparkan Rujuk jadual aras kuasa pada muka surat sebelah 2 Laraskan masa memasak dengan menekan butang 10min ...

Страница 10: ...uhar Contoh Tekan butang MEE SEGERA sebanyak dual kali utnuk memasak 300 gram mee segera Rujuklan jadual di muka surat sebelah untuk keterangan lebih lanjut Gunakan perkakas yang selamat digunakan di dalam ketuhar gelombang mikro sahaja 1 Untuk berhenti sementara Buka pintu ketuhar Hasilnya Proses memasak berhenti Untuk menyambung semula memasak tutup pintu ketuhar dan tekan Start sekali lagi 2 Un...

Страница 11: ...yur segar 200 250 g 300 350 g 400 450 g 500 550 g Basuh sayuran segar Masukkan sayuran segar ke dalam mangkuk Tutup sewaktu memasak dan biarkan Pop Corn Gunakan beg pop corn ketuhar gelombang mikro setiap beg dapat memuat 80 100g 5 minit Jangan lipat beg tersebut dan letakkan ia di tengah ketuhar pada bahagian kanan Kaki ayam 200 g 400 g 600 g 5 minit Sapukan potongan ayam dengan minyak dan tambah...

Страница 12: ...ekan butang Auto Defrost sekali atau lebih daripada sekali menurut jenis makanan yang akan dicairbekukan Rujuk jadual pada muka surat sebelah untuk maklumat lanjut 2 Pilih berat dengan menekan butang kg dan g seperti yang dikehendaki 3 Tekan butang Start Hasilnya Proses mencair beku bermula Ketuhar berbunyi bip separuh jalan untuk mengingatkan anda supaya membalikkan makanan itu Tekan butang Start...

Страница 13: ...ka surat sebelah 3 Tekan butang Start Hasilnya Pengendalian masak akan dimulai setelah kira kira dua saat Bila telah selesai 1 Ketuhar akan berbunyi beeps empat kali 2 Peringatan terakhir akan membunyikan beeps sebanyak tiga kali sekali setiap minit 3 Lama waktu pemakaian akan tertera lagi Kod Makanan Saiz Hidangan Standing Time Cadangan 1 Makanan siap masak 300 350 g 400 450 g 3 minit Letakkan di...

Страница 14: ...eeps empat kali 2 Peringatan terakhir akan membunyikan beeps sebanyak tiga kali sekali setiap minit 3 Lama waktu pemakaian akan tertera lagi Kod Makanan Saiz Hidangan Standing Time Cadangan 1 Beku dingin 150 g 300 g 450 g 1 minit Potong kedua dua hujung paket dan letakkan dalam mangkuk yang rendah Atur yis atau roti dari luar ke dalam Tutuplah ketika sedang memasak dan biarkan 2 Roti 150 g 300 g 4...

Страница 15: ...t lanjut mengenai perkakas dan peralatan memasak yang sesuai rujuk Panduan Perkakas Memasak pada muka surat 19 Untuk melaraskan unsur pemanasan kepada Oleh itu Kedudukan mendatar gril atau gabungan gelombang mikro gril Tarik unsur pemanasan ke arah anda Tolak ke atas sehingga ia selari dengan bumbung ketuhar Apabila membersihkan bahagian atas di dalam ketuhar lebih menyenangkan kalau pemanas ditar...

Страница 16: ...ALAH gunakan sarung tangan ketuhar apabila menyentuh bekas di dalam ketuhar kerana ia akan menjadi sangat panas Kuasa maksimum bagi mod gabungan gelombang mikro dan gril ialah 600W 1 Panaskan gril terlebih dahulu kepada suhu yang dikehendaki dengan menekan butang Grill dan kemudian tekan butang 10min 1min dan 10s 2 Buka pintu ketuhar dan letakkan makanan di atas rak 3 Tekan butang Grill Pilih masa...

Страница 17: ... g berapa kali yang sesuai 500g dalam contoh ini 3 Tekan butang Power Level Mod gelombang mikro I Power level jika perlu laraskan aras kuasa dengan menekan sekali lagi butang sekali atau lebih daripada sekali 600W dalam contoh ini 4 Laraskan masa memasak dengan menekan butang 10min 1min dan 10s berapa kali yang sesuai 4 minit dalam contoh ini 5 Tekan butang Grill Mod Bakar Grill II 6 Laraskan masa...

Страница 18: ...lepas pintu ketuhar dibuka dan ditutup sekali mod memasak akan di LARASKAN SEMULA selepas 30 saat Tekan butang Stop Pause dan kemudian mod memasak akan diLARASKAN SEMULA RESET 1 Tekan butang Stop Pause dan butang Start secara serentak Hasilnya Keadaan berikut ini dipaparkan Ketuhar tidak akan berbunyi beeps setiap kali Anda menekan butang atau telah selesai memasak 2 Untuk memasang semula beeper t...

Страница 19: ...ra Cawan bekas polistirena Beg kertas atau surat khabar Kertas kitar semula atau perapi logam Boleh digunakan untuk memanaskan makanan Terlampau panas boleh menyebabkan polistirena itu lebur Boleh terbakar Boleh menyebabkan pengarkaan Perkakas kaca Perkakas dari ketuhar ke meja Perkakas kaca halus Balang kaca Boleh digunakan kecuali kalau dihias dengan perapi logam Boleh diguna untuk memanaskan ma...

Страница 20: ...coklat lihat bab mengenai panduan teknik dan petua Menutup makanan semasa memasak Menutup makanan semasa memasak adalah sangat penting kerana air yang tersejat naik sebagai wap dan menyumbang kepada proses memasak Makanan boleh ditutup dalam pelbagai cara contohnya dengan pinggan seramik penutup plastik atau plastik lekap yang sesuai digunakan di dalam ketuhar gelombang mikro Masa Biar Selepas mem...

Страница 21: ...3 4 3 Potong lobak merah kepada saiz yang sama besar Bunga Kubis 250g 500g 4 4 6 7 3 Potong bunga bunga dalam saiz yang sama besar Potong bunga yang besar kepada dua bahagian Atur batang menghala ke tengah Courgettes 250g 3 3 3 Hiris courgettes Masukkan 30ml 2 sudu besar air atau seketul kecil mentega Masak sehingga lembut Terung 250g 2 3 3 Hiris terung kepada kepingan yang kecil dan renjiskan 1 s...

Страница 22: ...alau tidak kemungkinan ia akan menjadi panas terlalu cepat contohnya pai daging kisar Kacau hingga sebati atau balikkan makanan semasa memanaskan semula untuk mendapatkan hasil yang terbaik Kacau sekali lagi sebelum dihidangkan jika boleh Berhati hati apabila memanaskan cecair dan makanan bayi Untuk mengelakkan didihan cecair yang membuak buak dan kemungkinan kulit anda melecur kacau sebelum semas...

Страница 23: ...i dengan teliti sebelum memberikannya kepada bayi Suhu menghidang yang disyorkan ialah 37 C NOTA Makanan bayi amat perlu diperiksa dengan teliti sebelum dihidangkan untuk mengelakkan kulit melecur Gunakan aras kuasa dan masa dalam jadual pada muka surat sebelah sebagai garis panduan untuk memanas semula Panduan untuk Memanas Semula Dua Hidangan Gunakan aras kuasa dan masa dalam jadual ini sebagai ...

Страница 24: ...atau mi telur ke dalam pinggan seramik leper Tutup dengan plastik lekap gelombang mikro Kacau sebelum dihidangkan Pasta dengansos dingin 350g 600W 4 5 3 Letakkan pasta contohnya ravioli tortellini di dalam pinggan seramik yang dalam Tutup dengan tudung plastik Kacau sekali sekala semasa memanas semula dan sekali lagi sebelum membiar dan menghidangkannya Hidangan Sedia dingin 350g 450g 550g 600W 4 ...

Страница 25: ...antiti yang besar Ingat petua ini semasa mendingin beku dan mencairbekukan makanan Untuk mencair makanan beku makanan dingin dengan suhu lebih kurang 18 C hingga 20 C gunakan jadual berikut sebagai panduan Semua makanan dingin beku mesti dicairbekukan menggunakan aras kuasa cair beku 180 W Makanan Kuantiti Masa min Standing Time min Arahan Daging Daging kisar Stik babi 200g 400g 250g 6 7 10 12 7 8...

Страница 26: ...gabungan boleh didapati dengan mod ini 600W Gril 450W Gril dan 300W Gril Perkakas memasak untuk memasak dengan gelombang mikro gril Gunakan perkakas memasak yang gelombang mikro boleh meresap melaluinya Perkakas memasak haruslah kalis nyala Jangan gunakan perkakas memasak logam dengan mod gabungan Jangan gunakan sebarang jenis perkakas memasak plastik kerana ia boleh menjadi cair Makanan yang sesu...

Страница 27: ...as ham kepingan keju 2 keping 300g 4 keping 600g 450W Gril 3 4 6 7 Bakar kepingan roti dahulu Letakkan roti bakar dengan bahan bahan di atasnya di atas rak Letakkan 2 keping roti bakar bertentangan terus di atas rak Biarkan selama 2 3 minit Kentang Bakar 250g 500g 600W Gril 4 5 6 7 Ubi kentang dibelah dua Letakkannya dalam bulatan di atas rak dengan bahagian yang dibelah itu di atas gril Kentang S...

Страница 28: ...tu terus di atas pinggan putar Makanan Segar Kuantiti Kuasa Masa Sebelah Masa 2 Belah Arahan Rol Roti setiap satunya berat 50g 2 keping 4 keping MW Gril 300W Gril 1 2 2 3 Gril sahaja 2 3 2 3 Susun rol roti dalam bulatan dengan bahagian bawahnya ke atas terus di atas pinggan putar Gril sebelah lagi sehingga kepada kerangupan yang anda mahu Biarkan selama 2 5 minit Baguette Rot Bawang Putih 200 250 ...

Страница 29: ...nya Masak dengan ditutup selama 6 hingga 7 minit menggunakan 900W Kacau beberapa kali semasa memasaknya MEMERANGKAN HIRISAN BADAM Ratakan 30g hirisan badam di atas pinggan seramik bersaiz sederhana Kacau beberapa kali semasa memerangkannya selama 3 hingga 4 minit menggunakan 600W Biarkannya selama 2 3 minit di dalam ketuhar Gunakan sarung tangan semasa mengeluarkannya dari ketuhar Membersihkan Ket...

Страница 30: ...ya anda mahu menyimpan ketuhar anda buat sementara waktu pilihlah tempat yang kering dan tidak berhabuk Sebabnya Habuk dan keadaan yang lembap boleh merosakkan bahagian bahagian di dalam ketuhar yang bergerak Ketuhar gelombang mikro ini bukan untuk kegunaan komersil Spesifikasi Teknikal SAMSUNG berusaha untuk mempertingkatkan produknya sepanjang masa Justeru itu kedua dua spesifikasi teknikal dan ...

Страница 31: ...31 MA Nota CE2933N MA fm Page 31 Monday February 18 2002 10 01 AM ...

Страница 32: ...CE2933N MA fm Page 32 Monday February 18 2002 10 01 AM ...

Страница 33: ...E2933N ...

Страница 34: ...2 ...

Страница 35: ...3 CT ...

Страница 36: ...4 ...

Страница 37: ...5 CT ...

Страница 38: ...6 240V ...

Страница 39: ...7 CT ...

Страница 40: ...8 ...

Страница 41: ...9 CT 1400 1400 1400 1400 ...

Страница 42: ...10 ...

Страница 43: ...11 CT ...

Страница 44: ...12 ...

Страница 45: ...13 CT Monday February 18 2002 11 19 AM ...

Страница 46: ...14 ...

Страница 47: ...15 CT ...

Страница 48: ...16 ...

Страница 49: ...17 CT ...

Страница 50: ...18 ...

Страница 51: ...19 CT ...

Страница 52: ...20 ...

Страница 53: ...21 CT ...

Страница 54: ...22 ...

Страница 55: ...23 CT ...

Страница 56: ...24 ...

Страница 57: ...25 CT ...

Страница 58: ...26 ...

Страница 59: ...27 CT ...

Страница 60: ...28 ...

Страница 61: ...29 CT ...

Страница 62: ...30 00 00 0V 50 Hz ...

Страница 63: ...31 CT ...

Страница 64: ......

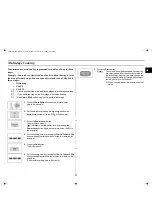
Страница 65: ...nstant Reheat Cook Feature 10 Instant Reheat Cook Settings 11 Using the Auto Defrost Feature 12 Auto Defrost Settings 12 Using the Auto Reheat Feature 13 Auto Reheat Setting 13 Using the Steam Cook Feature 14 Steam Cook Setting 14 Choosing the Heating Element Position 15 Choosing the Accessories 15 Grilling 16 Combining Microwaves and the Grill 16 Multistage Cooking 17 Switching the Beeper Off 18 ...

Страница 66: ...he frozen food in the oven Press the Auto Defrost button once or more time according to the type of food to the defrosted 2 Select the weight by pressing the kg and g buttons as required 3 Press the Start button Leave the food in the oven Press 30s once or more times for each extra 30 seconds that you wish to add 1 Preheat the grill to the required temperature by pressing the Grill button and then...

Страница 67: ... GRILL 1 AUTO REHEAT SELECTION 2 INSTANT REHEAT COOK SELECTION 3 AUTO DEFROST FEATURE SELECTION 4 GRILL MODE SELECTION 5 CLOCK SETTING 6 TIME SETTING 7 STOP PAUSE BUTTON 8 STEAM COOK SELECTION 9 WEIGHT SELECTION 10 COMBI MODE SELECTION 11 MICROWAVE MODE SELECTION 12 START BUTTON 2 3 4 9 7 10 12 5 1 6 8 11 CE2933 GB_XML fm Page 3 Monday February 18 2002 10 01 AM ...

Страница 68: ...ect between the oven door and front face or allow food or cleaner residues to accumulate on sealing surfaces Ensure that the door and door sealing surfaces are kept clean by wiping after use first with a damp cloth and then with a soft dry cloth c Do not operate the oven if it is damaged until it has been repaired by a qualified microwave service technician trained by the manufacturer It is partic...

Страница 69: ... least 20 seconds after the oven has been switched off so that the temperature can equalize Stir during heating if necessary and ALWAYS stir after heating Take care when handling the container after heating You may burn yourself if the container is too hot A risk of delayed eruptive boiling exists To prevent delayed boiling and possible scalding you should put a plastic spoon or glass stick into t...

Страница 70: ... appliance is damaged it must be replaced by the manufacturer or its service agent or a similarly qualified person in order to avoid a hazard Do not install the microwave oven in hot or damp surroundings like next to a traditional oven or radiator The power supply specifications of the oven must be respected and any extension cable used must be of the same standard as the power cable supplied with...

Страница 71: ...s and in this booklet must therefore be respected to ensure Even cooking of the food right to the centre The same temperature throughout the food 1 To display the time in the Then press the button 24 hour notation Once 12 hour notation Twice 2 Set the hour with the h button and the minutes with the min button 3 When the right time is displayed press the button again to start the clock Result The t...

Страница 72: ... or a breaker to be triggered The food is either overcooked or undercooked Was the appropriate cooking length set for the type of food Was an appropriate power level chosen Sparking and cracking occur inside the oven arcing Have you used a dish with metal trimmings Have you left a fork or other metal utensil inside the oven Is aluminium foil too close to the inside walls The oven causes interferen...

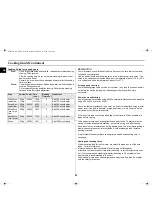
Страница 73: ...ct lower power level the cooking time must be increased 1 Press the Power Level button Result The 900W maximum cooking power indications are displayed Select the appropriate power level by pressing the Power Level button again until the corresponding wattage is displayed Refer to the power level table on the next page 2 Set the cooking time by pressing the 10min 1min and 10s button 3 Press the Sta...

Страница 74: ... Example Press the Instant Noodle button two times to cook the 300g instant noodle Refer to the table on the next page for turther details Use only recipients that are microwave safe 1 To stop Timerarily Open the door Result Cooking stops To resume cooking close the door and press Start again 2 To stop completely Press the Stop Pause button Result The cooking stops If you wish to cancel the cookin...

Страница 75: ...g cooking and standing Stir it before standing Fresh vegetables 200 250 g 300 350 g 400 450 g 500 550 g Wash the vegetables Put the vegetables into a bowl Cover it during cooking and standing Popcorn Use Micro popcorn bag each for 80 100g Unfold the bag Place in the middle of the microwave oven with right side Chicken Leg 200 g 400 g 600 g 5 mins Brush the chicken pices with oil and spices like pe...

Страница 76: ...ost button Press the Auto Defrost button once or more times according to the type of food to be defrosted Refer to the table on the next page for further details 2 Select the weight by pressing the kg and g buttons as required 3 Press the Start button Result Defrosting begins The oven beeps halfway through defrosting to remind you to turn the food over Press Start again to finish defrosting Food S...

Страница 77: ... button Result Cooking starts after about two seconds When it has finished 1 The oven beeps four times 2 The end reminder signal will beep 3 times once every minute 3 The current time is displayed again Code Food Serving Size Standing Time Recommendations 1 Ready meal 300 350 g 400 450 g 3 mins Put on a ceramic plate and cover with microwave cling film This programme is suitable for meals consisti...

Страница 78: ...ven beeps four times 2 The end reminder signal will beep 3 times once every minute 3 The current time is displayed again Code Food Serving Size Standing Time Recommendations 1 Dumpling 150 g 300 g 450 g 1 min Cut both ends of package put on a shallow dish Arrange the dumplings or breads from out side to inside dish Cover ir during cooking and standing 2 Bread 150 g 300 g 450 g 1 min Cut both ends ...

Страница 79: ...towels etc For further details on suitable cookware and utensils refer to the Cookware Guide on page 19 To set the heating element to the Then Horizontal position grill or combined microwave grill Pull the heating element towards you Push it upwards until it is parallel with the oof of the oven When cleaning the upper part inside the cavity it will be convenient to turn heater downward by 45 and c...

Страница 80: ...e combined microwave and grill mode is 600W 1 Preheat the grill to the required temperature by pressing the Grill button and then the 10min 1min and 10s buttons 2 Open the door and place the food on the rack 3 Press the Grill button Select the cooking time by pressing the 10min 1min and 10s buttons 4 Press the Start button 1 Make sure that the heating element is in the horizontal position refer to...

Страница 81: ...ss the Power Level button The microwave mode I if necessary set the power level by pressing the Power Level button again once or more times 600W in the example 4 Set the cooking time by pressing the 10min 1min and 10s buttons the appropriate number of times 4 minutes in the example 5 Press the Grill button The Grill mode II 6 Set the cooking time by pressing the 10min 1min and 10s buttons the appr...

Страница 82: ...he cooking mode will be RESET after 30 seconds Press the Stop Pause button and then cooking mode will be RESET 1 Press the Stop Pause and Start buttons at the same time Result The following indication is displayed The oven does not beep each time you press a button or cooking ends 2 To switch the beeper back on press the Stop Pause and Start buttons again at the same time Result The following indi...

Страница 83: ...ainers Paper bags or newspaper Recycled paper or metal trims Can be used to warm food Overheating may cause the polystyrene to melt May catch fire May cause arcing Glassware Oven to table ware Fine glassware Glass jars Can be used unless decorated with a metal trim Can be used to warm foods or liquids Delicate glass may break or crack if heated suddenly Must remove the lid Suitable for warming onl...

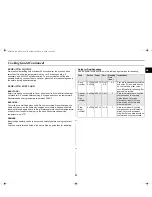
Страница 84: ...e for example see the chapter with tips techniques and hints Covering during cooking To cover the food during cooking is very important as the evaporated water rises as steam and contributes to cooking process Food can be covered in different ways e g with a ceramic plate plastic cover or microwave suitable cling film Standing times After cooking is over food the standing time is important to allo...

Страница 85: ...Carrots 250g 3 4 3 Cut carrots into even sized slices Cauliflower 250g 500g 4 4 6 7 3 Prepare even sized florets Cut big florets into halves Arrange stems to the centre Courgettes 250g 3 3 3 Cut courgettes into slices Add 30 ml 2 tbsp water or a knob of butter Cook until just tender Egg Plants 250g 2 3 3 Cut egg plants into small slices and sprinkle with 1 tablespoon lemon juice Leeks 250g 3 3 3 C...

Страница 86: ... to heat up very quickly mince pies for example Stir well or turn food over during reheating for best results When possible stir again before serving Take particular care when heating liquids and baby foods To prevent eruptive boiling of liquids and possible scalding stir before during and after heating Keep them in the microwave oven during standing time We recommend putting a plastic spoon or gl...

Страница 87: ...lk or food before giving it to the baby Recommended serving temperature ca 37 C REMARK Baby food particularly needs to be checked carefully before serving to prevent burns Use the power levels and times in the next table as a guide lines for reheating Guide for Dual Reheating Use the power levels and times in this table as a guide lines for reheating Food Portion Power Time Standing Time min Instr...

Страница 88: ...tti or egg noodles on a flat ceramic plate Cover with microwave cling film Stir before serving Filled pasta with sauce chilled 350g 600W 4 5 3 Put filled pasta e g ravioli tortellini in a deep ceramic plate Cover with plastic lid Stir occasionally during reheating and again before standing and serving Plated Meal chilled 350g 450g 550g 600W 4 5 5 6 5 6 3 Plate a meal of 2 3 chilled components on a...

Страница 89: ...and defrosting food For defrosting of frozen food with a temperature of about 18 to 20 C use the following table as a guide All frozen food should be defrosted using defrosting power level 180 W Food Portion Time min Standing Time min Instructions Meat Minced beef Pork steaks 200g 400g 250g 6 7 10 12 7 8 15 30 Place the meat on a flat ceramic plate Shield thinner edges with aluminium foil Turn ove...

Страница 90: ...owns evenly Three combination modes are available with this model 600 W Grill 450 W Grill and 300 W Grill Cookware for cooking with microwave grill lease use cookware that microwaves can pass through Cookware should be flameproof Do not use metal cookware with combination mode Do not use any type of plastic cookware as it can melt Food suitable for microwave grill cooking Food suitable for combina...

Страница 91: ...tin into a small glass Grill pyrex dish Put the dish on the rack After cooking stand for 2 3 minutes Chicken Pieces 450g 2pcs 650g 2 3pcs 850g 4pcs 300W Grill 7 8 9 10 11 12 7 8 8 9 9 10 Brush chicken pieces with oil and spices Put them in a circle with the bones to the middle Put one chicken piece not into the centre of the rack Stand for 2 3 minutes Roast Chicken 900g 1100g 450W Grill 10 12 12 1...

Страница 92: ... PUDDING Mix pudding powder with sugar and milk 500 ml by following the manufacturers instructions and stir well Use a suitable sized glass pyrex bowl with lid Cook covered for 6 to 7 minutes using 900 W Stir several times well during cooking BROWNING ALMOND SLICES Spread 30 g sliced almonds evenly on a medium sized ceramic plate Stir several times during browning for 3 to 4 minutes using 600 W Le...

Страница 93: ... from closing correctly Clean the microwave oven cavity right after each use with a mild detergent solution but let the microwave oven cool down before cleaning in order to avoid injury Storing and Repairing Your Microwave Oven A few simple precautions should be taken when storing or having your microwave oven serviced The oven must not be used if the door or door seals are damaged Broken hinge De...

Страница 94: ...E2933N Power source 240V 50 Hz Power consumption Microwave Grill Combined mode 1500 W 1400 W 2900 W Output power 100 W 900 W 6 Level IEC 705 Operating frequency 2450 MHz Magnetron OM75P 31 Cooling method Cooling fan motor Dimensions W x H x D Outside Oven cavity 517 x 297 x 404 mm 336 x 241 x 349 mm Volume 28 liter Weight Net 18 kg approx CE2933 GB_XML fm Page 30 Monday February 18 2002 10 01 AM ...

Страница 95: ...31 GB Memo CE2933 GB_XML fm Page 31 Monday February 18 2002 10 01 AM ...

Страница 96: ...CE2933 GB_XML fm Page 32 Monday February 18 2002 10 01 AM ...

Отзывы: