background image

CE2927N_17_gb.fm Page 36 Monday, July 9, 2001 10:23 AM

Содержание CE2917N

Страница 1: ...ing the Cooking Time 11 Manual Defrosting of Food 12 Using the Instant Reheat Cook Feature CE2917N CE2917NT 12 Instant Reheat Cook Setting CE2917N CE2917NT 12 Using the Auto Defrosting Feature CE2927N CE2927NT 13 Auto Defrost Settings CE2927N CE2927NT 13 Using the Crusty Plate CE2927NT CE2917NT 14 Crusty Plate Setting CE2927NT CE2917NT 15 Choosing the Heating Element Position 16 Choosing the Acces...

Страница 2: ...o select the appropriate weight Result Cooking starts after about two seconds Leave the food in the oven Turn the TIME WEIGHT dial to the desired time Result Cooking starts after about two seconds 1 Turn the COOKING POWER CONTROL knob to the Grill symbol 2 Turn the TIME WEIGHT knob to select the appropriate time Result Cooking starts after about two seconds 1 Place the food in the oven Select the ...

Страница 3: ...OUPLER ROLLER RING LIGHT GRILL TIME WEIGHT DIAL SAFETY INTERLOCK HOLES VARIABLE COOKINGPOWER CONTROL KNOB VENTILATION HOLES DOOR LATCHES DOOR TURNTABLE COUPLER ROLLER RING SAFETY INTERLOCK HOLES LIGHT DOOR HANDLE VARIABLECOOKING POWER CONTROL KNOB GRILL TIMER KNOB CE2927N_17_gb fm Page 3 Monday July 9 2001 10 23 AM ...

Страница 4: ...NG BUTTON 3 MANUAL DEFROST 4 COMBI Microwave Grill 5 TIME WEIGHT DIAL 6 VARIABLE COOKING POWER CONTROL KNOB 7 AUTO DEFROST 8 GRILL 9 TURNTABLE ON OFF BUTTON 1 2 3 4 5 7 6 8 9 1 MANUAL DEFROST 2 INSTANT REHEAT COOK 3 TURNTABLE ON OFF 2 1 3 CE2927N_17_gb fm Page 4 Monday July 9 2001 10 23 AM ...

Страница 5: ... surfaces Ensure that the door and door sealing surfaces are kept clean by wiping after use first with a damp cloth and then with a soft dry cloth c Do not operate the oven if it is damaged until it has been repaired by a qualified microwave service technician trained by the manufacturer It is particularly important that the oven door closes properly and that there is no damage to the 1 Door door ...

Страница 6: ...at least 20 seconds after the oven has been switched off so that the temperature can equalize Stir during heating if necessary and ALWAYS stir after heating Take care when handling the container after heating You may burn yourself if the container is too hot A risk of delayed eruptive boiling exists To prevent delayed boiling and possible scalding you should put a plastic spoon or glass stick into...

Страница 7: ...le of this appliance is damaged it must be replaced by the manufacturer or its service agent or a similarly qualified person in order to avoid a hazard Do not install the microwave oven in hot or damp surroundings like next to a traditional oven or radiator The power supply specifications of the oven must be respected and any extension cable used must be of the same standard as the power cable sup...

Страница 8: ... the food out of the oven Standing times specified in recipes and in this booklet must therefore be respected to ensure Even cooking of the food right to the centre The same temperature throughout the food 1 To display the time in the Then press the button 24 hour notation Once 12 hour notation Twice 2 Turn the TIME WEIGHT dial to set hour 3 Press the button 4 Turn the TIME WEIGHT dial to set minu...

Страница 9: ...ood is either overcooked or undercooked Was the appropriate cooking length set for the type of food Was an appropriate power level chosen Sparking and cracking occur inside the oven arcing Have you used a dish with metal trimmings Have you left a fork or other metal utensil inside the oven Is aluminium foil too close to the inside walls The oven causes interference with radios or televisions Sligh...

Страница 10: ...IMUM POWER 900 W 2 Set the time by turning TIME WEIGHT dial Result The oven light comes on and the turntable starts rotating 1 Cooking starts and when it has finished the oven beeps four times 2 The end reminder signal will beep 3 times once every minute 3 The current time is displayed again 1 Set the power level to maximum by turning COOKING POWER CONTROL knob MAXIMUM POWER 900 W 2 Set the time b...

Страница 11: ...o stop completely Turn the TIME WEIGHT dial to the left 0 will be displayed 1 To stop Timerarily Open the door Result Cooking stops To resume cooking close the door 2 To stop completely Turn the TIMER knob to 0 Adjust the remaining cooking time by rotating the TIME WEIGHT dial During the cooking to increase or decrease the cooking time of you food turn the dial right or left Adjust the remaining c...

Страница 12: ...wed when cooking or reheating food with the Instant Reheat and Cook Feature 1 Turn the COOKING POWER CONTROL knob to the Manual Defrost symbol 2 Turn the TIME WEIGHT dial to select the appropriate time Result The oven light comes on and the turntable starts rotating 1 Cooking starts and when it has finished the oven beeps four times 2 The end reminder signal will beep 3 times once every minute 3 T...

Страница 13: ...g time after Auto Defrosting has finished 1 Turn the COOKING POWER CONTROL knob to the Auto Defrost symbol 2 Turn the TIME WEIGHT dial to select the appropriate weight Result The oven light comes on and the turntable starts rotating 1 Cooking starts and when it has finished the oven beeps four times 2 The end reminder signal will beep 3 times once every minute 3 The current time is displayed again...

Страница 14: ...t with the highest Microwave Grill Combination 600W Grill setting by following the times and instructions in the chart Always use oven gloves to take out the crusty plate as will become very hot 2 Brush the plate with oil if you are cooking food such as bacon and eggs in order to brown the food nicely Please note that the crusty plate has a teflon layer which is not scratch resistant Do not use an...

Страница 15: ...ack Pizza frozen 300 350 g 400 450 g 600W Grill 5 min 7 8 min 9 10 min Preheat crusty plate Put the frozen pizza on the crusty plate Put crusty plate on the rack Mini Pizza chilled 100 150 g 200 250 g 600W Grill 5 min 3 3 min 4 4 min Preheat crusty plate Put the chilled pizza pieces in a circle on the plate Set crusty plate on the rack OvenChips frozen 200 g 300 g 400 g 450W Grill 4 min 9 min 12 m...

Страница 16: ...less even We recommend that you turn the dish by hand halfway through the cooking process Warning Never operate the oven without local when turntable button is off Result The oven may catch fire and become extremely damaged Don t press Turntable on off button during cooking process To set the heating element to the Then Horizontal position grill or combined microwave grill Pull the heating element...

Страница 17: ... be very hot Check that the heating element is in the horizontal position 1 Preheat the grill to the required temperature by the turning the cooking power control knob to Grill symbol and turning the TIME WEIGHT knob to the appropriate position 2 Open the door and place the food on the rack 3 Set the time by turning the TIME WEIGHT dial Result The oven light comes on and the turntable starts rotat...

Страница 18: ...ther details 2 Open the oven door Place the food on the rack and the rack on the turntable Close the door 3 Turn the Cooking Power Control knob to the appropriate power Level 4 Set the time by turning TIME WEIGHT dial Result The oven light comes on and the turntable starts rotating 1 Cooking starts and when it has finished the oven beeps four times 2 The end reminder signal will beep 3 times once ...

Страница 19: ...ontainers Paper bags or newspaper Recycled paper or metal trims Can be used to warm food Overheating may cause the polystyrene to melt May catch fire May cause arcing Glassware Oven to table ware Fine glassware Glass jars Can be used unless decorated with a metal trim Can be used to warm foods or liquids Delicate glass may break or crack if heated suddenly Must remove the lid Suitable for warming ...

Страница 20: ...the chapter with tips techniques and hints Covering during cooking It is very important to cover the food during cooking because evaporated water rises as steam and contributes to the cooking process Food can be covered in different ways e g with a ceramic plate plastic cover or microwave suitable cling film Standing times It is important to allow standing time when you have finished cooking the f...

Страница 21: ... the centre Brussels Sprouts 250g 5 5 3 Add 60 75 ml 5 6 tbsp water Carrots 250g 3 4 3 Cut carrots into even sized slices Cauliflower 250g 500g 4 4 6 7 3 Prepare even sized florets Cut big florets into halves Arrange stems to the centre Courgettes 250g 3 3 3 Cut courgettes into slices Add 30 ml 2 tbsp water or a knob of butter Cook until just tender Egg Plants 250g 2 3 3 Cut egg plants into small ...

Страница 22: ...imes When reheating food for the first time it is helpful to make a note of the time taken for future reference Always make sure that the reheated food is piping hot throughout Allow food to stand for a short time after reheating to let the temperature even out The recommended standing time after reheating is 2 4 minutes unless another time is recommended in the chart Take particular care when hea...

Страница 23: ...aghetti or egg noodles on a flat ceramic plate Cover with microwave cling film Stir before serving Filled pastawith sauce chilled 350g 600W 4 5 3 Put filled pasta e g ravioli tortellini in a deep ceramic plate Cover with plastic lid Stir occasionally during reheating and again before standing and serving Plated Meal chilled 350g 450g 550g 600W 4 5 5 6 5 6 3 Plate a meal of 2 3 chilled components o...

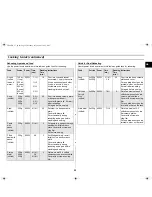
Страница 24: ...tand in order to complete defrosting The standing time for complete defrosting will vary depending on the quantity defrosted Please refer to the table below Hint Flat food defrosts better than thick and smaller quantities need less time than bigger ones Remember this hint while freezing and defrosting food For defrosting of frozen food with a temperature of about 18 to 20 C use the following table...

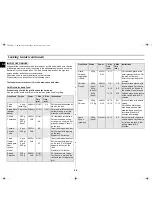
Страница 25: ...ot use any type of plastic cookware as it can melt Food suitable for microwave grill cooking Food suitable for combination mode cooking include all kinds of cooked food which needs reheating and browning e g baked pasta as well as foods which require a short cooking time to brown the top of the food Also this mode can be used for thick food portions that benefit from a browned and crispy top e g c...

Страница 26: ... Grill 4 5 Toast the breas slices first Put the toast with topping on the rack Stand for 2 3 minutes Toast Hawaii pineapple ham cheese slices 2 pcs 300 g 4 pcs 600 g 450W Grill 3 4 6 7 Toast the bread slices first Put the toast with topping on the rack Put 2 toasts opposite directly on the rack Stand for 2 3 minutes Baked Potatoes 250 g 500 g 600W Grill 4 5 6 7 Cut potatoes into halves Put them in...

Страница 27: ...Side Time min 2 Side Time min Instructions Bread Rolls each ca 50 g 2 pcs 4 pcs MW Grill 300W Grill 1 2 2 3 Grill only 2 3 2 3 Arrange rolls in a circle with the bottom side up directly on the turntable Grill the rolls until they are crispy Stand for 2 5 minutes Baguettes Garlic Bread 200 250g 1 pc MW Grill 450W Grill 3 4 Grill only 2 3 Put frozen baguette diagonally on baking paper on the rack Af...

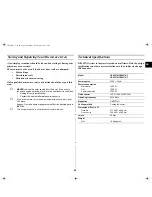
Страница 28: ... glass pyrex bowl with lid Cook covered for 6 to 7 minutes using 900 W Stir several times well during cooking BROWNING ALMOND SLICES Spread 30 g sliced almonds evenly on a medium sized ceramic plate Stir several times during browning for 3 to 4 minutes using 600 W Let it stand for 2 3 minutes in the oven Use oven gloves while taking out Cleaning Your Microwave Oven The following parts of your micr...

Страница 29: ...ven away temporarily choose a dry dust free place Reason Dust and damp may adversely affect the working parts in the oven This microwave oven is not intended for commercial use Technical Specifications SAMSUNG strives to improve its products at all times Both the design specifications and these user instructions are thus subject to change without notice Model CE2927N CE2927NT CE2917N CE2917NT Powe...

Страница 30: ...GB 30 Note CE2927N_17_gb fm Page 30 Monday July 9 2001 10 23 AM ...

Страница 31: ...GB 31 Note CE2927N_17_gb fm Page 31 Monday July 9 2001 10 23 AM ...

Страница 32: ...GB 32 Note CE2927N_17_gb fm Page 32 Monday July 9 2001 10 23 AM ...

Страница 33: ...GB 33 Note CE2927N_17_gb fm Page 33 Monday July 9 2001 10 23 AM ...

Страница 34: ...GB 34 Note CE2927N_17_gb fm Page 34 Monday July 9 2001 10 23 AM ...

Страница 35: ...GB 35 Note CE2927N_17_gb fm Page 35 Monday July 9 2001 10 23 AM ...

Страница 36: ...CE2927N_17_gb fm Page 36 Monday July 9 2001 10 23 AM ...

Отзывы: