background image

 EN

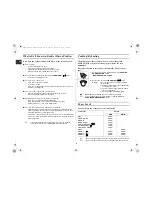
Quick Look-up Guide

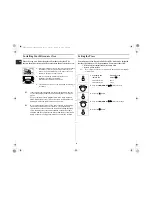
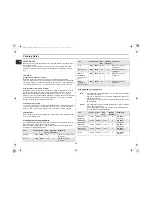
If you want to cook some food

If you want to Auto Defrost some food

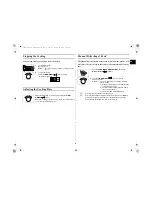
If you want to adjust the cooking time

If you want to grill some food

Oven

1.

Place the food in the oven.
Select the power level by rotating the 

COOKING POWER 

CONTROL

 knob.

2.

Select the cooking time by rotating the 

TIME/WEIGHT 

(

) dial. .

Result: 

Cooking starts after about two seconds.

1.

Turn the 

COOKING POWER CONTROL

 knob to the 

Auto 

Defrost 

(

) symbol.

2.

Turn the

 TIME/WEIGHT

 (

) dial to select the 

appropriate weight. 
Result: 

Cooking starts after about two seconds.

Leave the food in the oven.
Turn the 

TIME/WEIGHT

 (

) dial to the desired time. 

1.

Turn the 

COOKING POWER CONTROL

 knob to the 

Grill


(

) symbol.

2.

Turn the

 TIME/WEIGHT

 (

) dial to select the 

appropriate time.
Result: 

Cooking starts after about two seconds.

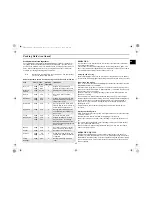
VENTILATION 
HOLES

DOOR LATCHES
 

DOOR HANDLE

DOOR

TURNTABLE

COUPLER  

ROLLER RING 

LIGHT 

GRILL

TIME/WEIGHT DIAL

SAFETY
INTERLOCK 
HOLES 

VARIABLE 
COOKING 
POWER 
CONTROL 
KNOB

jlY_Yku†nluTWYZW]y†luU”GGwˆŽŒGYGG{œŒš‹ˆ SGqˆ•œˆ™ GZWSGYWW^GG_a\ZGht

Содержание CE282DN

Страница 1: ...a Problem 8 Cooking Reheating 8 Power Levels 8 Stopping the Cooking 9 Adjusting the Cooking Time 9 Manual Defrosting of Food 9 Using the Auto Defrosting Feature 10 Auto Defrost Settings 10 Using the C...

Страница 2: ...OL knob to the Auto Defrost symbol 2 Turn the TIME WEIGHT dial to select the appropriate weight Result Cooking starts after about two seconds Leave the food in the oven Turn the TIME WEIGHT dial to th...

Страница 3: ...NTROL KNOB 5 COMBI Microwave Grill 6 CLOCK SETTING BUTTON 7 AUTO DEFROST 8 GRILL 1 2 3 5 6 7 8 4 1 DISPLAY 2 TIME WEIGHT DIAL 3 MANUAL DEFROST 4 VARIABLE COOKING POWER CONTROL KNOB 5 COMBI Microwave G...

Страница 4: ...or cleaner residues to accumulate on sealing surfaces Ensure that the door and door sealing surfaces are kept clean by wiping after use first with a damp cloth and then with a soft dry cloth c Do not...

Страница 5: ...tentional burn DO NOT touch heating elements or interior oven walls until the oven be cooled down Do not immerse the power cable or plug in water and keep the power cable away from heated surfaces Do...

Страница 6: ...the first time Setting the Time Your microwave oven has an inbuilt clock The time can be displayed in either the 24 hour or 12 hour notation You must set the clock When you first install your microwa...

Страница 7: ...oor The oven must be plugged into an appropriate wall socket The turntable must be in position in the oven If a power level other than the maximum is used the water takes longer to boil 1 The microwav...

Страница 8: ...may be reset To solve this problem disconnect the power plug and reconnect it Reset the time If the above guidelines do not enable you to solve the problem contact your local dealer or SAMSUNG after s...

Страница 9: ...Open the door Result Cooking stops To resume cooking close the door 2 To stop completely Turn the TIME WEIGHT dial to the left 0 will be displayed Adjust the remaining cooking time by rotating the TIM...

Страница 10: ...efrosting has finished 1 Turn the COOKING POWER CONTROL knob to the Auto Defrost symbol 2 Turn the TIME WEIGHT dial to select the appropriate weight Result The oven light comes on and the turntable st...

Страница 11: ...he highest Microwave Grill Combination 600W Grill setting by following the times and instructions in the chart Always use oven gloves to take out the crusty plate as will become very hot 2 Brush the p...

Страница 12: ...beside the centre 2 baguettes side by side on the plate Put crusty plate on rack Pizza frozen 300 350 g 4 min 600W Grill 9 10 min Preheat crusty plate Put the frozen pizza on the crusty plate Put crus...

Страница 13: ...ic containers dishes paper cups towels etc For further details on suitable cookware and utensils refer to the Cookware Guide on page 15 To set the heating element to the Then Horizontal position grill...

Страница 14: ...d temperature by turning the cooking power control knob to grill symbol and turning the TIME WEIGHT knob to the appropriate position 2 Open the door Place the food on the rack and the rack on the turn...

Страница 15: ...tyrene cups containers Paper bags or newspaper Recycled paper or metal trims Can be used to warm food Overheating may cause the polystyrene to melt May catch fire May cause arcing Glassware Oven to ta...

Страница 16: ...e for frozen vegetables Use a suitable glass pyrex bowl with lid Cook covered for the minimum time see table Continue cooking to get the result you prefer Stir twice during cooking and once after cook...

Страница 17: ...d It is preferable to underestimate cooking time and add extra heating time if necessary Heating and standing times When reheating food for the first time it is helpful to make a note of the time take...

Страница 18: ...ed Stir after cooking time Stand for 2 3 minutes Before serving stir well and check the temperature carefully Baby milk 100ml 200ml 300W 30 40sec 50 sec to 1min 2 3 Stir or shake well and pour into a...

Страница 19: ...nt while freezing and defrosting food For defrosting of frozen food with a temperature of about 18 to 20 C use the following table as a guide All frozen food should be defrosted using defrosting power...

Страница 20: ...e a short cooking time to brown the top of the food Also this mode can be used for thick food portions that benefit from a browned and crispy top e g chicken pieces turning them over half way through...

Страница 21: ...3 minutes Baked Potatoes 250 g 500 g 600 W Grill 4 5 8 9 Cut potatoes into halves Put them in a circle on the rack with the cut side to the grill Chicken Pieces 450 500 g 2 pcs 300 W Grill 8 9 9 10 P...

Страница 22: ...during cooking BROWNING ALMOND SLICES Spread 30 g sliced almonds evenly on a medium sized ceramic plate Stir several times during browning for 3 to 4 minutes using 600 W Let it stand for 2 3 minutes i...

Страница 23: ...your oven away temporarily choose a dry dust free place Reason Dust and damp may adversely affect the working parts in the oven This microwave oven is not intended for commercial use Technical Specifi...

Страница 24: ...jlY_Yku nluTWYZW y luU GGw GY GG SGq GZWSGYWW GG_a ZGht...

Отзывы: