background image

19

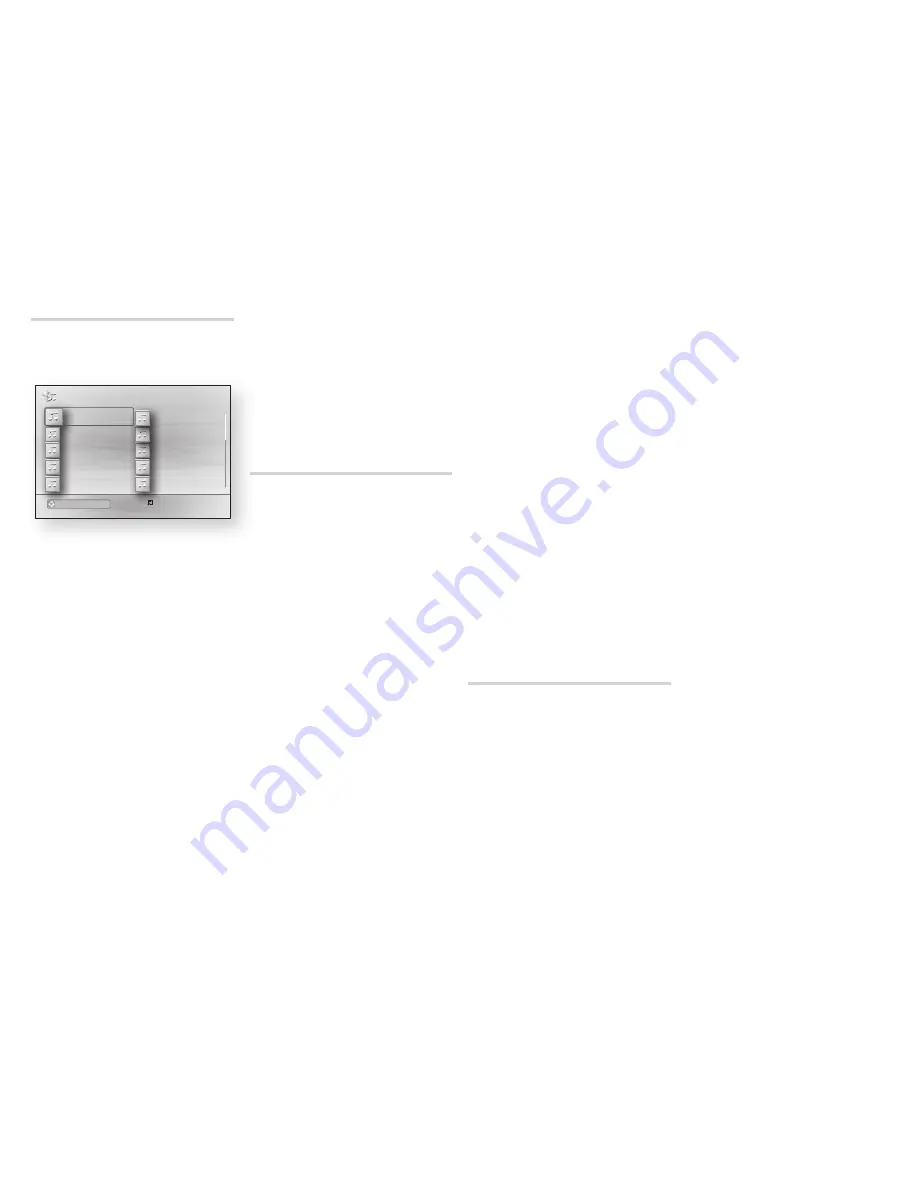
playlist

1. 

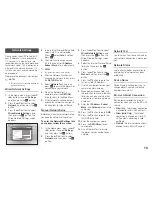
To move to the Music List, press 

the 

5

 or 

REtuRN

 button.

The Music List screen appears.


c

 Select     Tools  

( )

 Jump to Page  

'

 Return

1/2 Page

Music

TRACK 001

TRACK 001
02:38

TRACK 003
02:38
TRACK 005
02:38
TRACK 007
02:38
TRACK 009
02:38

TRACK 004
02:38

TRACK 002
02:38

TRACK 006
02:38
TRACK 008
02:38
TRACK 010
02:38

CD      

Change Device

2. 

Press the ▲▼◄► buttons to move 

to a desired track, and then press 

the 

yELLoW (C)

 button. A check 

appears on the track.

Repeat this procedure to select 

additional tracks.

3. 

To remove a track from the list, 

move to the track, and then press 

the 

yELLoW (C)

 button again.

The check on the track is 

cancelled.

4. 

When done, press the 

v

 button.

The tracks you selected are 

displayed on the right side of the 

screen. The player plays the first 

track.

5. 

To change the play list, press the 

button or 

REtuRN

 button to 

return to the Music List. Repeat 

Steps 2, 3, and 4.

6. 

To cancel the play list and return 

to the Home screen, press the 

REtuRN

 or 

ExIt

 button.


NotES


ƒ

You can create a playlist with up to 99 tracks 

on Audio CDs (CD-DA).


ƒ

If you remove all the tracks from a play list 

and then press the 

v

 button, the player 

lists and plays all the tracks on the disc.

Ripping

Lets you copy audio files contents 

from an Audio CD (CD-DA) to USB/

HDD device.

1. 

Open the disc tray. Place the audio 

(CD-DA) disc on the tray, and 

close the tray. Insert a USB device 

into the USB jack on the front of 

the product.

2. 

In Stop mode, press the ▲▼◄► 

buttons to move to a desired track, 

and then press the 

yELLoW (C)


button. A check appears on the 

track.

Repeat this procedure to select 

additional tracks.

3. 

To remove a track from the list, 

move to the track, and then press 

the 

yELLoW (C)

 button again.

The check on the track is 

cancelled.

4. 

When done, press the 

tooLS


button and then select the 

Rip


using the ▲▼ buttons. and then 

press the 

v

 button. The Rip 

pop-up appears.

5. 

Use the ▲▼ buttons to select the 

device to store the ripped files, 

and then press the 

v

 button.


NotES


ƒ

Do not disconnect the device while ripping is 

in progress.

6. 

If you want to cancel ripping, press 

the 

v

 button and then select 

yes

. Select 

No

 to continue ripping.

7. 

When ripping is complete, the 

"Ripping completed." message 

appears. Press the 

v

 button to 

go back to the Playback screen.


NotES


ƒ

This function may not be supported by some 

discs.


ƒ

On the Ripping screen, you can also choose 

Select All

 and 

Deselect All

.


-

Use 

Select All

 to select all tracks. This 

cancels your individual track selections. 


-

Use 

Deselect All

 to deselect all 

selected tracks at once.

disc Copy to uSB

Lets you copy video/photo/music 

contents from data Disc to USB/HDD 

device. 

1. 

Open the disc tray. Place the data 

disc on the tray, and close the tray. 

Insert a USB device into the USB 

jack on the front of the product. 

The new device pop-up appears.

2. 

Press the ▲ button, and then 

press the ◄► buttons to select 

Blu-ray, DVD or CD.  

3. 

Use the ▲▼ buttons to select 

photos

Videos 

or 

Music

, and 

then press the 

v

 button. The 

Photos, Videos & Music screen 

appears listing the content of the 

device. Depending on how the 

contents is arranged, you will see 

either folders, individual files, or 

both.


NotES


ƒ

Even though the player will display folders for 

all content types, it will only display files of 

the Content Type you selected in Step 3. For 

example, if you selected music, you will only 

be able to see music files. You can change 

this selection by returning to the Photos, 

Videos & Music screen and repeating Step 3.

4. 

In Stop mode, use the ▲▼◄► 

buttons to select the 

VIdEoS

pHotoS

, or 

MuSIC

, and then 

press the 

yELLoW (C)

 button. A 

check appears to the left of the 

desired item.

5. 

Repeat Step 4 to select and check 

additional desired item.

6. 

To remove the desired item from 

the list, press the 

yELLoW (C)


again. 

The check on the desired item is 

removed.

Содержание BD-J5500

Страница 1: ...ne the possibilities Thank you for purchasing this Samsung product To receive more complete service please register your product at www samsung com register Blu ray Disc Player user manual BD J5500 EN...

Страница 2: ...e abnormal disc playback If this occurs unplug the product wait for two hours and then connect the plug to the power outlet Then insert the disc and try to play back again Be sure to pull the power pl...

Страница 3: ...spose of the plug Do not connect the plug to a mains jack as there is a risk of shock hazard from the bared flexible cord To disconnect the apparatus from the mains the plug must be pulled out from th...

Страница 4: ...ently check on children who are using the 3D function If there are any reports of tired eyes headaches dizziness or nausea have the child stop viewing 3D TV and rest Do not use the 3D Active Glasses f...

Страница 5: ...ept CD layer DVD RW VR mode CVD CD ROM CDV CD G CD I LD CD Gs play audio only not graphics 3 9 GB DVD R for Authoring Region Code Both players and discs are coded by region These regional codes must m...

Страница 6: ...S 1920x1080 H 264 BP MP HP 1920x1080 wmv WMV wmv9 VC 1 AP WMA 1920x1080 VC 1 SM 1920x1080 mp4 MP4 MP4 mp4v AAC 1920x1080 H 264 BP MP HP 1920x1080 mpg mpeg MPEG MPEG1 MP1 2 Dolby Digital DTS 1920x1080...

Страница 7: ...AVCHD and the AVCHD logo are trademarks of Matsushita Electronic Industrial Co Ltd and Sony Corporation NOTES Some AVCHD format discs may not play depending on the recording condition AVCHD format dis...

Страница 8: ...e HDMI IN jack on your TV Do not connect the power cord to the wall outlet until you have made all the other connections When you change the connections turn off all devices before you start Audio Vid...

Страница 9: ...gital Audio Out jack on the product to the Digital Coaxial In jack of the receiver Good quality You will hear sound only through the front two speakers with Digital Output set to PCM Audio Audio Metho...

Страница 10: ...to the Setup Procedure If you leave the player in the stop mode for more than 5 minutes without using it a screen saver will appear on your TV If the player is left in the screen saver mode for more t...

Страница 11: ...E contents Digital contents BD Wise Resolution of Blu ray Disc 1080p Auto Max Resolution of TV input Max Resolution of TV input 1080p 60F Movie Frame Off 1080p 60F 1080p 60F Movie Frame Auto 24 fps 1...

Страница 12: ...D Settings are not applied Blu ray Discs may include three audio streams Main Feature Audio The audio soundtrack of the main feature BONUSVIEW audio An additional soundtrack such as the director or ac...

Страница 13: ...etup Before you start manual network setup you need the network setting values To enter the Network Settings into your player follow these steps 1 In the Home menu press the buttons to select Settings...

Страница 14: ...e Anynet feature To operate this function connect this player to an Anynet Samsung TV with an HDMI cable With Anynet on you can operate this player using a Samsung TV remote control and start disc pla...

Страница 15: ...upgrade the software using the USB Host jack When the software upgrade is done check the software details in the software Upgrade menu Do not turn off the player during the software upgrade It may ca...

Страница 16: ...1 Press the 8 button to open the disc tray 2 Place a disc gently into the disc tray with the disc s label facing up 3 Press the 8 button to close the disc tray Playback starts automatically Playing Fi...

Страница 17: ...you selected in Step 2 For example if you selected music you will only be able to see music files You can change this selection by returning to the Home screen and repeating Step 2 3 A screen appears...

Страница 18: ...previous or next chapter or file Using the disc menu title menu popup menu and title list DISC MENU button During playback press this button to start the disc menu function TITLE MENU button During pl...

Страница 19: ...select the Rip using the buttons and then press the v button The Rip pop up appears 5 Use the buttons to select the device to store the ripped files and then press the v button NOTES Do not disconnect...

Страница 20: ...the MP3 file the size of the photo and the encoding method You can t enlarge the subtitle and PG graphic in the full screen mode Appendix Troubleshooting Before requesting service please try the follo...

Страница 21: ...ion between Player and PC is unstable The IP address under the same subnetwork should be unique If they are not IP interference can cause this phenomenon Check if you have a firewall enabled If so dis...

Страница 22: ...isc formats may be revised changed updated improved and or supplemented some discs are produced in a manner that allows specific or limited operation or restricts features during playback some discs b...

Страница 23: ...s detected a message will be displayed and playback or copying will be interrupted More information about Cinavia technology is provided at the Cinavia Online Consumer Information Centre at http www c...

Страница 24: ...A E 800 SAMSUNG 726 7864 www samsung com ae support English www samsung com ae_ar support Arabic OMAN 800 SAMSUNG 726 7864 KUWAIT 183 2255 183 CALL BAHRAIN 8000 4726 QATAR 800 2255 800 CALL EGYPT 0800...

Страница 25: ...Blu ray BD J5500 Samsung www samsung com register AK68 02543A 00 AK68 02543A 00...

Страница 26: ...2 I...

Страница 27: ...3 CE CLASS 1 LASER PRODUCT KLASSE 1 LASER PRODUKT LUOKAN 1 LASER LAITE KLASS 1 LASER APPARAT PRODUCTO L SER CLASE 1 Blu ray Disc DVD BS1362...

Страница 28: ...4 HDMI OUT HDMI HDMI OUT HDMI BD Wise HDMI 46 11 5 138 Blu ray 3D Blu ray 3D Blu ray Disc Association USB DLNA...

Страница 29: ...RW R CD RW R WMA MP3 USB RE R CD RW R DVD RW R BD RE R BD DVD RW R CD RW R JPEG USB RE R DVD R CD RW R DVD DVD RW R 10 DVD R 25 USB BD R BD J DVD R 3 9 VR DVD RW CVD CD ROM CDV CD G CD I LD CD G DVD R...

Страница 30: ...MA WMA wma USB DRM MP3 30 MSC USB USB HUB USB USB USB USB SAMSUNG NTSF MS Windows USB 1920x1080 MP3 Dolby Digital DTS WMA PCM DivX 3 11 4 5 6 AVI avi MP4v3 1920x1080 H 264 BP MP HP 1920x1080 MP3 Dolby...

Страница 31: ...264 x v Color AVCHD x v Color AVCHD Sony Corporation x v Color Matsushita Electronic Industrial Co AVCHD AVCHD Sony Corporation Ltd AVCHD AVCHD DVD x v Color SCREEN A B VIEW FULL BONUS REPEAT REPEAT...

Страница 32: ...I HDMI Audio Out HDMI HDMI HDMI HDMI HDMI HDMI HDMI 1080p 1080i HDMI 720p HDMI HDCP SCREEN A B VIEW FULL BONUS REPEAT REPEAT AUDIO HOME SUBTITLE A B Bonusview Blu rayDisc Blu ray Disc DVD Blu ray Disc...

Страница 33: ...9 Blu ray HDMI 1 HDMI IN HDMI OUT HDMI 2 PCM DLNA Samsung ISP DSL...

Страница 34: ...7 1 4 1 VIDEOS 2 MUSIC 3 Settings 4 Change Device 5 PHOTOS 6 PLAY DISC 7 USB POWER v Settings v v EXIT OSD 3D Blu ray OSD OSD D 5 HDMI CEC Anynet HDMI CEC Samsung Anynet HDMI CEC HDMI Anynet HDMI CEC...

Страница 35: ...ray 1080p Auto 1080 60F Off 1080p 60F 1080p 60F Auto 24 1080p 24F 1080p 24F 1080i 1080i 1080i 720p 720p 720p 576p 480p 576p 480p 576p 480p DVD HDMI HDMI BD Wise 576i 480i Auto 1080p 1080p 1080i 1080i...

Страница 36: ...ital Plus Dolby Digital DTS Dolby Digital Dolby TrueHD PCM PCM Dolby TrueHD Dolby Digital DTS DTS DTS PCM PCM DTS Dolby Digital DTS DTS DTS HD HRA PCM PCM DTS HD HRA Dolby Digital DTS DTS DTS HD MA PC...

Страница 37: ...ISP Auto v Settings v Network Wired Network Settings v Picture Sound Network System Language Security General Support Settings Wired Network Settings Internet Protocol Setup Auto IP Address 0 0 0 0 Su...

Страница 38: ...g HDMI CEC Samsung Anynet Anynet HDMI Anynet 15 Anynet Anynet BD Blu ray BD LIVE BD USB NTFS FAT32 FAT16 USB 4 USB 2 0 BD DivX Video On Demand DivX VOD DivX VOD BD LIVE BD LIVE BD LIVE BD LIVE USB 1 B...

Страница 39: ...oftware Upgrade By Online Settings Support Software Upgrade By online Connecting to v Server Yes Samsung Electronics by online By USB USB www samsung com bluraysupport USB RUF RUF USB USB USB Settings...

Страница 40: ...otification v On v Yes Samsung Electronics Samsung USB USB 1 USB USB App 1 App 2 App 3 App 4 App 5 Change Device Settings Play disc Photos Videos Music No Disc New device connected Photos Videos Music...

Страница 41: ...tings Play disc Photos Videos Music No Disc Change Device No Disc 123 a Close PHOTOS VIDEOS MUSIC v v v RETURN EXIT 2 1 USB USB DVD CD Blu ray VIDEOS PHOTOS v MUSIC v v RETURN EXIT 2 1 DLNA DLNA Blu r...

Страница 42: ...SCREEN A B VIEW FULL BONUS REPEAT REPEAT AUDIO HOME SUBTITLE 1 4 6 3 2 5 CD DA 1 2 3 CD DA 4 5 6 CD DA MP3 TOOLS Pause c Select Tools Return 00 08 05 57 1 6 TRACK 001 05 57 TRACK 002 04 27 TRACK 003 0...

Страница 43: ...9 02 38 TRACK 004 02 38 TRACK 002 02 38 TRACK 006 02 38 TRACK 008 02 38 TRACK 010 02 38 CD a Change Device C C v Music RETURN List EXIT RETURN 99 CD DA v CD DA USB CD DA USB USB C C TOOLS Rip v v Yes...

Страница 44: ...Select All Desellect All DVD Bluray USB TOOLS Start Slide Show Stop Slide Show Slide Show Speed Background Music 4 Zoom Rotate Information Tools MP3 6 1 Blu ray Disc DVD Disc Menu Blu ray Disc DVD Se...

Страница 45: ...I HDMI HDMI 576p 480p 1080p 1080i 720p HDMI HDCP Samsung DLNA DLNA DLNA DLNA BD LIVE BD LIVE Network Status USB 1 BD LIVE BD Allow All BD LIVE Internet Connection BD LIVE 1 BD LIVE BD BD www Samsung s...

Страница 46: ...M Bitstream a 100 BASE 10 DVD VIDEO BD ROM CD RW R DVD RW R BD RE R Audio CD CD DA BD RE R BD ROM Samsung CD RW R DVD RW R DVD RW R DVD VIDEO Blu ray Blu ray Blu ray CD DVD RW R DVD RW R DVD VIDEO BD...

Страница 47: ...0 668 7 295 673 High Definition Multimedia Interface HDMI HDMI Licensing LLC Oracle Java Oracle Blu ray Disc Blu ray Blu ray Disc Association DLNA CERTIFIED DLNA DLNA 2 0 Digital Out BD BD ROM BD BD R...

Страница 48: ...www samsung com ae_ar support Arabic OMAN 800 SAMSUNG 726 7864 KUWAIT 183 2255 183 CALL BAHRAIN 8000 4726 QATAR 800 2255 800 CALL EGYPT 08000 726786 16580 www samsung com eg support ALGERIA 021 36 11...

Отзывы: