background image

Basics

19

Initial setup

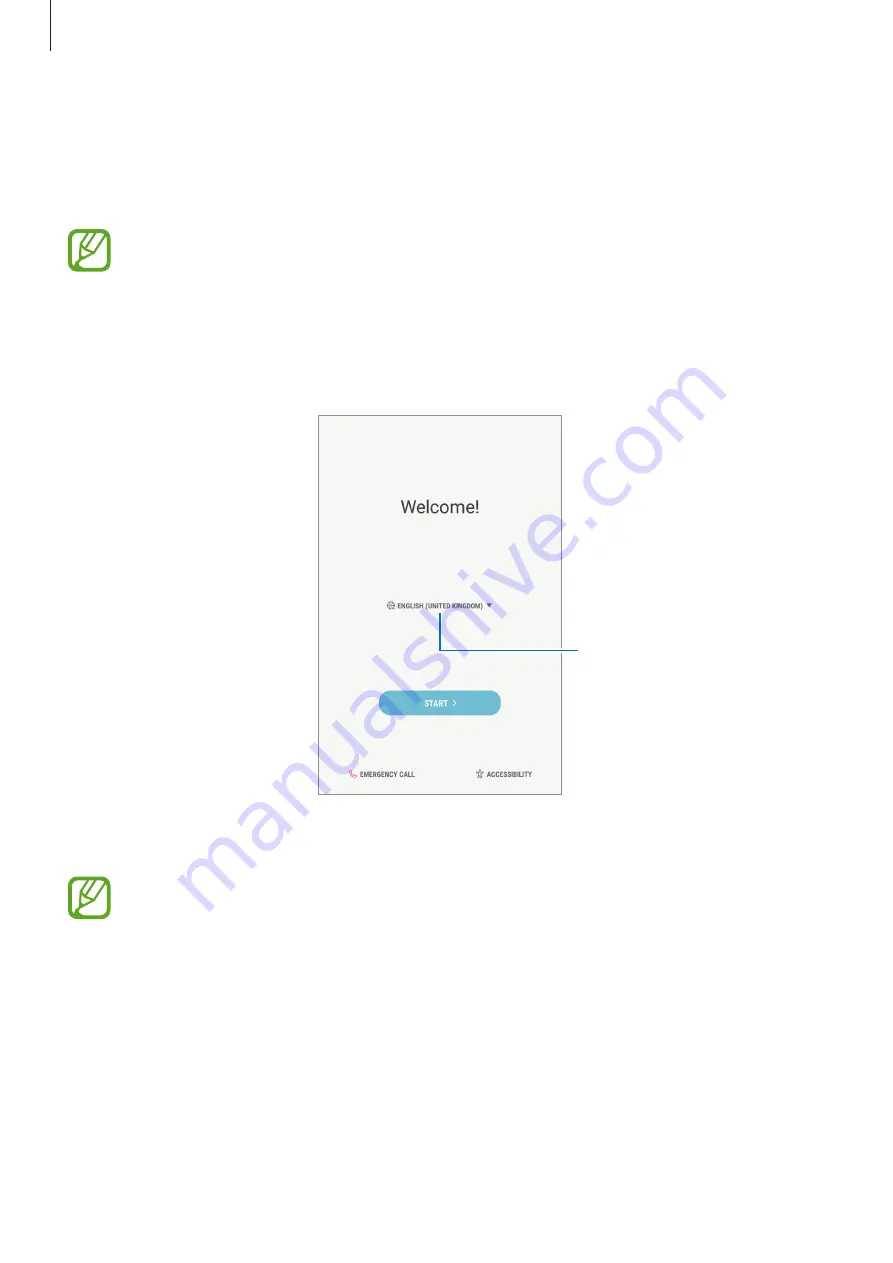
When you turn on your device for the first time or after performing a data reset, follow the 
on-screen instructions to set up your device.

The initial setup procedures may vary depending on the device’s software and your 
region.

Turn on the device.

Select your preferred device language.

Select a language.

Select a Wi-Fi network and connect to it.

If you do not connect to a Wi-Fi network, you may not be able to set up some device 
features during the initial setup.

Follow the on-screen instructions to proceed the initial setup.

Set a screen lock method to protect your device. You can protect your personal 
information by preventing others from accessing your device. To set the screen lock 
method later, tap 

Not now

.

Содержание A3LSMT395C

Страница 1: ...www samsung com User Manual English EU 08 2017 Rev 1 0 SM T395C ...

Страница 2: ...tial setup 21 Samsung account 22 Transferring data from your previous device 26 Understanding the screen 34 Notification panel 36 Entering text Apps and features 38 Installing or uninstalling apps 40 Bixby Home 48 Phone 53 Contacts 56 Messages 59 Internet 61 Email 62 Camera 74 Gallery 79 Multi window 83 Samsung Notes 84 Calendar 85 Samsung Flow 86 My Files 86 Clock 88 Calculator 88 Game Launcher 9...

Страница 3: ...n settings 101 Sounds and vibration 102 Notifications 102 Display 103 Blue light filter 103 Wallpaper 104 Advanced features 105 Device maintenance 108 Apps 108 Lock screen and security 109 Secure Folder 113 Cloud and accounts 114 Users 116 Backup and restore 117 Google 117 Accessibility 118 General management 119 Software update 119 User manual 120 About tablet ...

Страница 4: ...xtracting and using these materials for commercial or other purposes is an infringement of copyright laws Users are entirely responsible for illegal use of media You may incur additional charges for data services such as messaging uploading and downloading auto syncing or using location services depending on your data plan For large data transfers it is recommended to use theWi Fi feature Default ...

Страница 5: ... device may feel hotter to the touch This does not affect the device s lifespan or performance and is in the device s normal range of operation If the battery becomes too hot the charger may stop charging Do the following when the device heats up Disconnect the charger from the device and close any running apps Wait for the device to cool down and then begin charging the device again If the lower ...

Страница 6: ... recording videos for extended periods When streaming videos while using the maximum brightness setting When connecting to aTV While multitasking or when running many apps in the background When using Multi window When updating or installing apps while recording videos When downloading large files during a video call When recording videos while using a navigation app When using large amount of dat...

Страница 7: ...o lower the device s temperature the screen brightness and the performance speed will be limited and battery charging will stop Running apps will be closed and you will only be able to make emergency calls until the device cools down If the device overheats or feels hot for a prolonged period a power off message will appear Turn off the device and wait until it cools down Precautions for operating...

Страница 8: ...e with other devices Appearances and specifications are subject to change without prior notice You can purchase additional accessories from your local Samsung retailer Make sure they are compatible with the device before purchase Use only Samsung approved accessories Using unapproved accessories may cause the performance problems and malfunctions that are not covered by the warranty Availability o...

Страница 9: ... not cover the proximity light sensor area with screen accessories such as a screen protector or stickers Doing so may cause the sensor to malfunction Do not allow water to contact the touchscreen The touchscreen may malfunction in humid conditions or when exposed to water Keys Key Function Power Press and hold to turn the device on or off Press to turn on or lock the screen Recents Tap to open th...

Страница 10: ... cable supplied with the device The device may be damaged if you use Micro USB cable To save energy unplug the charger when not in use The charger does not have a power switch so you must unplug the charger from the electric socket when not in use to avoid wasting power The charger should remain close to the electric socket and easily accessible while charging 1 Connect the USB cable to the USB po...

Страница 11: ...ultiple apps at once network apps or apps that need a connection to another device the battery will drain quickly To avoid losing power during a data transfer always use these apps after fully charging the battery Using a power source other than the charger such as a computer may result in a slower charging speed due to a lower electric current The device can be used while it is charging but it ma...

Страница 12: ... or corrupt the data stored in it Use caution to insert the memory card right side up The device supports the FAT and the exFAT file systems for memory cards When inserting a card formatted in a different file system the device will ask to reformat the card or will not recognise the card To use the memory card you must format it If your device cannot format or recognise the memory card contact the...

Страница 13: ...the device on and off Press and hold the Power key for a few seconds to turn on the device When you turn on your device for the first time or after performing a data reset follow the on screen instructions to set up your device To turn off the device press and hold the Power key and then tap Power off Follow all posted warnings and directions from authorised personnel in areas where the use of wir...

Страница 14: ...e 2 Select your preferred device language Select a language 3 Select aWi Fi network and connect to it If you do not connect to aWi Fi network you may not be able to set up some device features during the initial setup 4 Follow the on screen instructions to proceed the initial setup 5 Set a screen lock method to protect your device You can protect your personal information by preventing others from...

Страница 15: ...unt You can enjoy Samsung services and keep your data up to date and secure across all of your devices Refer to Samsung account for more information 7 Select features you want to use and complete the initial setup The Home screen will appear ...

Страница 16: ... services that can be used with your Samsung account visit account samsung com For more information on Samsung accounts launch the Settings app and tap Cloud and accounts Accounts Samsung account Help Registering your Samsung account Registering a new Samsung account If you do not have a Samsung account you should create one 1 Launch the Settings app and tap Cloud and accounts Accounts Add account...

Страница 17: ...vice your data such as contacts or events will also be removed 1 Launch the Settings app and tap Cloud and accounts Accounts 2 Tap Samsung account Remove account 3 Tap OK enter your Samsung account password and then tap CONFIRM Transferring data from your previous device You can transfer contacts images and other data from a previous device to your device via Smart Switch or Samsung Cloud This fea...

Страница 18: ...a computer You can download the app from www samsung com smartswitch Transferring data wirelessly viaWi Fi Direct Transfer data from your previous device to your device wirelessly viaWi Fi Direct 1 On both devices download and install Smart Switch from Galaxy Apps or Play Store 2 Place the devices near each other 3 Launch Smart Switch on both devices 4 On the previous device tap WIRELESS SEND CONN...

Страница 19: ...h 2 On the computer launch Smart Switch If your previous device is not a Samsung device back up data to a computer using a program provided by the device s manufacturer Then skip to the fifth step 3 Connect your previous device to the computer using the device s USB cable 4 On the computer follow the on screen instructions to back up data from the device Then disconnect your previous device from t...

Страница 20: ...ur data If your device supports Samsung Cloud launch the Settings app tap Cloud and accounts Samsung Cloud Backup settings and then back up your data The data backup method may vary depending on your model Some data will not be backed up To check which data will be backed up launch the Settings app tap Cloud and accounts Samsung Cloud Backup settings Restoring data 1 On your new device launch the ...

Страница 21: ...pply excessive pressure to it with your fingertips The device may not recognise touch inputs close to the edges of the screen which are outside of the touch input area Leaving the touchscreen idle for extended periods may result in afterimages screen burn in or ghosting Turn off the touchscreen when you do not use the device It is recommended to use fingers when you use the touchscreen Tapping Tap...

Страница 22: ...ap and hold an item and drag it to the target position Double tapping Double tap the screen Swiping Swipe upwards downwards to the left or to the right Spreading and pinching Spread two fingers apart or pinch on the screen ...

Страница 23: ...atures It displays widgets shortcuts to apps and more The Apps screen displays icons for all apps including newly installed apps The screen may appear differently depending on the region or service provider A widget Favourite apps Screen indicators A folder Bixby Home indicator View your customised content An app ...

Страница 24: ... Home screen Apps screen Moving items Tap and hold an item and then drag it to a new location To move the item to another panel drag it to the side of the screen To add a shortcut to an app on the Home screen tap and hold an item on the Apps screen and then drag it to the top or bottom of the screen A shortcut to the app will be added on the Home screen You can also move frequently used apps to th...

Страница 25: ...A new folder containing the selected apps will be created Tap Enter folder name and enter a folder name Adding more apps Tap ADD APPS on the folder Tick the apps to add and tap ADD You can also add an app by dragging it to the folder Moving apps from a folder Tap and hold an app to drag it to a new location Deleting a folder Tap and hold a folder and then tap Delete folder Only the folder will be ...

Страница 26: ...reen Widgets Widgets are small apps that launch specific app functions to provide information and convenient access on your Home screen Tap and hold a widget and then drag it to the Home screen The widget will be added on the Home screen Home screen settings Change the size of the grid to display more or fewer items on the Home screen and more Displaying all apps on the Home screen Without using a...

Страница 27: ...No signal Signal strength Roaming outside of normal service area GPRS network connected EDGE network connected UMTS network connected HSDPA network connected HSPA network connected LTE network connected Wi Fi connected Bluetooth feature activated Location services being used Call in progress Missed call New text or multimedia message Alarm activated Mute mode activated Vibration mode activated Fli...

Страница 28: ...our personal information by preventing others from accessing your device After setting the screen lock method the device will require an unlock code whenever unlocking it Swipe Swipe in any direction on the screen to unlock it Pattern Draw a pattern with four or more dots to unlock the screen PIN Enter a PIN with at least four numbers to unlock the screen Password Enter a password with at least fo...

Страница 29: ...es and then tap the Palm swipe to capture switch to activate it It is not possible to capture a screenshot while using some apps and features Notification panel When you receive new notifications such as messages or missed calls indicator icons appear on the status bar To see more information about the icons open the notification panel and view the details To open the notification panel drag the s...

Страница 30: ...ts Access the notification settings Quick setting buttons Using quick setting buttons Tap quick setting buttons to activate certain features Swipe downwards on the notification panel to view more buttons To change feature settings tap the text under each button To view more detailed settings tap and hold a button To rearrange buttons tap Button order tap and hold a button and then drag it to anoth...

Страница 31: ...ap it twice Change the keyboard settings Enter a space Move the cursor Changing the input language Tap Languages and types MANAGE INPUT LANGUAGES and then select the languages to use When you select two or more languages you can switch between the input languages by swiping to the left or right on the space key Additional keyboard functions Tap and hold to use various functions Other icons may app...

Страница 32: ...ons Switch to the floating or split keyboard You can move the keyboard to another location by dragging the tab Change the keyboard settings Copying and pasting 1 Tap and hold over text 2 Drag or to select the desired text or tap Select all to select all text 3 Tap Copy or Cut The selected text is copied to the clipboard 4 Tap and hold where the text is to be inserted and tap Paste To paste text th...

Страница 33: ...download free apps tap INSTALL To purchase and download apps where charges apply tap the price and follow the on screen instructions To change the auto update settings tap Settings Auto update apps and then select an option Play Store Purchase and download apps Launch the Play Store app Installing apps Browse apps by category or search for apps by keyword Select an app to view information about it...

Страница 34: ... may need permission to access or use information on your device When you open an app a pop up window may appear and request access to certain features or information Tap ALLOW on the pop up window to grant permissions to the app To view your app permission settings launch the Settings app and tap Apps Select an app and tap Permissions You can view the app s permissions list and change its permiss...

Страница 35: ...account Starting Bixby Bixby saves data about your usage patterns and routine to your Samsung account and provides recommended features 1 On the Home screen swipe to the right 2 Read the on screen information about the app and tap NEXT 3 Tap SIGN IN and follow the on screen instructions to sign in to your Samsung account If you are already signed in this step will not appear 4 Read and agree to th...

Страница 36: ...analysing your usage patterns and your routine To open Bixby Home swipe to the right on the Home screen Upcoming reminder Recommended content Reminder The content and order of the cards update automatically at a specified interval To manually update cards swipe downwards on the screen To close Bixby Home swipe to the left on the screen ...

Страница 37: ...ed To use this feature you must register and sign in to your Samsung account Starting Reminder You can start Reminder from Bixby Home 1 On the Home screen swipe to the right The Bixby Home screen will appear 2 Tap GET STARTED on the UPCOMING REMINDERS card The Reminder intro page will appear 3 Make sure the Add icon on Home screen option is ticked and tap START The reminder composition screen will...

Страница 38: ...e at 9 AM 1 Launch the Reminder app 2 Tap Write a reminder and enter Take medicine 3 Tap Set conditions Specific date and time and set the time to 9 AM 4 Tap SAVE to save the reminder Creating reminders while browsing the Internet While browsing the Internet you can create reminders to view a webpage such as a news site later 1 While browsing the Internet tap Share 2 Tap Reminder The webpage addre...

Страница 39: ...inders list Launch the Reminder app You can view your reminders list To view reminder details select a reminder Setting reminder details Add or edit reminder details such as frequency date and time or location 1 Select a reminder to edit and tap EDIT 2 Edit the conditions and tap SAVE Reminder conditions Add an image Checklist Repeat interval Reminder information ...

Страница 40: ...st and you will be reminded at the preset times Deleting reminders To delete a reminder swipe right on a reminder and tap Delete To delete multiple reminders tap and hold a reminder tick reminders to delete and then tap DELETE Using recommended content on Bixby Home When you open Bixby Home you can view the content that is frequently updated as Bixby cards Swipe upwards or downwards to view the Bi...

Страница 41: ... off the alarm tap the switch next to the alarm to deactivate it Checking a reminder If you have added reminders the most recent reminder will appear on the Bixby Home screen On the Bixby Home screen swipe upwards or downwards to scroll to the Reminder card You can check the reminder information If the reminder has a checklist you can complete individual items on the checklist To view the reminder...

Страница 42: ...d on the list tap Don t show again Selecting apps to show as Bixby cards Add or delete apps to show as cards on the Bixby Home screen On the Bixby Home screen tap Settings Cards and tap the switches next to items to add or delete them If an app is not installed on the device you must install it to use it On the Bixby Home screen tap Settings Apps with cards and then download an app Bixby settings ...

Страница 43: ...nch the Phone app and enter a phone number If the keypad does not appear on the screen tap to open the keypad 2 Tap to make a voice call or tap to make a video call Add the number to the contacts list Preview the phone number Hide the keypad Delete a preceding character Access additional options ...

Страница 44: ...ed dial select a speed dial number and then add a phone number To make a call tap and hold a speed dial number on the keypad For speed dial numbers 10 and up tap the first digit s of the number and then tap and hold the last digit For example if you set the number 123 as a speed dial number tap 1 tap 2 and then tap and hold 3 Making calls from the locked screen On the locked screen drag outside th...

Страница 45: ...ar Open the notification panel to view the list of missed calls Alternatively launch the Phone app and tap RECENTS to view missed calls Blocking phone numbers Block calls from specific numbers added to your block list 1 Launch the Phone app and tap Settings Block numbers 2 Tap select contacts and then tap DONE To manually enter a number tap Enter phone number enter a phone number and then tap When...

Страница 46: ...e at the top of the device and keep the device away from your ears Keypad Hide Open or close the keypad Mute Turn off the microphone so that the other party cannot hear you End the current call During a video call Tap the screen to use the following options VOLUME Adjust the volume Access additional options Camera Turn off the camera so that the other party cannot see you Switch Switch between the...

Страница 47: ...does not appear on the screen tap to open the keypad 3 Tap Create contact to create a new contact or tap Update existing to add the number to an existing contact Adding a phone number to Contacts from the calls list 1 Launch the Phone app and tap RECENTS 2 Tap a phone number 3 Tap CREATE CONTACT to create a new contact or tap UPDATE EXISTING to add the number to an existing contact ...

Страница 48: ...s Creating a new contact 1 Launch the Contacts app tap and then select a storage location 2 Enter contact information Select a storage location Add an image Open more information fields Enter contact information Depending on the selected storage location the types of information you can save may vary 3 Tap SAVE ...

Страница 49: ...web accounts such as your Samsung account Launch the Settings app tap Cloud and accounts Accounts select an account name select the account to sync with and then tap Contacts Samsung account or Sync Contacts Searching for contacts Launch the Contacts app Use one of the following search methods Scroll up or down the contacts list Drag a finger along the index at the left side of the contacts list t...

Страница 50: ... service provider The profile sharing feature is only available for contacts who have activated the profile sharing feature on their device 1 Launch the Contacts app and select your profile 2 Tap EDIT edit your profile and tap SAVE 3 Tap Profile sharing and then tap the switch to activate it To use the profile sharing feature your phone number must be verified You can view your contacts updated pr...

Страница 51: ...e your contacts list 1 Launch the Contacts app and tap Manage contacts Merge contacts 2 Tick contacts and tap MERGE Deleting contacts 1 Launch the Contacts app and tap Delete 2 Select contacts and tap DELETE Messages Introduction Send and view messages by conversation Sending messages You may incur additional charges for sending messages when you are roaming 1 Launch the Messages app and tap 2 Add...

Страница 52: ...ts Send the message 4 Tap SEND to send the message Viewing messages Messages are grouped into message threads by contact You may incur additional charges for receiving messages when you are roaming 1 Launch the Messages app and tap CONVERSATIONS 2 On the messages list select a contact 3 View your conversation To reply to the message enter a message and tap SEND ...

Страница 53: ...then tap the switch to activate it 2 Change the notification settings Notification sound Change the notification sound Vibrate when sound plays Set the device to vibrate when you receive messages Pop up display Set the device to display messages in pop up windows Preview message Set the device to display message content on the locked screen and in pop up windows Setting a message reminder You can ...

Страница 54: ...older and launch the Internet app 2 Tap the address field 3 Enter the web address or a keyword and then tap Go To view the toolbars drag your finger downwards slightly on the screen Bookmark the current webpage Close the tab Open a new tab Move between pages Refresh the current webpage Access additional options Open the homepage View your bookmarks saved webpages and recent browsing history ...

Страница 55: ...et mode If you are using this feature for the first time set whether to use a password for secret mode In secret mode you cannot use some features such as screen capture In secret mode the device will change the colour of the toolbars Changing security settings You can change your password Tap Settings Privacy Secret mode security Change password Deactivating secret mode Tap Turn off Secret mode ...

Страница 56: ...nt tap Add account If you have more than one email account you can set one as the default account Tap Set default account Sending emails 1 Tap to compose an email 2 Add recipients and enter an email text 3 Tap SEND to send the mail Reading emails When Email is open the device will automatically retrieve new emails To manually retrieve emails swipe downwards on the screen Tap an email on the screen...

Страница 57: ...os in places where you may violate other people s privacy Launching Camera Use the following methods to launch Camera Launch the Camera app On the locked screen drag outside the circle Some methods may not be available depending on the region or service provider Some camera features are not available when you launch the Camera app from the locked screen or when the screen is turned off while the s...

Отзывы: