English
- 10 -
al results for Assistant by choosing the related option
when prompted. Press
OK
consecutively to proceed.
8. Country
In the next step select your
Country
from the list and
press
OK
to continue.
9. Password
Depending on the country selection you made in the
previous step you may be asked to define a password
(PIN) at this point. Press
OK
to proceed. The selected
PIN cannot be 0000. This PIN will be required in order
to access some menus, contents or to release locked
channels, sources etc. You will have to enter it if you
are asked to enter a PIN for any menu operation later.
10. Select TV Mode
In the following step of the initial setup, you can set
the TV’s operation mode either as
Home
or as
Store
.
Store
option will configure your TV’s settings for store
environment. This option is intended only for store
use. It is recommended to select
Home
for home use.
11. Chromecast built-in always available
Select your chromecast availability preference. If set as
On
your TV will be detected as a Google Cast device
and allow Google Assistant and other services to wake
your TV up to respond to Cast commands, even when
on standby mode and the screen is off.
12. Tuner Mode
Note:
If you don’t want to perform a tuner scan, select one of
the available options anyway. You can skip the scan at some
later stage of the installation wizard. If you skip this step you
can perform a channel search later using the related
Channels
menu options.
The next step is the selection of the tuner mode.
Select your tuner preference to install channels for
Live TV function.
Antenna
and
Cable
options are
available. Highlight the option that corresponds to
your environment and press
OK
or
Right
directional
button to proceed.
Antenna
If
Antenna
option is selected, the TV will search for
digital terrestrial and analogue broadcasts. On the next
screen highlight
Scan
option and press
OK
to start
the search or select
Skip Scan
to continue without
performing a search.
Cable
If
Cable
option is selected, the TV will search for
digital cable and analogue broadcasts. If any, available
operator options will be listed on the
Select Operator
screen. Otherwise this step will be skipped. You
can select only one operator from the list. Highlight
the desired operator and press
OK
or the
Right
directional button to proceed. On the next screen
select
Scan
option to start a search or select
Skip
Scan
to continue without performing a search. If
Scan
is selected a configuration screen will be displayed
next.
Scan Mode
,
Frequency(KHz)
,
Modulation
,
Symbol Rate(Ksym/s)
,
Network ID
options may need
to be set. To perform a full scan set the
Scan Mode
as
Full/Advance
if available. Depending on the selected
operator and/or
Scan Mode
some options may not be
available to be set.
Once you are done with setting available options,
press the
Right
directional button to proceed. The TV
will start to search available broadcasts.
When the initial setup is completed “
Complete
”
message will be displayed. Press
OK
to finish the
setup.
A disclaimer of liability will be displayed on the screen.
You can use Up and Down directional buttons to scroll
through and read the entire text. Highlight
Accept
and
press
OK
to proceed.
Home Screen will be displayed. You can highlight
Live
TV
app and press
OK
to switch to Live TV mode and
watch TV channels.
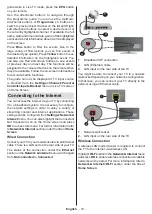
Home Screen
To enjoy the benefits of your Android TV, your TV must
be connected to the Internet. Connect the TV to a
home network with a high-speed Internet connection.
You can connect your TV wirelessly or wired to your
modem/router. Refer to the
Network & Internet
and
Connecting to the Internet
sections for further
information on how to connect your TV to the internet.
The Home menu is the centre of your TV. Press the
Home
button to display Home Screen. From the
Home menu you can start any application, switch to a
TV channel, watch a movie or switch to a connected
device. Depending on your TV setup and your country
selection in the initial setup the Home menu may
contain different items.
The available options of the Home Screen are posi-
tioned in rows. To navigate through the Home Screen
options use the directional buttons on the remote.
Apps, YouTube, Google Play Movies & TV, Google
Play Music and Google Play related rows and rows of
the applications you have installed might be available.
Select a row then move the focus to the desired item
in the row. Press
OK
button to make a selection or to
enter a sub-menu.
On the upper left of the screen, search tools will be
located. You can choose either to type a word to start
a search via the virtual keyboard or try voice search
option if your remote has a built-in microphone.
Move the focus to the desired option and press
OK
to proceed.
On the upper right of the screen,
Notifications
,
Inputs,
Network & Internet
(will be named as
Connected
or
Not Connected
according to the current connection
Содержание 50UA220
Страница 2: ...50540003...

