background image

- 15 -

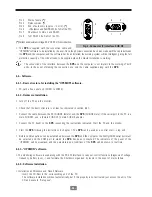
Leds nivel baterías.

Nivel baterías.

Leds nivel de carga.

Nivel de carga.

nº 5

> 91 %

nº 5

> 96 %

nº 4

76 - 90 %

nº 4

76 - 95 %

nº 3

51 - 75 %

nº 3

51 - 75 %

nº 2

26 - 50 %

nº 2

26 - 50 %

nº 1

0 - 25 %

nº 1

10 - 25 %

8.2.- Alarmas acústicas.

• Descarga. Modulada cada 3 seg. con led 

(b)

 activo, indica que las cargas se alimentan de las baterías, al retornar

la red se inhibirá. Si desea silenciar la alarma ver apartado 8.3.

• Batería baja. Modulada cada 1 seg. con led 

(b)

 activo, indica final de autonomía. En breve el 

SPS

 se bloqueará

como protección de las baterías y al restablecerse la red, se pondrá automaticamente en marcha.

• Sobrecarga. Alarma permanente.

• Sustitución baterías. Alarma permanente con led 

(a)

 iluminado. Realizar el auto-test según apartado 7.3.

8.3.- Silenciador alarma.

• En "modo autonomía", led 

(b) 

iluminado y alarma activa, presione sobre el pulsador 

(6)

 durante menos de 1

segundo, la alarma se inhibirá.

• No es posible anular la alarma acústica de "Batería baja" o "Sobrecarga".

9.- LOCALIZACIÓN DE FALLOS.

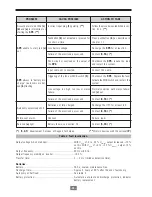
• Ver tabla 2.

10.- CARACTERÍSTICAS TÉCNICAS.

Entrada.

Tensión de entrada AC: ...................................................... 100 V, 110 V, 115 V, 120 V, 220 V, 230 V, 240 V ±25 %.
Frecuencia de entrada: ....................................................... 50 Hz ó 60 Hz ±10 % (auto detección).

Salida.

Potencia según modelo: ..................................................... Ver tabla 3.
Tensión de salida sobre inversor: ........................................ 100 V, 110 V, 115 V, 120 V, 220 V, 230 V, 240 V ±5 %.
Funcionamiento del inversor: .............................................. PWM (onda senoidal).

 Tabla 1. Nivel baterías.

Содержание SPS.1000.TOP

Страница 1: ... TOP UNINTERRUPTIBLE POWER SUPPLY series TOP SYSTÈME D ALIMENTATION SANS INTERRUPTION série TOP Manual de usuario instalación y puesta en marcha User s manual installation and start up Manuel d utilisateur installation et mise en service EK263N05 ...

Страница 2: ...GURIDAD 6 SAFETY WARNINGS 20 MISES EN GARDE DE SÉCURITÉ 34 Manual de usuario instalación y puesta en marcha 5 17 User s manual installation and start up 19 31 Manuel d utilisateur installation et mise en service 33 45 ...

Страница 3: ... entire disposal for any further information or any query you should wish to make Thank you In our policy of constant evolution we reserve the right to modify the characterisitcs in part or in whole without forewarning All reproduction or third party concession of this manual is prohibited without the previous written authorisation of our company Nous vous remercions d avance d avoir bien voulu dé...

Страница 4: ... 4 ...

Страница 5: ...polaridad de entrada P 6 2 Conexión de la salida Conexión con las cargas a alimentar 6 3 Conexión con las baterías externas conector 4 6 4 Conexión de la línea telefónica Modem 6 5 Conexión interface a optoacopladores y RS 232 6 6 Software 6 6 1 Estructura básica para la instalación del software UPSMON 6 6 2 Instalación del Hardware 6 6 3 Software UPSMON 6 6 4 Instalación del Software 7 PUESTA EN ...

Страница 6: ...n discrepancias el usuario debe cumplir las normas locales pertinentes Las instrucciones e ilustraciones de este manual son genéricas para toda la serie y son una guía como referencia Si su modelo no equipa alguno de los elementos descritos omitir toda referencia y proseguir Por otra parte el equipo se entrega debidamente identificado mediante serigrafía o etiquetado prestar atención al mismo Para...

Страница 7: ... que advierte del Peligro de descarga eléctrica e indicado como En el interior del equipo existen tensiones peligrosas no abrir jamás la carcasa el acceso debe efectuarlo personal autorizado y competente En caso de mantenimiento o avería consultar al SAT más próximo Debe conectarse obligatoriamente la conexión de tierra de protección asegurándose que ello se realiza antes de conectar la tensión de...

Страница 8: ... del equipo y de ellas mismas Evitar esfuerzos y choques mecánicos Jamás debe exponerse una batería a altas temperaturas Existe peligro de explosión No romper la carcasa ni intentar abrirla El electrólito interior es tóxico y dañino para la piel y ojos En caso de contacto del ácido con partes del cuerpo enjuagar rápidamente con agua abundante y acudir urgentemente al servicio médico más próximo La...

Страница 9: ...a utilizar entre el equipo y su ordenador Con ello se obtiene un funcionamiento inteligente que proporciona una protección perfecta de las cargas críticas Todos los modelos pueden incrementar opcionalmente la autonomía con la adición de módulos de baterías externos a través del conector previsto en el equipo y se identifican mediante una B detrás del modelo Los equipos con el opcional Detector de ...

Страница 10: ...dad excedan los límites especificados En los SPS 400 a 1250 TOP comprobar que el fusible 5 esté colocado en su alojamiento y conectar el cordón de entrada suministrado con el equipo a la base 0 del mismo La alimentación del equipo se realiza a través del cable enchufable 1 y debe de conectarse a una toma de corriente enchufe del tipo con toma de tierra sin red presente seccionador de area abierto ...

Страница 11: ...PS 3000 TOP y en los modelos B con autonomía extendida Antes de interconectar el SPS con el los módulo s de baterías comprobar que el equipo esté parado y la protección del módulo s de baterías se encuentre n en posición OFF Seguidamente conectar un extremo de la manguera de cables suministrada al conector 4 y el otro extremo a los bornes del módulo de baterías respetando la polaridad indicada en ...

Страница 12: ...le entre el PC SUB D9 hembra y el SPS SUB D9 macho Si el puerto serie en su PC es un SUB D25 macho utilice un adaptador SUB D25 hembra a SUB D9 macho Conecte el PC carga al SPS respetando las instrucciones indicadas Ponga en marcha el PC y monitor Ponga en marcha el SPS siguiendo las instrucciones del capítulo 7 El SPS puede utilizarse como unidad central de marcha paro Antes de que se puedan esta...

Страница 13: ... ON respectivamente y volver a poner en marcha el equipo 7 2 Paro del SPS Parar las cargas Presionar sobre el pulsador 7 durante como mínimo 1 segundo hasta que se pare el SPS En el SPS 3000 TOP o modelos con autonomía extendida B desactivar el magnetotérmico del módulo de baterías 7 3 Función auto test Utilice el auto test tanto para verificar el funcionamiento correcto del SPS como el de las con...

Страница 14: ...inversor quien suministra tensión de salida Led Elevador de tensión ámbar e Cuando el estabilizador está corrigiendo una condición de tensión de red baja el led se ilumina Sí la tensión está por debajo del márgen inferior de regulación del AVR el led parpadea y es el inversor quien suministra tensión de salida Led Sobrecarga f rojo Se ilumina para indicar que el equipo está al límite de la carga S...

Страница 15: ...maticamente en marcha Sobrecarga Alarma permanente Sustitución baterías Alarma permanente con led a iluminado Realizar el auto test según apartado 7 3 8 3 Silenciador alarma En modo autonomía led b iluminado y alarma activa presione sobre el pulsador 6 durante menos de 1 segundo la alarma se inhibirá No es posible anular la alarma acústica de Batería baja o Sobrecarga 9 LOCALIZACIÓN DE FALLOS Ver ...

Страница 16: ...ado Autonomía demasiado corta Alarma permanente Led a rojo encendido Polaridad clavija de entrada 1 incorrecta Pulsador 6 sin activar o presionado du rante poco tiempo Tensión baterías baja Fallo unidad electrónica de potencia Cortocircuito o sobrecarga en la salida del SPS Cable entrada sin conectar Disparo del fusible o magnetotérmico 5 Tensión de línea demasiado alta demasia do baja o fallo de ...

Страница 17: ... s n m para modelos hasta SPS 2000 TOP 3 500 m s n m para modelos superiores Altura máxima de almacenaje 15 000 m s n m Humedad Hasta 95 sin condensación Ruido acústico 40 dBA a 1 m para modelos hasta SPS 800 TOP 45 dBA para modelos superiores Normativa seguridad EN 50091 1 Normativa CEM EN 50091 2 Marcado CE Calidad ISO 9001 Modelo Potencia Autonomía a Dimensiones Peso neto VA W media carga min F...

Страница 18: ... 18 ...

Страница 19: ...ut polarity detector P 6 2 Connection of the output Connection to the loads to be supplied 6 3 Connecting to external batteries connector 4 6 4 Connecting the telephone line Modem 6 5 Connection interface to optocouplers and RS 232 6 6 Software 6 6 1 Basic structure for installing the UPSMON software 6 6 2 Hardware Installation 6 6 3 UPSMON software 6 6 4 Software Installation 7 STARTING UP AND SH...

Страница 20: ...r s locality may invalidate certain recom mendations contained in the manual Where discrepancies occur users must comply with all pertinent local regulations The instructions and illustrations in this manual are generic for the whole series and are a guide for reference If your model does not have any of the described elements omit all references to them and continue Furthermore the unit is delive...

Страница 21: ...to the unit respecting the Low Voltage Electrotechnical regulation Pay special attention to the labelling of the unit that warns of the Danger of electrical discharge and indicated as There are dangerous voltages inside the unit never open the case access must only be made by authorised competent personnel In the event of maintenance of breakdown consult your closest After Sales Service A S S The ...

Страница 22: ...he batteries themselves Avoid efforts and mechanical shocks A battery must never be exposed to high temperatures for risk of explosion Do not break the housing or attempt to open it The internal electrolyte is toxic and harmful to skin and eyes In the event of acid coming into contact with parts of the body rinse rapidly with abundant water and go to the closest medical service The batteries are a...

Страница 23: ...ring software and a connection cable for use between the unit and the computer In this way intelligent working is achieved which gives perfect protection to the critical loads The autonomy of all models may be extended optionally by adding external battery models through the connector provided and which are identified by an B behind the model All devices with the optional Input polarity detector a...

Страница 24: ...ation Do not run the SPS when the temperature and humidity exceed the specified limits In the SPS 400 to 1250 TOP make sure that the fuse 5 is in its place and connect the input cable supplied with the unit to its base 0 The unit is supplied through the pluggable cable 1 and it must be connected to a grounded socket without the mains present area contact open 6 1 Connection to the mains 6 1 1 Conn...

Страница 25: ... and in versions B with extended autonomy Before interconnecting the SPS with the battery module s make sure the unit is switched off and the battery module protection is OFF Then connect one end of the cable harness supplied to connector 4 and the other end to the terminals of the battery module always respecting the polarity indicated on the labeling and the color of the cables red positive and ...

Страница 26: ... in section 6 6 1 Connect the cable between the PC SUB D9 female and the SPS SUB D9 male If the serial port in the PC is a male SUB D25 use a female SUB D25 to male SUB D9 adapter Connect the PC load to the SPS respecting the instructions indicated Start the PC and the monitor Start the SPS following the instructions in chapter 7 The SPS can be used as a central start stop unit Before communicatio...

Страница 27: ...ircuit breaker to the ON or I whatever corresponds and start the machine once more 7 2 Shutting down the SPS Stop the loads Press button 7 for at least 1 second until the SPS goes out In the SPS 3000 TOP or models with extended autonomy B deactivate the MCB of the battery module 7 3 Auto test function Use the auto test both to make sure the SPS is working correctly and the state of the batteries W...

Страница 28: ...imit of the AVR the led flashes and the inverter supplies output voltage Voltage elevator led amber e When the stabilizer corrects a low mains voltage situation this led lights up If the input voltage is below the lower adjustment limit of the AVR the led flashes and the inverter supplies output voltage Overload led red f This lights to indicate that the device is at the limit of its charge capaci...

Страница 29: ...eries and when the mains returns the unit will start automatically Overload Permanent alarm Battery replacement Permanent alarm with Led a alight Perform the auto test as in section 7 3 8 3 Alarm silencer In Autonomy mode Led b active on and alarm active push on the button 6 for less than 1 second to silence the alarm It is not possible to annul the Low battery or Overload acoustic alarm 9 FAULT L...

Страница 30: ...arge autonomy mode Led b flashing Autonomy excessively short Permanent alarm Red Led a light Incorrect input plug 1 polarity Pushbutton 6 not activated or pressed for too short a time Low battery voltage Failure of the electronic power unit Short circuit or overload on the output of the SPS Input cable not connected Triggering of the fuse or MCB switch 5 Line voltage too high too low or mains fail...

Страница 31: ...ht 6 500 m s n m for models up to SPS 2000 TOP 3 500 m s n m for highers models Maximum storage height 15 000 m s n m Humidity Up to 95 without condensation Acoustic noise 40 dBA at 1 m for models up to SPS 800 TOP 45 dBA at 1 m for highers models Safety regulation EN 50091 1 CEM regulation EN 50091 2 Marking CE Quality ISO 9001 Model Power Autonomy at Dimensions Net weight VA W half load min Dept...

Страница 32: ... 32 ...

Страница 33: ...d entrée P 6 2 Connexion de la sortie connexion avec les charges à alimenter 6 3 Connexion aux batteries externes connecteur 4 6 4 Connexion de la ligne téléphonique Modem 6 5 Connexion interface à optocoupleurs et RS 232 6 6 Logiciel 6 6 1 Structure de base pour l installation du logiciel UPSMON 6 6 2 Installation des appareils 6 6 3 Logiciel UPSMON 6 6 4 Installation du logiciel 7 MISE EN MARCHE...

Страница 34: ...ur doit appliquer les normes locales pertinentes Les instructions et les illustrations de ce manuel sont génériques pour toute la série et servent de guide de référence Si votre modèle n est pas accouplé à l un des éléments décrits omettez la référence et continuez Sachez également que l appareil vous est livré correctement identifié par sérigraphie ou étiquetage lisez son identification En cas de...

Страница 35: ... symbole Certaines tensions dangereuses sont présentes à l intérieur de l appareil n ouvrez jamais la carcasse Seul le personnel agréé et compétent doit pouvoir y accéder En cas de maintenance ou de panne consultez le SAT le plus proche Branchez le obligatoirement à une prise de terre de protection et assurez vous de l avoir fait avant de brancher la tension d entrée Pour les petits appareils racc...

Страница 36: ...ommager l appareil et les batteries Evitez les efforts et les chocs mécaniques N exposez jamais une batterie à des températures élevées car il y a risque d explosion Ne cassez pas la carcasse n essayez pas de l ouvrir L électrolyte intérieur est toxique et nocif pour la peau et les yeux En cas de contact corporel avec l acide rincez rapidement à grande eau et adressez vous de toute urgence au serv...

Страница 37: ...e de raccordement pour relier l appareil à votre ordinateur Cela permet de travailler avec un fonctionnement intelligent qui assure une protection parfaite des charges critiques En outre nous pouvons installer optionnellement un surplus d autonomie sur tous les modèles en ajoutant des modules de batteries externes branchés au connecteur prévu à cet effet L appareil s identifié par la lettre B appo...

Страница 38: ...mpérature et l humidité dépassent les limites indiquées Sur les SPS 400 à 1250 TOP vérifiez que le fusible 5 est placé dans son logement et branchez le cordon d entrée fourni avec l appareil à la prise 0 L appareil est alimenté par un câble connectable 1 il faut le brancher à une prise de courant muni de prise de terre sans réseau présent sectionneur de zone ouvert 6 1 Connexion au réseau 6 1 1 Co...

Страница 39: ...pareil Cette connexion ne peut se faire que sur le SPS 3000 TOP et sur les modèles B à autonomie prolongée Avant de brancher le ou les modules de batteries au SPS vérifiez que l appareil est à l arrêt et que la protection du ou des modules de batteries est bien sur la position OFF Connectez ensuite une extrémité du tuyau de câbles au connecteur 4 et l autre extrémité aux bornes du module de batter...

Страница 40: ...agraphe 6 6 1 Branchez le câble entre le PC SUB D9 femelle et le SPS SUB D9 mâle Si le port série de votre PC est un SUB D25 mâle utilisez un adaptateur SUB D25 femelle à SUB D9 mâle Branchez le PC charge au SPS en suivant nos instructions Allumez le PC et le moniteur Mettez le SPS en marche en suivant les instructions du chapitre 7 Le SPS peut servir d unité centrale de marche arrêt Avant de pouv...

Страница 41: ...puyez sur le magnétothermique s il s est déclenché et rallumez l appareil 7 2 Arrêt du SPS Éteignez les charges Appuyez sur le bouton 7 pendant au moins 1 secondes jusqu à l arrêt du SPS Sur le SPS 3000 TOP ou les modèles à autonomie prolongée B désactivez le magnétothermique du module de batteries 7 3 Fonction autotest Utilisez autotest pour vérifier le bon fonctionnement du SPS ainsi que l état ...

Страница 42: ...tie Voyant Augmentation de tension orange e Quand le stabilisateur est en train de corriger une condition de tension de réseau faible le voyant s allume Si la tension se trouve au dessous de la limite inférieure de réglage de l AVR le voyant clignote et c est l inverseur qui fournit alors la tension de sortie Voyant Surcharge rouge f S allume quand les charges connectées au SPS dépassent la puissa...

Страница 43: ...du réseau l appareil se mettra en marche automatiquement Surcharge Alarme permanente Remplacement batteries Alarme permanente avec voyant a allumé Faire un autotest comme indiqué au paragraphe 7 3 8 3 Silencieux alarme En mode autonomie voyant b allumé et alarme acoustique déclenchée appuyez sur le bouton 6 pendant moins de 1 seconde et l alarme s arrêtera Il est impossible de désactiver l alarme ...

Страница 44: ...ente Voyant a rouge allumé Polarité de fiche d entrée 1 incorrecte Bouton 6 non activé ou enclenché trop vite Tension batteries faible Panne unité électronique de puissance Court circuit ou surcharge à la sortie du SPS Câble entrée débranché Déclenchement du fusible du magnét 5 Tension de ligne trop élevée trop faible ou panne de réseau Panne unité électronique de puissance Batteries mal rechargée...

Страница 45: ...usqu àSPS 2000 TOP 3 500 m au dessus du niveau de la mer modèles superieurs Altitude maximale de stockage 15 000 m au dessus du niveau de la mer Humidité Jusqu à 95 sans condensation Niveau de bruit 40 dBA à 1 m de distance jusqu à SPS 800 TOP 45 dBA à 1 m de distance modèles superieurs Normes de sécurité EN 50091 1 Normes CEM EN 50091 2 Marquage CE Qualité ISO 9001 Modèle Puissance Autonomie à En...

Страница 46: ... 46 a h g b d a c 6 a 7 e f SPS 400 TOP SPS 1250 TOP SPS 1500 TOP SPS 3000 TOP Fig 4 Sinóptico synoptic synoptique SPS TOP 1 Fig 4 1 Fig 4 Fig 3 Frontal Front Vue avant SPS TOP ...

Страница 47: ...47 Fig 5 Posterior Rear Vue arrière SPS 400 TOP SPS 1250 TOP Fig 6 Posterior Rear Vue arrière SPS 1500 TOP SPS 3000 TOP 4 9 8 3 4 9 8 5 2 1 Sólo para only for seulement pour SPS 3000 TOP 8 9 2 4 3 5 1 0 ...

Страница 48: ...salicru com 08460Palautordera Tel 34938482400 sat salicru com ...

Отзывы: