background image

3.1 Clean and Maintenance

3.Maintanance

-10-

1. All electric parts,

    include motor,

    switch, etc. should

    be away from water.

2.Please don’t clean 

   the surface with 

   rough material like 

   steel wire ball, 

   brush or coarse 

cloth, etc. It will greatly scratch the 

surface.

3. Please don’t clean 

    with gasoline,acidic

    substance,benzene

    ,solvent and other

    chemical agents. If

you need to clean,please use neutral 

cleanser, and wipe dry the appliance 

surface by soft cloth after cleaning. 

4.If the stainless steel

   panel is stained with

   salty liquor, 

   disinfectant, 

   bleaching powder 

and other cleanser, please wipeit 

by wet cloth at once and dry it by 

dry cloth.

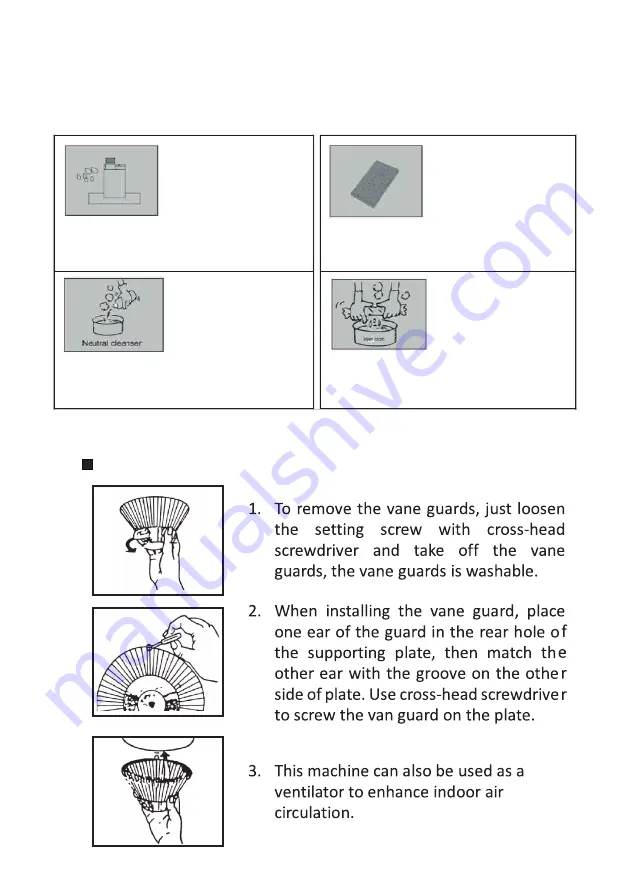
Removing filter set

Содержание R-828

Страница 1: ...F74 A388...

Страница 2: ...tion Circuit Diagram 2 Installation 2 1 Installation Tool 2 2 Component Name Diagram 2 3 Installation Procedure 3 Maintenance 3 1 Clean and Maintenance 3 2 Trouble Shooting 1 2 3 4 5 6 6 7 9 10 11 1 P...

Страница 3: ...oid cuts and abrasions during installation or cleaning WARNING To reduce the risk of a range top grease fire a Clean ventilation fans frequently G accum b Always turn hood on when c foods i e Crepes S...

Страница 4: ...1 2 Measurement connected duct existing suitable 2 26 34 ABOVE COOKING SURFACE 26 34 HOOD BODY...

Страница 5: ...3...

Страница 6: ...L CUS Ceritficate Illumination 4 Figure Figure Parts name Parts name Q ty Q ty Complete Appliance Rectangular damper Oil cup User manual Warranty card Oil collector R 838 only Mesh lter R 838 only Van...

Страница 7: ...5 Operation Circuit Diagram R 828 R 838...

Страница 8: ...guard Vane guard Oil collector Oil collector Power supply cord Power supply cord Connecting line Rectangular damper Switch Connecting line Rectangular damper Switch Panel Condenser Condenser Lamp hold...

Страница 9: ...ductwork sections Electrical knockouts Available in two different exhaust vents Refer to the content of that 1 2 Measurement For round vent the standard type please connect the 6 exhaust duct to the r...

Страница 10: ...of a keyhole slot Take the power supply cord through the access hole Step 9 Step 10 Fit the keyhole slots over the screws 8 Route the power supply cord Knockout opening Connector Drill an acces hole...

Страница 11: ...11 7 Step 12 Step 13 9 Wire the power supply cord Green grounding wire Wiring case cover Power supply Nut Screw connector Fix the supporting plate Supporting plate Hang up the oil collectors Oil colle...

Страница 12: ...greatly scratch the surface 3 Please don t clean with gasoline acidic substance benzene solvent and other chemical agents If you need to clean please use neutral cleanser and wipe dry the appliance su...

Страница 13: ...g or duct work Change the ducting to at least 8 or higher Adjust the duct opening direction Remove all the blocking from the duct work or duct opening Close all the windows and doors to eliminate the...

Отзывы: