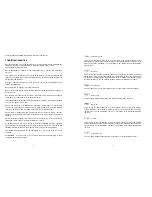
CMY – miscelazione dei colori
Il sistema di miscelazione dei colori CMY è basato sulla gradazione dei filtri colore giallo,
ciano e magenta. Attraverso la variazione della percentuale di ognuno dei tre colori si
può ottenere una gamma di colori infinita.
BEAM EFFECT
Il beam shaper permette di appiattire il fascio luminoso. Il fascio può ruotare di 180
°
.
FOCUS
Lente motorizzata.
DIMMER
L’unità dimmer permette un dimmeraggio fra compreso fra lo 0-100%
SHUTTER / STROBE
Questa unità permette un effetto strobo con una frequenza compresa fra 1 e 10 flash al
secondo.
VENTOLE
Il proiettore è raffreddato da tre ventole assiali una in ogni lato della testa del proiettore
e un’altra nella base del proiettore. La velocità delle ventole (e di conseguenza la
rumorosità) può essere ridotta con continuità se è richiesto un funzionamento molto
silenzioso.
Attraverso il pannello di controllo usando la funzione “FAnS” si possono scegliere 5 modi
per far operare le ventole a bassa velocità. Riferirsi alle istruzioni sotto il menù SPEC -
funzioni speciali.
PANNELLO DI CONTROLLO
Il pannello di controllo situato sul lato anteriore del proiettore offre molte opzioni. Si può
settare facilmente l’indirizzo DMX, leggere le ore di funzionamento della lampada e
dell’apparecchio, accendere e spegnere la lampada,attivare delle sequenza demo,
effettuare un reset ed inoltre utilizzare speciali funzioni per il controllo manuale o il
service. Al menu principale si accede premendo il tasto “MODE” - premere tante volte
fino a quando sul display non compare la scritta “A001” (o l’indirizzo attualmente
memorizzato). Scorrere le voci di menù premendo i tasti “UP” e “DOWN”, il display
visualizzerà una dopo l’altra le seguenti voci: “A001”, “rPAn”, “rTilt”, “16br”, “LAti”, “Poti”,
“LAMP”, “dEMo”, “rESE”, “SPEC”. Premere “ENTER” per selezionare una voce.
17
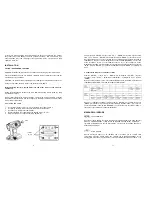
FUNCTION OF THE CONTROL CHANNELS - 8 BIT PROTOCOL:
DMX
channels
1
2
3
4
5
6
7
8
9
10
11
12 13
14
function Pan Tilt Pan/tilt
speed
Fan
On/off
lamp
Colours Cyan
Magenta Yellow CMY
speed
Macro Effects - Strobe Dimmer
ADDRESSING
The Control Board on the top side of the projector allows you to assign the DMX
fixture address, which is defined as the first channel from which the projector will
respond to the controller. If you set, for example, the address to channel 5, the
moving head will use the channel 5 to 20 for control.
Please, be sure that you don’t have any overlapping channels in order to control each
projector correctly and independently from any other fixture on the DMX data link.
If two, three or more Moving Wash 575 are addressed similarly, they will work similarly.
For address setting follow this procedure:
1.
Switch on the projector and wait until the fixture reset has finished ("rSt" is
flashing at the display).
2.
Press the “MODE” key in order to access the main menu. Browse through the
menu by pressing the “UP” and “DOWN” keys until the display shows "A001".
Confirm by pressing “ENTER” key and the letter "A" will flash.
3.
Use the “UP” and “DOWN” keys to select the desired address.
4.
Confirm by pressing “ENTER” or “MODE” to cancel.
CONTROLLING
After having addressed all projector , you may now start operating these via your
lighting controller.
Note:
After switching on, the projector will automatically detect whether DMX 512 data is
received or not. If there is no data received at the DMX-input, the display will start to
flash "A001" with actually set address.
This situation can occurr if:
the 3 PIN XLR plug (cable with DMX signal from controller) is not connected with
the input of the projector, or the controller is switched off or defective.
LAMP
The proiector is to be operated with a HSR 575 or MSR 575 lamp.
A relay inside of the projector allows you to switch on and off the lamp via the Control
Board on the top side or via your controller.
44


