


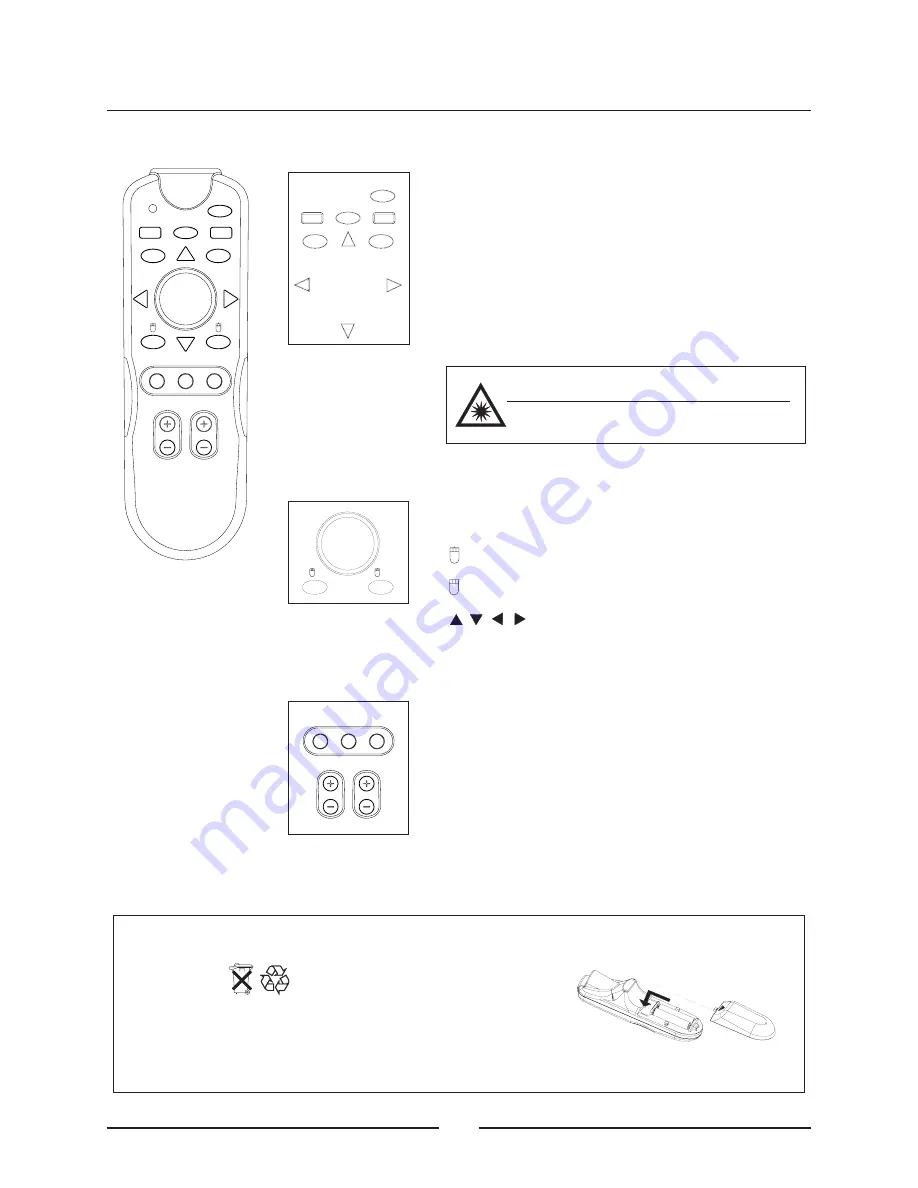
INSERTING BATTERIES BEFORE OPERATION
-
: the same as "Left button" of PC mouse.
-
: the same as "Right button" of PC mouse.
-
: moving the mouse "up", "down", "left"
and "right"
L
R
POWER
SOURCE
MENU
LASER
ESC
ENTER
R
L
U
D
R
L
FREEZE
VOLUME
ZOOM
AUTO
MUTE
R
FREEZE
VOLUME
ZOOM
L
AUTO
MUTE
LASER
ENTER
POWER
ESC
SOURCE
MENU
U
D
L
R
11
USING THE REMOTE CONTROL
General Function Keys
-
: turning on the unit and starting operation.
-
selecting the input source manually such as
VGA (connecting computer), Video, S-Video, DVI, YCbCr,
or HDTV (YPbPr).
-
: On-Screen Display menu (OSD) and adjust the
picture elements. Using "
" button to enter OSD
components or using "
" to cancel OSD.
-
: pressing the button to use the remote control as
a laser pointer.
POWER
SOURCE:
MENU
ENTER
ESC
LASER
Caution!
Do not point LASER pointer to anyone's eyes
or stare into beam.
Laser Beam:Laser type: Class 2
Wavelength: 650nm
Output: 0.45-0.80 mW
Mouse Keys
User can use the remote control as a wireless PC mouse
while connecting the projector to a computer.
Hot Keys
-
no audio effect. Press the same button
to relieve the function.
-
adjusting the image automatically in accordance
with the input signal.
-
freezing the picture. Press the same
button to relieve the function.
-
using +, - to adjust volume.
-
using +, - to zoom the projected image.
MUTE:
AUTO:
FREEZE:
VOLUME:
ZOOM:
WARNING
Only use the appropriate batteries, according the manufacturer
specifications (see "Specifications" section in page 17). The
provided batteries are notre chargeable. Bring back the defective or
empty batteries to your local waste disposal in accordance with the
current regulations. Do not throw of used batteries in the dustbin.


