background image

Specialized in developing,designing and manufacturing kinds of vinyl cutter

7.After cutting

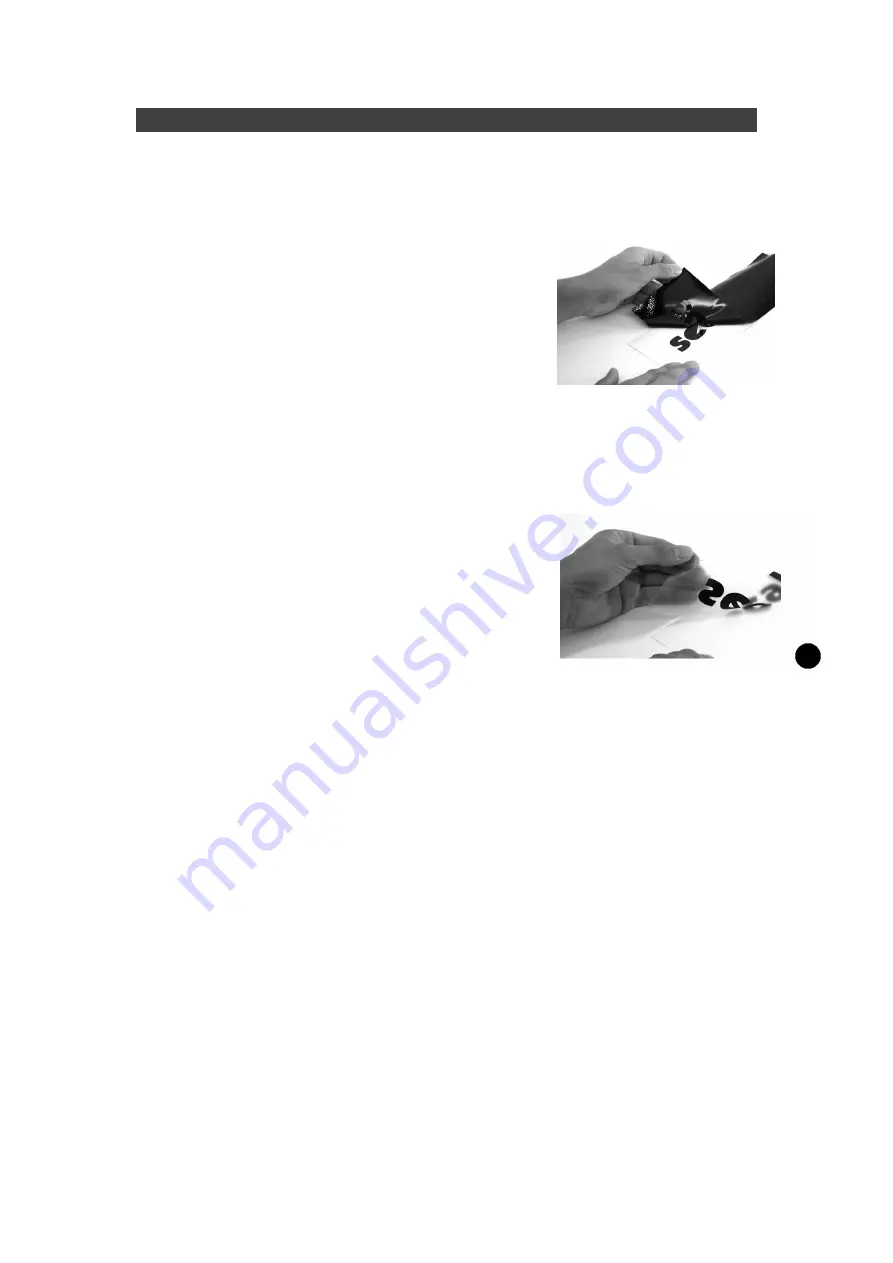
7.1.Weeding

Weeding refers to the process of removing the
parts of the media you don’ require.
We recommend using a scalpel or a spacial
weeding tool for this job,to avoid damage to
the adhesive surface.After weeding, You can
use a transfer press to transfer flock and flex
media to the textiles to be processed;apply
application tape to self-adhesive media before transferring.

7.2.Apply

Apply application tape to the weeded
material and use a roller or flat scraper to
press down firmly.To apply adhesive to the
transfer foil,remove the backing from the foil
to leave the adhesive affixed to the
application tape.You an now apply the
adhesive to the required surface.

8.Blade

Blade are extremely sensitive,extremely sharp and dangerous precision
tools.

●Always keep blade well out the reach of children.
●To avoid danger of injury,always handle blade with caution.
●Handle blade with caution and always replace the protective cap when not in
use.If the tip of the blade comes into contact with a hard material such as
following glass or stone,tiny fissures may occur at the blade tip making the
blade useless.Note the following to avoid unnecessary wear and tear the blade
and to ensure maximum working life.
●Avoid cutting the backing of loaded media.The deeper you cut into the loaded
material,the more wear and tear the blades are exposed to.
●Always set the cutting depth of the blade to cut the media precisely and
cleanly without cutting too deep.Extending the blades beyond the required
cutting depth impacts the service life of the blades without achieving better
cutting results.
●Always use the right custom blades for thicker material.
●Ragged edges on cutting the loaded media show that the blades are
blunt.Always replace blunt blades immediately.

Содержание SAGA-1350I

Страница 1: ...SAGA 420I SAGA 720I IP SAGA 1350I IP SAGA 420II IIP SAGA 720II IIP SAGA 1350II IIP SAGA 1800II IIP...

Страница 2: ...to plotter Please release the pressure contact rollers when not in use by flipping the pressure levers up Please keep your hands or other parts of the body far form carriage when using the machine Ne...

Страница 3: ...B connection Lead RS 232connection Lead Blade holder Pen holder and pen Safety fuse 3 Drag blade CD with software and drivers 1Spanner 1 hex key 3 Floor Stand Installation 720 1350 1800 Step1 Position...

Страница 4: ...T stand and put the screws into the holes but don t tighten them at this step Repeat the same steps with another stand beam T stand for left side stand beam T stand for right side Step3 Position the...

Страница 5: ...alized in developing designing and manufacturing kinds of vinyl cutter Step4 Place two roll holders into the holes in the roll holder support roll holder support Step5 How to install floor stand to ma...

Страница 6: ...Adjustment depth knobs Don t touch the tip of the blade with your fingers Lock Notice The blade is a consumable item and you ll always get the best quality cut with a newer blade please Replace with a...

Страница 7: ...tighten the lock 3 Press the push pin to remove the blade form the blade holder when replacing blade step1 step2 step3 what is the correct blade depth The correct blade depth blade just carve a post...

Страница 8: ...eveloping designing and manufacturing kinds of vinyl cutter Step 4 Will seat in the carriage on the right side of the blade holder and to fasten on blade holder 1 Cutting plotter appearance 5 1 front...

Страница 9: ...s Reset to restart Option function keys Set to set up function can change XP YP Tool offset sensitivity Test to perform cutting tests in different ways Laser On Off laser Speed to adjust the value of...

Страница 10: ...indoes95 98 Me system Please make sure that the machine supporting the use of software such as Dragoncut software Flexi software Artcut signcut etc 6 2 2 How to installation USB print driver Notice Pl...

Страница 11: ...h rollers are positioned above the grit roller The white marks on top trail will help you position pinch rollers when media on the platen push the pinch roller level downward to lower down the pinch r...

Страница 12: ...ting Mode You can press the mode key multiple times in off mode toggle through the following menus Force Use the Left Right keys to set the force in unites of one gram the valid range of values is bet...

Страница 13: ...e modified If you want to pause of cutting you can press the test key wanted to end work please press the reset key 6 7cutting test Press the Test key to perform a cutting test The cutting plotter wil...

Страница 14: ...ngerous precision tools Always keep blade well out the reach of children To avoid danger of injury always handle blade with caution Handle blade with caution and always replace the protective cap when...

Страница 15: ...ty any accumulated dirt and media residue from beneath the pinch roller housing Clean the platen paper sensors and pinch rollers with a damp cloth and dry with a soft line free cloth Wipe dust and dir...

Страница 16: ...800mm Max cutting width 630mm 1200mm 1660mm Accuracy 0 01m 0 01m 0 01m Connectors USB RS 232 USB RS 232 USB RS 232 Drive Servo Servo Servo Power consumption 100w 100w 100w Ambient temperature 5 35 5 3...

Страница 17: ...o Power consumption 100w 100w 100w 100w Ambient temperature 5 35 5 35 5 35 5 35 Meas 66 33 32cm 97 34 43cm 160 34 41cm 207 36 51cm G W N W 10 9kgs 27 5 25kgs 38 35kgs 52 47kgs 10 4 Stepper machine tec...

Страница 18: ...Specialized in developing designing and manufacturing kinds of vinyl cutter Warm prompt If in accordance with the instruction cannot complete the installation testing please contact your agent...

Отзывы: