manualshive.com logo in svg
background image

4

SL3000 v.5.01 EN

This unit was built with state-of-the-art technology and to 

generally recognised safety related technical standards currently app-

licable. These installation instructions are to be followed by all people 

working with the unit, in both installation and maintenance.

It is extremely important that these installation instructions are made 

available at all times to the relevant technicians, engineers or servicing 

and maintenance personnel. The basis prerequisite for safe handling 

and trouble free operation of this system is a sound knowledge of the 

basic and special safety regulations concerning conveyor technology, 

and elevators in particular. The unit may only be used for its intended 

purpose. Note in particular that, no unauthorised changes or additions 

may be made inside the unit or individual components.

Exclusion of liability

The manufacturer is not liable with respect to the buyer of this product 

or to third parties for damage, loss, costs or work incurred as a result of 

accidents, misuse of the product, incorrect installation or illegal chang-

es, repairs or additions. Claims under warranty are likewise excluded in 

such cases. The technical data is the latest available. The manufacturer 

accepts no liability arising from printing errors, mistakes or changes.

Declaration of conformity

Download ”The declaration of conformity” at our website: 

www.safeline-group.com

Safety Precautions!

 - Only trained professionals, who are authorised to work on the equip-

ment, should install and confi gure this product.

 - This quality product is dedicated for the lift industry. It has been 

designed and manufactured to be used for its specifi ed purpose only. 

If it is to be used for any other purpose, SafeLine must be contacted in 

advance.

 - It should not be modifi ed or altered in any way, and should only be 

installed and confi gured strictly following the procedures described in 

this manual.

 - All applicable health and safety requirements and equipment 

standards should be considered and strictly adhered to when installing 

and confi guring this product.

 - After installation and confi guration this product and the operation 

of the equipment should be fully tested to ensure correct operation 

before the equipment is returned to normal use. 

Electrical and electronic products may contain materials, parts and 

units that can be dangerous for the environment and human health. 

Please inform yourself about the local rules and disposal collection 

system for electrical and electronic products. The correct disposal of 

your old product will help to prevent negative consequences for the 

environment and human health.

General 

information

Содержание SL3000

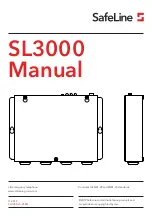
Страница 1: ...www safeline group com 11 2019 2019SafeLineandalltheSafeLineproductsand accessoriesarecopyrightedbylaw SL3000 Manual Lift emergency telephone CompliestoEN81 28andEN81 70standards SL3000 v 5 01EN...

Страница 2: ...Activating the SIM card 12 Mounting 13 Programming interfaces 14 Programming method 15 Programming Unit numbers 16 Configuration examples SafeLine Autodialer Units 17 Parameter list 18 Operation 23 Fr...

Страница 3: ...mA Emergency light Emergency light output 12V max 0 5A Acoustic emergency signal output 12 VDC max 0 5A Inputs 10 30 Volts 5 mA Optically isolated Relay outputs Max 2A 30V DC 0 5A 125V AC potential fr...

Страница 4: ...acturer accepts noliability arisingfromprintingerrors mistakesorchanges Declaration of conformity Download The declaration ofconformity atourwebsite www safeline group com SafetyPrecautions Only train...

Страница 5: ...GSM Net Call in out progress 4 RS232 PC connection For firmware update and programming 5 Slot for optional extra voice station card Two supplementary microphone speaker units can be connected for the...

Страница 6: ...for PSTN line Connect telephone line here 3 GSM antenna connection SMA 4 SIM card holder 5 Volume controls For the extra remotes Turn right to increase the volume 6 Terminals For the extra voice stat...

Страница 7: ...3000v 5 01EN Grey Grey Orange Orange Black Black Red Red Blue Blue Green Green 12 V AT Alarm 12 V AT Alarm 12 V AT Alarm 12 V AT Alarm Yellow Yellow Brown Brown Yellow Green Yellow Green Wiring diagra...

Страница 8: ...0v 5 01EN Grey Grey Orange Orange Black Black Red Red Grey Grey Orange Orange Black Black For more information see parameter list code 88 Wiring diagram Cable type 1 Extra remote board Extra input 2 E...
Страница 9: ...range White Orange White Orange Orange Green White Green White Blue Blue 12 V at alarm 12 V at alarm 12 V at alarm 12 V at alarm Em button NO NC Acoustic signal Brown Brown Brown White Brown White Gre...

Страница 10: ...tra remote board Orange Orange Blue Blue Orange Orange Orange White Orange White Green White Green White Blue Blue Orange White Orange White Extra input 2 Extra input 1 Emergency light Green Blue Gree...

Страница 11: ...ne out to next safeline Phone line in Phone line with RJ12 Connecting the phone line Parallel wiring Telephone line in Daisy chain wiring Serial wiring Telephone line in Wiring diagram SafeLine 3000 o...

Страница 12: ...code 0000 or 1234 this to clear the old code in memory PIN code set to 0000 1234 or deactivate 1 Insert the SIM card in an ordinary cellular phone In the Security settings menu change the PIN code to...

Страница 13: ...0v 5 01EN Mounting PSTN board GSM board Adding an extra station board Mounting Unplug the main power and battery before performing any changes To avoid GSM interference Place the main unit the station...
Страница 14: ...fter installation with a programming cable from us Remote programming For remote programming you can use any PSTN tone dial phone Dial the phone number of the SafeLine 3000 Enter the function codes on...
Страница 15: ...l restart with the new settings 2 short beeps 2 short beeps One long beep Invalid input Last code has to be reentered On site programming with handset Start programming 00 Enterthepassword 0000 Valid...

Страница 16: ...The next unit answers Unit programming is done Programming the unit number Start programming 00 Enter the password 0000 Terminate programming 00 Unit number 82 n Programming Unit numbers To remotely...

Страница 17: ...feLine Call Centre 1 Start configuration 2 1st phone number 3 2nd phone number 4 Call type 1st number 5 Call type 2st number 6 Alarm button delay 7 End configuration If at any time you need to start o...

Страница 18: ...4th Phone number 14 CALL TYPE CODE DATA COMMENTS Call type 1st number 21 Change call type 1 4 th number 0 P100 1 VOICE Default 2 Q23 3 CPC Change this only if your alarm operator is using any of the m...

Страница 19: ...Lift Car to alarm central 52 Speak This message will be played to the alarm receiver and in the car when the call is answered Make sure that there is no noise in the background when recording the mes...

Страница 20: ...oming call Can be set from 00 16 00 Never answering Default 02 Unit number 82 Program Unit number 0 9 when units share phone line Detect dial tone 83 0 Off 1 On Default Set to off if SafeLine has prob...

Страница 21: ...when the call is acknowledged green pictogram Relay 2 will be deactivated when the call is disconnected 2 DTMF controlled The relays can be activated remotely for 5 seconds Relay 1 will be activated...

Страница 22: ...lift telephone When there is a voice response some ascending tones will be heard The call is validated by pressing 4 The call is terminated by pressing 0 The call is terminated without reciept notifi...

Страница 23: ...s Rapidly flashing Yellow Activealarmnotreset Callingoutin progress LED 3 indicates thephoneline sstatus Continuousred NoSIM cardorcommunicationfailure whenusingGSM Flashing red Notelephonelineconnect...

Страница 24: ...LED GreenLED Lightoff Noalarm activated TelephonelinenotOK Flashing slowly Flashing once every5 seconds Telephone line notOK Flashing once every5seconds UnitisOK Flashing quickly Flashing twiceeverys...

Страница 25: ...ashes green if valid telephone line connected Connect a telephone to the RJ12 connector on the front of the SafeLine 3000 Internal dial tone Lift the handset Phone line dial tone Dial out All LEDs are...

Страница 26: ...w 2 Make calls with a normal fixedphonelineandthroughGSM 3 Emergency calls tonumbersatthepress ofthealarmbutton 4 Test alarms at preset intervals 5 Sendreceipts toSLCC alarmreceiver for defined condit...

Страница 27: ...7 8 9 0 1 2 3 4 5 6 7 8 9 0 1 2 3 4 5 6 7 8 9 0 1 2 3 4 5 6 7 8 9 0 1 2 3 4 5 6 7 8 9 0 1 2 3 4 5 6 7 8 9 0 SL3000v 5 01EN Intercom between machine room car pit Top of car Press 1 to call the lift car...

Страница 28: ...Emergency alarm activated Dial tone Calling 1st phone number Answer Calling 2nd phone number Answer Calling 3rd phone number Answer Calling 4th phone number Answer Alarm operator made connection Wait...

Страница 29: ...can be reset by pressing the reset button Battery test If the reset button is pressed 3 times within 2 seconds a battery test will be performed The battery test takes about 20 minutes To cancel the ba...

Страница 30: ...loud Lower the volume and check again Interfering noise when the call is connected If the main unit is installed on the car roof the problem might be due to induction in the phone cable According to...

Страница 31: ...Technical requirements EN 81 28 2003 Lift Remote alarm on passenger and goods passenger lifts EN 12015 2014 EMC Emission Electromagnetic compatibility EN 12016 2013 EMC Lifts Immunity Electromagnetic...

Страница 32: ...ost safeline no SafeLine Denmark Erhvervsvej 19 2600 Glostrup Denmark Tel 45 44 91 32 72 info dk safeline se SafeLine Headquarters Antennv gen 10 135 48 Tyres Sweden Tel 46 0 8 447 79 32 info safeline...

Отзывы: