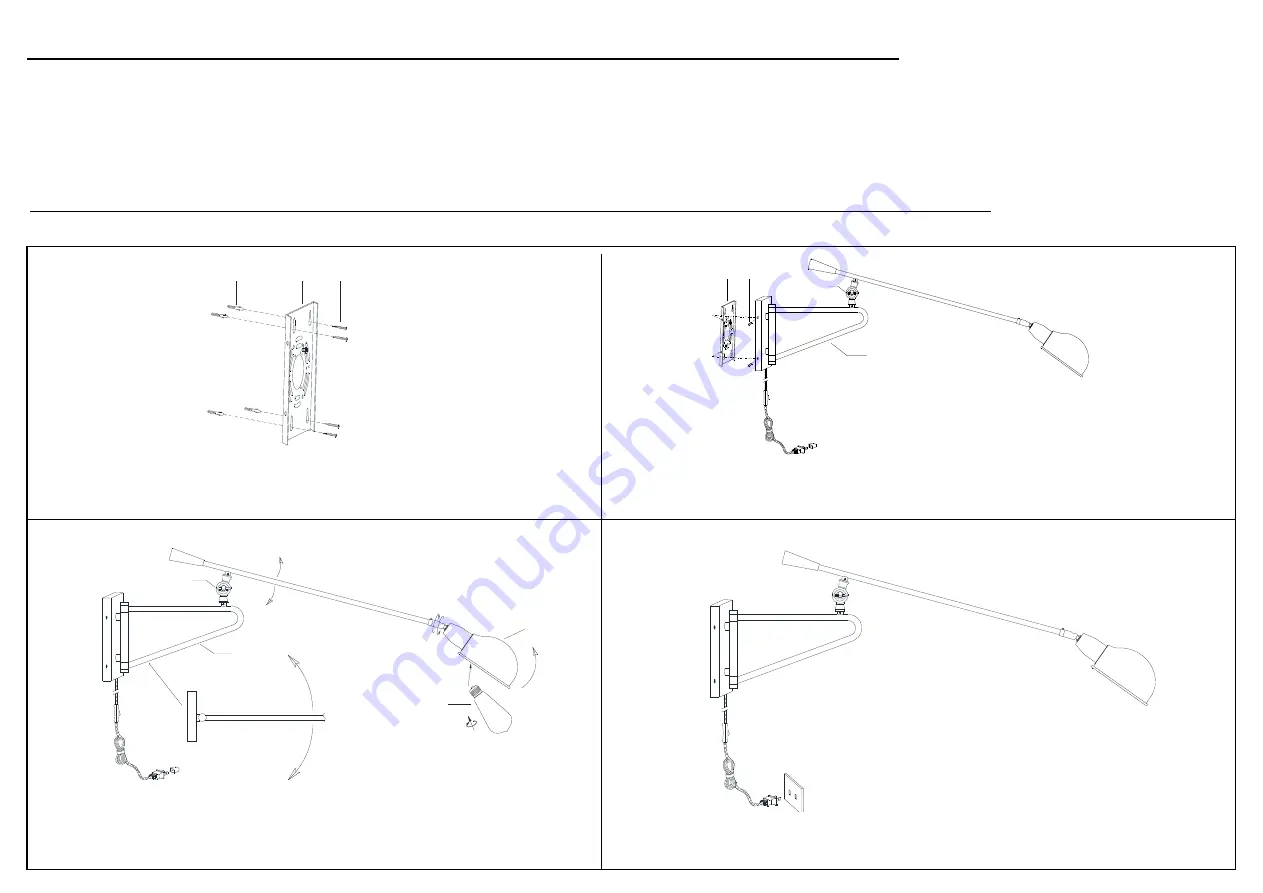
Installation to the wall
NOTE: PLEASE USE TYPE"A" BULB MAX 25‐WATT OR LED BULB MAX 9‐WATT, THERE IS LED 5‐WATT BULB IN THE BOX
Step 3:
Then loosen the handle (H), adjust the height of the lamp body, rotate the iron
shade (J), adjust the position of the iron cover, rotate the lamp arm (K) from side to side,
and install the bulb (I) into the socket after adjusting the position.
Step 4:
Put the plug into the plugbase.
* Before beginning assembly of product, make sure all parts are present. Compare parts with package contents list and hardware contents list.
* If any part is missing or damaged, do not attempt to assemble the product.
* Estimated Assembly Time: 20 minutes.
* Tools Required for Assembly (not included): Screwdriver, Junction box
* If you are having difficulty, our friendly Customer Care team is always here to help. Please email
Step 1:
First mark the position of the rubber plug hole with the mounting plate (A), punch
holes on the wall and install the anchor (C),and then fix the mounting plate (A) on the wall
with screw (B) .
Step 2:
Fix the lamp
arm
(K) on mounting plate (A) with mounting screw (F).
PREPARATION
A
B
C
H
I
J
K
A
F
H
K
2/3


