Grids Surface
STEP6
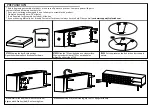
The unit needs to be secured against wall using p an p kit. Please
Consult your local hardware store to get advice of appropriate screw and
Fischer according to your wall type.
Drill pre-holes on wall as shown in fig(1) for the p protector. Repeat
STEP7
the step with same distance of both p protector a ached in step. Insert fischer
to each hole on the wall using hammer as shown in fig(2) .
Secure the Tip Protector using Screw as shown in fig(3).
Make a loop by inser ng the provided Fastener / Cable es into both p
protector on wall and on backside of product, with the grids surface facing
inside of loop as shown in fig(4).
Repeat on the other side.
Fasten the cable es un l posi on of product as close as possibleto wall as
5
shown in fig(5).


