Sender Setup:
Troubleshooting:
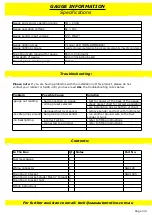
Total depth of gauge
Gauge and sender operating range
Specifications
GAUGE INFORMATION
Gauge lighting type
Mounting depth required for gauge
55mm (minimum)
60mm (including bezel)
Mounting hole size for gauge
52mm
Gauge lighting colours
Please note:
If you are having problems with the installation of this product, please do not
contact your retailer or SAAS until you have read
ALL
the troubleshooting notes below.
Gauge operating voltage
8v > 18v
For further assistance email: [email protected]
blue/red/green/purple/ice blue/pale green/white/needle only/scan
7 colour LED (NON-DIMMABLE)
Page 2/4
Page 3/4
How to select a sender preset:
-
Use the chart below to find a preset that suits your application. There are 6 presets to choose
from, each preset is represented by a segment on the gauge dial.
Preset
Ω
scale
Manufacturer
Empty
Full
1/2
1/4
3/4
-
-
-
-
240
33
Ω
Empty
-
1/4
-
1/2
-
3/4
-
Full
1
2
3
4
Dial
Dial
Ω
Dial
Ω
Empty
-
Dial
Ω
Empty
-
1/4
1/4
-
-
1/2
1/2
-
-
3/4
3/4
-
-
Full
Full
0
90
10
180
0
190
5
6
Dial
Ω
Ω
Dial
Empty
-
1/4
-
1/2
-
3/4
-
Full
-
3/4
-
Full
-
1/4
-
1/2
190
0
VDO / GM
Empty
33
240
SAAS Sender
(sold separately)
Auto Meter Sender
0
Ω
> 240
Ω
Gauge sender input voltage
12V- ONLY!
Problem
Possible Cause
Solution
-gauge not reading
-bad connection on gauge
-test for power at the back of the gauge
-needle jumps around -bad ground on fuel sender
-damaged fuel level sensor
-wrong preset selected
-check preset chart for correct application
-see installation tips at bottom of chart
-remove sender and test with multimeter
- For other vehicle’s and application’s not listed:
- Option 1:
Remove fuel sender from tank (if possible) and measure the resistance @ empty and
full. Pick a preset from the above chart that has the closest values and use that preset.
- Option 2:
Fill the fuel tank to its maximum, disconnect the fuel sender wire and measure the
resistance at the sender. Pick a preset from the above chart with the closest (Full) value and try
that preset. If this method does not work then choose the next closest preset and try again.
Installation Tips:
-no backlighting
-incorrect wiring
-connected to a dimmer
-refer to fitting instructions
-refer to fitting instructions
-run another ground wire to the fuel
sender or tank
Contents:
In The Box
Qty
Fuel level gauge
Wiring connector
Mounting U bracket
Mounting U bracket studs (M4x0.7 thread)
Mounting U bracket nuts
Fitting instructions
1
1
2
2
Notes
1
SG2190
SG21005
Part No.
1
Universal
Universal
Universal
-
Sender setup mode:
-
Turn ignition on.
-
Press and hold the sender preset button for 8 seconds, then release button.
-
Press and release button again to move the needle to your preferred preset.
-
Once you have selected a preset, wait 5 seconds for the gauge to exit setup mode.
-
Gauge is now programmed.
Preset (1)
Preset (6)
(2)
(3)
(4)
(5)


