


30
31
32
33
32
33
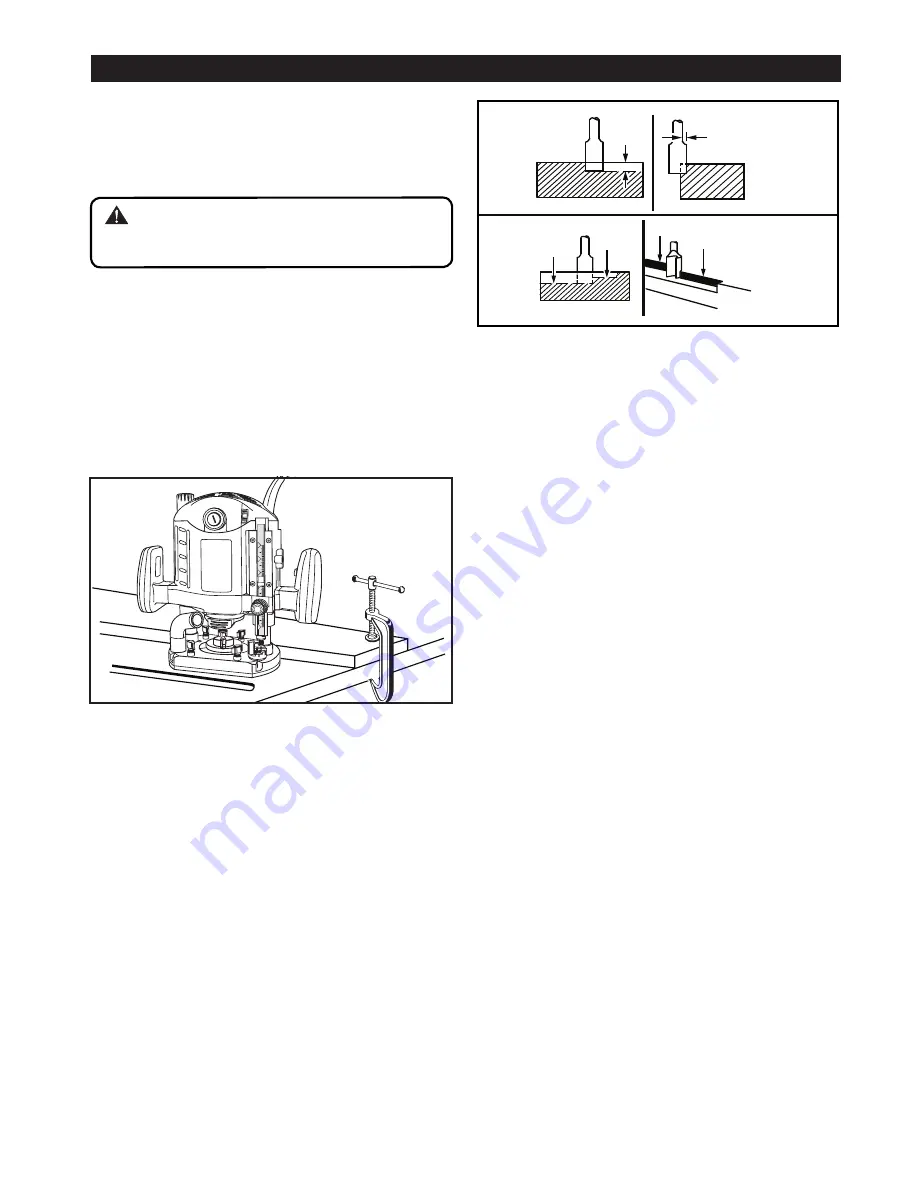
ROUTING GROOVES (Fig. 16)
When routing across the face of boards, set router at
desired depth of cut, place the edge of router base against
workpiece and turn on the router. Slowly feed the cutter into
the workpiece along desired line of cut.
WARNING:
If desired depth of cut is greater than can be safely
cut in one pass, make cuts in two or more passes.
When routing straight cuts across stock, clamp a straight edge to
the workpiece to use as a guide. Position the straight edge parallel
to the line of cut and offset the distance between the cutting edge
of the cutter and the edge of the router base. Hold the router base
against the straight edge and rout the groove.
When routing a groove wider than the diameter of the cutter, clamp
a straight edge on both sides of the cutlines. Position both guides
parallel to the desired line of cut and spaced equal distances
from the desired edges of the groove. Rout along one guide; then,
reverse direction and rout along the other guide. Clean out any
remaining waste in the center of the groove freehand.
DEPTH OF CUT (Fig. 17&18)
As previously mentioned, the depth of cut is important because it
affects the rate of feed that, in turn, affects the quality of the cut
(and also the possibility of damage to your router motor and bit).
A deep cut requires a slower feed than a shallow one and a too
deep cut will cause you to slow the feed so much that the bit is
no longer cutting, it is scraping, instead.
Making a deep cut is never advisable. The smaller bits are easily
broken off when subjected to too much side thrust. A large enough
bit may not be broken, but if the cut is too deep a rough cut will
result - and it may be very difficult to guide and control the bit as
desired. For these reasons, we recommed that you do not exceed
3.2 mm depth of cut in a single pass regardless of the bit size or
the softness or condition of the workpiece.
To make deeper cuts it is therefore necessary to mark as many
successive passes as required, lowering the bit 3.2 mm for each
new pass. In order to save time, do all the cutting necessary at one
depth setting, before lowering the bit for the next pass. This will also
assure a uniform dept when the final pass is completed.
ADJUSTMENTS
0
1
2
3
4
7
11
12
Fig. 17
Fig. 18
Fig. 16
Page 7


