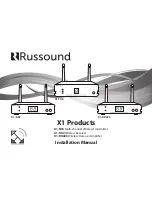
Russound X1 Products Installation Manual
3
SAFETY INSTRUCTIONS
8.
Heat - The appliance should be situated away from heat sources such as radiators,
heat registers, stoves, or other appliances (including amplifi ers) that produce heat.
Chaleur - L'appareil doit être placé loin des sources de chaleur telles que
des radiateurs, registres de chaleur, poêles ou autres appareils (incluant les
amplifi cateurs) qui produisent de la chaleur.
9.
Grounding or Polarization - Precaution should be taken so that the grounding or
polarization means of an appliance is not defeated.
La terre ou polarisation - précautions doivent être prises pour que les moyens d'un
appareil à la terre ou polarisation ne soit pas annulée.
10.
Power Cord Protection - Power supply cords should be routed so that they are not
likely to be walked on or pinched by items placed upon or against them, paying
particular attention to cords at plugs, receptacles, and the point where they exit
from the appliance.
Protection du cordon d'alimentation - Les cordons d'alimentation doivent être
acheminés de sorte qu'ils ne sont pas susceptibles d'être piétinés ou coincés par
des objets placés sur ou contre eux, en accordant une attention particulière aux
cordons au niveau des fi ches, des prises et à l'endroit où ils sortent de l'appareil.
11.
Power Sources - The appliance should be connected to a power supply only of the
type described in the operating instructions or as marked on the appliance.
Sources d'énergie - Cet appareil doit être connecté à une source d'alimentation du
type décrit dans le mode manuel ou tel qu'indiqué sur l'appareil.
12.
Main Power Disconnect - The power switch is a single-pole switch. When the
switch is in the “Off ” position, the appliance is not completely disconnected from
the main power. The main power plug is used as the disconnect device and shall
remain readily operable. When installing the product, ensure that the plug is easily
accessible.
Débranchez l'alimentation principale - L'interrupteur est un interrupteur unipolaire.
Lorsque l'interrupteur est en position "Off ", l'appareil n'est pas complètement
déconnecté de l'alimentation principale. La fi che d'alimentation est utilisée comme
dispositif de déconnexion et doit rester facilement accessible. Lors de l'installation
du produit, assurez-vous que la prise soit facilement accessible.
13.
Non-Use Periods - The power cord of the appliance should be unplugged from the
outlet when left unused for a long period of time.
Périodes de non-utilisation - Le cordon d'alimentation de l'appareil doit être
débranché de la prise en cas de non utilisé pendant une longue période de temps.
14.
Attachments - Only use attachments/accessories specifi ed by the manufacturer.
Accessoires - N'utilisez que des fi xations / accessoires spécifi és par le fabricant.
15.
Carts and Stands - The appliance should be used only with a cart or stand that is
recommended by the manufacturer. An appliance and cart combination should be
moved with care. Quick stops, excessive force and uneven surfaces
may cause the appliance and cart combination to overturn.
Chariots et supports - L'appareil doit être utilisé uniquement
avec un chariot ou un support recommandé par le fabricant.
Une combinaison de l'appareil et chariot doit être déplacé avec
précaution. Des arrêts brusques, une force excessive et des surfaces
inégales peuvent provoquer la chute de l'appareil et du chariot.
16.
Wall or Ceiling Mounting - The appliance should be mounted to a wall or ceiling
only as recommended by the manufacturer.
Mur ou au plafond - L'appareil doit être fi xé au mur ou au plafond, tel que
recommandé par le fabricant.
17.
Location of the Amplifi er - Do not mount this unit under a kitchen cabinet. Do not
expose the amplifi er to direct sun light or heating units as the amplifi er internal
components’ temperature may rise and shorten the life of the components. Avoid
damp and dusty places.
Localisation de l'amplifi cateur - Ne montez pas cet appareil dans une armoire de
cuisine. N'exposez pas l'amplifi cateur à la lumière directe du soleil ou appareils de
chauff age comme la température des composants internes de l'amplifi cateur de
risque d'augmenter et raccourcir la durée de vie des composants. Evitez les endroits
humides et poussiéreux.
18.
Object and Liquid Entry - Care should be taken so that objects do not fall and
liquids are not spilled into the enclosure through the openings.
Objets et de liquides - Des précautions doivent être prises afi n que des objets ne
tombent ou que des liquides coulent dans le boîtier à travers les ouvertures.
19.
Servicing - The user should not attempt to service the appliance beyond that
described in the operating instructions. All other servicing should be referred to
qualifi ed service personnel.
Entretien - L'utilisateur ne doit pas tenter de réparer l'appareil au-delà de celle
qui est décrite dans le manuel d'instructions. Toutes les réparations doivent être
eff ectuées par un technicien qualifi é.
20.
Damage Requiring Service - The appliance should be serviced by qualifi ed service
personnel when: A. The power supply cord or the plug has been damaged; B.
Objects have fallen, liquid has been spilled into the appliance; C. The appliance has
been exposed to rain; or D. The appliance does not appear to operate normally; or
E. The appliance has been dropped or the enclosure is damaged.
Dommages nécessitant des réparations - L'appareil doit être réparé par un
personnel qualifi é lorsque: A. Le cordon d'alimentation ou la prise a été
endommagé; B. Des objets sont tombés, du liquide a été renversé dans l'appareil
C. Si l'appareil a été exposé à pluie; ou D. l'appareil ne semble pas fonctionner
normalement, ou E. L'appareil est tombé ou son boîtier est endommagé.
X1_Manual.indd 3
1/24/14 7:53 AM


