Brewing Instructions
1. Place the Coffeemaker on a flat, level surface. Plug the unit into a
120V, AC electrical outlet.
2. Open the Lid by using the lip located on top of the Coffeemaker.
(See Figure 1).
3. Place a #4 cone-shaped paper filter into the Removable Filter Basket.
Measure 1/2 to 1 tablespoon of drip or regular grind coffee for each
cup of coffee desired. For stronger or milder coffee, adjust amount
of coffee to suit your taste.
NOTE:
We recommend using coffee ground specifically for automatic
drip coffeemakers.
4. Fill the Carafe with cold water and pour it into the Water Chamber.
Fill to the desired level using the Water Level Indicator Window to
measure. For the best tasting brewed coffee, is recommended that no
less than 2 cups of coffee be brewed at a time. Place the Carafe on
the Warming Plate.
IMPORTANT:
Always use fresh, cool water in your appliance.
Warm water or other liquids, except as listed in the Care and
Cleaning Instructions, may cause damage to the appliance.
NOTE:
The amount of brewed coffee will always be less than the
amount of water placed into the Coffeemaker, since about 10% is
absorbed by the coffee grounds and filter.
5. Close the Lid.
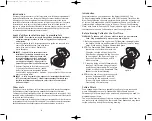
6. You may choose to brew your coffee at a stronger brew strength.
To do so, press the Brew Strength Button. A filled coffee cup icon
will appear in the Display indicating a stronger brew strength.
(See Figure 2).
7. Press the Power Select ON/OFF Button. The Red ON Light will
illuminate and the word “ON” will appear in the upper right hand
corner, indicating that the brewing cycle has begun. Hot water will
be dispensed gently and evenly through the coffee grounds.
NOTE:
If you prefer to use the Timer to preset the Coffeemaker, see
the Using the Timer Control section.
8. To pour a cup of coffee before the brew cycle is complete, simply
remove the Carafe from the Warming Plate and pour. Brewing will
continue but dripping will automatically pause. Return the Carafe to
the Warming Plate within 1 minute; dripping will resume.
CAUTION:
To prevent injury when utilizing Pause & Pour (drip-stop)
feature, replace Carafe within 1 minute of removing during
brewing process.
9. To brew another Carafe of coffee, turn unit OFF and wait
10 minutes to allow heating element to cool.
7
5
Tableau de commande
Interrupteur Marche (ON) /Arrêt (OFF)
– Appuyer sur l’interrupteur pour
mettre l’appareil en marche et lancer le cycle d’infusion. Vous pouvez
également arrêter la cafetière en appuyant de nouveau sur l’interrupteur
une fois le cycle terminé. Le voyant rouge (ON), figurant juste au-dessus
de l’interrupteur, s’allume lorsque la cafetière est en marche. Le voyant
vert (AUTO), situé au-dessus du bouton de lancement du cycle programmé,
s’allume une fois que la cafetière a été programmée.
Bouton de réglage de l’heure –
Utiliser ce bouton pour afficher l’heure
correcte au moment de régler l’horloge de l’appareil.
Bouton de réglage des minutes
– Utiliser ce bouton pour afficher les
minutes correctes au moment de régler l’horloge de l’appareil.
Bouton de programmation
– Utiliser ce bouton pour programmer votre
cafetière afin qu’elle se mette en marche au moment choisi.
Régulateur de concentration du café
– Utiliser ce bouton pour une
infusion plus lente conférant au café un goût plus riche et plus fort. Pour
assurer une saveur optimale, ce bouton régularise le processus d’infusion
en fonction de la quantité de café préparée. Ainsi, pour préparer 4 tasses
ou moins, appuyer sur ce bouton. Une icône représentant une tasse pleine
apparaîtra à l’écran. L’écoulement de l’eau à travers le panier-filtre sera
alors ralenti de manière à assurer une riche saveur de café par une
meilleure saturation des grains. Pour préparer 5 tasses de café ou plus,
appuyer de nouveau sur le bouton pour faire disparaître l’icône de la tasse.
Le café sera alors préparé selon le flot d’écoulement régulier de l’eau,
lequel accorde suffisamment de temps pour que les grains soient bien
saturés, sans pour autant conférer un goût amer au breuvage.
Bouton de lancement du cycle programmé –
Utiliser ce bouton pour
lancer le cycle d’infusion programmé à l’avance. Vous pouvez
également annuler la programmation de la cafetière en appuyant de
nouveau sur ce bouton.
Figure 2
RH_RH12DSBCAN_IB_13-5-05 5/13/05 4:45 PM Page 15


