background image

Problem

Potential reason

Potential solution

If the microwave 

doesn’t work

1. Microwave is not 

plugged in

Make sure the plug is plugged in securely into the mains 
and the plug is switched on. If it is not, remove the plug 
from the socket, wait 10 seconds and plug it in again 
securely.

2. Plug is not working

The plug socket that the microwave is plugged into may 
have become faulty. Plug the microwave into another 
known good plug socket, ensure that the socket is turned 
on and check if the microwave now works.

3. The plug has a blown 

fuse or the mains circuit 

has a blown fuse/tripped 

fuse

Check the plug for a blown circuit fuse or a tripped main 
circuit breaker. If these seem to be working properly, test 
the socket with another appliance. 

4. Microwave has 
developed a fault

Contact customer services to talk through the problem to 
see if any solution for the fault can be found. If not and the 
product is within its warranty period, then the microwave 
should be returned to the retailer it was purchased from for 
a replacement or refund.

If the microwave 

power will not 

work 

1. Door is not closed

Make sure the door is securely closed. Otherwise, the 
microwave will not engage or operate.

2. The power has not 

been set/the timer dial 

has not been turned.

Set the microwave power by pressing the ‘Power’ button. 

Select

the time by turning the dial and pressing ‘

Start

’ to 

confirm.

Not heating

Magnetron not working

The component that produces the microwaves is called a 
magnetron, if food is not being heated or is 'luke' warm 
then it is likely this component has developed a fault. If the 
microwave is within its warranty period, please contact 
customer services  for further advice or take the microwave 
back to the retailer it was purchased from for a refund or 
replacement.

29

PROBLEM SOLVING

The  microwave  oven  may  cause  interference to  your  radio,  TV  or similar  
equipment. If this happens,  you  can  stop the  interference by moving the 
radio, TV or equipment as far away from your microwave oven as possible.

WARNING: To reduce the risk of personal injury, always 
unplug the microwave before performing maintenance 
or trouble shooting checks.

Содержание Luna RHMDL801

Страница 1: ...mily size Digital Microwave User Guide For Customer Services Spare Parts please call 0345 209 7461 Opening times Monday Friday 8am 8pm Saturday 9am 1pm Or visit us at www productcare co uk PLEASE RETA...

Страница 2: ...How to use the microwave 20 26 Cooking tips 27 Cleaning the microwave 28 Important utensil information 29 Problem solving 30 33 Guarantee customer services 33 Spare parts 34 Connection to the mains su...

Страница 3: ...ds must not be heated in sealed containers since they are liable to explode The appliance and its accessible parts may become hot during use Care should be taken to avoid touching heating elements Do...

Страница 4: ...d above and persons with reduced physical sensory or mental capabilities or lack of experience and knowledge only if they are being supervised or have been given instruction in the safe use of the app...

Страница 5: ...with the teat left on Remove it if replacing the bottle back into the oven Eggs in their shell and whole hard boiled eggs should not be heated in microwave ovens since they may explode even after mic...

Страница 6: ...any container fully always leave a gap for steam to escape Do not use plastic containers when heating or cooking foods that contain a lot of fat or sugar Always have the glass tray and turntable supp...

Страница 7: ...se the microwave oven for heating utensils plates or dishes Do not cook using a container with a restricted opening such as bottles as they may explode Before you clean your microwave oven turn it off...

Страница 8: ...t could adversely affect the life of the appliance and possibly result in a hazardous situation You should clean the outside of the oven with a damp cloth Do not allow water to seep into the ventilati...

Страница 9: ...d detergent and water then dry You can wash the turntable support in mild soapy water Failure to maintain the oven in a clean condition especially if liquid is left under the turntable could lead to d...

Страница 10: ...lay Hit Start and you re cooking If you want to choose your own cooking power and time this is also extremely easy press the Power button turn the time dial and the Start button will commence the proc...

Страница 11: ...oler The microwaves do not stay in the air or in the food when you open the microwave oven door The microwave oven will work using an ordinary household electrical socket Inside the microwave oven is...

Страница 12: ...wave 800W Oven Capacity 23L Turntable Diameter 27cm External Dimensions H x W x D 28 8 x 49 8 x 38 2cm Net Weight Approx 11 7Kg Number of Power Levels 5 Defrost Accessories Included Turntable coupling...

Страница 13: ...ping with a damp cloth Do not remove place in a dishwasher 2 Check the oven after unpacking for any visual damage such as A misaligned door Damage to the door Dents or holes in the door window and scr...

Страница 14: ...owave top 5 Screen display 6 Turntable coupling 7 Turntable ring 8 Control panel buttons and dial 9 Waveguide cover do not remove 1 2 3 4 6 7 9 5 8 For Customer Services Spare Parts please call 0345 2...

Страница 15: ...e voltage is the same as on the rating label do not use extension cables or mains socket adaptors The microwave oven should be used freestanding only and must not be built in or used in a cabinet Sele...

Страница 16: ...m producing appliance as this will damage the microwave oven The minimum installation height is 85cm A minimum clearance of 7 5cm is required between the oven and any adjacent walls Leave a minimum cl...

Страница 17: ...y should align with the turntable coupling 17 TURNTABLE INSTALLATION Before first use check that any securing tape and all packaging has been removed from the glass tray and turntable ring assembly Th...

Страница 18: ...ass tray always place on or in suitable microwaveable cookware Please check that crockery is microwave safe before using If the glass tray or turntable ring assembly has been damaged in any way contac...

Страница 19: ...by 1 minute until 10 minutes Defrost Clock Press to set a pre set defrost programme or set a pre set cooking programme or to set clock Pause Cancel Press once to pause a cooking cycle or twice to canc...

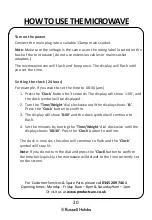
Страница 20: ...be displayed 2 Turn the Time Weight dial clockwise until the display shows 8 Press the Clock button to confirm 3 The display will show 8 00 and the clock symbol will continue to flash 4 Set the minut...

Страница 21: ...five times the screen display will show 20P 20 power 2 Once you have selected your microwave power you can turn the Time Weight dial clockwise to set the cooking time desired 3 Press the Start button...

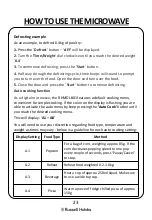
Страница 22: ...ct the defrost weight desired 2 Once the weight is selected press the Start button to commence defrosting The maximum defrost weight is 2 KG During defrosting beep sounds will be heard two times to pr...

Страница 23: ...cooking menu convenient for simple cooking If the colon on the display is flashing you are able to activate the auto menu by keep pressing the Auto Cook button until you reach the desired cooking men...

Страница 24: ...ox 450g Place the slices on a film covered dish to prevent water loss A 6 Vegetable To cook vegetables up to 500g A 7 Meat To cook vegetables up to 500g A 8 Fish To steam up to 500g fish Wash and remo...

Страница 25: ...plastic bags Do not use melamine dishes as they contain a material which will absorb microwave energy This may cause the dishes to crack or burn and will slow down the cooking speed Use only cookware...

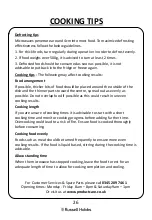
Страница 26: ...t overlap food if possible as this could result in uneven cooking results Cooking length If you are unsure of cooking times it is advisable to start with a short cooking time and monitor cooking progr...

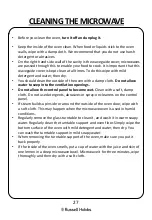
Страница 27: ...rol panel to become wet Clean with a soft damp cloth Do not use detergents abrasives or spray on cleaners on the control panel If steam builds up inside or around the outside of the oven door wipe wit...

Страница 28: ...cooking speed Use only cookware that is approved to be used in a microwave oven Do not cook using a container with a restricted opening such as bottles as they may explode Do not heat baby bottles wit...

Страница 29: ...eturned to the retailer it was purchased from for a replacement or refund If the microwave power will not work 1 Door is not closed Make sure the door is securely closed Otherwise the microwave will n...

Страница 30: ...ally However if the microwave sparks again on first use after the waveguide has been replaced and the microwave cleaned please contact customer services for further advice 2 Metal or foil No metal or...

Страница 31: ...id Paint damage peeling Maintenance If the microwave is within its warranty period please contact customer services for further advice or take the microwave back to the retailer it was purchased from...

Страница 32: ...removed Check that the turntable coupling is fitted correctly and the transportation tape has been removed 2 Turntable roller ring not fitted or fitted incorrectly Check that the coupling has be place...

Страница 33: ...e Refund or replacement is at the discretion of the retailer The following conditions apply The product must be returned to the retailer with the original proof of purchase The product must be install...

Страница 34: ...g spare parts simply contact our friendly Customer Services team using the details provided at the bottom of this page Turntable coupling For Customer Services Spare Parts please call 0345 209 7461 Op...

Страница 35: ...k that the voltage marked on the product corresponds with your supply voltage This product is fitted with a 13A plug complying with BS1363 If this plug is unsuitable or needs to be replaced refer to c...

Страница 36: ...wire and must be connected to the terminal marked with the letter L or coloured RED Always ensure that the plug cord grip is fastened correctly If a 13A BS1363 fused plug is used it must be fitted wit...

Страница 37: ...37 NOTES...

Страница 38: ...38 NOTES...

Страница 39: ...39 NOTES...

Страница 40: ...materials contained within Your co operation is vital to ensure the success of these schemes and for the protection of the environment For your nearest disposal facility visit www recycle more co uk o...

Отзывы: