Rushworks Dayshift Скачать руководство пользователя страница 9


Internal Switcher Control Panel 


The internal Switcher controls what input is on the Preview and Program bus.  You can change 

inputs in the following ways: 


1) AUTO button - This will dissolve/fade between what’s currently active on the Program input 

and the Preview  input.   


2) TAKE button - This will cut  between what’s currently active on the Program input  and the 

Preview  input.   


3)  Direct  selection -  Clicking the INPUT or BLK buttons on the Preview (lower) bus displays that 

source on the Preview Monitor. Clicking the INPUT or BLK buttons on the Program (upper) bus 

displays that source on the Program Monitor, which outputs the system video and audio.  


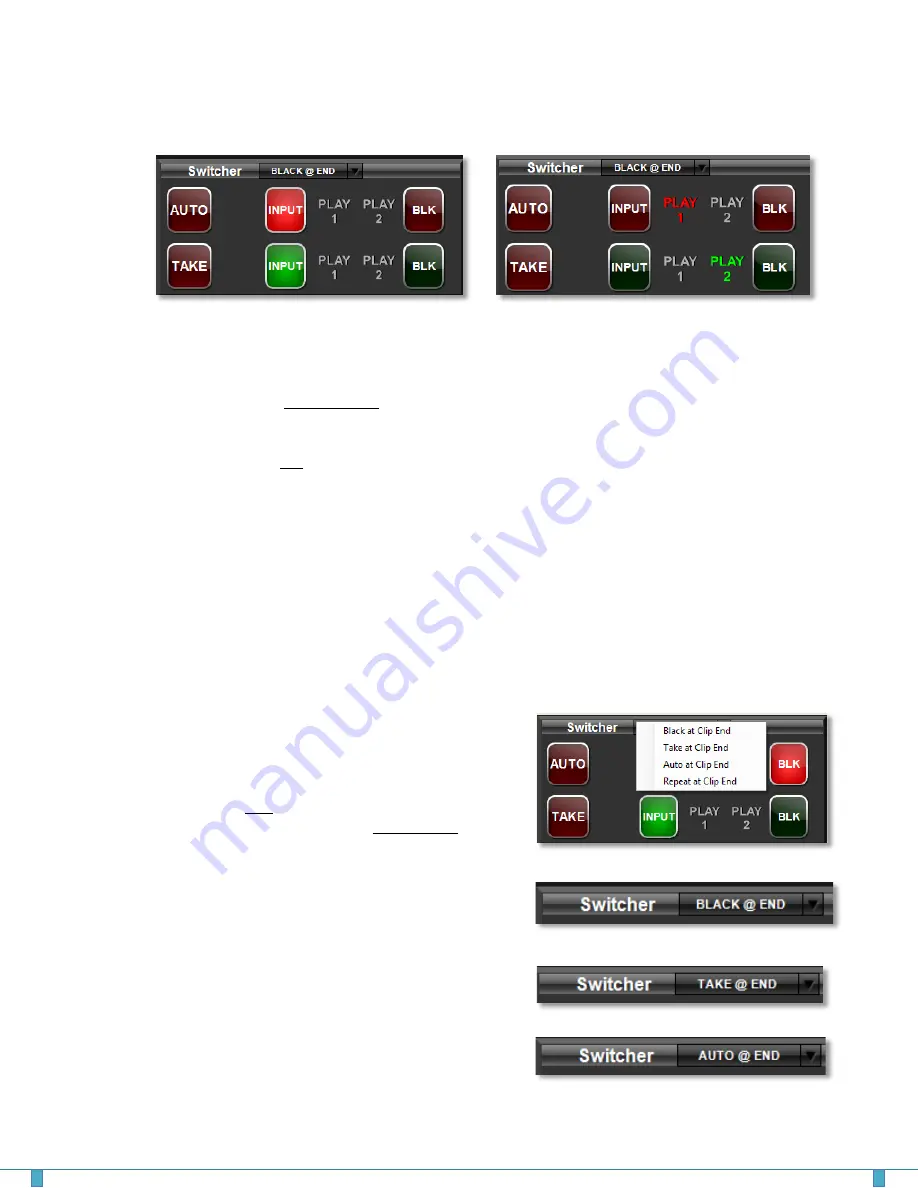
Clips and graphics are routed to the Preview bus by clicking on them in the File Browser. When the 

Preview Monitor is active the PLAY 2 item on the Preview bus is GREEN. To play the clip or graphic use 

the AUTO or TAKE buttons. In the example above on the right, one clip is outputting on the Program Monitor 

and a second clip or graphic is cued on the Preview Monitor, ready to be output via the AUTO or TAKE 

buttons. 


Clip End Actions allow you to control what happens when 

a clip on the Program Monitor (system output) reaches its 

end. The menu is located in the Switcher panel header.  


When you click on the text of the button it will cycle though 

the four choices. When you click on the down arrow it will 

display a menu as shown on the right: 
 
Black at Clip End – When the clip finishes playing you will 

see black until you choose another input on the switcher. 
 
Take at Clip End 
– When the clip finishes playing the 

system will perform a TAKE command, switching to the 

preview input. 
 
Auto at Clip End 
– When the clip finishes playing the 

system will perform a fade-to-black transition. 

DAYSHIFT User Guide 

Page


9


Содержание Dayshift

Страница 1: ...USER GUIDE Version 2 0...

Страница 2: ...dware Overview 3 Software Overview 4 DAYSHIFT Panel 5 Settings Panel 6 Config Tab 6 Preview Monitor 7 File Browser Panel 7 Program Monitor 8 Clock and Audio Panel 8 Internal Switcher Control Panel 9 R...

Страница 3: ...l recording or any later time on the same or following day You can also use it for manual ingest from sources as well as manual playback of individual files The default inputs and outputs are SDI and...

Страница 4: ...ols to manipulate the clip There is also a search box to let you quickly locate the clip you want to play There are two File Browser views available text and icon 5 Toward the right side of the screen...

Страница 5: ...s displayed in the upper right of the DayShift panel 3 Click on the Rec Start box type 170000 and click enter 4 In the already highlighted Duration box type 10000 and click enter 5 In the already high...

Страница 6: ...MPEG 2 2 Select the Bit Rate for the encoding A good average for SD MPEG 2 encoding is 8Mb sec A good average for HD MPEG 2 encoding is 35Mb sec Based on your entry the amount of available recording t...

Страница 7: ...on the keyboard When LIVE input or BLK is selected these controls are disabled File Browser Panel The File Browser panel can be used to play recorded files and any other properly formatted files on yo...

Страница 8: ...clicking the bug icon If a clip is playing on the Program Monitor the Location and Duration boxes indicate the time code LOCATION and DURATION of that clip During DayShift playback the duration is not...

Страница 9: ...AY 2 item on the Preview bus is GREEN To play the clip or graphic use the AUTO or TAKE buttons In the example above on the right one clip is outputting on the Program Monitor and a second clip or grap...

Страница 10: ...Support Info DAYSHIFT is a RUSHWORKS Software Innovation copyright RUSHWORKS 2010 2014 All Rights Reserved www RUSHWORKS tv SUPPORT AND TECHNICAL ASSISTANCE FOR DAYSHIFT IS AVAILABLE VIA EMAIL OR TELE...

Отзывы: