


RMP-D8 USB Firmware Update
Field Update Procedure:
1. Power ON the RMP-D8 and press the CONFIG button
once
to take note of the current firmware (FW) version on the
SYSTEM screen.
2. After confirming the current FW version, power the RMP-D8 OFF.
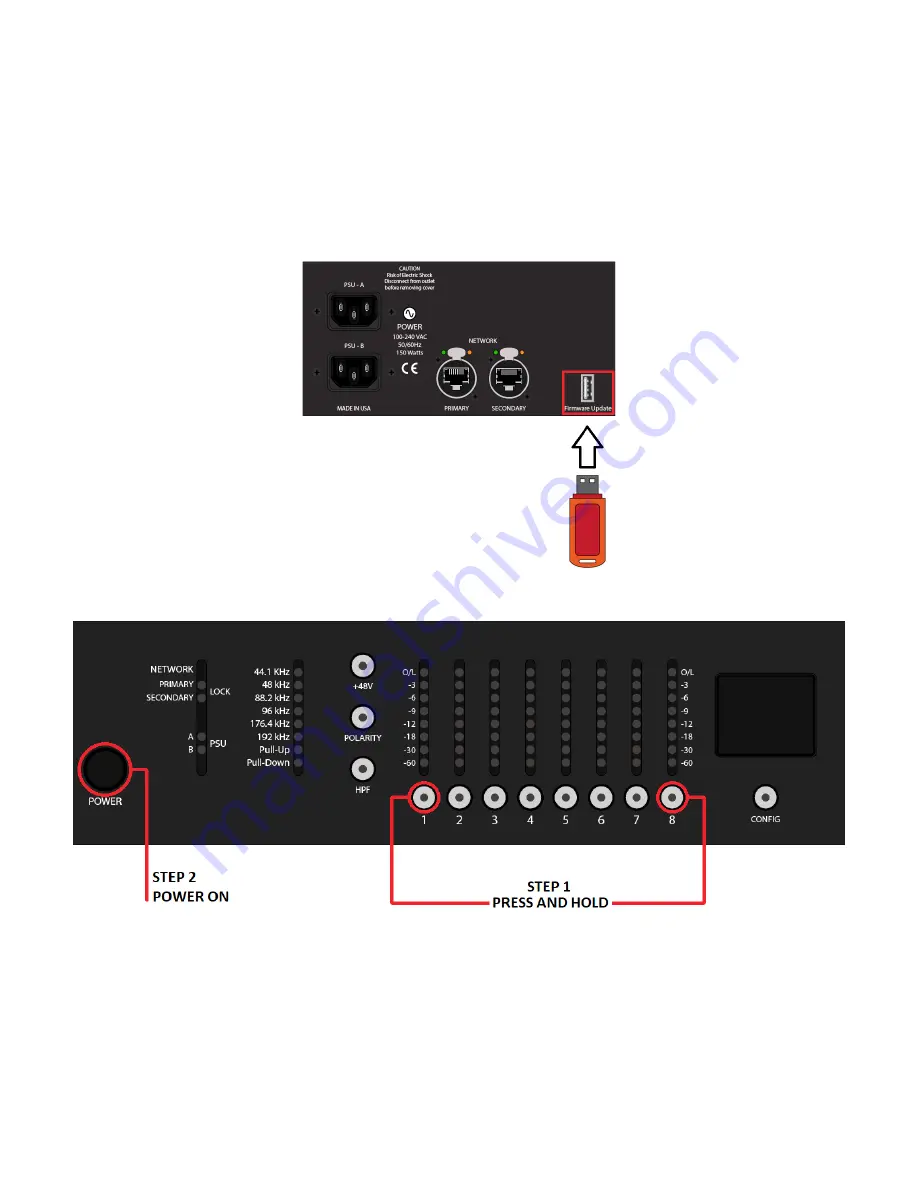
3. Plug a USB flash drive with the most recent “image.hex” file into the FIRMWARE UPDATE USB A port on the RMP-D8
rear panel.
4. PRESS and HOLD Channel 1 and Channel 8 “Channel Select” buttons (STEP 1). While holding Channel 1 and 8
channel select buttons, power on the RMP-D8 (STEP 2).
5. The RMP-D8 button LEDs will start to flash. At this point, release the Channel 1 and Channel 8 channel select
buttons. The LEDs will stop flashing once the new application code has finished loading. The RMP-D8 will subse-
quently boot up in standard operating mode.
6. When the RMP-D8 has finished it’s standard boot sequence, turn the RMP-D8 OFF and remove the USB Flash Drive
from the FIRMWARE UPDATE USB port.
7. Power the RMP-D8 ON again.
8. When the RMP-D8 has finished its boot sequence, press the CONFIG button once to verify that the new firmware
version has been successfully updated.
17


