20
COMPILER TECO/ATI
ENDORSED
DATE
29.02.2004
REG. CODE
1-5302-633
MODEL N°
51074
DATE OF ISSUE
02-04
REVISION
00
X
12
13
14
15
42.3 ÷ 43.7
28.3 ÷ 28,5
18,7 ÷ 18,9
14,91
±5%
Kg
D
C
A
2
°
1
°
3
°
B
X
90° - 120°
Ra = 0,5 - 1 µ
24,72
±5%
Kg
Ø 87 ÷ 87,020
CHECKS AND OVERHAUL
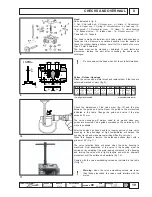
Free length
Grinding-in must always be carried out when new valves or
housings are mounted. Valve housings oversized on the outside by
0.5 mm are available.
Thoroughly wash the valve and housing with petroleum or gasoline
to eliminate lapping paste residues or swarf.
Proceed in the following way to make sure that the valve and seat
are tight:
1. Mount the valve on the head with cap string and cotters (see fig.
8)
2. Overturn the head and pour a few drops of diesel fuel or oil on
to the edge of the valve top
3. Blow compressed air into the head duct. Plug the edges of the
duct itself to prevent air escaping.
If there are air leaks in the form of bubbles between the housing
and valve, demount the valve and grind-in again.
Valve springs
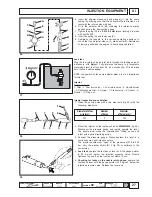
Check the length of the spring as indicated in fig. 13 to identify any
yielding.
Replace the springs if the values are different.
Rocker arms
Make sure that there are no evident signs of wear on the contacting
surfaces. Replace the parts if necessary.
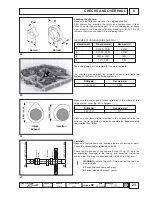
Cylinder
In special cast iron with integral liner. Use a bore gauge to check
the two internal diameters
(C-D)
perpendicular to each other and at
different heights (fig. 14). Maximum tolerated taper error
(A-B)
and
ovality error
(C-D)
: 0.06 mm.
Cylinder diameter:
If the diameter of the cylinder does not exceed said values or if there
are slight surface scores on the cylinder, it will be sufficient to
change the piston rings.
Do not manually hone the cylinder bore surfaces with
emery cloth or other means.
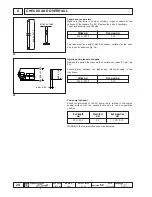
The cross-hatch pattern should be at an angle of 90°÷120°; lines
should be uniform and clear in both directions (fig. 15).
Average roughness must range between 0.5 mm 1 µm.
The cylinder surface which comes into contact with piston rings
should be machined with the plateau method.
Replace the cylinder and piston if there is a ridge in zone "
X
" fig. 15
of the cylinder and if tapering and ovality exceed the previously given
values.

