background image

9

EN

RUCKUS

®  

4WD

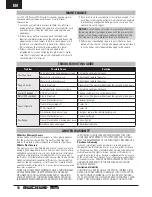
MOTOR CARE

• Seat the motor brushes by driving smoothly on a flat surface 

during use of the first battery charge.

• Prolong motor life by preventing overheating conditions. 

Undue motor wear results from frequent turns, stops and 

starts, pushing objects, driving in deep sand and tall grass, 

and driving continuously up hill. Not allowing motor to cool 

between runs can quickly diminish the performance of your 

vehicle. Allow adequate time for motor to cool to ambient 

temperature betweens runs for best vehicle performance.

• Over-temperature protection is installed on the ESC to 

prevent circuit damage, but cannot protect the motor from 

driving against heavy resistance.

RIDE HEIGHT ADJUSTMENT

Ride height is an adjustment that affects the way the vehicle  

jumps, turns and goes over bumps. Drop one end of the vehicle from 

approximately 3 inches (75 mm) in height onto a flat surface. When 

dropping the front of the vehicle, after the vehicle settles, make 

sure the front arms are equal and parallel to the flat surface. Do  the 

same with the rear to make sure both arms are parallel with the flat 

surface. To adjust your ride height, either add or remove spring clips 

to achieve the desired ride height.
Lower the front ride height to increase steering. Lower the rear  ride 

height to increase traction but decrease steering.

INITIAL SETUP

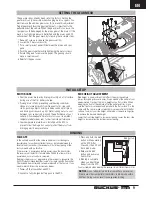
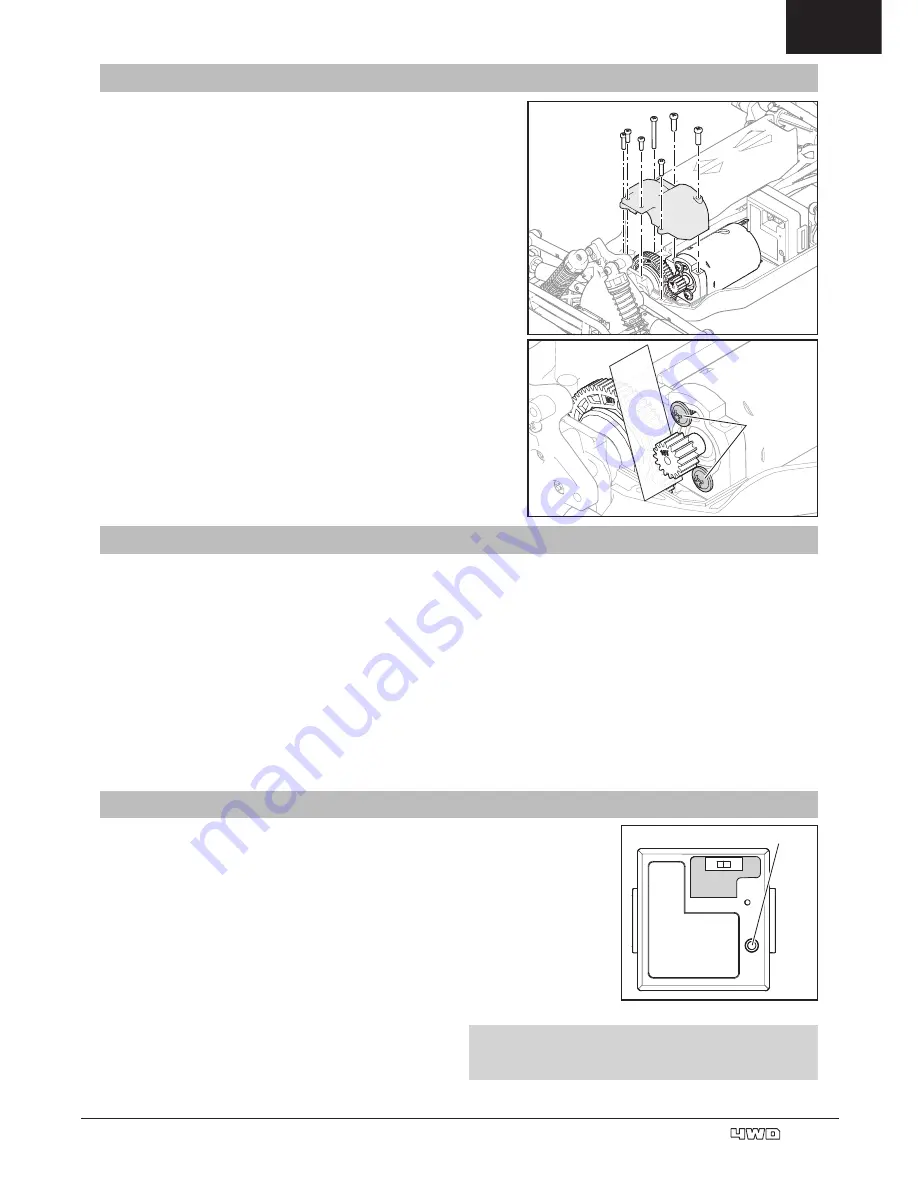
SETTING THE GEAR MESH

A

B

C

The gear mesh has already been set at the factory. Setting the 

gear mesh is only necessary when changing motors or gears. You 

must remove the vehicle’s gear cover (A) to make this adjustment. 

Proper gear mesh (how the gear teeth meet) is important to the 

performance of the vehicle. When the gear mesh is too loose, the 

spur gear could be damaged by the pinion gear of the motor. If the 

mesh is too tight, speed could be limited and the motor and ESC 

will overheat. Set the gear mesh by following these simple steps:

1. Remove 7 screws to remove the gear cover (A).

2. Loosen the 2 motor screws (B).

3. Put a small piece of paper (C) between the pinion and spur 

gears.

4. Push the gears together while tightening the motor screws.

5. Rotate the gears to remove the paper. The gearing should 

move a small amount.

6. Reinstall the gear cover.

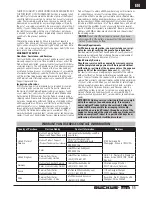
FAILSAFE 

In the unlikely event that the radio connection is lost during use 

(possibly due to low transmitter batteries or distance between the 

receiver and transmitter), the receiver will hold the steering at the 

last command with no throttle.
If the receiver is powered on before powering on the transmitter, 

the receiver will enter this failsafe mode. When the transmitter is 

powered on, normal control is resumed.
Binding is the process of programming the receiver to recognize the 

GUID (Globally Unique Identifier) code of a single specific transmitter. 

The included transmitter and receiver are bound at the factory. If you 

need to rebind, follow the instructions below.

1. Power off the transmitter and ESC.
2. Connect a fully charged battery pack to the ESC.

3. Press and hold the bind 

button while powering 

up the ESC. After 

2 seconds the ESC will 

be in bind mode.

4. Release the bind 

button and power on 

transmitter.

5. Binding is complete 

when you hear three 

beeps from the ESC. 

You must rebind when binding the receiver to a different transmitter.

NOTICE:

 Do not attempt to bind the transmitter and receiver 

if there are other compatible transmitters in bind mode within 

400 feet. Doing so may result in unexpected binding.

BINDING

Bind button

Содержание ECX01000AUT1

Страница 1: ...Gl ckwunsch zum Kauf des ECXRuckus 4WD Monster Truck Dieses 1 18 Scale Model ffnet Ihnen die Welt des RC Car Sports Nous vous f licitons pour l achat du ECXRuckus 4WD Monster Truck Ce mod le 1 18 vou...

Страница 2: ...liar with the features of the product before operating Failure to operate the product correctly can result in damage to the product personal property and cause serious injury This is a sophisticated h...

Страница 3: ...en certified as water resistant or waterproof If the motor becomes excessively wet apply very light throttle until the water is mostly removed from the motor Running a wet motor at high speeds may rap...

Страница 4: ...e battery and charger after charging and let them cool between charges Always inspect the battery before charging Always terminate all processes and contact Horizon Hobby if the product malfunctions A...

Страница 5: ...install 4 AA batteries 3 Slide the panel closed We recommend using only alkaline AA batteries in the transmitter however it is possible to use rechargeable Ni MH batteries Never install damaged batte...

Страница 6: ...Left steering with ST switch on NOR See Reverse Switch Steering Rate Adjusts the amount the front wheels move when the steering wheel is turned left or right Throttle Dual Rate Adjusts the maximum amo...

Страница 7: ...ormance of the motor GETTING STARTED 1 Power on the transmitter 2 Connect the battery to the Electronic Speed Control ESC Receiver unit and power on the vehicle 3 Do a test of the transmitter s contro...

Страница 8: ...ndoors can cause overheating at low speeds Operating at low speed increases heat in the electronic speed control ESC Overheating can damage the vehicle and failure may result Steering Dual Rate If the...

Страница 9: ...to the performance of the vehicle When the gear mesh is too loose the spur gear could be damaged by the pinion gear of the motor If the mesh is too tight speed could be limited and the motor and ESC...

Страница 10: ...Charge the vehicle battery pack Motor dirty or brushes worn Check clean replace the motor Sluggish Action Motor dirty or brushes worn Check clean replace the motor Bind in drivetrain Clean adjust the...

Страница 11: ...uded items and a brief summary of the problem A copy of your original sales receipt must be included for warranty consideration Be sure your name address and RMA number are clearly written on the outs...

Страница 12: ...vice may not cause harmful interference and 2 this device must accept any interference received including interference that may cause undesired operation CAUTION Changes or modifications not expressly...

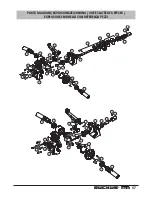
Страница 13: ...RAM EXPLOSIONSZEICHNUNG VUE CLAT E DES PI CES ESPLOSO DEL MODELLO CON REFERENZA PEZZI 14 14 14 14 14 14 14 10 10 3 18 18 3 3 3 3 3 11 11 3 3 18 3 10 16 14 15 15 8 14 14 18 14 14 14 14 14 16 16 10 10 1...

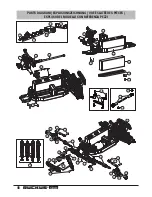
Страница 14: ...25 8 14 PARTS DIAGRAM EXPLOSIONSZEICHNUNG VUE CLAT E DES PI CES ESPLOSO DEL MODELLO CON REFERENZA PEZZI 14 14 26 6 23 2 6 14 14 13 19 19 12 13 9 9 1 14 10 10 11 5 1 14 4 14 12 13 10 10 5 11 9 22 14 7...

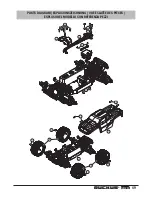
Страница 15: ...49 RUCKUS 4WD PARTS DIAGRAM EXPLOSIONSZEICHNUNG VUE CLAT E DES PI CES ESPLOSO DEL MODELLO CON REFERENZA PEZZI 6 6 14 13 14 14 14 6 20 20 14 14 14 21 14 14 14...

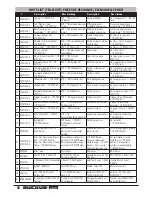
Страница 16: ...t 1 18 4WD All ECX 1 18 Zubeh rset Set de visserie Set completo viteria 1 18 4WD tutti 15 ECX212005 Slipper Assembly 1 18 4WD All ECX 1 18 Slipper montiert Slipper complet Gruppo antisaltellamento 1 1...

Страница 17: ...01000IT1 ECX01000T2 ECX01000AUT2 ECX01000IT2 www ecxrc com 2015 Horizon Hobby LLC ECX the ECX logo Ruckus Tazer EC3 and the Horizon Hobby logo are trademarks or registered trademarks of Horizon Hobby...

Отзывы: