It’s Under Control
®
The RKM-1+ audio keypad is designed for multi-room audio control, and provides the flexibility
to control almost any multi-zone receiver or distributed audio system.
The RKM-1+ provides superior quality and these specific features:
• Provides feedback from multi-zone receivers via any RTI XP series control processor.
• Includes interchangeable white, black, and light almond wallplates and function buttons.
• Non-volatile Flash memory stores system configuration even when power is lost.
• IR output port drives up to 1000 feet of wire for standalone control.
• Field upgradable firmware.
• USB programming.
• Eight (8) fully programmable hard buttons.
• Interchangeable LED backlit films.
• LED backlit films provide feedback of power status, selected source, and volume level.
• Use any standard Decora
®
type wallplate.
Key Features
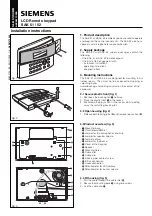
Installation & Operation
Mounting
The RKM-1+ is designed for flush-mount installations in walls or cabinets. It requires an available
mounting depth of 1.5 inches (38mm) including cables, from the front surface of the wall. RTI
recommends that the RKM-1+ be mounted in a single-gang electrical box or mud ring.
Power
The RKM-1+
is turned on simply by applying power to it either via a connecting block (e.g. the
RTI CB-8) or other power supply (9VDC - 16VDC, 350 mA), such as an RTI PS16-1.
Selected Source Film, Faceplate and Button Installation
The selected source film is LED backlit and may be changed to more closely match the audio
sources that will be controlled. A sheet with ten lens films is included with the RKM-1+, each
with different source configurations. Additionally, different colored wallplates and buttons ship
with your RKM-1+, allowing you to further tailor your RKM-1+.
To install the selected source display film and/or change the faceplate and button color:
1)
Remove the faceplate by pressing a small flat
-
head screwdriver into the release tab slots and
use your fingers to pry-up and carefully remove
the faceplate.
2)
Place screwdriver in groove on backside of face-
plate and press down to pry display lens off
3)
Choose appropriate selected source film and
faceplate/button color.
4)
Align film inside the raised edge on the back
-
side of the display lens (the letters will appear
reversed from backside so that they appear cor-
rectly when viewed from frontside).
5)
Once aligned, press film firmly in place.
6)
Snap display lens back onto faceplate color of
your choice, paying attention to correct orienta-
tion.
7)
If changing keypad buttons, gently slide each
button off rubber mold one at a time. Carefully
align new buttons and press down until firmly
seated.
8)
Snap faceplate back onto RKM-1+ enclosure.
RKM-1+
Faceplate (backside)
Display Lens (backside)
LED Backlit Film
Groove
Release Tab Slots
(Decora
®
is a registered trademark of Leviton Manufacturing Co. Inc.)
If you are encountering any problems or have a question about your RTI product, please contact RTI Technical Support for
assistance (see the Contacting RTI section of this guide for contact details).
RTI provides technical support by telephone or e-mail. For the highest quality service, please have the following
information ready, or provide it in your e-mail.
• Your Name
• Company Name
• Telephone Number
• E-mail Address
• Product model and serial number (if applicable)
If you are having a problem with hardware, please note the equipment in your system, a description of the problem, and
any troubleshooting you have already tried.
If you are having a problem with software, please note what version you have installed, the operating system on your
PC, a description of the problem, and any troubleshooting you have already tried. If you are calling about a software or
programming question or problem, please be at you computer when you place your call. This will considerably speed up
the troubleshooting process.
Please do not return products to RTI without return authorization.
Connection Options
Service & Support
RS-232 (1)
POWER / IR
SENSE
IR / SERIAL / SENSE
EXPANSION
+12VDC, 1A
MULTI-PURPOSE I/O PORTS
RS-232 (2)
ETHERNET
RS-232 (3)
TRIGGERS
RELAYS
RTI COM
POWER
1 2 3
1 2 3
1
2
3
GND
INPUT
HIGH OUT
A B
A B A B
4
1
2
3
5
6
+12VDC
3-24VDC
12V,100mA MAX
3A@30VDC MAX
GND
GND
Pin 5 +16VDC
Pin 6 Infrared
Pin 4 +16VDC
Pin 3 Infrared
Pin 2 RS-485+
Pin 7 Ground
Pin 1 RS-485-
Pin 8 Ground
XP-6s Control Processor
CB-8
Connecting
Block
Power
Supply
Power
Supply
Tuner
Cleaning
Occasional cleaning may be required, depending on use. To clean your RKM-1+, lightly dampen a lint-free cloth with a
glass cleaner or mild detergent, and wipe the buttons, surrounding bezel, and wallplate.
RKM-1+
(rear)
Television
Shades