


70
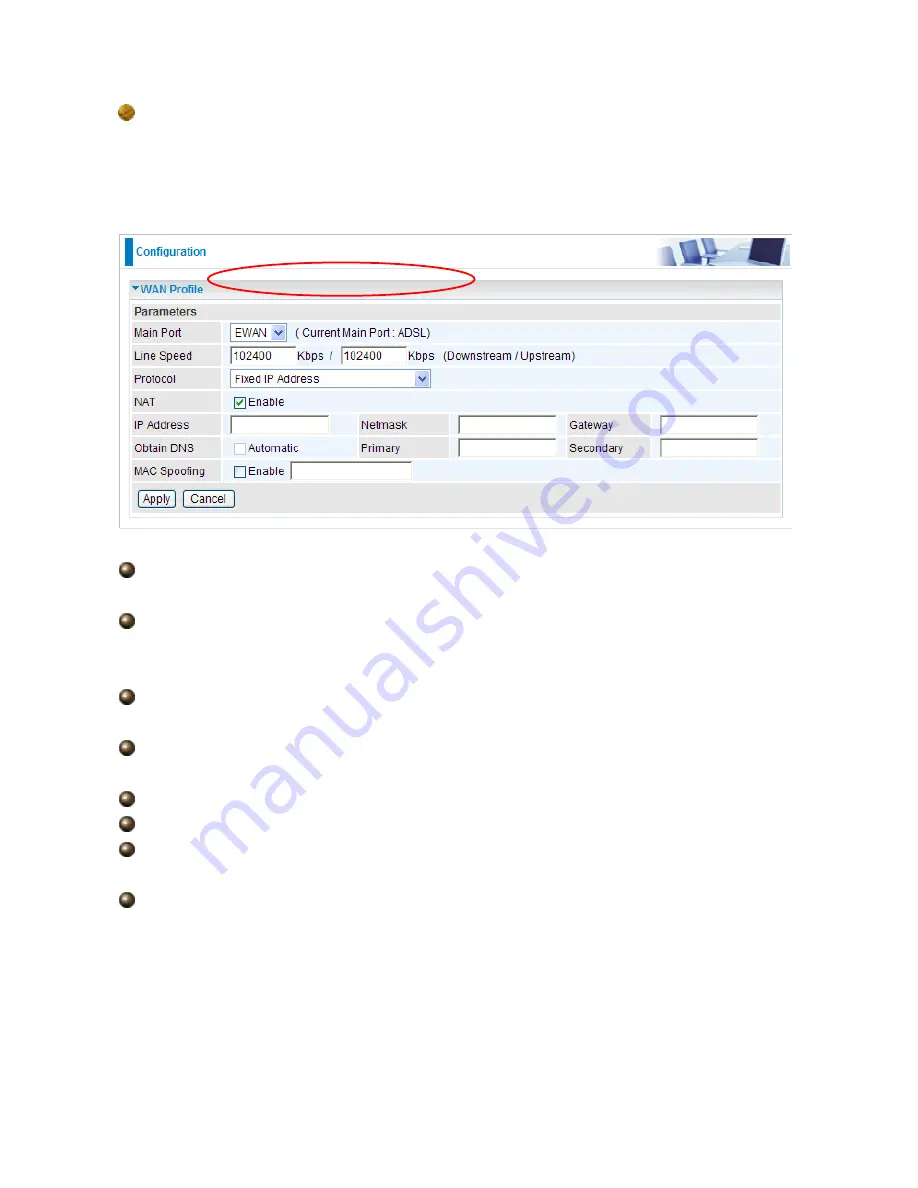
Fixed IP Address (EWAN)
Select this option to set static IP information. You will need to enter in the Connection type,
IP address, netmask, and gateway address, provided to you by your ISP. Each IP address
entered in the fields must be in the appropriate IP form, which is four IP octets separated by
a dot (x.x.x.x). The Router will not accept the IP address if it is not in this format.
Line Speed:
Set the downstream and upstream of your connection in kilobytes per
second. The connection speed is used by QoS settings.
NAT:
The NAT (Network Address Translation) feature allows multiple users to access the
Internet through a single IP account, sharing a single IP address. If users on your LAN have
public IP addresses and can access the Internet directly, the NAT function can be disabled.
IP Address:
Your WAN IP address. Leave this at 0.0.0.0 to automatically obtain an IP
address from your ISP.
IP Netmask:
The default is 0.0.0.0. User can change it to other such as
255.255.255.0.Type the netmask assigned to you by your ISP (if given).
Gateway:
You must specify a gateway IP address (supplied by your ISP)
Obtain DNS Automatically:
Select this check box to use DNS.
Primary DNS/ Secondary DNS:
Enter the IP addresses of the DNS servers. The DNS
servers are passed to the DHCP clients along with the IP address and the netmask.
MAC Spoofing:
Select Enable and enter a MAC address that will temporarily change
your router’s MAC address to the one you have specified in this field. Leave it as Disabled if
you do not wish to change the MAC address of your router.
Содержание BEC 7300N
Страница 1: ...BEC 7300N 802 11n draft ADSL2 Firewall Router User Manual...
Страница 3: ...3 5 5 Restart 114 5 6 Logout 115 Chapter 6 116...
Страница 9: ...9 1 3 Applications of the BEC 7300N...
Страница 25: ...25 9 Congratulations You ve completed the setup procedure and you are now ready to surf the Internet enjoy...
Страница 54: ...54 Step 7 WPS set up complete And you have set up security enabled Wi Fi networks...
Страница 56: ...56 Step 4 Enter the AP SSID and apply Next button...


