Real Time Automation, Inc.
25
1-800-249-1612
ASCII Configuration
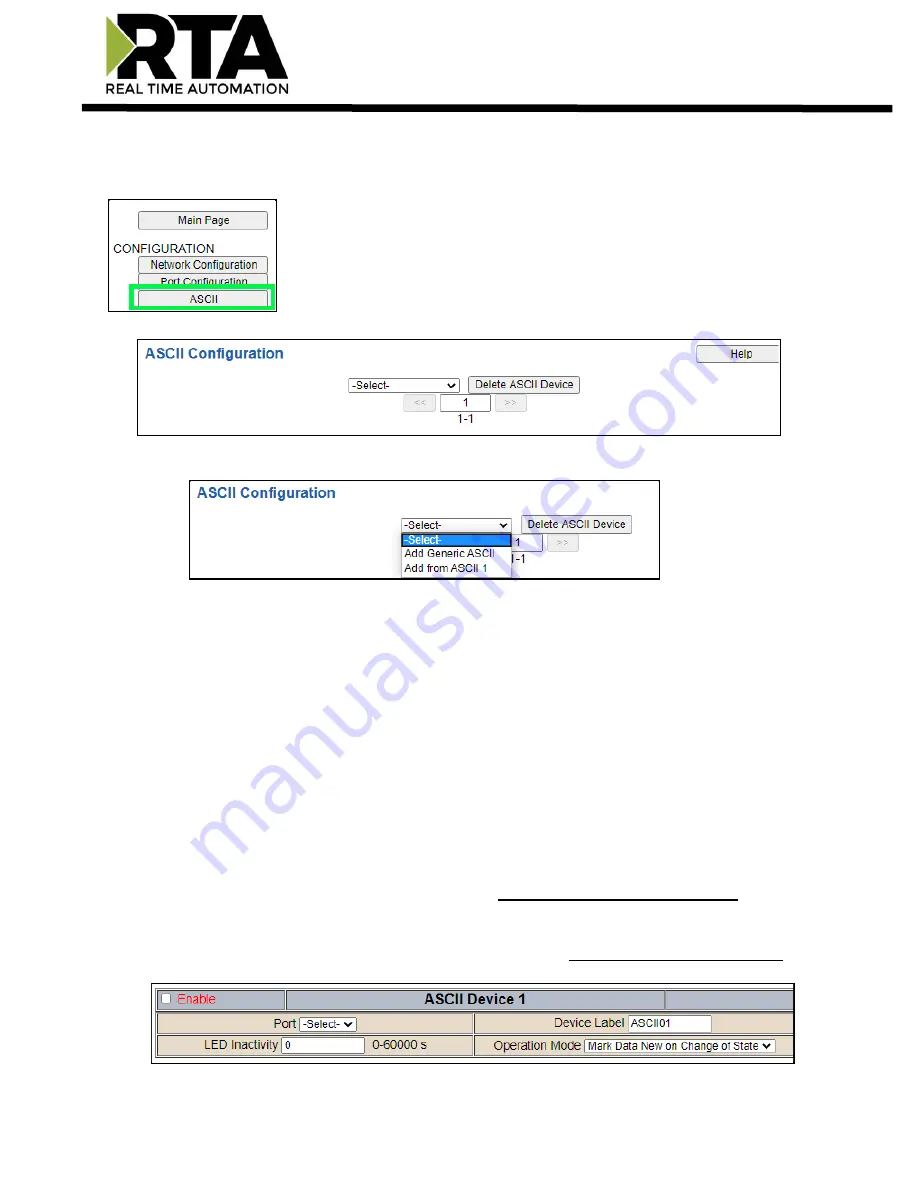
After the port configuration has been completed, click the
ASCII
button to continue configuration.
1)
To add an ASCII device or additional ASCII device, click the -Select- dropdown menu under ASCII
Configuration and select
Add Generic ASCII
option.
a)
To remove a device, navigate to the ASCII device to delete using the
<<
and
>>
buttons and click
the
Delete ASCII Device
button.
b)
To create a new ASCII device with the same parameters already configured from another ASCII
device, click the -Select- dropdown menu and select the
Add from ASCII
X
option (where X
represents the ASCII device you wish to copy parameters from).
c)
Once created, you can make any additional changes needed to that new ASCII device.
2)
The
Enable
check box should be selected for the device.
3)
Port
: Select which port is being used for communication. This port must be configured on the
Port/USB or TCP/IP (depending on your product) Configuration page. If it has not yet been
configured, it will not display in this dropdown.
4)
Enter a
Device Label
to identify the device within the gateway.
5)
LED Inactivity Timeout
: Enter the amount of time, in seconds, to wait before flashing the LED red
indicating that no messages have been received or transmitted during this time.
6)
Operation Mode:
a.
Mark Data New on Change of State: Send data to the mating technology, on a per point basis,
upon a change of state. For more explanation see the Receive Data
–
Operation Mode section
below.
b.
Mark Data New on New Message: Send data to the mating technology for all data points, no
matter change of state or not. For more explanation see the Receive Data
–
Operation Mode
section below.


