46
performance and ensures longer battery life.
·
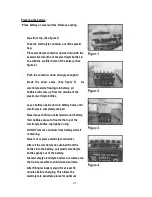
After 30 minutes the battery is ready for its initial
charge. Place cap strip loosely over the filling
holes as shown in the picture. (See figure 4)
How to Initially Charge the battery:
1.
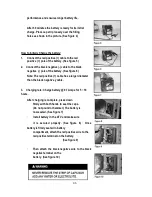
Connect the red positive (+) cable to the red
positive (+) pole of the battery. (See figure 5)
2. Connect the black negative (-) cable to the black
negative (-) pole of the battery. (See figure 6)
Note: The red positive (+) cable has a larger diameter
than the black negative y cable.
3. Charging rate: Charge battery @ 0.7 Amps for 5 ~ 10
hours.
·
After charging is complete, press down
firmly with both hands to seat the caps.
(Do not pound or hammer.) The battery is
now sealed. (See figure 7)
·
Install battery in the ATV and make sure
it is secured properly. (See figure 8) · Once
battery is firmly seated in battery
compartment, attach the red positive wire to the
red positive terminal on the battery.
(See figure 9)
·
Then attach the black negative wire to the black
negative terminal on the
battery. (See figure 10)
Содержание Blizzard 150
Страница 5: ...VI...
Страница 15: ...8...
Страница 16: ...9...
Страница 20: ...13 FUEL TANK CAP Fuel tank cap...
Страница 21: ...14...
Страница 26: ...19 WARNINGS...
Страница 28: ...21...
Страница 29: ...22...
Страница 31: ...24...
Страница 35: ...28 OPERATION OF HILLS CLIMBING A HILL...
Страница 47: ...40 Center or call Ricky Power sports LLC hotline 1 844 250 2199 Center...
Страница 62: ...55...
Страница 66: ...59 TIRES Any questions please consult Ricky Power Sports LLC authorized dealers...
Страница 80: ...73...


