1313-17F957IM-AA 20120803RA
Page 12 of 25
1-800-59-ROUSH
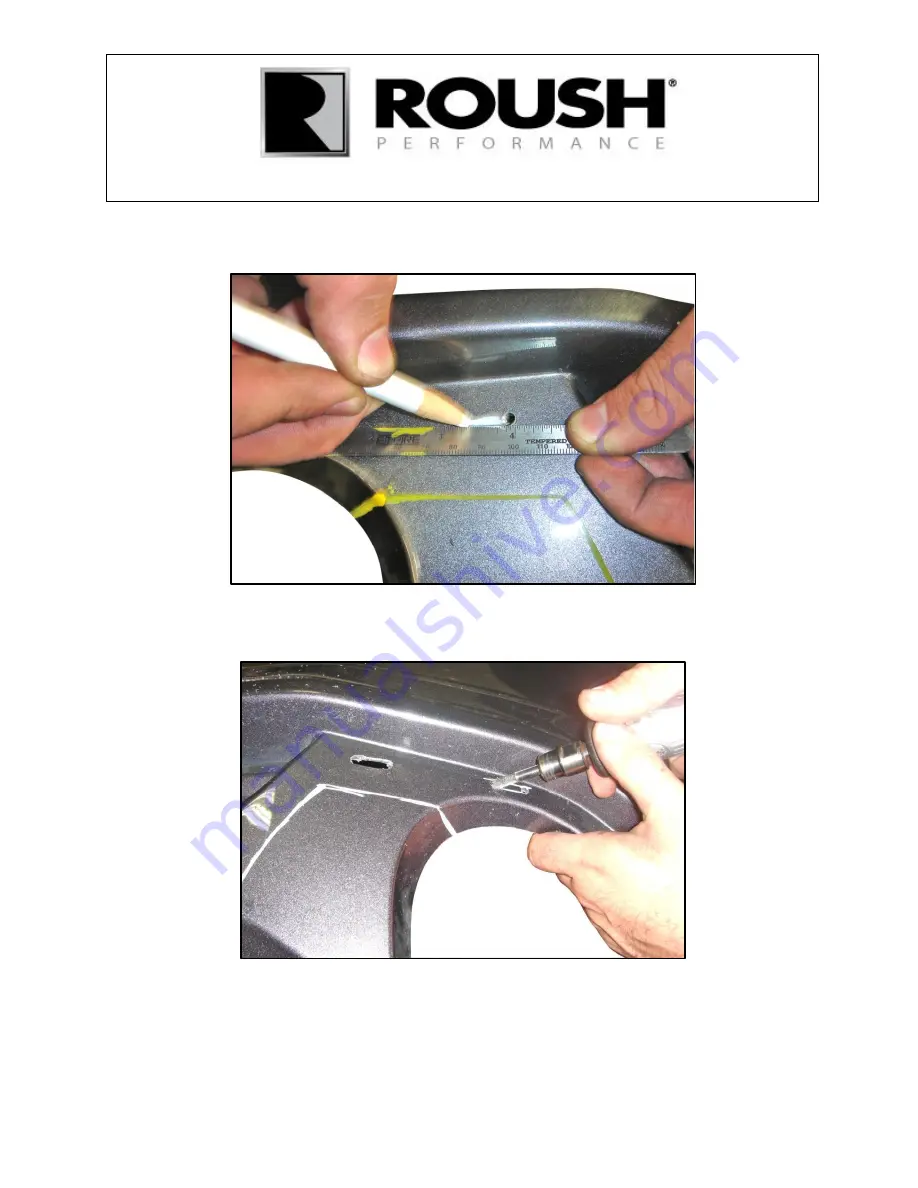
14. Mark the lines to be slotted on the bumper cover.
15. Using a 1/4
” de-burring tool, open the slots marked on the bumper.
Страница 1: ...he Roush off road exhaust system P N 1313 5231 Installation Instructions Before installing your ROUSH Performance Product s read through the entire installation procedure and check to make sure all it...
Страница 2: ...ion Part Number Qty 2013 Mustang Rear Bumper Cover Valance Kit R1313 17F957 1 Rear Bumper Valance 1313 17F957 1 Rear Valance Tape Kit 1313 17F957TAPE 1 Rear Valance Template 1313 17F958TMPL 1 Installa...
Страница 3: ...structions could cause personal injury or death Read each step of the installation manual carefully before starting the actual installation Always wear safety glasses for eye protection Place ignition...
Страница 4: ...or jewelry that can get caught in rotating parts or scratch surface finishes Allow the engine cooling system brakes and exhaust to cool before working on a vehicle WORK SAFELY Perform this installati...
Страница 5: ...l The following section will guide you through the removal of the factory bumper cover 1 Open the trunk and remove the two 2 plastic nuts two 2 pin type retainers release the trunk trim panel disconne...
Страница 6: ...1313 17F957IM AA 20120803RA Page 6 of 25 1 800 59 ROUSH 2 Release the side marker harness retainer 3 Disconnect the LH and RH tail lamp electrical connectors...
Страница 7: ...25 1 800 59 ROUSH 4 Remove the six 6 11 mm nuts push the harness grommets through the body and remove the LH and RH tail lamps 5 Remove the six 6 screws and depress the two 2 center clips on the LH a...
Страница 8: ...1313 17F957IM AA 20120803RA Page 8 of 25 1 800 59 ROUSH 6 On the underside of the vehicle remove and discard the two 2 clips 7 Remove the four 4 pin type retainers...
Страница 9: ...SH 8 Remove the two 2 pin type retainers CAUTION To protect the bottom of the bumper cover from damage place on a protective surface once removed 9 Pull outward on the LH and RH side to release the bu...
Страница 10: ...e the two 2 reflectors and the center trim piece depress the four 4 reflector marker tabs and fourteen 14 center trim tabs 11 Cut out the exhaust area templates provided in the kit P N 1313 17F958TMPL...
Страница 11: ...AA 20120803RA Page 11 of 25 1 800 59 ROUSH 12 Using a center punch mark the center of the holes on the template 13 Remove the template use a 1 8 drill bit to drill the pilot holes and finish with a 1...
Страница 12: ...1313 17F957IM AA 20120803RA Page 12 of 25 1 800 59 ROUSH 14 Mark the lines to be slotted on the bumper cover 15 Using a 1 4 de burring tool open the slots marked on the bumper...
Страница 13: ...posite side 17 Cut out the locator U Nut template provided in the kit P N 1313 17F958TMPL tape the template to the bumper cover Using a center punch mark the the center of the holes on the template Cu...
Страница 14: ...e 9 16 holes openings using a 9 16 drill bit Repeat above step for the opposite side NOTE The bottom edge of the template must be flush with the surface edge of the bumper cover 19 Cut out the center...
Страница 15: ...A Page 15 of 25 1 800 59 ROUSH 20 Using a 1 8 drill bit drill the pilot holes and finish with a 1 4 drill bit 21 Mark the lines to be slotted on the bumper cover Using a 1 4 de burring tool open the s...
Страница 16: ...OUSH 22 Install the two 2 J clips P N N623332 S439 in the holes on the bumper cover 23 Cut out the template for lower LH and RH bumper cover mounts Using a center punch mark the center of the holes on...
Страница 17: ...lot holes using a 1 8 drill bit and finish opening the holes with a 3 8 drill bits on the LH and RH bumper cover mounts 25 Using alcohol clean the rear valance and bumper cover mating surfaces Apply 3...
Страница 18: ...1313 17F957IM AA 20120803RA Page 18 of 25 1 800 59 ROUSH 26 Install the 2 sided tape P N 1313 17F957TAPE on the back side of the rear valance as shown 27 Peel the backing off the 2 sided tape...
Страница 19: ...0 59 ROUSH 28 Place the rear valance P N 1313 17F957 on the bumper cover 29 Install the twelve 12 U nuts P N 19339B two 2 W clips P N W9X14 and two 2 8 mm bolts P N R18020057 00 on the back of the val...
Страница 20: ...1313 17F957IM AA 20120803RA Page 20 of 25 1 800 59 ROUSH 31 Remove sections of the foam bumper cover insert shown for proper fit...
Страница 21: ...rse the removal steps 1 9 2 Remove the factory bolt from the mounting bracket 3 With the bumper cover installed mark the center of the two 2 holes for the center bumper cover mount NOTE After drilling...
Страница 22: ...1313 17F957IM AA 20120803RA Page 22 of 25 1 800 59 ROUSH 4 Drill two 2 1 8 pilot holes Open with a 1 4 drill bit on the center bumper cover bracket 5 Install the two 2 J clips P N N623332 S439...
Страница 23: ...Install the two 2 8 mm bolts P N R18020057 00 and one 1 factory bolt removed in step 3 Tighten to 6 Nm 53 lb in 7 Install the two 2 push pins two 2 8 mm bolts and two 2 nuts P N W704521 S437 through l...
Страница 24: ...1313 17F957IM AA 20120803RA Page 24 of 25 1 800 59 ROUSH Congratulations You have completed the installation of your new ROUSH Performance Products 2013 Mustang rear valance kit...
Страница 25: ...icals that affect the parts This Limited Warranty does not cover surface deterioration of paint trim and appearance items that result from use and or exposure to the elements such as stone chips scrat...