


12
MODEL SOLU COMP II
SECTION 4.0
DISPLAY AND OPERATION
SECTION 4.0
DISPLAY AND OPERATION
4.1 DISPLAY
4.2 KEYPAD
4.3 PROGRAMMING AND CALIBRATING THE SOLU COMP II - TUTORIAL
4.4 SECURITY
4.5 USING HOLD
4.1. DISPLAY
The Solu Comp II has a two-line display.
The display can be customized to meet
user requirements (see Section 5.11).
Figure 4-1 shows some of the displays
available during normal operation. View
A is the default screen for a single sen-
sor. View B is the default screen for dual
sensors.
The Solu Comp II has information
screens that supplement the data in the
main display. Press
"
or
'
to view the
information screens. The last informa-
tion screen is the software version.
During calibration and programming, key
presses cause different displays to
appear. The displays are self-explanato-
ry and guide the user step-by-step
through the procedure.
4.2 KEYPAD
Figure 4-2 shows the Solu Comp II key-
pad.
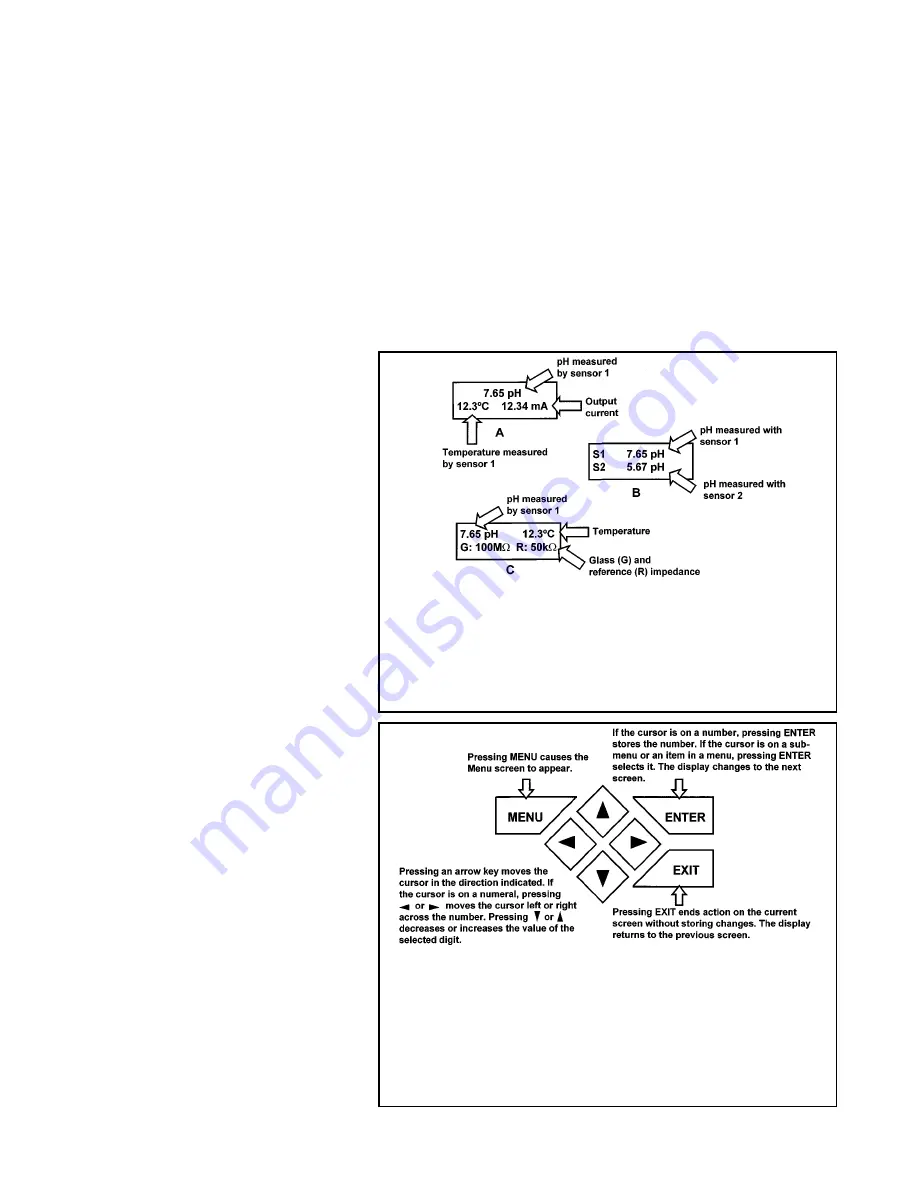
FIGURE 4-1. Displays During Normal Operation
Screen A shows pH, temperature, and current output for sensor 1. Screen
B shows pH for sensors 1 and 2. Although screens A and B are the most
useful, other screens can be selected. For example, screen C shows the
pH, temperature, and glass and reference impedance for sensor 1. If
screen C were for sensor 2, S2 would appear in the display. See Section
5.9 for more details.
FIGURE 4-2. Solu Comp II Keypad
Four arrow keys move the cursor around the screen. A blinking word or
numeral show the position of the cursor. The arrow keys are also used to
change the value of a numeral. Pressing ENTER stores numbers and set-
tings and moves the display to the next screen. Pressing EXIT returns to
the previous screen without storing changes. Pressing MENU always
causes the main menu screen to appear. Pressing MENU followed by EXIT
causes the main display to appear.
Содержание SOLU COMP II
Страница 5: ...QUICK REFERENCE GUIDE MENU TREE FOR pH ORP REDOX MEASUREMENTS ...
Страница 58: ...FOLD ALONG DOTTED LINES ...


