


UltraLink 2 Quick Start Guide
1- Unit Configuration
To configure the UL 2, the default IP address must be changed to be compatible with your
network. To modify the IP address, connect the unit to a computer configured with an
Ethernet card. Use a network cross over cable to connect the computer to UltraLink 2.
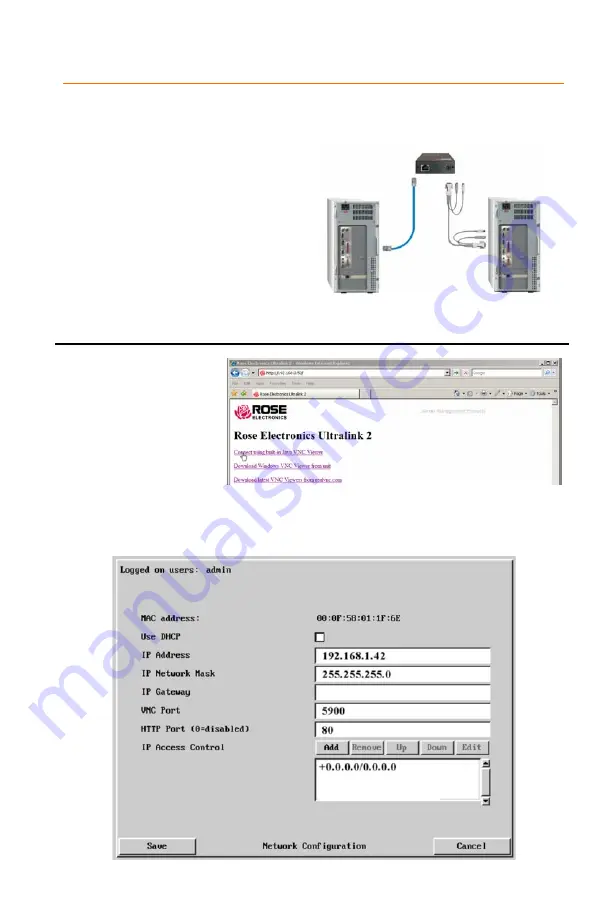
Connect the computer to be accessed as shown below.
1- Access the control panel, network tab on
the computer being used to configure the
UltraLink 2.
2- Change the existing IP address to
192.168.1.40 and the IP network
mask to 255.255.255.0.
UL 2’s default IP is 192.168.1.42. This
change creates a standalone network that
is compatible with UltraLink 2.
3- From the computer used to configure the
unit, start a web browser and enter the IP
address 192.168.1.42 as the URL. The
UltraLink 2 will answer with the below
display in the browser.
1- Click on the link:
“Connect using built-in
VNC Viewer”.
2- The built-in viewer will
start and display the
connected computer’s
video in the window.
3- Click on “Configure” in
the upper right corner to
display the configuration
menu.
Initial connection screen
From the configuration menu, click on “Network Configuration”, the below menu will display.
Network
cross over cable
Computer to access
(Needed for power to
the UltraLink 2 unit)
Computer used to
configure UL 2
Keyboard, monitor, and
mouse also connected.


