10-00328 REV C
9
7.2 INSTALLATION
The Q-LED II can be operated at any attitude. The unit should be installed by securely
mounting the light housing to a stable surface. The threaded ¼- 20 tapped mounting
holes are an integral feature of the Q-LED II; mounting clamps are not required. Refer
to installation outline drawing (ROS P/N 10-00369) for specific installation dimensions.
If mounting brackets are required for your application, QL brackets are available for
purchase (ROS P/N 70-08251-01), and allow the light to easily be oriented in any
direction.
7.3 INTERCONNECTION
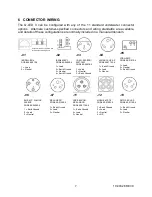
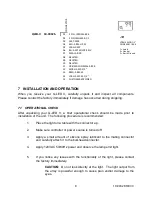
Interconnection is made via the underwater connector. To mate the connector,
TURN
POWER OFF
, clean both halves of the connector, lubricate the mating connector lightly
with food grade silicone spray, and push together.
The other end of the cable attaches to the required power source
8 MAINTENANCE
The Q-LED II is designed as a zero maintenance lamp. Please contact ROS or an
authorized sales rep. if you have any questions.
APPENDIX
10-00369
Installation Outline Drawing, Q-LED III and II
70-08251
Bracket, LED, QL, Al


