background image

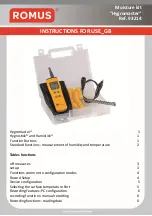
Mode d’emploi 

Moisture kit 

 "Hygromaster“ 

 Ref. 93214 

Function Buttons 
 

The hygromaster® four buttons used, alone or in pairs to take measurements, log 
readings and set the machine. Pressed alone, each button has the following standard 
features: 
 
          On, off and held. 
          Movement of the upper part of the screen. 
          Scrolling the lower part of the screen. 
          Storage of measurement in memory. 
For details of the button combinations, refer to the function tables. 
 

Standard functions: measuring humidity and temperature 
 

1. Connect Hygrostick® or Humistick® to high partly taken from the unit shall directly or  
via  prolongateur-. 
2. Turn hygromaster® on by briefly pressing 
3. Press      repeatedly to show the relative humidity (% RH), dew point (TD) or 
mixture / absolute humidity ratio (ppmw / gpp - part per million / grains per pound) in part 
high of the screen. 
4. Press      repeatedly to display the room temperature (RT), surface temperature (TS), 
the difference in surface temperature over the dew point (AT), time and date, the number 
series of the probe. 
5. To turn off, press      and hold until the display shows "OFF". Otherwise, the unit will 
automatically turn off after the time set by the user (2 minutes by default) after the last 
button press or RS232 activity.


Note 

• The battery status appears three seconds when any change to the device 
configuration. 
Change the batteries immediately when a bar is displayed: this means that less than 
10% 
charge. See note below regarding clock. 
• TS and DT are displayed only when the auxiliary temperature sensor is plugged into 
the jack on the 
right side of the apparatus itself on (see above). Otherwise, the lower part of the screen 
displays 
"OFF" and "-" after three seconds. 
• In case of successive readings in both halves of the screen without change, the 
decimal of 
top of the screen flashes to show that new measures are always taken. 

Содержание Hygromaster

Страница 1: ... Standard functions measurement of humidity and temperature 2 Tables functions off measures 3 setup 3 Functions common to configuration modes 4 Record Setup 4 Device configuration 5 Selecting the surface temperature Port 5 Recording Features PC configuration 6 recording functions manual recording 6 Recording functions reading data 6 ...

Страница 2: ...the recorded measurements are displayed in a table and graph to an analysis simple and fast Hygrostick et Humistick The hygromaster is used with a detachable humidity probe for measuring relative humidity and ambient temperature Two types of sensor are available Hygrostick and Humistick The Hygrostick is optimized for measuring the humidity of 30 to 100 RH and can be used with Protimeter ankles to...

Страница 3: ...the screen 4 Press repeatedly to display the room temperature RT surface temperature TS the difference in surface temperature over the dew point AT time and date the number series of the probe 5 To turn off press and hold until the display shows OFF Otherwise the unit will automatically turn off after the time set by the user 2 minutes by default after the last button press or RS232 activity Note ...

Страница 4: ... probe TA TS ΔT secondary screen scrolling The time is displayed in the upper part of the screen HH MM date in the lower MM DD The serial number of the probe scrolls Storage of measurement in memory Log Press and hold 3 seconds to store measures momentary display of the number recordings and stored data b Configuration Press both buttons simultaneously see details below Button Function Display sym...

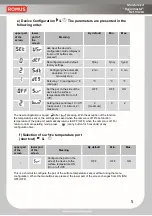
Страница 5: ...es paramètres se présentent dans l ordre suivant upper part of the screen lower part of the screen Definition of PC configuration meaning Min Max Entry into the mode configuration recording the display is frozen as the buttons are pressed The logging interval is set 15 minutes example 0 No record 24H Delay before the first record 0 No delay 24H If it is not zero count the number remaining and stop...

Страница 6: ...um 2 maximum 2 maximum 0 2 The new configuration is saved after pressing With the exception of the function the temperature sensor the settings are saved when the camera is off Probe function temperature of the side port automatically returns to OFF OFF when the camera is off For return to normal operating mode press or any button for 5 seconds at any configuration time f Selection of surface temp...

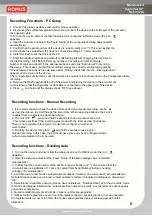
Страница 7: ...mended to check the clock before performing manual recording press as described above to scroll through the time date When replacing batteries the clock is to adjust from a computer as described above 2 The unit OFF press and hold 3 seconds to take a manual check point This works exactly as if the recording was made with the timer as described above There is no requirement to register it is useful...

Страница 8: ...g the probe to the HYGROMASTER to take the measurement After an hour turn on Raise the relative humidity value of balance HRE Installation of vinyl flooring is possible when the ERH is less than or equal to 85 to another coating if the percentage is less than 85 support is considered dry If this measure is not reached remove the probe recap the ankle with his hood which will renew the operation un...

Отзывы:

Похожие инструкции для Hygromaster