background image


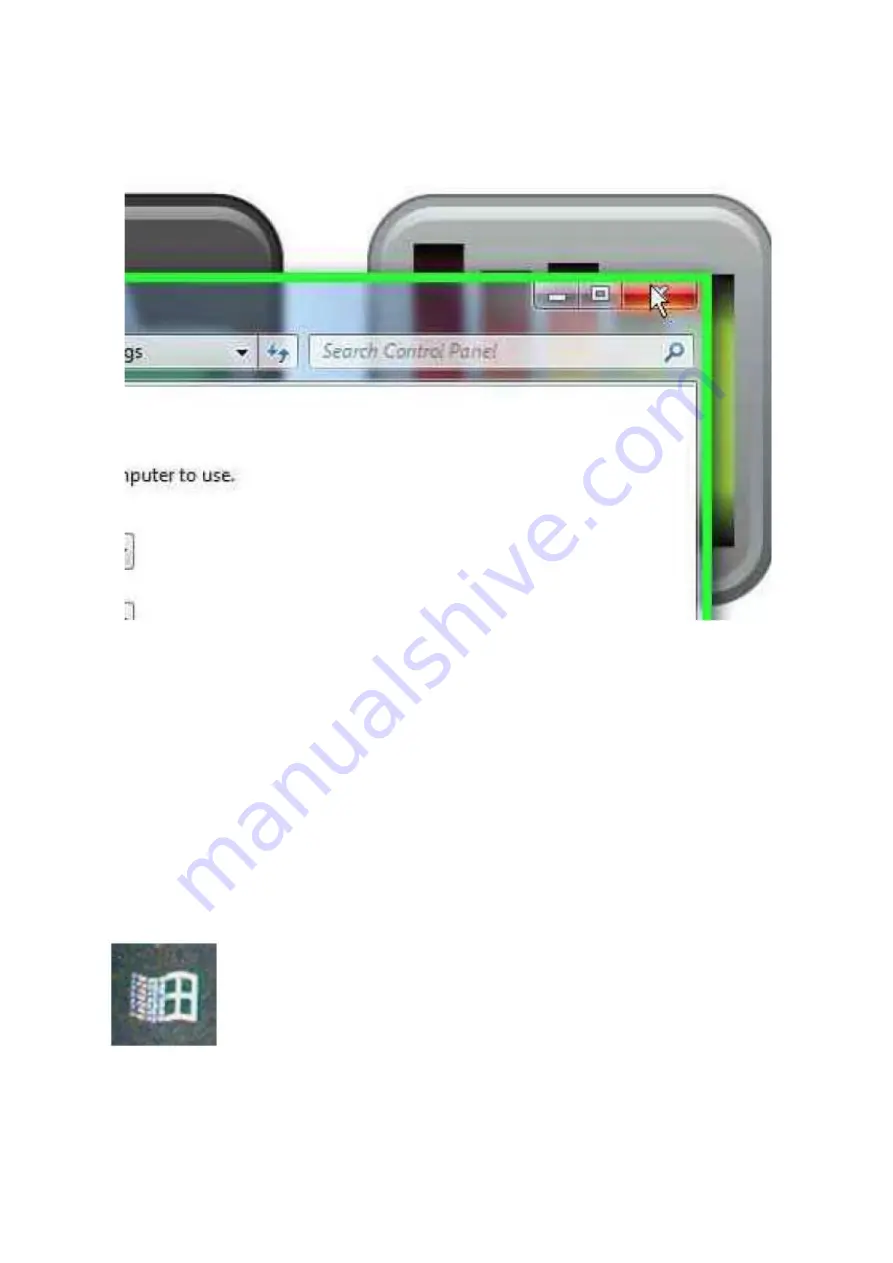
Left-click on the red ‘X’ in the upper right corner of the ‘Control Panel’ dialogue box 
to dismiss it and the procedure is complete. 


Left-click anywhere in the white space of the Mega Pod Menu to continue playing. 


The volume needs adjustment 


Use the remote keyboard while the Mega Pod™ is running, to set the microphone 
input volume.  Press the flag key: 


This will bring up the Start Menu on the lower left and the System Tray on the lower 
right.  In the lower right-hand corner, hover the mouse pointer over the speaker icon 
and right-click. 


Содержание Mega Pod 21905

Страница 1: ...ly making sure that you and any colleagues who will also need this have a failsafe way of remembering the password Please be aware that recovery of forgotten passwords in these products is not straight forward nor speedy Password recovery for Windows is not covered under the terms of our standard customer support and as such is a chargeable service Should you require additional information please ...

Страница 2: ...Colour As shown 4 Brief Description 9 interactive applications in one panel Easy to use touch screen technology 5 Contents 1 x Panel 1 x universal adapter UK European USA 1 x wireless keyboard and trackball unit 6 Snoezelen Stimulations Sight Sound ...

Страница 3: ... impact acrylic protective panel over a 37 LCD display built in speakers external jack for handheld microphone and external USB ports for accessories and software upgrades Applications include Kaleidoscope Spiral Sensations Music Time Matching Game Shape Sorter Fireworks Paint and Draw Trace A Shape There are 3 ways to control the Mega Pod 1 Using the touchscreen In this your finger acts like a mo...

Страница 4: ...connect power to the panel without using the Shutdown feature first see below Failure to do so may result in corruption of the data in the system 1 Press and hold the start button for 3 to 5 seconds After a few seconds the monitor should turn on and you will see the device booting up This should take 1 to 2 minutes to complete ...

Страница 5: ... see the calibration screen for the touchscreen Follow the instructions on screen 3 Once the calibration is complete you will be taken to the index screen of the applications 4 From the index screen touch the activity that you want to play ...

Страница 6: ...Within the activity you can choose of these options Administrative Actions Go to the index screen ...

Страница 7: ...eft on for an extended period If it becomes too out of calibration you may need to use the wireless trackball to access the calibrate menu option Update allows you to update the software on the panel You will need to have a USB flash drive provided to you by ROMPA for this Please follow the instructions given to you on the USB flash drive Shutdown allows you to turn off the panel This must be done...

Страница 8: ......

Страница 9: ...11 Safety Always supervise the use of this product Do not open up the panel when the panel is plugged in and switch off Do not plug the panel in until the Mega Pod is fully assembled and installed ...

Страница 10: ...a suitably qualified professional builder or from an estates department to understand the construction of the wall the panel is to be fixed to so that the correct fittings can be used Attach fixings such as mirror plates to the back of the panel Check the fixings e g mirror plates you buy can easily support 32kg You may wish to attach two mirror plates to the back of the panel at the top and two o...

Страница 11: ...llowing but not near your finger the touchscreen may need to be re calibrated see Administrative Actions above If the screen is not responding at all the touchscreen may not be properly connected to the panel see Installation above The Mega Pod orientation is landscape not portrait If the picture appears sideways it is set to landscape not portrait While using the keyboard in this setting it will ...

Страница 12: ... the Control Panel dialogue box that appears left click on the Adjust screen resolution In the Screen Resolution menu under Orientation left click on the small arrow pull down select Portrait and left click ...

Страница 13: ... Left click on Apply Left click on Keep changes ...

Страница 14: ... Left click on OK ...

Страница 15: ...pace of the Mega Pod Menu to continue playing The volume needs adjustment Use the remote keyboard while the Mega Pod is running to set the microphone input volume Press the flag key This will bring up the Start Menu on the lower left and the System Tray on the lower right In the lower right hand corner hover the mouse pointer over the speaker icon and right click ...

Страница 16: ... Select Recording devices from the menu and left click From the Sound dialogue box that appears right click on the Microphone list item ...

Страница 17: ... Select the Properties menu item and left click From the Microphone Properties dialogue box left click the Levels tab ...

Страница 18: ...ing down the left mouse key use the roller ball to move the slider until the value is set to 15 Release the mouse key Do the same for the slider under Microphone Boost setting the value to 20 0 dB Click OK to dismiss the Microphone Properties and Sound dialogue boxes and the procedure is finished ...

Страница 19: ...es of these instructions can be downloaded at www rompa com We hope you find our instructions invaluable If you have any suggestions for improving them further your comments will be greatly received please contact us at producthelp rompa com MEGA POD 21905 October 2019 Copyright ROMPA Ltd ...

Страница 20: ...vous aussi que vos collègues qui nécessitent l accès au produit avez une manière de souvenir ce mot de passe sans risqué de l oublier Prière de noter que le recouvrement d un mot de passe oublié faut grand effort et longtemps Les termes normaux de notre garantie n appliquent pas au recouvrement de mots de passe et par conséquent il faut payer pour ce service Si vous nécessitez plus de renseignemen...

Страница 21: ...cription 9 programmes interactifs géniaux dans un panneau Utilisation facile grâce à la technologie du toucher de l écran 5 Contenu 1 x Panneau 1 x Adaptateur universel Royaume Uni Europe Etats Unis 1 x clavier sans fil avec trackball 6 Stimulations Snoezelen Vue Ouïe ...

Страница 22: ...eau acrylique efficace pour un écran 37 LCD haut parleurs intégrés prise externe jack pour micro et des ports USB externes pour accessoires et pour renouveler le logiciel Dim 115 L x 72 5 l x 14 cm profond Les activités comprennent Kaleidoscope Spiral Sensations spirales Music Time musique Matching Game correspondre Shape Sorter formes Fireworks feux d artifice Paint and Draw dessin Trace A Shape ...

Страница 23: ...tart Button Bouton de commencement Touchscreen Frame Cadre de l écran tactile Air Intake Vents Fentes pour la Ventilation External Microphone Jack Prise Femelle pour le Microphone Activer le Système Branchez Prière de noter NE JAMAIS débrancher ce panneau sans terminer correctement le panneau voir Shutdown Sinon on risque endommager les données de ce système ...

Страница 24: ...système se remet à zéro Cette remise à zéro durera vers 1 à 2 minutes pour se compléter 2 Après la remise à zéro soit complète vous verrez l écran de calibration pour l écran de toucher Suivez les instructions sur l écran 3 Dès que la calibration soit complète vous verrez l écran de contenu des applications 4 De cet écran touchez l activité voulue ...

Страница 25: ...Une fois à l intérieur de l activité choisissez entre Il est possible que des autres options puissent être visibles selon l activité Actions Administratives Accéder à l écran de contenu des applications ...

Страница 26: ...ire d d étalonner de nouveau l écran tactile si le Mega Pod soit allumé pendant longtemps Si l écran tactile soit très mal étalonné vous pourrez nécessiter le trackball sans fil pour accéder au menu d étalonnage Upgrade vous permet de réactualiser le logiciel du panneau du panneau Pour cette réactualisation il faudrait une clé USB fournie par ROMPA En ce cas là prière de suivre les notices sur la ...

Страница 27: ... Shutdown vous permet d éteindre le panneau Il faut toujours éteindre le panneau avant de le débrancher ...

Страница 28: ...1 Sûreté Il faut toujours surveiller l usage de ce produit Ne pas ouvrir le panneau quand le panneau est branché éteignez et débranchez le panneau d abord Ne pas brancher le panneau avant de l installer ...

Страница 29: ...ez un maçon convenablement qualifié pour les conseils au sujet de la construction du mur en vue d acheter et d utiliser les installations correctes Attachez les installations comme les plaques à l arrière du panneau Vérifiez que les plaques sont capables de tenir 32 kilos sans risque Vous pourriez attacher deux plaques à l arrière du panneau au dessus et deux autres à l arrière du panneau vers le ...

Страница 30: ...stes mais pas tellement minutieusement il faudra calibrer de nouveau l écran tactile voir Actions Administratives plus haut Si le curseur ne suit point vos gestes il est possible que l écran tactile ne soit pas correctement connecté au panneau voir Installation plus haut L orientation est horizontale au lieu de verticale Si l image est de côté il est réglé à l orientation horizontale En utilisant ...

Страница 31: ... options visibles dans Control Panel cliquez sur Adjust screen resolution Dans le menu Screen Resolution au dessous de Orientation cliquez sur la flèche pour accroître le menu choisissez Portrait et cliquez ...

Страница 32: ... Cliquez sur Apply Cliquez sur Keep changes ...

Страница 33: ... Cliquez sur OK ...

Страница 34: ... Il faut régler le volume Utilisez le clavier sans fil pour régler le volume Appuyez sur le bouton avec le drapeau On verra le menu de commencement Start en bas à gauche aussi que System Tray en bas à droite Dans le coin en bas à droite oscillez la souris sur le symbole haut parleur et cliquez en vous servant du bouton à droite ...

Страница 35: ... Choisissez Recording devices du menu et cliquez Du menu Sound cliquez en vous servant du bouton à droite sur Microphone ...

Страница 36: ... Choisissez le menu Properties et cliquez Du menu Microphone Properties cliquez sur Levels ...

Страница 37: ...s de Microphone En cliquant et tenant le bouton gauche de la souris servez vous de la balle pour régler cette ligne au niveau 15 Relâchez le bouton de la souris Répétez pour la ligne Microphone Boost la réglant au niveau 20 0 dB Cliquez sur OK ...

Страница 38: ... Cliquez dans l espace blanche du menu pour continuer MEGA POD 21905 octobre 2019 Copyright ROMPA Ltd ...

Отзывы: