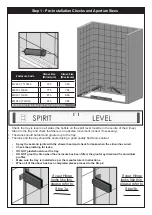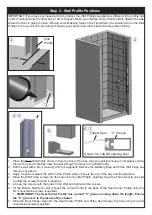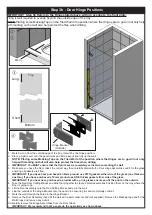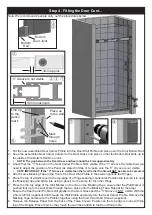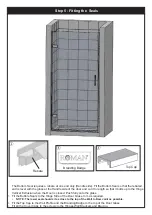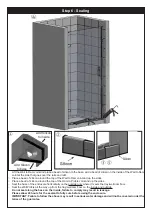
background image

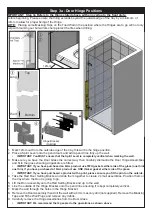
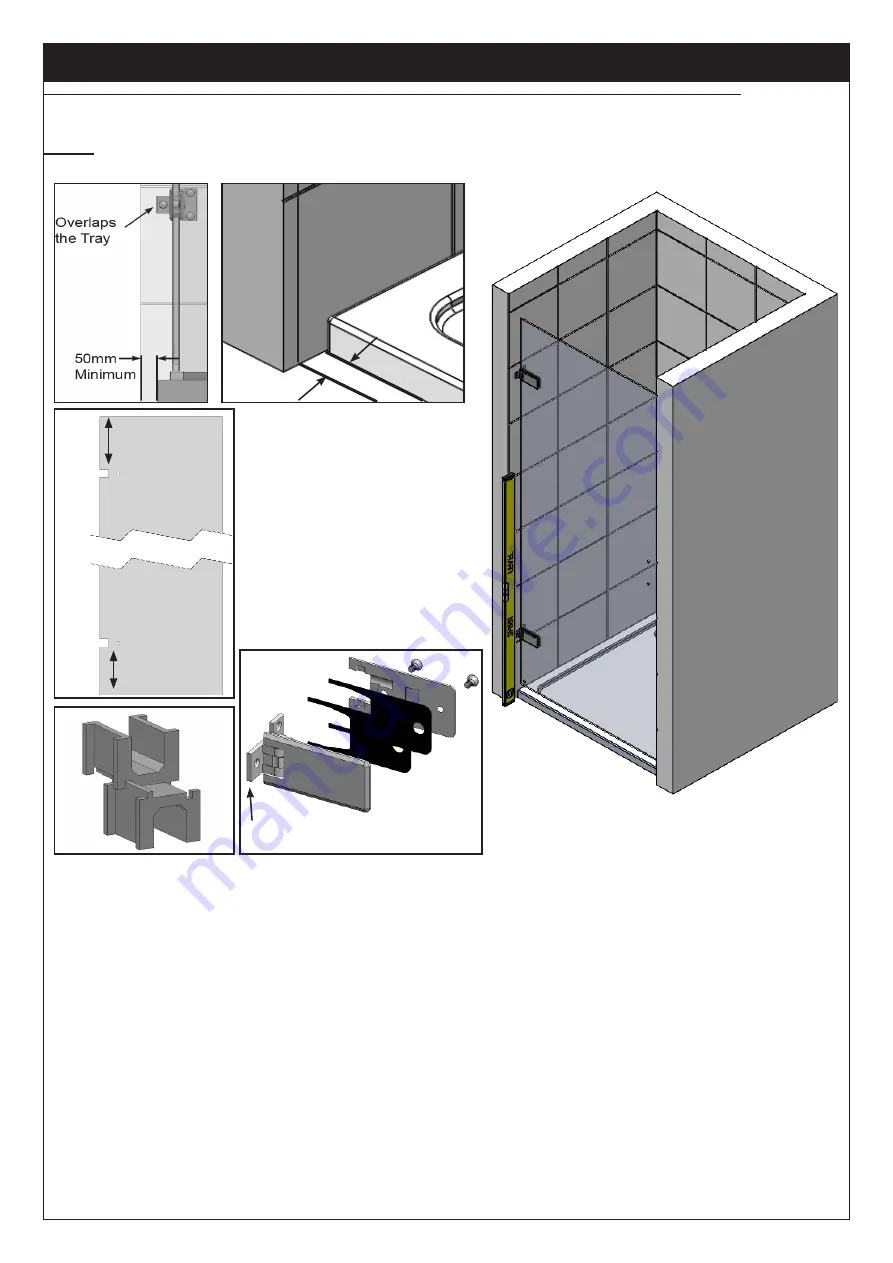
Step 3a - Door Hinge Positions

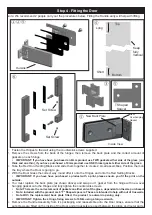
IMPORTANT:  Step 3a Refers to the Hinge stated above, with an overlap to the front plate.

Before beginning, Please ensure that tiling extends beyond the outside edge of the tray by a minimum  of 

50mm to allow for proper fixing of the Hinge.

NOTE:

  Placing some Masking Tape on the Tiled Wall in the position where the Hinges are to go will not only 

help with marking out but will also help protect the tiles when drilling.

1.  Mark 12mm out from the outside edge of the tray, this will be the hinge position.

2.  Place a Spirit Level onto the pencil mark and add a pencil line fully up the wall.

•  IMPORTANT: You MUST ensure that the Spirit Level is completely vertical when marking the wall.

3.  Make sure you have the Door Glass the correct way then carefully dismantle the Door Hinge Assemblies 

and fit to the glass ensuring all gaskets are fitted.

•  IMPORTANT: If you have purchased an 8mm product use TWO gaskets either side of the glass (one thick 

one thin), if you have purchased a 10mm product use ONE thicker gasket either side of the glass.

• 

IMPORTANT: If you have purchased a product with a print, please ensure you fit the print on the outside.

4.  Take the Red Door Setting Blocks and slide them together to create 2 small assemblies. Position them on 

the tray where the Door is going to go.

5.  Lift the Door assembly onto the Red Setting Blocks and up to the wall.

6.  Line the outside of the Hinge Bracket onto the pencil line ensuring it is kept completely vertical.

7.  Mark the wall through the holes in the Hinge Bracket.

8.  Remove the Door Assembly then drill the wall with a 6mm masonry drill (not supplied). Remove the Masking 

Tape and fit the Wall Plugs and remove any debris.

9. 

Carefully remove the Hinge Assemblies from the Door Glass.

•  IMPORTANT: We recommend that 2 people do the operations as shown above.

Top

Bottom

Long

Short

Hinge Bracket 

(Outside)

12mm

Содержание KL Series

Страница 1: ...t product Please look at the labels on the side of the product packaging 2 Check all the product components are in the box and the fixing kits 3 Unpack your product and handle it with care 4 Please check the product for defects or damage once the installation has commenced we cannot accept responsibility for any defects or damage 5 Please take time to read these instructions prior to installing yo...

Страница 2: ...bing for leaks DO NOT plasterboard over the tray DO NOT grout the tiles when the enclosure has been fitted the grout may discolour the aluminium profiles Make sure the tray is installed as per the manufacturer s instructions When all of the above has been completed please proceed to the Step 2 Step 1 Pre Installation Checks and Aperture Sizes Enclosure Code Alcove Size Minimum Alcove Size Maximum ...

Страница 3: ...ill not supplied Remove the Masking Tape and fit the Wall Plugs and remove any debris 3 Apply a bead of sealant the width of the Profile where it meets the top of the tray and the tiled wall 4 Place the Wall Fixing screws into the holes into the Wall Profile carefully move the Foam Seal to one side to allow the screws through if required 5 Line up the screws with the holes in the Wall and tighten ...

Страница 4: ...suring all gaskets are fitted IMPORTANT If you have purchased an 8mm product use TWO gaskets either side of the glass one thick one thin if you have purchased a 10mm product use ONE thicker gasket either side of the glass IMPORTANT If you have purchased a product with a print please ensure you fit the print on the outside 4 Take the Red Door Setting Blocks and slide them together to create 2 small...

Страница 5: ...or Hinge Assemblies and fit to the glass ensuring all gaskets are fitted IMPORTANT If you have have purchased an 8mm product use TWO gaskets either side of the glass one thick and one thin if you have purchased a 10mm product use ONE thicker gasket either side of the glass IMPORTANT If you have have purchased a product with a print please ensure you fit the print on the outside 4 Take the Red Door...

Страница 6: ...u have have purchased a product with a print please ensure you fit the print on the outside 5 You must replace the back plate as shown above and swap out 1 gasket from the hinge with new over hanging gasket onto the Hinges and fully tighten the countersink screws Note There are the correct amount of gaskets on either side of the glass dependant on the size purchased Note Included with the product ...

Страница 7: ...g it horizontal Position the level so it is over the Masking Tape and add a line using a pencil do the same for the other Hinge 6 Place the the top edge of the Wall Marker on the line on the Masking Tape ensure that the Wall Marker is pushed fully up to the wall Mark through the two holes onto the Masking Tape Repeat for the other 7 Ensure the Seal Carrier Profile is still parallel to the Door Gla...

Страница 8: ...to the Hinge Vertical Extrusion when the Door is closed Push fully onto the glass 2 Fit the Bubble Seals to the Hinge Side of the Door Glass trim as required NOTE The lower seal should sit as close to the top of the Wall to Dam Joint as possible 3 Fit the Top Cap to the Wall Profile and the Branding Badge to the top of the Door Glass 4 Fit all the Cover Caps to the screws to the Hinges Wall Bracke...

Страница 9: ...and up the sides 4 Seal the base of the enclosure horizontally on the outside only where it meets the tray wetroom floor 5 Seal the Wall Profile all the way up from the tray wetroom floor on the inside and outside Do not seal along the base on the inside failure to comply may result in leakage Please allow 24 hours for the sealant to fully cure before using the enclosure IMPORTANT Failure to follo...

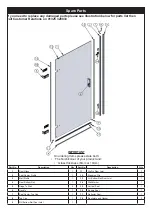
Страница 10: ...er 1 5 Hinge To Wall 2 15 Vertical Seal 1 6 Handle 1 16 Bubble Seal 1 7 Seal Carrier Top Cap 1 17 Deflector Seal 1 8 Top Cap 1 18 Backplate and Gasket 2 9 RH Bottom Rail Door Joint 1 If you need to replace any damaged parts please see illustration below for parts list then call Customer Relations on 01325 328033 IMPORTANT On ordering Items please state both The finish colour of your product and Gl...

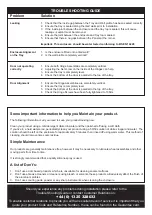
Страница 11: ...ch or solvents these products will adversely affect the finish of the aluminium profiles 3 Don t use scouring pads powder or any sharp instruments when cleaning the enclosure Should you experience any problems during installation please refer to the Trouble Shooting Guide or contact Customer Relations on 44 0 1325 328033 To enable customer relations to provide you with an excellent level of servic...

Отзывы: