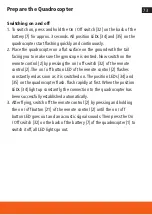
background image

87

Using the Quadrocopter

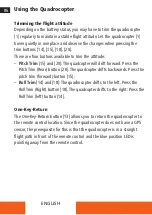
1. Activate the One-Key-Return with the One-Key-Return button [13]. The 

quadrocopter will fly back towards the remote control. 

2.  When the desired position is reached, press the One-Key-Return Button 

[13] again or push the right control stick forward to cancel the One-Key-
Return. 

Headless mode

Headless mode is a so-called relative control mode. In this mode, no 
matter what orientation the quadrocopter is in, it will always fly in the 
direction that the right control stick [17] is steered. It does not matter 
whether the front of the quadrocopter is in front, behind, to the left or to 
the right.
Beginners can quickly complete some flight exercises in headless mode. 
However, to properly control a quadrocopter, you should prefer Normal 
mode. To activate Headless Mode, press the Headless Mode button [24]. 
Three rapid acoustic signals and the flashing of the quadrocopter‘s LEDs 
indicate the activated mode. To deactivate, press the button again.

Содержание Fly 80

Страница 1: ...Rollei Fly 80 Quadrokopter Quadrocopter ANLEITUNG AUF DEUTSCH MANUAL IN ENGLISH www rollei de...

Страница 2: ...rung 5 Bestandteile Lieferumfang 6 Allgemeines 9 Sicherheitshinweise 10 Den Quadrokopter vorbereiten 19 Verwenden des Quadrokopters 25 Transport 44 Wartung und Fehlerbehebung 45 Wind 46 Technische Da...

Страница 3: ...ponents What s in the Box 54 General 57 Safety Instructions 58 Prepare the Quadrocopter 65 Using the Quadrocopter 72 Transport 90 Maintenance and Troubleshooting 91 Wind 92 Technical Data 93 Storage 9...

Страница 4: ...hen Ersatzteilen und Zubeh r finden Sie auf https www rollei de Bestimmungsgem er Gebrauch Dieser Quadrokopter ist ausschlie lich als Flugmodell konzipiert Er ist ausschlie lich f r den Privatgebrauch...

Страница 5: ...n Quadrokopter an Dritte weitergeben geben Sie unbedingt diese Bedienungsanleitung mit Zeichenerkl rung Die folgenden Symbole werden in dieser Bedienungsanleitung auf dem LED Licht oder auf der Verpac...

Страница 6: ...opf One key return Rolltrimmung links Nicktrimmung vor Flip Taste 3D Roll Rechter Steuerkn ppel Pitch Roll Rolltrimmung rechts Videoaufnahme Nicktrimmung zur ck Ein Aus Taste Fernbedienung mit LED rot...

Страница 7: ...7 STOP Bestandteile Lieferumfang 2 10 9 7 8 11 27 26 16 17 25 18 24 STOP 20 22 21 11 16 12 15 13 14 19 23 3 4 6 5...

Страница 8: ...fach mit eingelegtem Akku Micro USB Anschluss Ein Ausschalter Quadrocopter Landef e Vordere Positions LEDs blau Hintere Positions LEDs rot Speicherkartenfach Ladeanzeige LEDs 31 32 33 34 35 36 37 28 2...

Страница 9: ...UAS_Betreiberregistrierung_ node html www easa europa eu drones NAA Die nach der Registrierung erhaltene UAS Betreiber Nummer e ID muss gut sichtbar an allen Quadrokoptern des Betreibers z B mittels e...

Страница 10: ...hrt ist Warnung Verletzungsgefahr Gefahr von Augenverletzungen Halten Sie einen Sicherheitsabstand von 1 bis 2 Meter um sich oder andere vor Verletzungen zu sch tzen Um Unf lle zu vermeiden fliegen Si...

Страница 11: ...igkeit gef llten Gegenst nde wie z B Vasen auf den Quadrokopter oder die Fernsteuerung Der Quadrokopter und die Fernsteuerung sollten nicht Tropf oder Spritzwasser ausgesetzt werden Verwenden Sie eine...

Страница 12: ...senen durchgef hrt werden Dieses ferngesteuerte Modell ist kein Spielzeug Geeignet f r Personen ab 16 Jahren Sorgen Sie daf r dass Kinder keine Gegenst nde in den Quadrokopter hineinstecken Halten Sie...

Страница 13: ...hlie lich nur f r den Austausch der Rotorbl tter genutzt werden Eine anderweitige Benutzung des mitgelieferten Schraubendrehers ist nicht gestattet Der Wechsel von Rotorbl ttern darf ausschlie lich nu...

Страница 14: ...el Wasser und Seife ab Vermeiden Sie Augenkontakt mit der Akkus ure Sollten Sie doch einmal Augenkontakt mit Akkus ure erfahren sp len Sie die Augen mit viel Wasser aus und kontaktieren umgehend einen...

Страница 15: ...ltung f r Abf lle Vor der Entsorgung m ssen Akkus zuerst entfernt und separat vom Ger t entsorgt werden Versuchen sie niemals Akkus wieder aufzuladen die nicht daf r vorgesehen sind Niemals verschiede...

Страница 16: ...Abstand von gefahrentr chtigen und besonders gesch tzten Bereichen Betreiben Sie Ihren Quadrokopter nicht in der N he von Funkstationen Hochspannungsleitungen Transformatork sten oder hnlichem Diese E...

Страница 17: ...verwenden Sie zur Reinigung keinen Dampfreiniger Der Quadrokopter kann sonst besch digt werden Verwenden Sie den Quadrokopter nicht mehr wenn die Kunststoff oder Metallbauteile des Ger ts Risse oder...

Страница 18: ...versicherung abzuschlie en Information hierzu bekommen Sie bei den Modellsportverb nden oder bei einer Versicherung Ein Netzadapter ist nicht im Lieferumfang enthalten Bei Problemen des Produktes aufg...

Страница 19: ...rst die Schraube mit dem Schraubendreher 8 aufdrehen und dann den Klemmverschluss an der Oberseite etwas nach innen ziehen und dann die Abdeckung abheben Nehmen Sie zun chst eventuell vorhandene Batte...

Страница 20: ...und Demontage des Smartphone Halters Mithilfe der zur Verf gung gestellten App Seite 35 ff k nnen Sie den Quadrokopter gleichzeitig mit der Fernbedienung 2 steuern und das Live bild der Kamera verfol...

Страница 21: ...emente der Fernbedienung ausgerichtet ist Lassen Sie dann die obere Klemme des Smartphone Halters vorsichtig wieder herab bis das Smartphone eingeklemmt ist und entsprechend fest und sicher sitzt Pr f...

Страница 22: ...ank oder einem handels blichen USB Netzstecker verbinden und den Akku 7 laden Die Ladeanzeige LEDs 37 beginnen Rot zu blinken Wenn der Akku 7 vollgeladen ist leuchten die Ladeanzeige LEDs 37 konstant...

Страница 23: ...us gefolgt von den hinteren Flugarmen Achten Sie darauf dass die Flugarme beim Ausklappen leicht einrasten 2 Entfalten Sie alle Rotorbl tter Hinweis Achtung Alle Flugarme und Rotorbl tter m ssen aufge...

Страница 24: ...sprechend der unten stehenden Ab bildung ein Dr cken Sie die Speicherkarte so tief in das Speicherkar tenfach bis sie h rbar einrastet Zum Entnehmen der Speicherkarte dr cken Sie erneut kurz darauf di...

Страница 25: ...drokopter immer vom Boden aus da sich der Quad rokopter bei jedem Neustart automatisch neu kalibriert Dieser Vorgang dauert ca 1 Sek Sollte der Quadrokopter nach einer Kollision oder eines Absturzes w...

Страница 26: ...ten kontrollierten Flug durchf hren Achtung Beachten Sie dass die Reichweite des Signals der Fernsteuerung ca 40 Meter betr gt Sie m ssen mit dem Quadrokopter in diesem Bereich bleiben Sollte der Quad...

Страница 27: ...Quadrokopter blinken zu n chst schnell Wenn die Positions LEDs 34 konstant leuchten wurde die Verbindung zum Quadrokopter erfolgreich automatisch aufgebaut 3 Nach dem Fliegen schalten Sie die Fernbedi...

Страница 28: ...Fernbedienung 1 und danach einschalten von Quadro kopter 1 Nun k nnen Sie beide Quadrokopter gleichzeitig verwenden Halten Sie beim Fliegen unbedingt gen gend Abstand zwischen beiden Quadrokop tern um...

Страница 29: ...Kalibrierung dauert nur 1 2 Sekunden Diese Kalibrierung ist speziell nach l ngerem Nichtbenutzen und St rzen oder Zusammenst en n tig Danach l sst sich der Quadrokopter wieder ganz normal steuern 1 Dr...

Страница 30: ...den linken Steuerkn ppel 25 nach oben Die Rotoren drehen sich schneller und der Quadrokopter steigt Sinken Dr cken Sie den linken Steuerkn ppel 25 nach unten Die Rotoren drehen sich langsamer und der...

Страница 31: ...sich auf der eigenen Achse nach rechts Vorw rts fliegen Dr cken Sie den rechten Steuerkn ppel 17 nach oben Die Front des Quadrokopters neigt sich nach unten und er fliegt vorw rts R ckw rts fliegen D...

Страница 32: ...n Sie den rechten Steuerkn ppel 17 nach links Der Quadrokopters neigt sich leicht nach links und er fliegt nach links Nach rechts fliegen Dr cken Sie den rechten Steuerkn ppel 17 nach rechts Der Quadr...

Страница 33: ...11 Die Fernbedienung gibt drei akustische Signale von sich Der Fortgeschrittenenmodus ist aktiviert Nach erneutem dr cken der Geschwindigkeitsmodus Taste 3 Speed Mode 11 gibt die Fernbedienung ein ak...

Страница 34: ...ren sollte der Quadro kopter eine Flugh he von mindestens 2 Meter haben Rolle links Dr cken Sie den rechten Steuerkn ppel 17 nach links Der Quadrokopter macht eine Rolle nach links Rolle rechts Dr cke...

Страница 35: ...one ffnen Sie die Option WLAN Verbindungen und verbinden Sie das Smartphone mit dem WiFi Netzwerk der Drohne Dieses wird mit der Netzwerkkennung Fly 80_XXXX angezeigt Das Passwort zum Verbinden der Dr...

Страница 36: ...Symbol die ge w nschte Sprache Englisch Deutsch oder Franz sisch einstellen und weitere Optionen aufrufen Zum ndern des WiFi Passwort nutzen Sie zun chst die Option WiFi Passwort Geben Sie ein neues P...

Страница 37: ...t keine Speicherkarte eingelegt werden die Fotos auf dem Smartphone gespeichert Videoaufnahme starten stoppen Aufnahmen werden bei eingelegter Speicherkarte automatisch auf dieser gespeichert Ist kein...

Страница 38: ...artphone aktivieren Nun k nnen Sie Ihren Flug mit einer VR Brille berwachen Headless Modus der Drohne aktivieren In diesem Modus fliegt die Drohne immer in die Richtung in die man mit der Fernsteuerun...

Страница 39: ...sowie rechts neben den rechten Steuerbutton k nnen Sie die Flugeigenschaften der Drohne trimmen Dies ist notwendig wenn die Drohne bei Windstille nicht mehr die Schwebefunktion halten kann Lassen Sie...

Страница 40: ...stehen Ihnen vier Kn pfe zur Verf gung Nicktrimmung 15 und 20 Der Quadrocopter driftet nach vorne Dr cken Sie die Taste Nicktrimmung hinten 20 Der Quadrocopter driftet nach hinten Dr cken Sie die Tast...

Страница 41: ...s Dabei fliegt der Quadrokopter egal in welcher Ausrichtung er sich befindet immer in die Richtung in die der rechte Steuerkn ppel 17 gesteuert wird Egal ob die Frontseite des Quadrokopters sich vorn...

Страница 42: ...deoaufnahme zu machen W hrend der Dauer der Aufnahme blinken die Positions LEDs 34 35 am Quadrokopter kontinuierlich Dr cken Sie den Videoaufnahmeknopf erneut um die Aufnahme zu be enden Hinweis Bitte...

Страница 43: ...rker Wind das automatische Landen bei schwachem Akku sehr stark beeinflussen Rotorbl tter austauschen Zum Austauschen eines defekten Rotorblattes entnehmen Sie aus Sicher heitsgr nden zuerst die Batte...

Страница 44: ...er Rotorbl tter immer darauf dass nur gleich gekennzeichnete Rotorbl tter miteinander ausgetauscht werden d rfen wobei A1 und A2 sowie B1 und B2 baugleich sind Rotoren mit der Kennzeichnung A1 oder A2...

Страница 45: ...uadrokopters und die Batterien der Fern bedienung ausreichend geladen sind Gegebenenfalls laden Sie den Akku des Quadrokopters auf und oder wechseln die Batterien der Fernbedienung berpr fen Sie ob di...

Страница 46: ...falls laden Sie den Akku des Quadrokopters auf und oder wechseln die Batterien der Fernbedienung berpr fung Sie ob eine Trimmung des Quadrokopters notwendig ist Kapitel Trimmen der Fluglage auf Seite...

Страница 47: ...stemperatur 10 C 45 C Ma e L B H 29 5 x 28 7 x 5 cm aufgeklapppt 14 5 x 9 2 x 5 cm zusammengeklappt Gewicht 155 g inklusive Batterie und Rotoren H chstabfluggewicht 160 g Fernbedienung Reichweite Fern...

Страница 48: ...Einstellbare Kamera Neigung 0 60 manuell einstellbar Max Sendefrequenz 17 dBm Lieferumfang Rollei Fly 80 Fernsteuerung mit Smartphonehalterung 4x Ersatz Rotorbl tter inkl Schrauben 1 200 mAh Lithium P...

Страница 49: ...ass kein Wasser in das Geh use gelangt Hinweis Gefahr durch Fehlbedienung Unsachgem erUmgangmitderQuadrokopterkannzuBesch digungf hren Verwenden Sie keine aggressiven Reinigungsmittel B rsten mit Meta...

Страница 50: ...es Akkus dr cken und den Akku 7 in Pfeilrichtung zu den hinteren Positons LEDs 35 aus dem Akkufach 31 schieben 3 Entnehmen Sie vorsichtig den Akku aus dem Quadrokopter 4 Schrauben Sie nun mit einem Kr...

Страница 51: ...von ob sie Schadstoffe enthalten oder nicht einer umweltgerechten Entsorgung zuzuf hren Akkus und Batterien sind deshalb mit dem nebenstehenden Zeichen versehen Informieren Sie sich hierzu bei Ihrem H...

Страница 52: ...ceipt Keep these in a safe place with the quadrocopter Note Information on purchasing additional spare parts and accessories can be found at https www rollei com Intended Use This quadrocopter is desi...

Страница 53: ...fic guidelines and laws Keep the operating instructions for further use If you pass the quadrocopter on to third parties be sure to include this operating manual Explanation of Symbols The following s...

Страница 54: ...One key return Roll trim left Pitch trim forward Flip button 3D roll Right control stick Pitch Roll Roll trim right Video recording Pitch trim back On off button remote control with LED red Emergency...

Страница 55: ...55 STOP 2 10 9 7 8 11 27 26 16 17 25 18 24 STOP 20 22 21 11 16 12 15 13 14 19 23 3 4 6 5 Components What s in the Box...

Страница 56: ...rtment with battery inserted Micro USB port On Off switch Quadrocopter Landing feet Front position LEDs blue Rear position LEDs red Memory card compartment Charge indicator LEDs 31 32 33 34 35 36 37 2...

Страница 57: ...ration Link www easa europa eu drones NAA The UAS operator number e ID received after registration must be affixed to all quadrocopters of the operator in a clearly visible manner e g by means of an E...

Страница 58: ...on the warranty card Warning Risk of injury Danger of eye injuries Keep a safe distance of 1 to 2 metres to protect yourself or others from injury To avoid accidents never fly the quadrocopter near pe...

Страница 59: ...liquids Do not place objects filled with liquid such as vases on the quadrocopter or remote control The quadrocopter and remote control should not be exposed to dripping or splashing water Use a main...

Страница 60: ...e quadrocopter Keep batteries away from children and pets If you suspect that your child has swallowed a battery seek medical attention immediately Warning Danger of suffocation Keep plastic film and...

Страница 61: ...ce only with the same or an equivalent type of battery Follow the safety consumption and disposal instructions provided by the battery manufacturer Remove old or discharged batteries from the remote c...

Страница 62: ...s out Under no circumstances should you disassemble destroy puncture or short circuit the quadrocopter battery there is a risk of explosion Battery disposal Old or discharged batteries must be properl...

Страница 63: ...Do not operate your quadrocopter near radio stations high voltage lines transformer boxes or similar These installations can cause radio interference Only use the quadrocopter outdoors in good weathe...

Страница 64: ...alling or other are not covered by the warranty and are therefore subject to a charge Please inform yourself about the applicable legal situation for the use of the quadrocopter you have purchased in...

Страница 65: ...ent by first unscrewing the screw with the screwdriver 8 and then pulling the clamp fastener on the top slightly inwards and then lifting off the cover First remove any batteries from the battery comp...

Страница 66: ...dismounting the smartphone holder With the help of the app provided page 81 et seq you can control the quadrocopter simultaneously with the remote control 2 and follow the live image from the camera T...

Страница 67: ...n of the controls of the remote control Then carefully lower the upper clamp of the smartphone holder again until the smartphone is clamped in place and is suitably tight and secure Carefully shake th...

Страница 68: ...bank or to a commercially available USB mains plug and charge the battery 7 The charging indicator LEDs 37 start flashing red When the battery 7 is fully charged the char ging indicator LEDs 37 light...

Страница 69: ...the front flight arms followed by the rear flight arms Make sure that the flight arms engage slightly when unfolded 2 Unfold all rotor blades Note Attention All flight arms and rotor blades must be u...

Страница 70: ...36 of the quadrocopter Insert the memory card according to the illustration below Press the memory card deep into the memory card compartment until you hear it click into place To remove the memory c...

Страница 71: ...time it is restarted This process takes about 1 second If the quadrocopter is off course after a collision or crash during flight land the quadrocopter and reboot to allow the quadrocopter to recali...

Страница 72: ...rol signal is approx 40 metres You must stay within this range with the quadrocopter If the quadro copter loses connection with the remote control it will immediately switch automatically to landing m...

Страница 73: ...the remote control 2 The on off button LED of the remote control 2 flashes constantly red as soon as it is switched on The position LEDs 34 and 35 on the quadrocopter flash flash rapidly at first When...

Страница 74: ...tch off Qua drocopter 1 and Remote Control 1 2 Switch on quadrocopter 2 then switch on remote control 2 Wait for quadrocopter 2 and remote control 2 to connect 3 Switch on remote control 1 and then sw...

Страница 75: ...on takes only 1 2 seconds This cali bration is especially necessary after longer periods of non use and falls or collisions Afterwards the quadrocopter can be controlled normally again 1 Press the sta...

Страница 76: ...Climb Push the left control stick 25 upwards The rotors turn faster and the quadrocopter climbs Descend Press the left control stick 25 down The rotors turn slower and the quadrocopter descends Turn...

Страница 77: ...he quadrocopter turns to the right on its own axis Flying forward Press the right control stick 17 upwards The front of the quadrocopter tilts down and it flies forward Flying backwards Press the righ...

Страница 78: ...ress the right control stick 17 to the left The quadro copter tilts slightly to the left and it flies to the left Flying to the right Press the right control stick 17 to the right The quadrocopter til...

Страница 79: ...Mode 11 again The remote control emits three acoustic signals After pressing the 3 Speed Mode button 11 again the remote control emits an acoustic signal and you are back in beginner mode Aerobatic mo...

Страница 80: ...batic mode the quadrocopter should have a flight altitude of at least 2 metres Roll left Press the right control stick 17 to the left The quadrocopter makes a roll to the left Roll right Press the rig...

Страница 81: ...e Open the Wi Fi connections option and connect the smartphone to the drone s Wi Fi network This will be displayed with the network identifier Fly 80_XXXX The password to connect the drone to the smar...

Страница 82: ...you can set the desired language English German or French and call up further options via the symbol at the bottom left To change the WiFi password first use the WiFi password option Enter a new pass...

Страница 83: ...rted If no memory card is inserted the photos are saved on the smartphone Start stop video recording Recordings are automatically saved on the memory card if one is inserted If no memory card is inser...

Страница 84: ...adless mode of the drone In this mode the drone always flies in the direction you steer with the remote control Use this icon to recalibrate the gyroscope in the drone Take off Pressing this icon star...

Страница 85: ...itions Let the drone hover in one place and observe the changes as you move the scroll bars Notice The control buttons for photo and video 19 23 on the remote control 2 do not work when the APP is ope...

Страница 86: ...ress the Pitch Trim Rear button 20 The quadcopter drifts backwards Press the pitch trim forward button 15 Roll Trim 14 and 18 The quadrocopter drifts to the left Press the Roll Trim Right button 18 Th...

Страница 87: ...no matter what orientation the quadrocopter is in it will always fly in the direction that the right control stick 17 is steered It does not matter whether the front of the quadrocopter is in front b...

Страница 88: ...make a vi deo recording For the duration of the recording the position LEDs 34 35 on the quadrocopter flash continuously Press the video recording button again to stop recording Notice Please note th...

Страница 89: ...conditions and strong winds can greatly affect the automatic landing when the battery is low Replacing the rotor blades To replace a defective rotor blade first remove the battery from the qua drocopt...

Страница 90: ...ways make sure that only rotor blades marked the same may be exchanged with each ot her whereby A1 and A2 as well as B1 and B2 are identical in construction Rotors marked A1 or A2 may only be attached...

Страница 91: ...ries are sufficiently charged If necessary charge the quadrocopter battery and or change the remote control batteries Check if the distance between the quadrocopter and the remote control is more than...

Страница 92: ...rol are sufficiently charged If necessary charge the battery of the quadrocopter and or change the batteries of the remote control Check whether trimming of the quadrocopter is necessary Chapter Trimm...

Страница 93: ...erating temperature 10 C 45 C Dimensions L W H 29 5 x 28 7 x 5 cm unfolded 14 5 x 9 2 x 5 cm folded Weight 155 g including battery and rotors Maximum take off weight 160 g Remote control Remote contro...

Страница 94: ...camera tilt 0 60 manually adjustable Max Transmission frequency 17 dBm What s in the Box Rollei Fly 80 remote control with smartphone holder 4x spare rotor blades incl screws 1 200 mAh lithium polyme...

Страница 95: ...ger due to incorrect handling Improper handling of the quadrocopter 1 can lead to damage Do not use any aggressive cleaning agents brushes with metal or nylon bristles or sharp objects or nylon bristl...

Страница 96: ...pressing the battery release button and sliding the battery 7 out of the battery compartment 31 in the direction of the arrow towards the rear position LEDs 35 3 Carefully remove the battery from the...

Страница 97: ...accumulators in an environmentally sound manner regardless of whether or not they contain harmful substances Rechargeable batteries and batteries are therefore marked with the adjacent symbol For mor...

Страница 98: ...www rollei com Fly 80 Quadrokopter Quadrocopter...

Страница 99: ...99...

Страница 100: ...www rollei com rollei_de rollei foto de Rollei GmbH Co KG In de Tarpen 42 22848 Norderstedt Service Hotline 49 40 270750277 Item No 35101...

Отзывы: