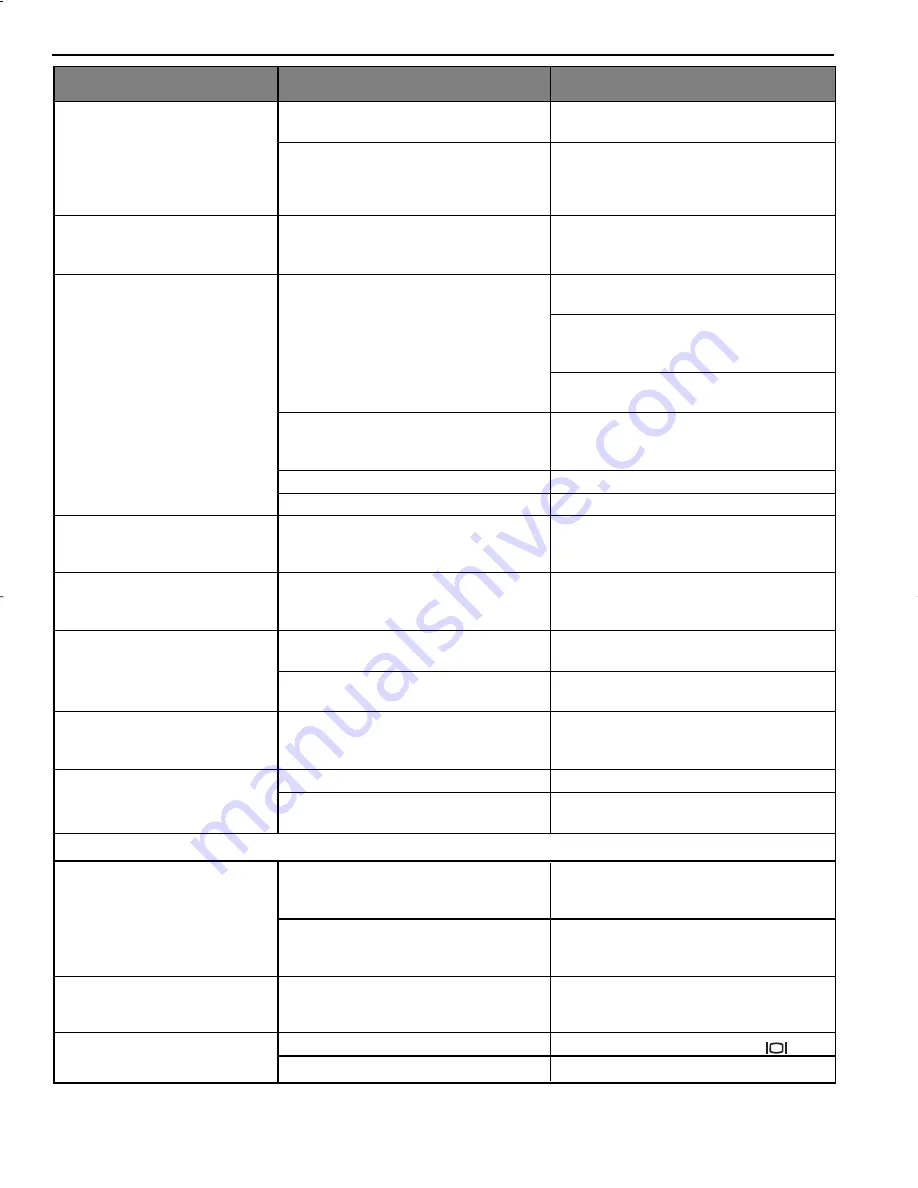
background image

53

TROUBLESHOOTING

POSSIBLE CAUSE

Subject or camera was moved as the
picture was taken.
The focus was not locked before
taking the picture.

White balance is not set properly.

Memory is full.

Camera is not set in picture/video clip
taking mode.

Power is off.
Camera is in Auto Power off mode.
The SD card is locked or write
protected.

Viewfinder is dirty.

Something was blocking the lens
when taking the picture.
The picture was not centered correctly
in the viewfinder.
The battery level is low and the
camera does not have sufficient
power to complete picture capture.
The camera is not turned on.
The camera is processing a picture;
the ready LED light is still blinking.

Protective plastic film still in place on
the camera.

The LCD brightness level is set too
low.

Protective plastic film still in place on
the camera.

LCD is turned off.
The battery level is low.

SYMPTOM

Picture taken is blurry.

There is something wrong with
the color of your photographs.

Cannot take a picture or a
video clip.

Cannot take a picture or a
video clip when using an SD
memory card.
Picture is blurred when looking
through the viewfinder.

Part of the picture/ video clip is
missing.

Camera is not responding
during picture capture.

The shutter button does not
work.

The LCD display is dark.

The LCD screen looks milky
and/or scratched.

The LCD is not displaying
anything.

POSSIBLE SOLUTION

Hold camera steady until picture is
taken.
Before taking a picture, press the
shutter button half-way to lock the
focus, and press the shutter button fully
to capture the picture. (p.12)
Reset the white balance feature to Auto,
or for the specific lighting in the
surrounding area.
Delete all pictures and continue
shooting.
Download the stored files to your PC
and delete the files from the camera
internal memory or memory card.
Insert a memory card with sufficient
memory available.
Set the camera to the proper mode for
recording video clips, or taking
photographs.
Turn the power on.
Turn the power on.
Remove the SD card from the card slot
and slide the lock switch to off.

Clean the viewfinder with a soft cloth or
cotton swab.  See the Camera
maintenance section.
Keep hands, fingers, etc. away from the
lens when taking a picture.
Leave space around the subject when
centering the picture in the viewfinder.
Replace batteries.

Turn the camera on.
Wait until the light stops blinking before
attempting to take another picture.

Make sure the protective plastic film
covering the LCD during shipment, has
been removed.
Increase the brightness level on your
LCD to meet your personal needs.  See
p.34 for setting the brightness.
Make sure the protective plastic film
covering the LCD during shipment, has
been removed.
Turn the LCD on, by pressing (       ).
Replace the batteries.

LCD

Rollei dcx400 UGuide-E  2003:12:01  5:07 PM  Page 53

Содержание dcx400

Страница 1: ......

Страница 2: ...engineered and manufactured to give you dependable operation Read this manual before operating the camera to become more familiar with it This manual has been written and formatted with depth and detail so that you can easily follow the instructions to maximize the features of your camera ENGLISH 1 ...

Страница 3: ...r 7 Red eye Reduction LED Self Timer LED 8 Port Cover 9 Mini USB port 10 TV Out port 11 Flash Ready LED 12 Viewfinder 13 Auto Focus LED 14 LCD 15 Tripod Socket 16 Battery Memory Card Door 17 Mode Switch 18 Reset Button 19 Left arrow Zoom out W 20 Up arrow Delete one Self timer 21 OK Button 22 Right arrow Zoom in T 23 Down arrow Flash 24 Wrist Strap Holder 25 MENU Button 26 LCD On Off Button 27 Mem...

Страница 4: ...the Viewfinder 10 Flash Ready LED 11 Taking a Picture with the LCD 12 Auto Focus Lock 12 Setting the Flash 13 Optical Zoom 14 Digital Zoom 14 Using the Main Menu in Camera Mode 17 Capture Mode Options 17 Self Timer 18 Macro Mode 18 Continuous Shooting 19 Image Resolution 19 Image Quality 20 White Balance 20 EV Compensation 21 Scene Selection 22 TAKING VIDEO CLIPS 23 REVIEWING YOUR FILES 23 Using R...

Страница 5: ...98 98SE 41 Installing DirectX 9 Windows 2000 43 Installing ArcSoft PhotoImpression all Windows users 44 Installing Adobe Acrobat Reader 5 all Windows users optional 46 CONNECTING THE CAMERA TO THE COMPUTER 48 Downloading Pictures and Video Clips onto your Computer 48 Using ArcSoft PhotoImpression 49 Unplugging your Camera from the Computer 49 TV MODE 50 Connecting the Camera to the Television 50 U...

Страница 6: ...ble with Secure Digital SD memory cards not included Attaching the Wrist Strap Please attach the wrist strap to prevent dropping the camera Loading the Batteries The camera can use 2x AA alkaline lithium or rechargeable batteries to operate For better performance do not use alkaline batteries 1 Open the Battery Memory Card door fig 1 1 Slide the door in the direction of the arrow marked on it and ...

Страница 7: ...hecking the Battery Level There are 5 battery levels that are displayed on the LCD Note The camera s battery level indicator may not accurately reflect the state of a rechargeable battery even the chargeable batteries have been fully recharged To extend battery life the camera will automatically power off after 2 minutes of inactivity To change this setting please refer to p 33 For better performa...

Страница 8: ...refer to the Customizing the Camera Settings section on page 33 Language s Date Format Setting TV Option English Español MM DD YYYY NTSC Français Deutsch DD MM YYYY PAL Italiano Nederlands Danske YYYY MM DD PAL Setting the Date 1 Press to change the number in the blinking position until you reach the desired setting 2 Press to highlight the month day or year The selection will blink when it is hig...

Страница 9: ...r more than 4 minutes the time will return to its default setting TURNING THE LCD ICONS ON AND OFF LCD can be used to frame subjects for image and video clip capture review stored images and video clips and display the current camera settings 1 Use the button to toggle the LCD mode The LCD mode changes each time the button is pressed Note In order to save battery power you may turn off the LCD dis...

Страница 10: ...to having a 16MB internal memory the camera can use Secure Digital SD memory cards to store images and video clips 1 Open the Battery Memory Card door Slide the door in the direction of the arrow marked on it and lift it open fig 1 1 2 Insert the memory card as indicated by the diagram fig 1 2 Please insert the card in straight not on an angle 3 Shut the Battery Memory Card door by sliding it in t...

Страница 11: ...camera will focus the lens at different distances to find the correct focus range and you will hear a rapid click sound from the camera 4 Press the shutter button fully to capture the image fig 1 2 The camera will make a click sound When the image has been captured the Flash Ready LED next to the viewfinder will blink to indicate that the image is being stored A AWB A AWB A AWB A AWB Camera Mode U...

Страница 12: ... to page 12 fig 1 1 The camera will focus the lens at different distances to find the correct focus range and you will hear a rapid click sound from the camera 4 Press the shutter button fully to capture the image fig 1 2 The camera will make a click sound When the image has been captured the Flash Ready LED next to the viewfinder will blink to indicate that the image is being stored A preview of ...

Страница 13: ...ture the picture fig 1 8 Note The AF LED will continue blinking in the following conditions 1 There are several subjects at different distances within the focus lock area Recompose the picture by moving the camera slightly 2 There is no color contrast Recompose the picture with a subject that contains more color 3 There is insufficient lighting Increase the lighting in the surrounding area A A AWB...

Страница 14: ...places where flash photography is prohibited such as museums To prevent blurry pictures in low light situations hold the camera steady when pressing the Shutter button or mount the camera on a tripod Night Mode A slow shutter speed is used in this mode to capture the lights in night scenes To prevent blurry pictures in low light situations hold the camera steady when pressing the Shutter button or...

Страница 15: ...ined with the 3x optical zoom can give you up to 18x magnification to your pictures How to use digital zoom 1 At the maximum optical zoom level continue to press T until the digital zoom is activated There will be a short delay before the digital zoom is activated When the digital zoom is being used the zoom bar will turn blue A AWB AWB 07 04 03 02 40PM 4M 28 45 A AWB 07 04 03 02 40PM 4M 4M 4M 28 ...

Страница 16: ...Macro mode 3 The image quality may degrade slightly with Digital Zoom 4 Digital Zoom can only be monitored with the LCD and not through the optical viewfinder Activating Deactivating Digital Zoom The digital zoom feature can be turned off by following the steps below How to activate or deactivate Digital Zoom 1 In Camera Mode press the MENU button to display the Main Menu 2 Press until Digital Zoo...

Страница 17: ... MODE OK WHITE BALANCE EV COMPENSATION SETUP RETURN SELECT CAMERA MODE CAPTURE MODE QUALITY SETUP IMAGE SIZE DIGITAL ZOOM SCENE SELECTION RETURN SELECT CAMERA MODE Q 4M 3M 2M 1M V OFF PARTY INDOOR BEACH SNOW SUNSET NIGHT LANDSCAPE RETURN SET SCENE SELECTION OK FIREWORKS NIGHT PORTRAIT RETURN SET SCENE SELECTION OK AUTO SUNNY FLUORESCENT TUNGSTEN RETURN SET WHITE BALANCE OK AWB RETURN SET DIGITAL Z...

Страница 18: ...mark 8 To return to the previous menu press 9 To exit the menu at any time press the MENU button CAPTURE MODE OPTIONS The capture mode menu has 4 features to choose from for taking pictures Capture Mode Option Description Single Shot The camera will take 1 picture at a time P 12 Single shot with Macro The camera will take 1 picture at a time in Macro mode P 18 Continuous Shooting The camera will t...

Страница 19: ...ght stops blinking MACRO MODE CLOSE UP SHOOTING This mode enables the camera to capture pictures in close distances Setting Macro Mode 1 In the main menu press to enter the Capture Mode submenu 2 Press to highlight Single shot with Macro OR Continuous shot with Macro 3 Press to enter the mode The Macro icon will be displayed on the LCD Taking a picture in Macro Mode 1 Frame the subject in the LCD ...

Страница 20: ... setting in this mode IMAGE RESOLUTION Image Resolution determines the size of a captured image Higher resolution images contain more details and have larger file sizes Images Stored on 16MB memory approx 4MP 3 1MP 2MP 1 2MP VGA 2272 x 1704 2048 x 1536 1600 x 1200 1280 x 960 640 x 480 Fine 20 23 34 50 137 Normal 51 63 89 127 307 Economy 75 88 128 177 429 How to change the resolution 1 When Resolut...

Страница 21: ...ighting conditions you can use the Auto White Balance White Balance Mode Description Auto The camera will automatically choose the white balance setting Use this setting in variable conditions Sunny Use outdoors in sunny conditions Fluorescent Use indoors with fluorescent or ambient light conditions Tungsten Use indoors with tungsten light conditions How to change the White Balance 1 When White Ba...

Страница 22: ...Exposure in pictures that are too light will make the picture darker How to use Exposure Compensation 1 Press in the Main Menu until EV Compensation is highlighted 2 Press to display the EV Compensation bar on the LCD 3 Press to change the EV Compensation between 1 8 to 1 8 4 Press to select the desired value The camera will return to picture taking mode automatically after selecting A AWB 07 04 0...

Страница 23: ... 3 Set the camera to Self Timer mode 4 Press the shutter button Sunset This mode captures the deep hues and color variations in sunsets and sunrises Fireworks Use this mode to capture the burst of light from fireworks with a slower shutter speed Night Portrait Use this mode to capture a subject illuminated with the lights in a night scene with a slow shutter speed Use a tripod to prevent camera mo...

Страница 24: ...d Higher capacity memory cards can take longer video clips The Flash Menu and LCD on off buttons are deactivated in this mode The focus and the digital zoom cannot change during recording REVIEWING REVIEWING YOUR FILES YOUR FILES Using Review Mode In review mode you can review your stored pictures and video clips through the LCD Note When a memory card is inserted in the camera only the pictures s...

Страница 25: ...d it will not enhance the stored picture How to enlarge 1 In Review Mode press the or to scroll through the stored pictures and video clips 2 While viewing a stored still image press to use the Enlargement feature Press again to get different magnifications 3 In 2x 4x and 6x mode you may press to navigate in the picture Resolution Maximum Enlargement 2272 x 1704 6x 2048 x 1536 6x 1600 x 1200 4x 12...

Страница 26: ...SHOW T T Transfer all files from internal memory to memory card No Yes SELECT OK Using the Review Menu in Review mode 1 Turn the camera on 2 Set the Mode Switch to 3 Press the MENU button to display the main menu 4 Press until the desired option is highlighted 5 Press to enter the submenu 6 Press in the submenu to toggle between the options 7 Press to make a selection All selections will be marked...

Страница 27: ...ete all files 1 Press when Delete File is highlighted to enter the Delete File submenu 2 In the Delete Files submenu press 3 The next screen will read DELETE ALL press or to highlight No or Yes 4 Press to select If No is selected no change will be made and you will return to the Delete Files Menu If Yes is selected the next screen will read Are you sure 5 Press to select No or Yes Press to select ...

Страница 28: ... a picture or video clip When is pressed up in the top row of thumbnails the previous 9 files will be displayed When is pressed down in the bottom row of thumbnails the next 9 files will be displayed 3 Press to view the enlarged picture or video clip 2003 08 30 13 30 41 0001 0003 28 SEC AWB 4M JPEG A AWB A AWB A AWB AWB A AWB DELETE FILE THUMBNAIL SLIDE SHOW FILE TRANSFER SETUP RETURN SELECT REVIE...

Страница 29: ...tructions below Video clips The entire video clip will play back then the next file will be displayed Note When a memory card is inserted in the camera only the pictures stored in the memory card will be displayed in the slide show mode To view the pictures in the internal memory transfer files P 29 or turn the camera off and remove the memory card then turn on the camera back on Cancel the Slide ...

Страница 30: ...sfer all files from internal memory to memory card 6 Press to highlight No or Yes 7 Press to select If No is selected no change will be made and you will return to the Review mode If Yes is selected the screen will read Transferring and all files will be transferred to the memory card Note Before transferring files please insert a memory card with 16MB or more of available memory space 2003 08 30 ...

Страница 31: ...D BRIGHTNESS RETURN SELECT SETUP FORMAT ADJUST DATE ADJUST TIME TIME FORMAT DATE FORMAT RETURN SELECT SETUP 1 D M 12 24 NTSC PAL RETURN SET TV OPTION OK N P T 2 MIN 3 MIN RETURN SET SET AUTO OFF TIME OK T English Français Español Deutsch Italiano RETURN SET LANGUAGE OPTION OK WHITE BALANCE EV COMPENSATION SETUP RETURN SELECT CAMERA MODE CAMERA INFO RETURN SELECT SETUP Nederlands Danske RETURN SET ...

Страница 32: ...ME FORMAT 12 24 OK DD MM YYYY MM DD YYYY YYYY MM DD RETURN SET DATE FORMAT D M OK SET AUTO OFF TIME TV OPTION LANGUAGE OPTION RESTORE DEFAULT LCD BRIGHTNESS RETURN SELECT SETUP FORMAT ADJUST DATE ADJUST TIME TIME FORMAT DATE FORMAT RETURN SELECT SETUP 1 D M 12 24 ADJUST DATE 1 OK 01 01 2003 RETURN SET MM DD YYYY WHITE BALANCE EV COMPENSATION SETUP RETURN SELECT CAMERA MODE CAMERA INFO RETURN SELEC...

Страница 33: ...t is idle TV Option NTSC PAL Sets the mode the camera needs to adapt to your TV Page 50 Language Option English Sets the language in your camera Page 33 Français Español Deutsch Italiano Nederlands Danske Restore Default Yes No Sets all camera settings to the factory default Page 36 LCD Brightness Sets the LCD brightness level Page 34 Format Yes No Formats the internal memory or the memory card by...

Страница 34: ...nk when it is highlighted 4 Press to change the data in the blinking position until you reach the desired setting then press Note The date can be displayed in MM DD YYYY DD MM YYYY or YYYY MM DD Please go to page 31 to change this setting If the battery is removed for more than 4 minutes the date will return to its default setting Set Date Time will appear on the LCD when the camera is turned on P...

Страница 35: ...than 4 minutes the time will return to its default setting Set Date Time will appear on the LCD when the camera is turned on Press the Shutter button slightly to turn the reminder off SETTING THE LCD BRIGHTNESS How to set the LCD Brightness 1 In the Setup menu press until LCD Brightness is highlighted 2 Press to display the LCD Brightness bar on the LCD 3 Press to adjust the brightness 4 Press to ...

Страница 36: ...screen this indicates that the internal memory or the memory card is corrupted Please format the memory to continue 1 Formatting deletes all pictures and video clips from the memory 2 Removing the card during formatting may damage the card 3 Selecting the formatting feature while there is no memory card in the camera will cause the internal memory to format All pictures and video clips on the inte...

Страница 37: ...elected no change is made When Yes is selected the Default settings will be restored Please refer to the table below for the default settings OPTION DEFAULT STATUS Flash Auto Flash Quality Normal Image Size 2272 x 1704 Scene Selection OFF White Balance Auto Exposure Compensation 0 Auto Off 2 min LCD Brightness Center Time Format 12 Hours 24 Hours Slide Show Interval 5 Seconds Note After the camera...

Страница 38: ...MB for Microsoft DirectX 9 0 if required 64MB of RAM 128MB or more recommended Minimum 800 x 600 display with 16 bit color 1024 x 768 with 24 bit color or better recommended USB Port CD ROM Drive Macintosh Mac OS 9 0 9 1 9 2 9 3 and X or later Power PC based 32MB of RAM 640 x 480 display with Thousands of colors Millions of colors recommended Built In USB Port Installation Requirements The install...

Страница 39: ...s Storage camera drivers enable the camera to become an external drive on your computer Microsoft DirectX 9 DirectX 9 enables the movie playback applications on your computer to playback video clips that are captured with the camera ArcSoft PhotoImpression 2000 This photo software enables you to edit and enhance pictures ArcSoft VideoImpression 1 6 This video software enabales you to view and edit...

Страница 40: ...s Storage Drivers DirectX 9 p 43 and DirectX 9 p 41 Installing ArcSoft PhotoImpression 2000 p 44 Installing ArcSoft VideoImpression 1 6 Installing Adobe Acrobat Reader 5 if needed p 46 Connecting the camera to the computer p 48 Downloading pictures and video clips onto the computer p 48 Disconnecting the camera from the computer p 49 Data transfer may not function correctly if you have one of the ...

Страница 41: ...indows XP Media Center Edition 4 Press OK to close the window For Windows 98 98SE Me 2000 if the My Computer icon is not on your desktop click Control Panel icon from the Start Menu and double click on the System icon to open the System Property Box For Windows XP if the My Computer icon is not on your desktop click Control Panel icon from the Start Menu and click on the Performance and Maintenanc...

Страница 42: ...E If the installer does not start automatically within 30 seconds after the CD ROM has been inserted click on My Computer either on the Desktop or in the Start Menu and locate the CD ROM Drive Double click on the CD ROM Drive icon for installation and proceed to Step 5 Step 5 Select the language Click OK Step 6 The installation screen will appear Click on Install Camera Drivers Step 7 Click Next S...

Страница 43: ...E Step 9 Click Install Step 10 Install progress bar Step 11 The next screen will begin the DirectX setup Select I accept the agreement then click Next Step 12 Click Next Step 13 Click Finish Your computer will automatically reboot ...

Страница 44: ...Drive NOTE If the installer does not start automatically within 30 seconds after the CD ROM has been inserted click on My Computer either on the Desktop or in the Start Menu and locate the CD ROM Drive Double click on the CD ROM Drive icon for installation and proceed to Step 5 Step 5 Select the language Click OK Step 6 The installation screen will appear click on Install Microsoft DirectX 9 0 Ste...

Страница 45: ...he CD ROM included in your camera s packaging into your computer s CD ROM Drive NOTE If the installer does not start automatically within 30 seconds after the CD ROM has been inserted click on My Computer either on the Desktop or in the Start Menu and locate the CD ROM Drive Double click on the CD ROM Drive icon for installation and proceed to Step 5 Step 5 Select the language Click OK Step 6 The ...

Страница 46: ...RE INSTALLATION GUIDE Step 9 Click Next Step 10 Make sure all two applications are checked and then click Next Step 11 Click Next Step 12 The screen will show the status of the installation Step 13 Click Finish ...

Страница 47: ...nsert the CD ROM included in your camera s packaging into your computer s CD ROM Drive NOTE If the installer does not start automatically within 30 seconds after the CD ROM has been inserted click on My Computer either on the Desktop or in the Start Menu and locate the CD ROM Drive Double click on the CD ROM Drive icon for installation and proceed to Step 5 Step 5 Select the language Click OK Step...

Страница 48: ...m Files Adobe Acrobat 5 automatically OR You may change the default folder by clicking Browse and selecting a different folder in your computer Click Next Step 10 Installation progress Step 11 Select Yes to restart the computer or No to restart the computer later Click Finish ...

Страница 49: ...omputer Page 43 Downloading files from the camera Internal memory Do not insert the memory card Memory Card Insert the memory card Caution Do not attempt to open the battery memory door to insert or remove the memory card and or batteries when the camera is connected to the computer FOR WINDOWS USERS Downloading Pictures and Video Clips onto your computer 1 Connect the camera to the computer 2 Dou...

Страница 50: ...then be added to your album at the bottom of the application g To access these click CLOSE on the Camera Controls windows Double click on the thumbnail to open 10 You may now edit save print or further enhance your pictures using the buttons on the left hand side of the screen Please refer to ArcSoft s Software help section for a tutorial on all the features PhotoImpression offers UNPLUGGING YOUR ...

Страница 51: ... 4 Turn the camera on by pressing the power button 5 Connect the other end of the cable into the VIDEO port located in the cable connection panel fig 1 1 Using the TV as a Live Viewfinder 1 Connect the camera to the TV 2 Turn the camera on 3 Slide the Mode Switch to 4 The TV will become a live viewfinder Note You may record your TV Mode session by using your VCR Please refer to your VCR documentat...

Страница 52: ...problem with the memory Note If the internal memory or the memory card is corrupted the LCD will read ERROR The memory needs to be formatted Please format all files to continue page 35 Internal Memory Error 07 04 03 02 40PM A AWB 4M A AWB Memory Full 07 04 03 02 40PM A AWB 4M A AWB Card Full 07 04 03 02 40PM A AWB 4M A AWB ...

Страница 53: ...attery compartment Replace batteries Close the battery compartment properly Press the reset button on the back of the camera with a pointed object such as a pen then power the camera off then on Replace the batteries with new ones Your camera comes with an Auto Time Off setting so if the camera is inactive for a certain amount of time it powers off to conserve battery power Please refer to the Tim...

Страница 54: ...ark The LCD screen looks milky and or scratched The LCD is not displaying anything POSSIBLE SOLUTION Hold camera steady until picture is taken Before taking a picture press the shutter button half way to lock the focus and press the shutter button fully to capture the picture p 12 Reset the white balance feature to Auto or for the specific lighting in the surrounding area Delete all pictures and c...

Страница 55: ...cate drivers Windows 98 98SE The camera does not recognize your SD Card POSSIBLE SOLUTION Install Microsoft DirectX 9 p 41 Reset the camera by pressing the reset button with a pointed object such as a pen Reboot the computer Check that the Mini USB cable is plugged into the camera Check that the USB cable is plugged into the computer Turn your computer on Disconnect the Mini USB cable from the cam...

Страница 56: ...0 Silver Halide Film Auto exposure Auto white balance Preset exposure for Fireworks Night Landscape Party Indoor Beach Snow Scenes Sunset Night portrait Off Preset white balance for Sunny Fluorescent Tungsten 16MB Internal Non Volatile Memory Image Quality Image Size 2272 x 1704 2048 x 1536 1600 x 1200 1280 x 960 VGA Fine 4 5 1 20 23 34 50 137 Normal 11 1 51 63 89 127 307 Economy 17 1 75 88 128 17...

Страница 57: ...ght Mode and Fill in 2x AA rechargeable batteries can use alkaline lithium and rechargeable NiMH type Timeout for LCD and programmable auto power off for camera to conserve battery power Mini USB and TV Out Secure Digital SD Card AVI format QVGA 320x240 resolution with 30 fps clip length limited by available memory Mass Storage Driver for Window 98 98SE 2000 ME XP Mass Storage Driver for Mac OS 9 ...

Страница 58: ...wet Do not use outdoors when it is raining or snowing Should any form of liquid enter the camera do not use it Switch the camera off and then remove the batteries Do not continue to use the camera as this may cause a fire or electric shock Do not insert or drop metallic or inflammable foreign objects into the camera through access points e g card slot and battery chamber This may cause a fire or e...

Страница 59: ...When using SD Memory Cards do not change the attributes read only etc of the files pictures JPEG or video clips AVI on the card Doing so may prevent the camera from working properly when deleting etc Do not change the file names or the directory name of the pictures or video clips using a computer or save files other than pictures or video clips taken by this camera onto the SD memory card Picture...

Страница 60: ...is no guarantee that interference will not occur in a particular installation If this equipment does cause harmful interference to radio or television reception which can be determined by turning the equipment on and off the user is encouraged to try to correct the interference by one or more of the following measures Reorient or relocate the receiving antenna Increase the separation between the e...

Отзывы: