48
3. Editing Scanning Results
3
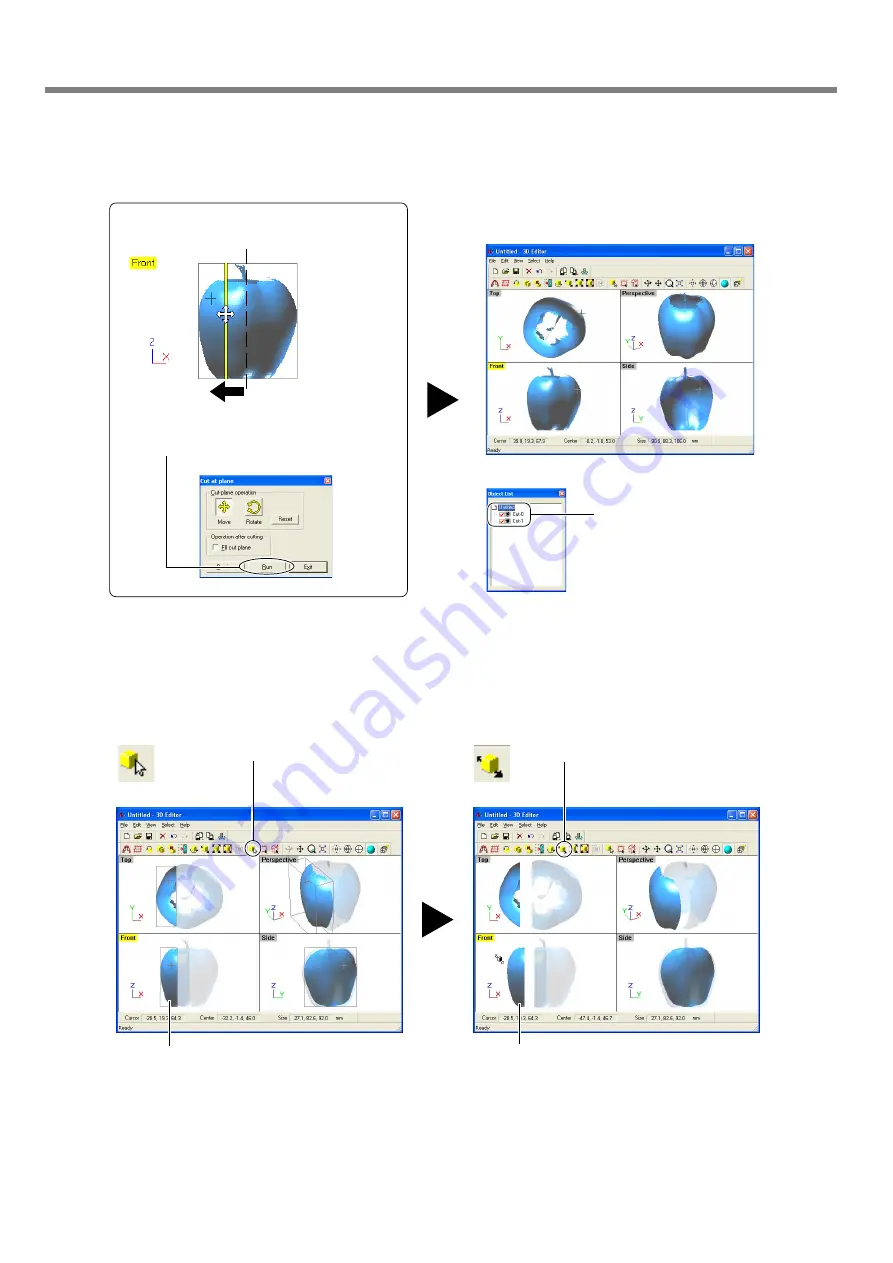
Using the [Front] window, let's try shifting the cut surface to the left, then carry out cutting.
4
Let's try separating the two objects.
When you're done with the operation, right-click to quit the [Move Object] mode.
3-3 Basic Operations for Objects
1
Click the [Select Object] button.
2
Click the left part of the apple
to select it.
3
Click the [Move Object] button.
4
Drag the portion you selected to the
left.
The apple is divided into two parts. However,
its still looks like a single object.
New objects with names like [Cut-0]
and [Cut-1] appear in the Object
List.
1
Drag the cut surface to move it to the left.
2
When you have decided on the cut location,
click [Run].
Содержание Picza LPX-1200
Страница 15: ...13 1 Preparing the Machine 1 2 Installing Installation Environment Place in a level stable location...
Страница 28: ...26...
Страница 52: ...50...
Страница 56: ...54...
Страница 57: ...55 5 Appendix...
Страница 59: ...57 5 Appendix 9 screw holes M6 depth 7 mm 70 130 110 30 4 5 4 5 1 1 scale 5 2 Table Dimensional Drawing Unit mm...
Страница 60: ...58...
Страница 61: ...59...
Страница 62: ...60...
Страница 63: ......


