background image

14

15

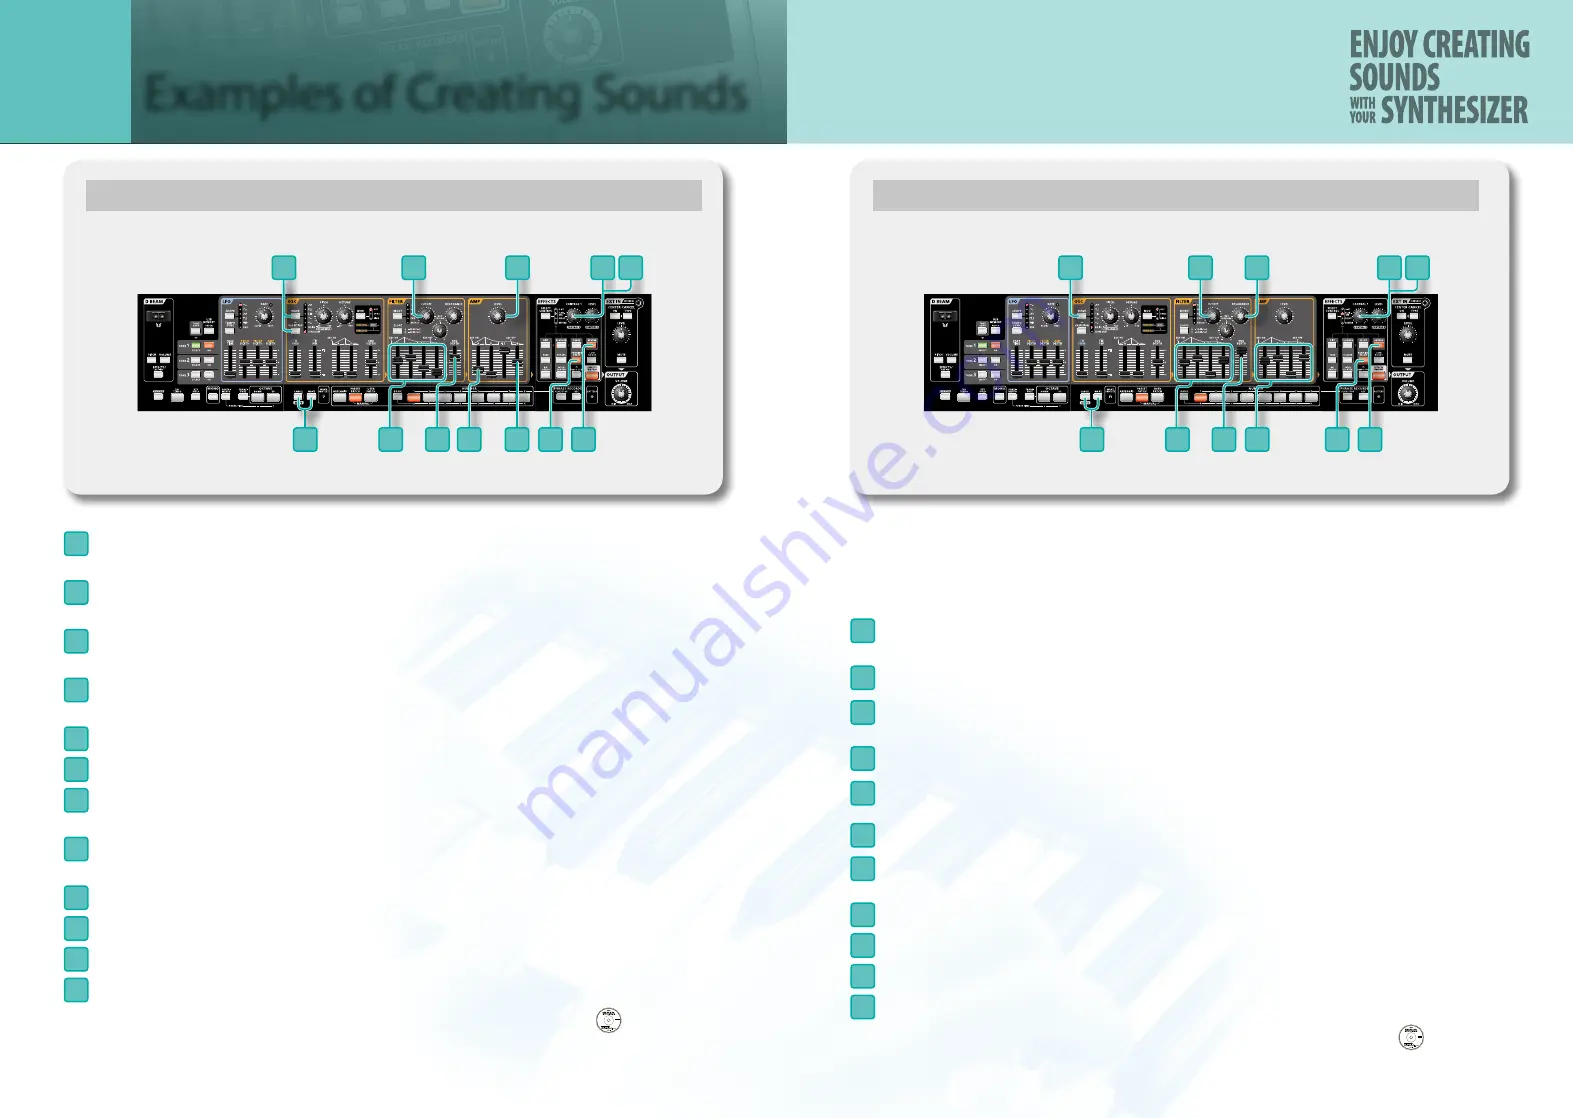
Synth Pad (PRESET PATCH: H-2)

1

2

3

5

6

7

8

9

11

10 12

4

1

  Press the 

[CANCEL/SHIFT]

 button and 

[WRITE]

 button to recall the initialized sound. 

The sawtooth wave is selected.

2

  Press the OSC 

[WAVE]

 button to select SUPER SAW. Press the 

[VARIATION]

 button to light the 

[WAVE]


button into red.

3

  Set the FILTER 

[CUTOFF]

 knob to the 1 o’clock position. 

The sound will become a bit darker.

4

  Now you’re ready to specify the overall character of the sound. Set the FILTER ENV 

[A]

 slider to 55%, 

the 

[D]

 slider to 70%, the 

[S]

 slider to 25%, and the 

[R]

 slider to 10%.

5

  Raise the FILTER ENV 

[ENV DEPTH]

 slider from 0 to the second mark to specify the overall character.

6

  Turn the AMP 

[LEVEL]

 knob all the way to the right (MAX).

7

  Set the AMP ENV 

[A]

 slider to the 20% position. 

The attack will become slower.

8

  Raise the AMP ENV 

[R]

 slider to about the middle position. 

Now the sound will linger for a while even after you take your finger off the key.

9

  Press the 

[PANNING DELAY]

 button so it’s lit.

10

  Set the EFFECTS 

[CONTROL 1]

 knob to the 10 o’clock position to add a sense of spaciousness. 

11

  Press the 

[REVERB]

 button so it’s lit.

12

  Set the EFFECTS 

[CONTROL 1]

 knob to the 1 o’clock position to add reverberation.


This synth pad is similar to the sound in chapter 5 “How to Make a Sound” of the 

 DVD.

Sound Effect (PRESET PATCH: H-5)

1

2

3

6

4

8

10

9

11

5

7

Here’s how to create a sound effect that might be appropriate  

for a spaceship taking off.

These settings may produce a sudden, loud sound. Turn the knobs slowly to avoid damaging your hearing  

or your speakers.

1

  Press the 

[CANCEL/SHIFT]

 button and 

[WRITE]

 button to recall the initialized sound. 

The sawtooth wave is selected.

2

  Press the OSC 

[WAVE]

 button to select NOISE.

3

  Turn the FILTER 

[CUTOFF]

 knob all the way to the left (MIN). 

You will no longer hear sound.

4

  Set the FILTER 

[RESONANCE]

 knob to the 9 o’clock position.

5

  Set the FILTER ENV 

[A]

 slider to 50%, the 

[D]

 slider to 65%, and the 

[R]

 slider to 60%. 

Lower the 

[S]

 slider all the way to the bottom.

6

  Slowly raise the FILTER ENV 

[ENV DEPTH]

 slider to the maximum position.

7

  Set the AMP ENV 

[A]

 slider to 55%, the 

[D]

 slider to 65%, and the 

[R]

 slider to 70%. 

Lower the 

[S]

 slider all the way to the bottom.

8

  Press the 

[PANNING DELAY]

 button so it’s lit.

9

  Set the EFFECTS 

[CONTROL 1]

 knob to the 11 o’clock position to add some spaciousness.

10

  Press the 

[REVERB]

 button so it’s lit.

11

  Set the EFFECTS 

[CONTROL 1]

 knob to the 12 o’clock position to add reverb.


This sound effect is similar to the sound in chapter 5 “How to Make a Sound” of the 

 DVD.

Examples of Creating Sounds

APPENDIX

Содержание Gaia SH-01

Страница 1: ...ACHIEVE MASTERY ENJOYCREATING SOUNDS WITH YOUR SYNTHESIZER Sound synthesis made easy Learn the basics of sound creation on Roland s new GAIA SH 01 synthesizer ...

Страница 2: ...ortable audio player here Patch Here you can call up patches Filter This determines the sound s brightness Amp This determines the sound s volume This is also where the sound s attack and decay are adjusted Effects Here you can apply reverb to give the sound more depth or add other effects LFO This modulates the sound Oscillator OSC This determines the sound s pitch The oscilla tor is the heart of...

Страница 3: ...Select a BANK Press the BANK and then press one of the 1 8 buttons Select a NUMBER Press one of the 1 8 buttons How to Think About Sound Programming As you take a closer look at the factory set patches preset patches you ll notice all sorts of clever tricks that were used to create the sounds Remember these tricks and use them to create new sounds from scratch As you create your own sounds by modi...

Страница 4: ... tempo 6 Set the RESONANCE knob at 10 o clock and the CUTOFF knob at 12 o clock 7 In sync with the tempo raise the LFO FILTER DEPTH slider and then bring it back to the center For the LFO DEPTH the center is 0 How Do I Stop the Sound Press the KEY HOLD button to stop the sound Add More Low End Turn on the TONE 3 button and play the keyboard Layering three tones produces an even fatter sound Save T...

Страница 5: ...nd of TONE 3 will disappear For additional expressive possibilities you can move the FILTER ENV DEPTH slider while you play Turn off the KEY HOLD button and raise the TONE 3 AMP R RELEASE slider to the maximum position The time over which the sound of TONE 3 disappears will lengthen You can change how the sound varies over time by adjusting the ADSR so you may want to adjust these settings until y...

Страница 6: ...is because most of the frequency range is not being allowed to pass The GAIA SH 01 contains five effects processors distortion DIST modula tion FLANGER delay DELAY reverb REVERB and low boost LOW BOOST Using the DIST or FUZZ effects located in the leftmost column will distort the sound making it more aggressive DELAY and REVERB let you create lush spacious sounds Go ahead and try out various effec...

Страница 7: ...ynth bass is similar to the sound in chapter 2 Recall and Edit Presets chapter 5 How to Make a Sound of the DVD Synth Lead PRESET PATCH H 7 7 3 2 9 4 11 10 5 8 6 1 1 Press the CANCEL SHIFT button and WRITE button to recall the initialized sound The sawtooth wave is selected Press the VARIATION button to light the WAVE button into red 2 Turn the PITCH knob to the right so the sound is raised by an ...

Страница 8: ...dd reverberation This synth pad is similar to the sound in chapter 5 How to Make a Sound of the DVD Sound Effect PRESET PATCH H 5 1 2 3 6 4 8 10 9 11 5 7 Here s how to create a sound effect that might be appropriate for a spaceship taking off These settings may produce a sudden loud sound Turn the knobs slowly to avoid damaging your hearing or your speakers 1 Press the CANCEL SHIFT button and WRIT...

Страница 9: ...sound for virtually any type of synthesizer Copyright 2010 ROLAND CORPORATION All rights reserved No part of this publication may be reproduced in any form without the written permission of ROLAND CORPORATION Roland and GAIA are either registered trademarks or trademarks of Roland Corporation in the United States and or other countries SH 1000 1973 JUPITER 8 1981 JUNO 60 1982 D 50 1987 JD 800 1991...

Отзывы: