6
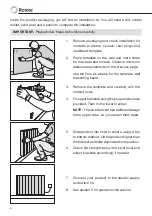
Inside the product packaging, you will find an installation kit. You will need a drill, rubber
mallet, spirit level and a pencil to complete the installation.
IMPORTANT:
Please follow these instructions carefully.
1. Remove packaging and check installation kit
contains brackets, screws, rawl plugs and
cardboard template.
2. Place template on the wall and mark holes
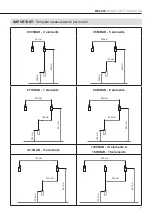
for brackets and screws. Observe minimum
distance requirements on the previous page.
Use the floor as a base for the template,
not
the skirting board.
3. Remove the template and carefully drill the
marked holes.
4. Fix upper brackets using the plugs and screws
provided. Then fix the lower bracket.
NOTE:
The lower bracket has a different design
to the upper ones, so you can tell them apart.
5. Slide product into fixed brackets, using a top
to bottom method. Lift the product higher than
the bracket and slide downwards into position.
6. Check the straightness with a spirit level and
adjust brackets accordingly if needed.
7. Connect your product to the electric supply
and switch on.
8. See section 5 for operation instructions.


